Independence Lake is a drinking water lake located North of Truckee, CA. The intake canal needed to be isolated and dewatered so that repairs could be performed on the intake structure. A cofferdam to control 15ft of water depth was achieved by using a 21ft tall AquaDam, supported with a 16ft and 10ft tall AquaDam.
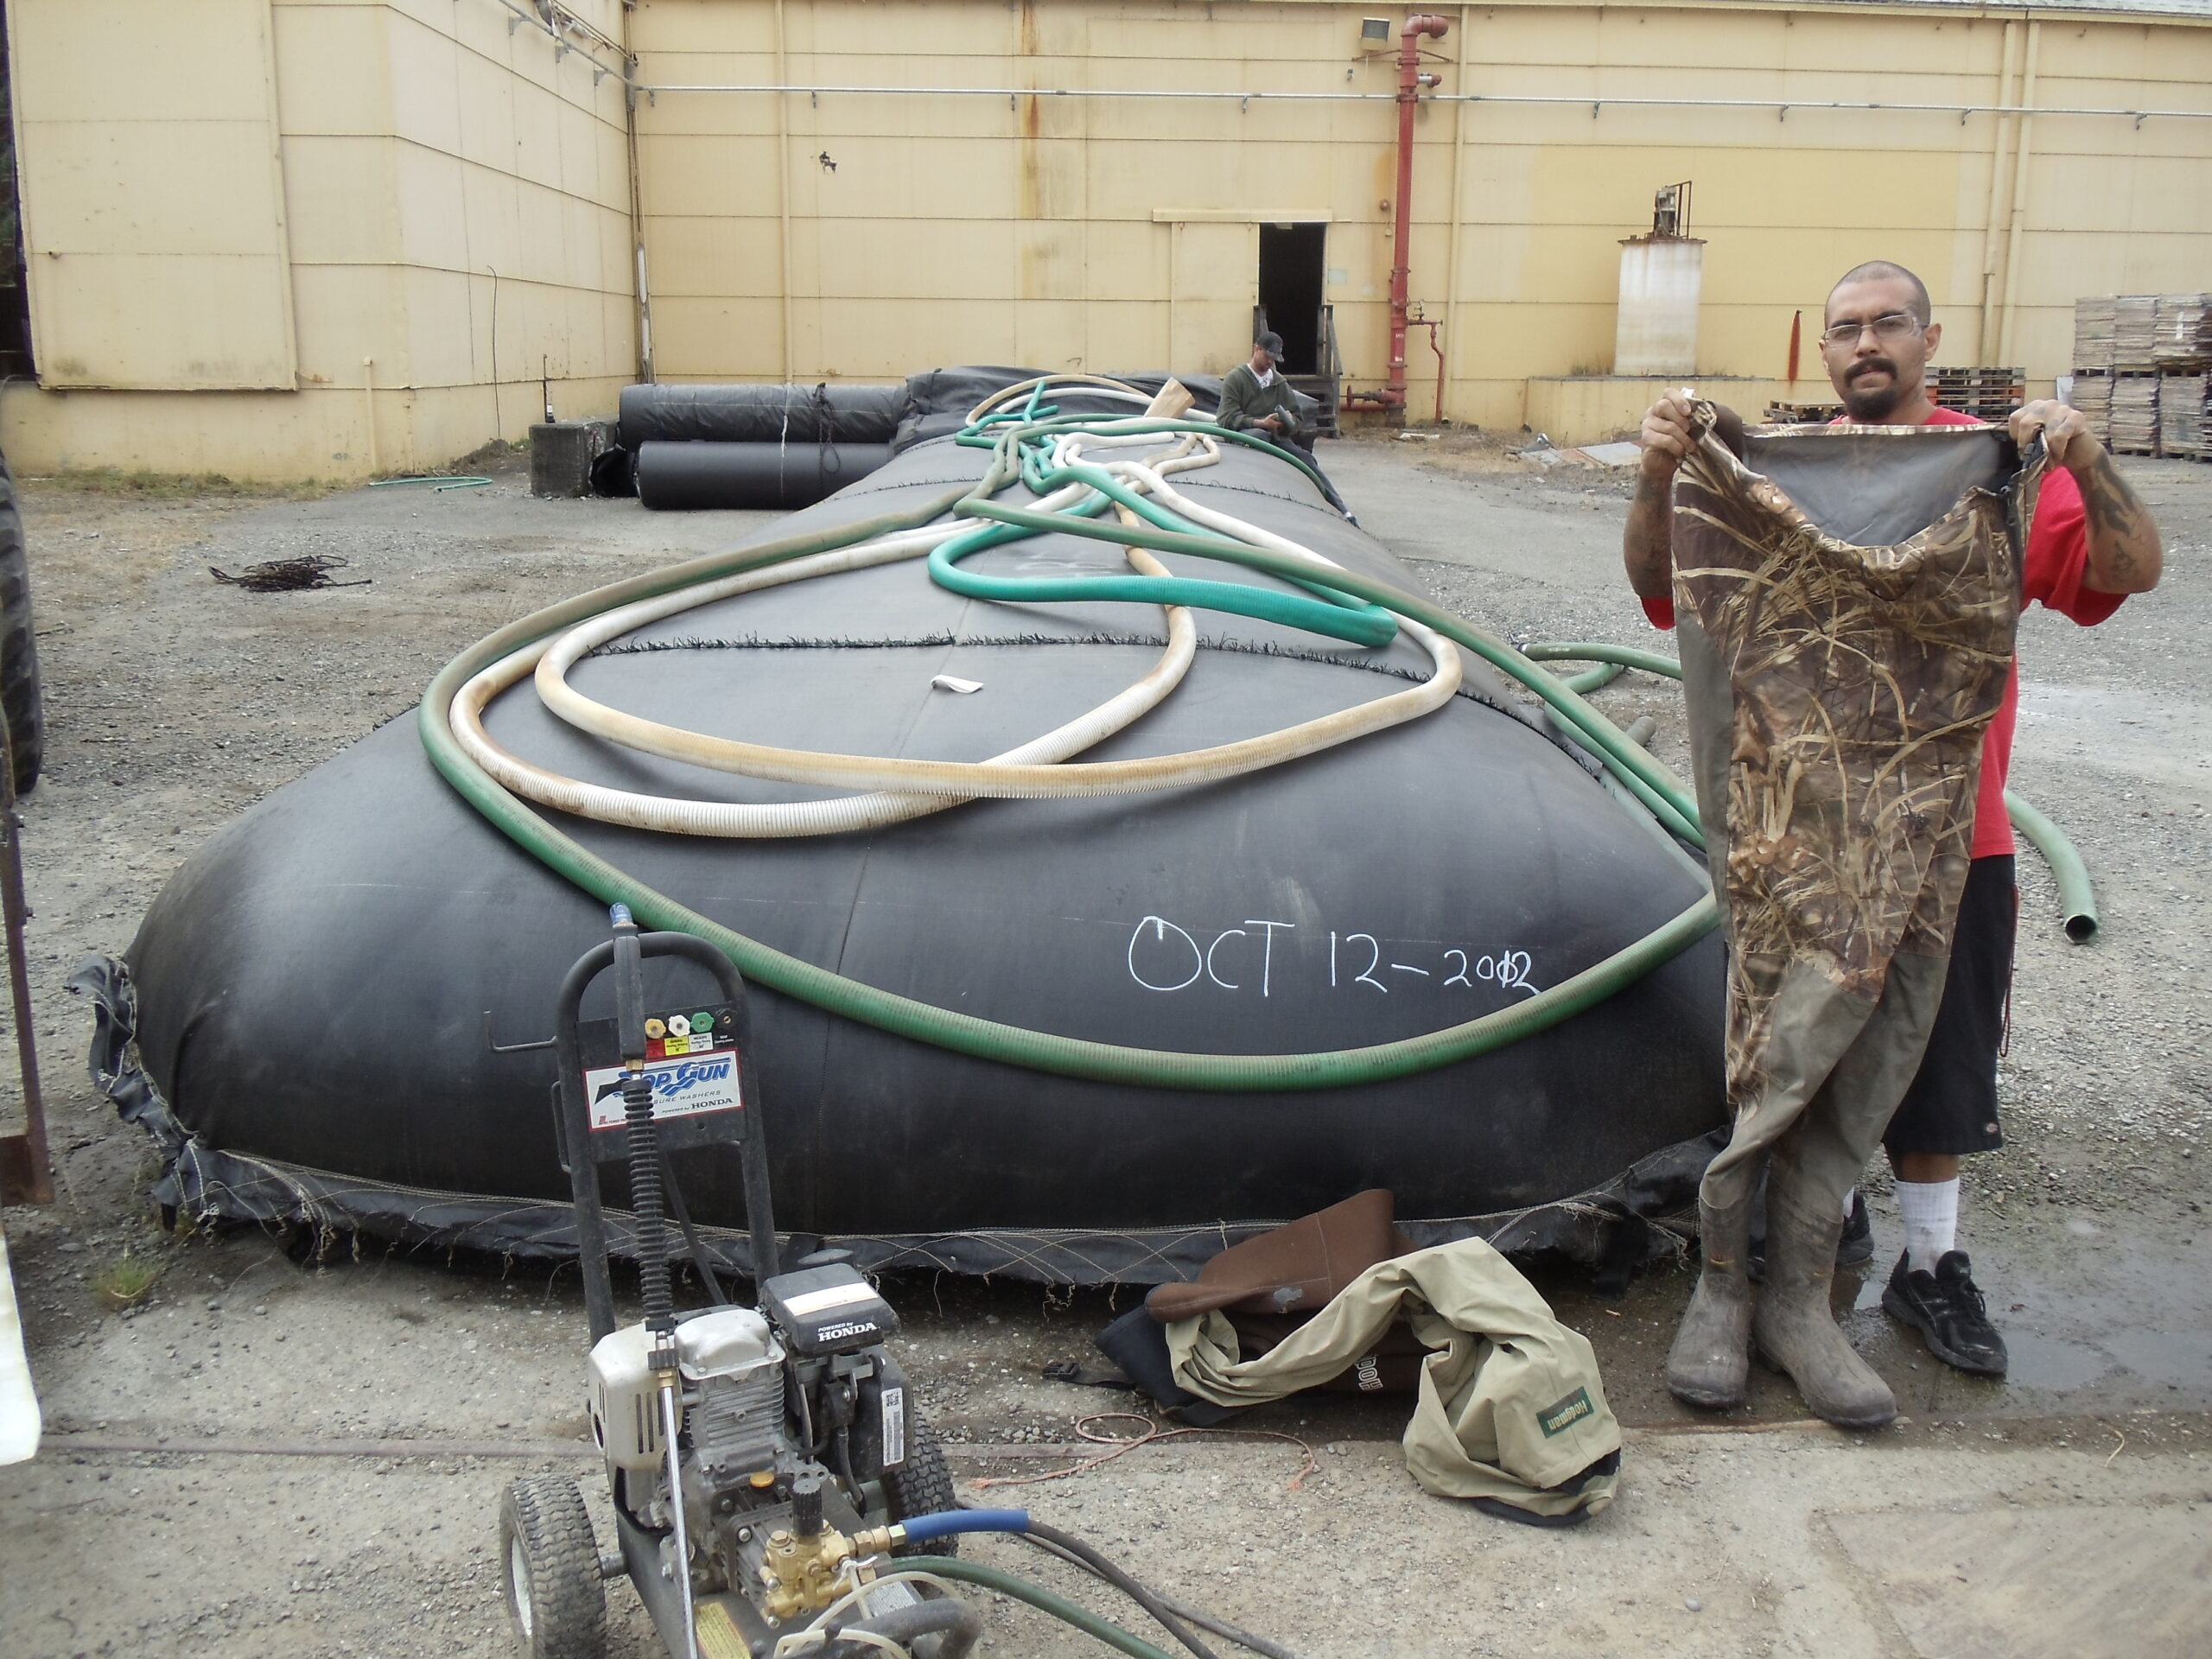
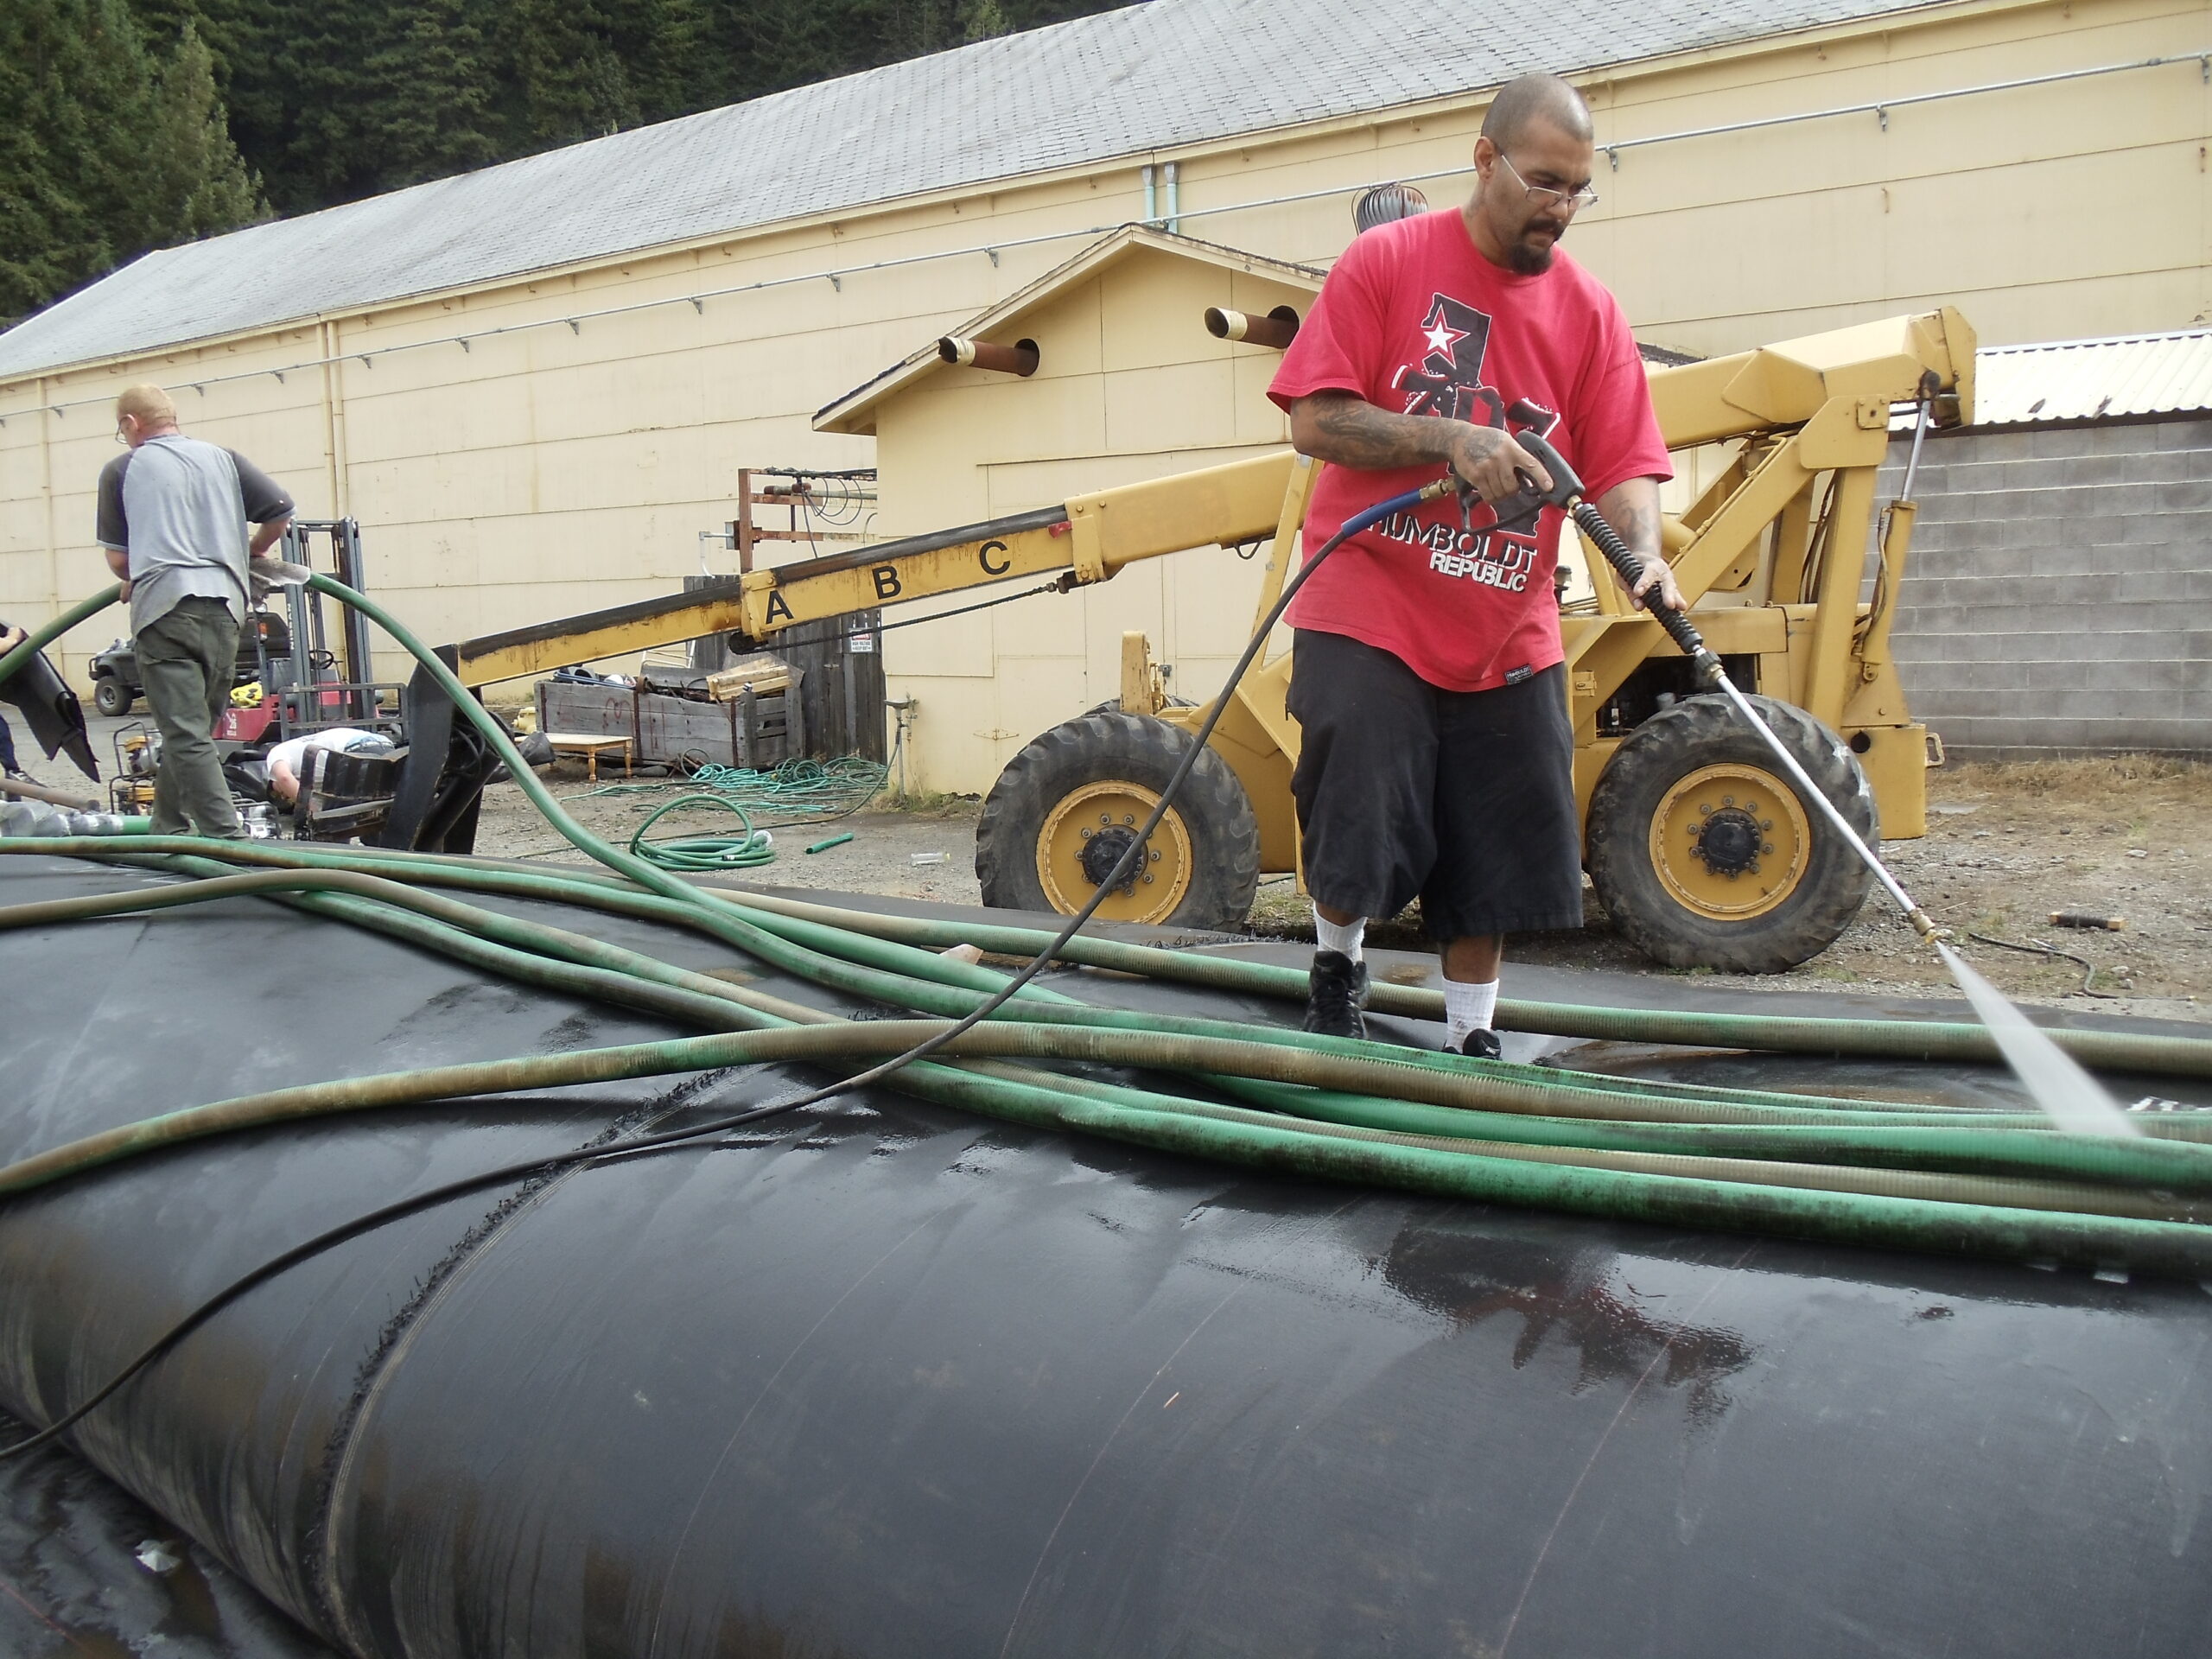
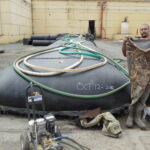
Any equipment that went into the water had to be cleaned prior to being delivered to the site. Date stamped pictures of the cleaning were required for the final report.
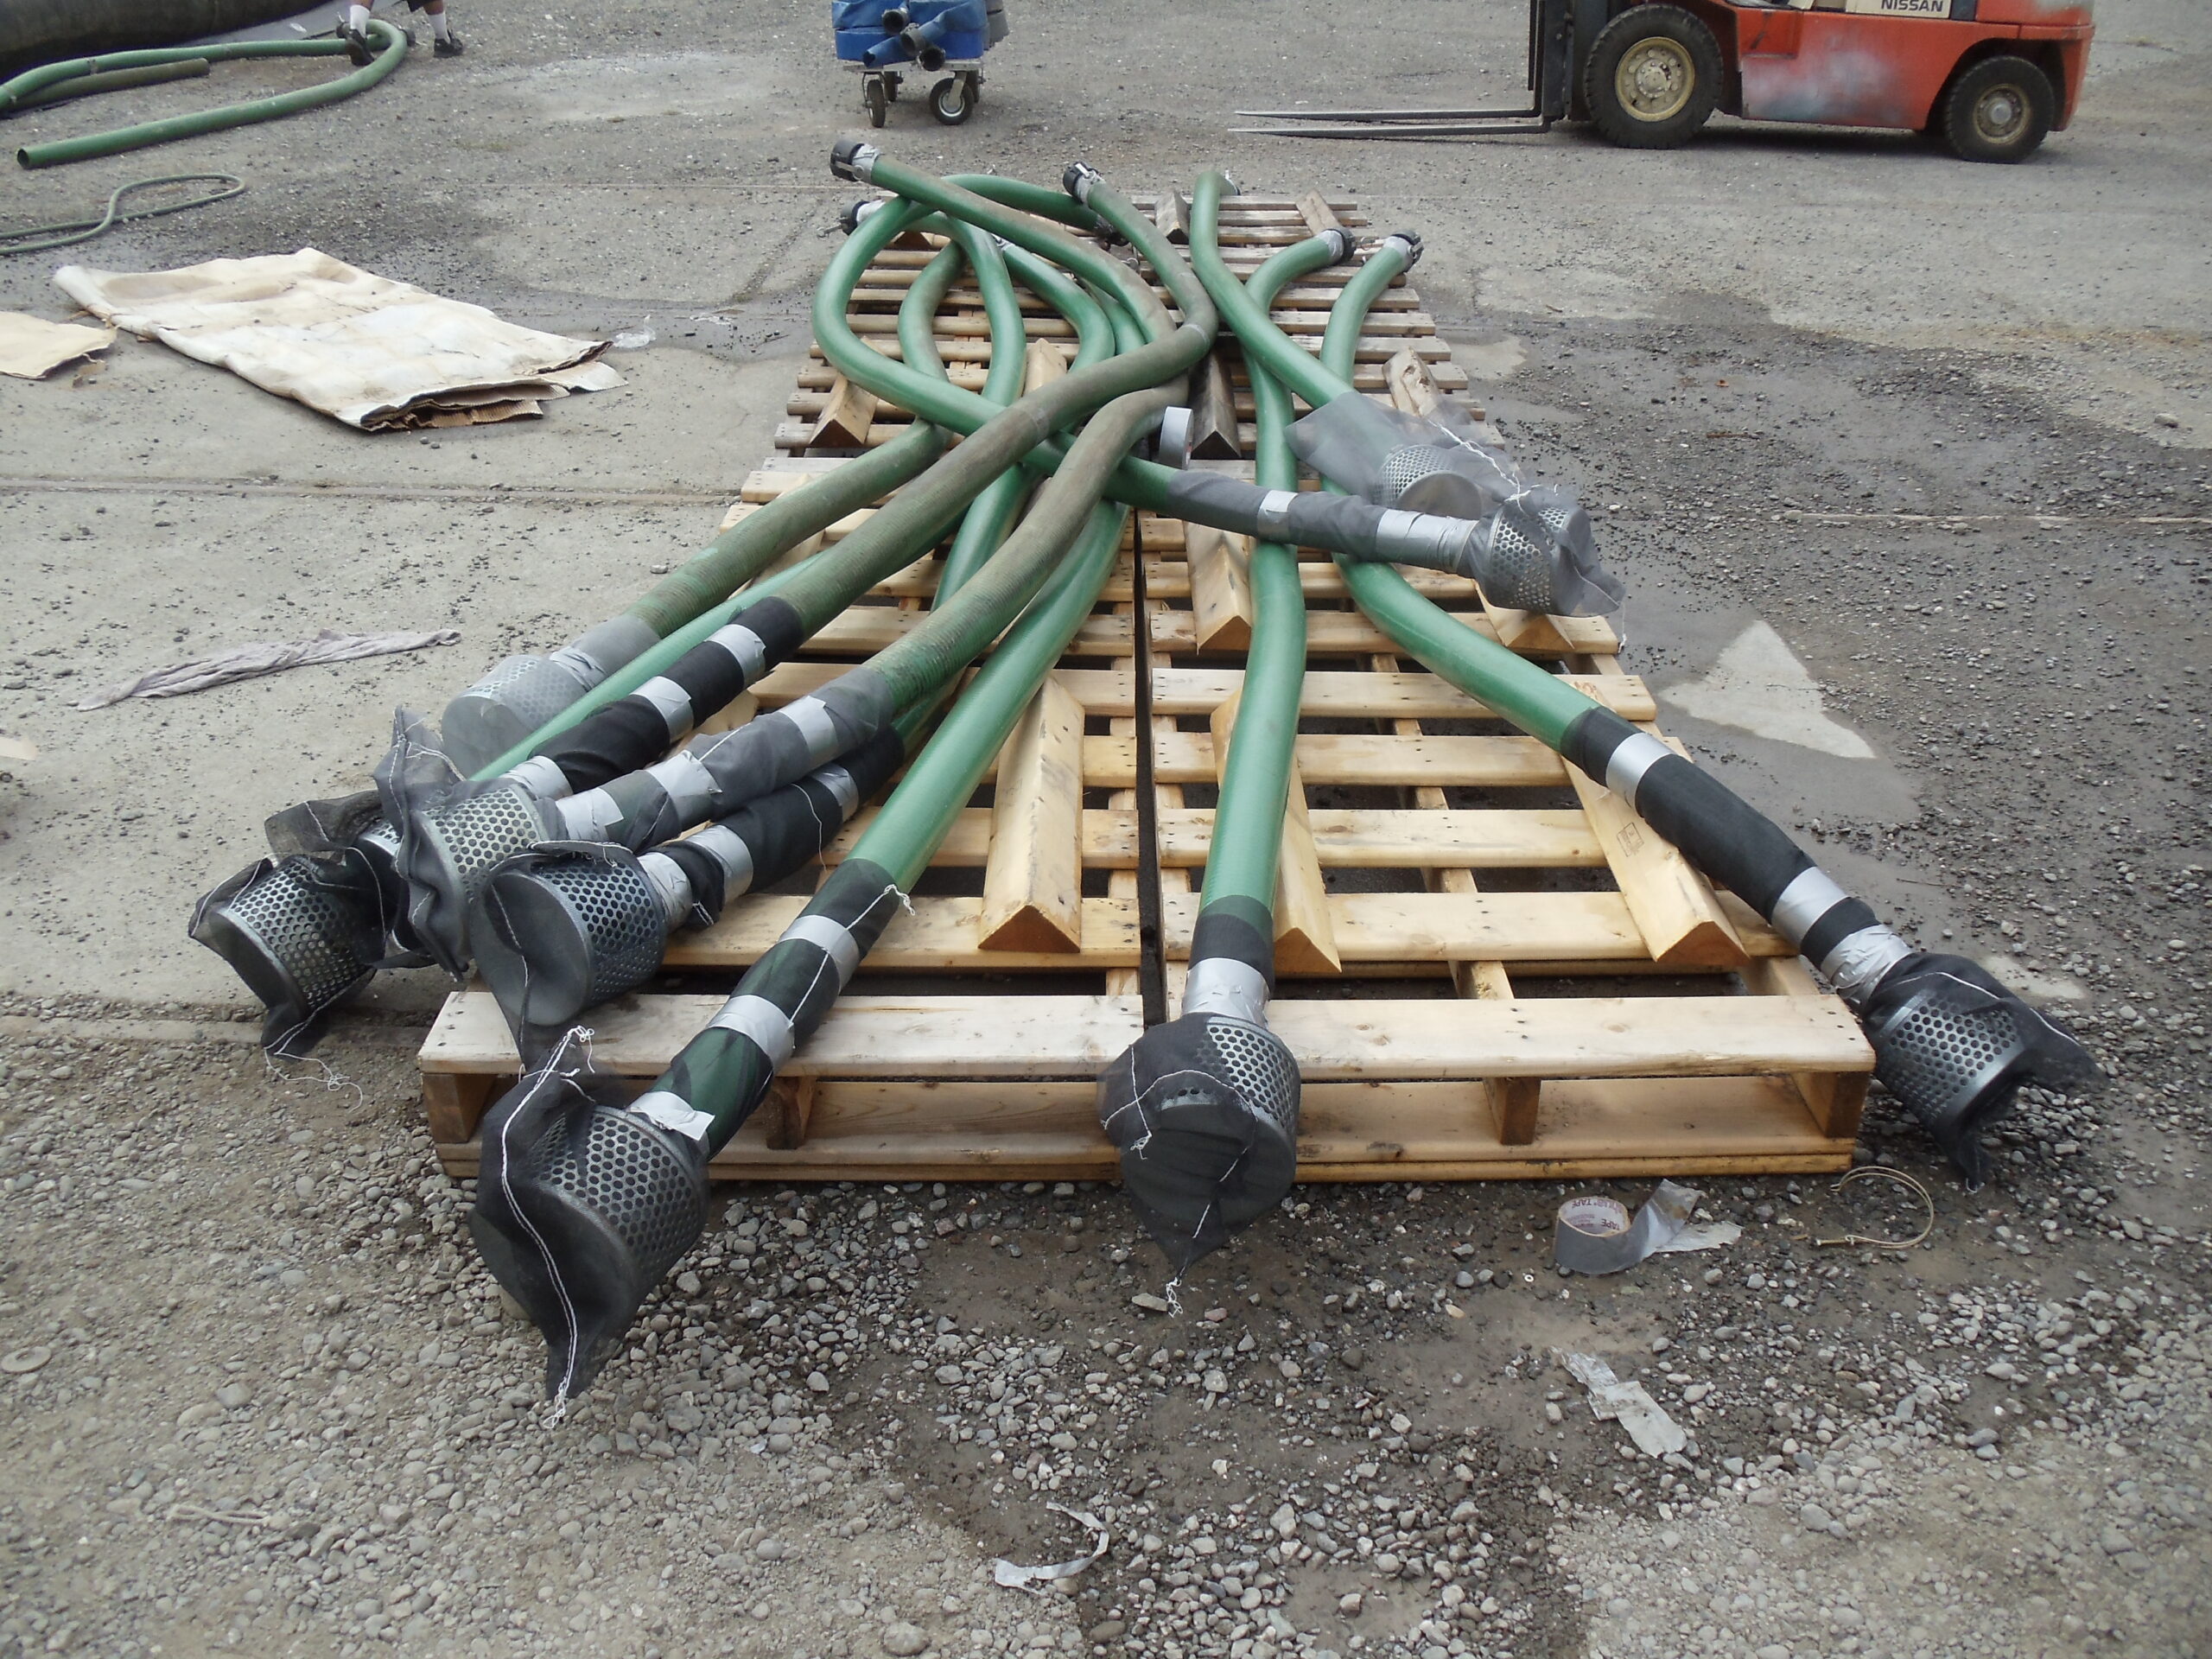
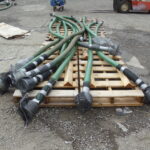
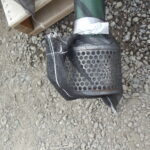
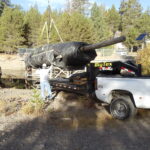
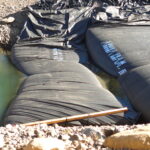
All of the suction hoses had to have fish netting sewn around the metal debris screens, to help prevent any accidental fish deaths.
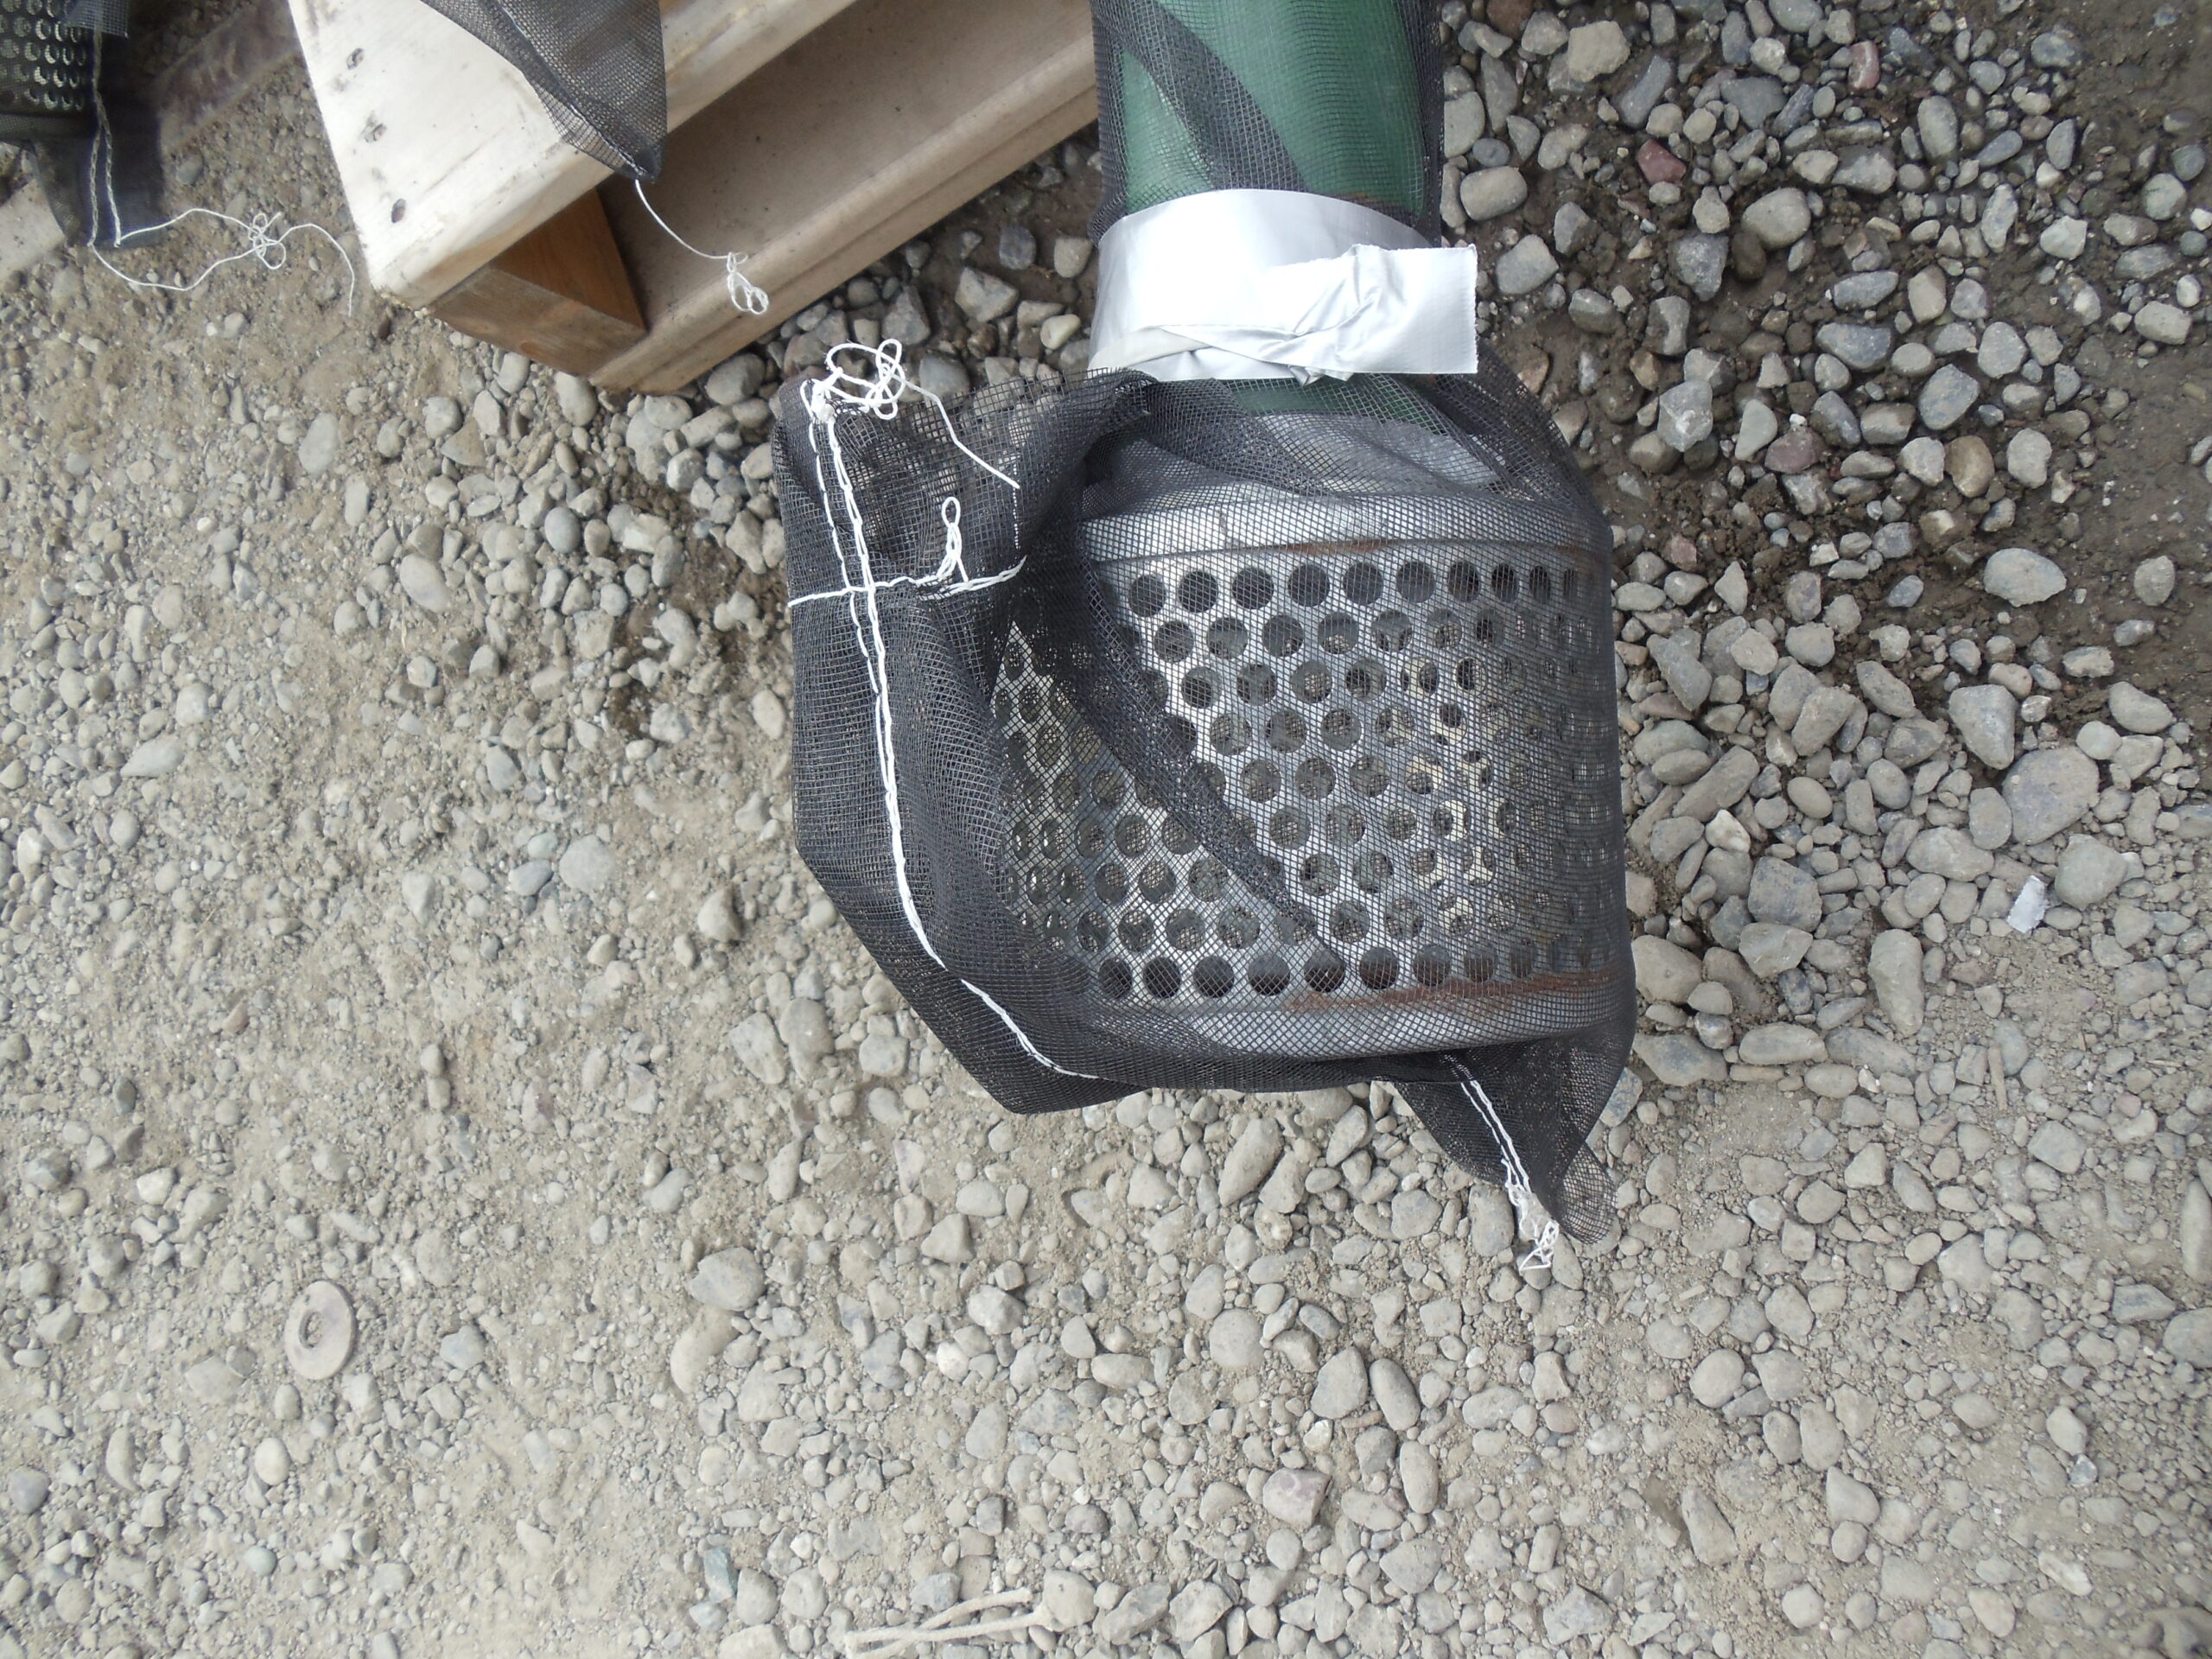
Here we can see a closer detail of netting used to help mitigate with accidental fish deaths.
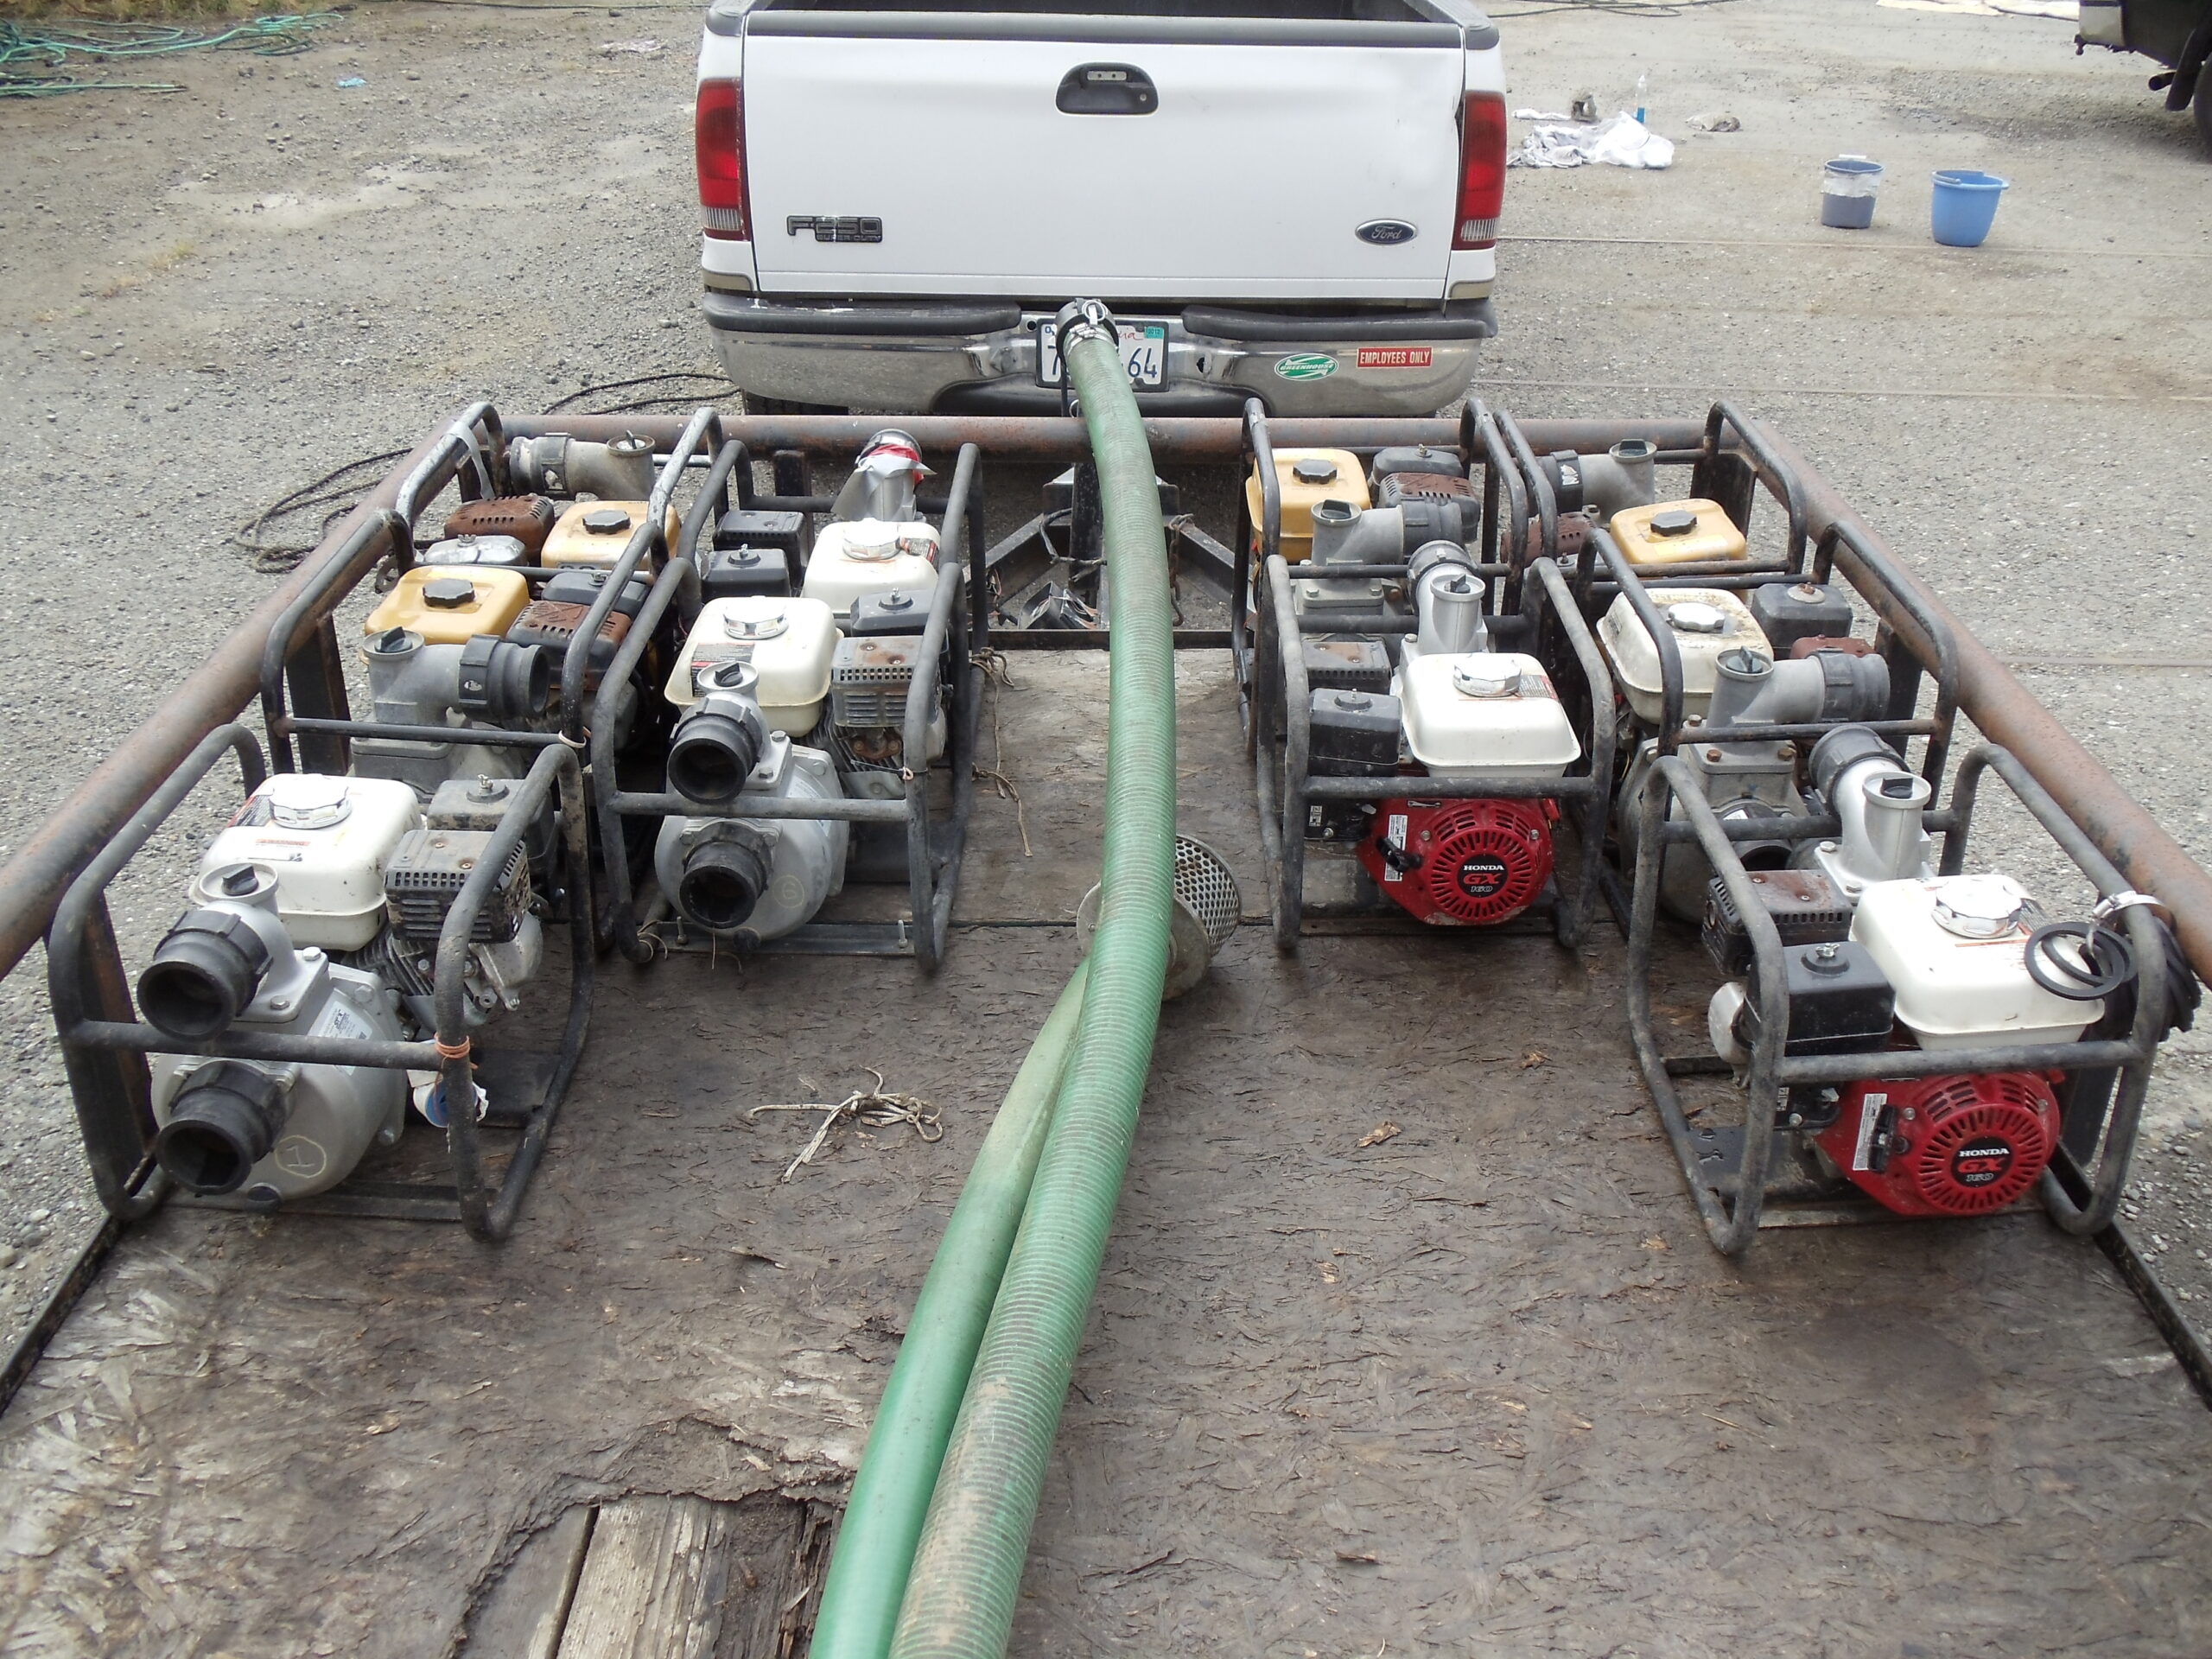
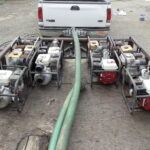
Aqua Dam Inc. (ADI) recommends that customers minimally use a pair of standard three (3) inch gas powered discharge water pumps for nearly all AquaDam installations. Larger pumps (in pairs) can be used for larger AquaDams to decrease fill time.
These two (2) inch suction hoses were cleaned as well. They will be used to prevent water from pooling between the AquaDams.
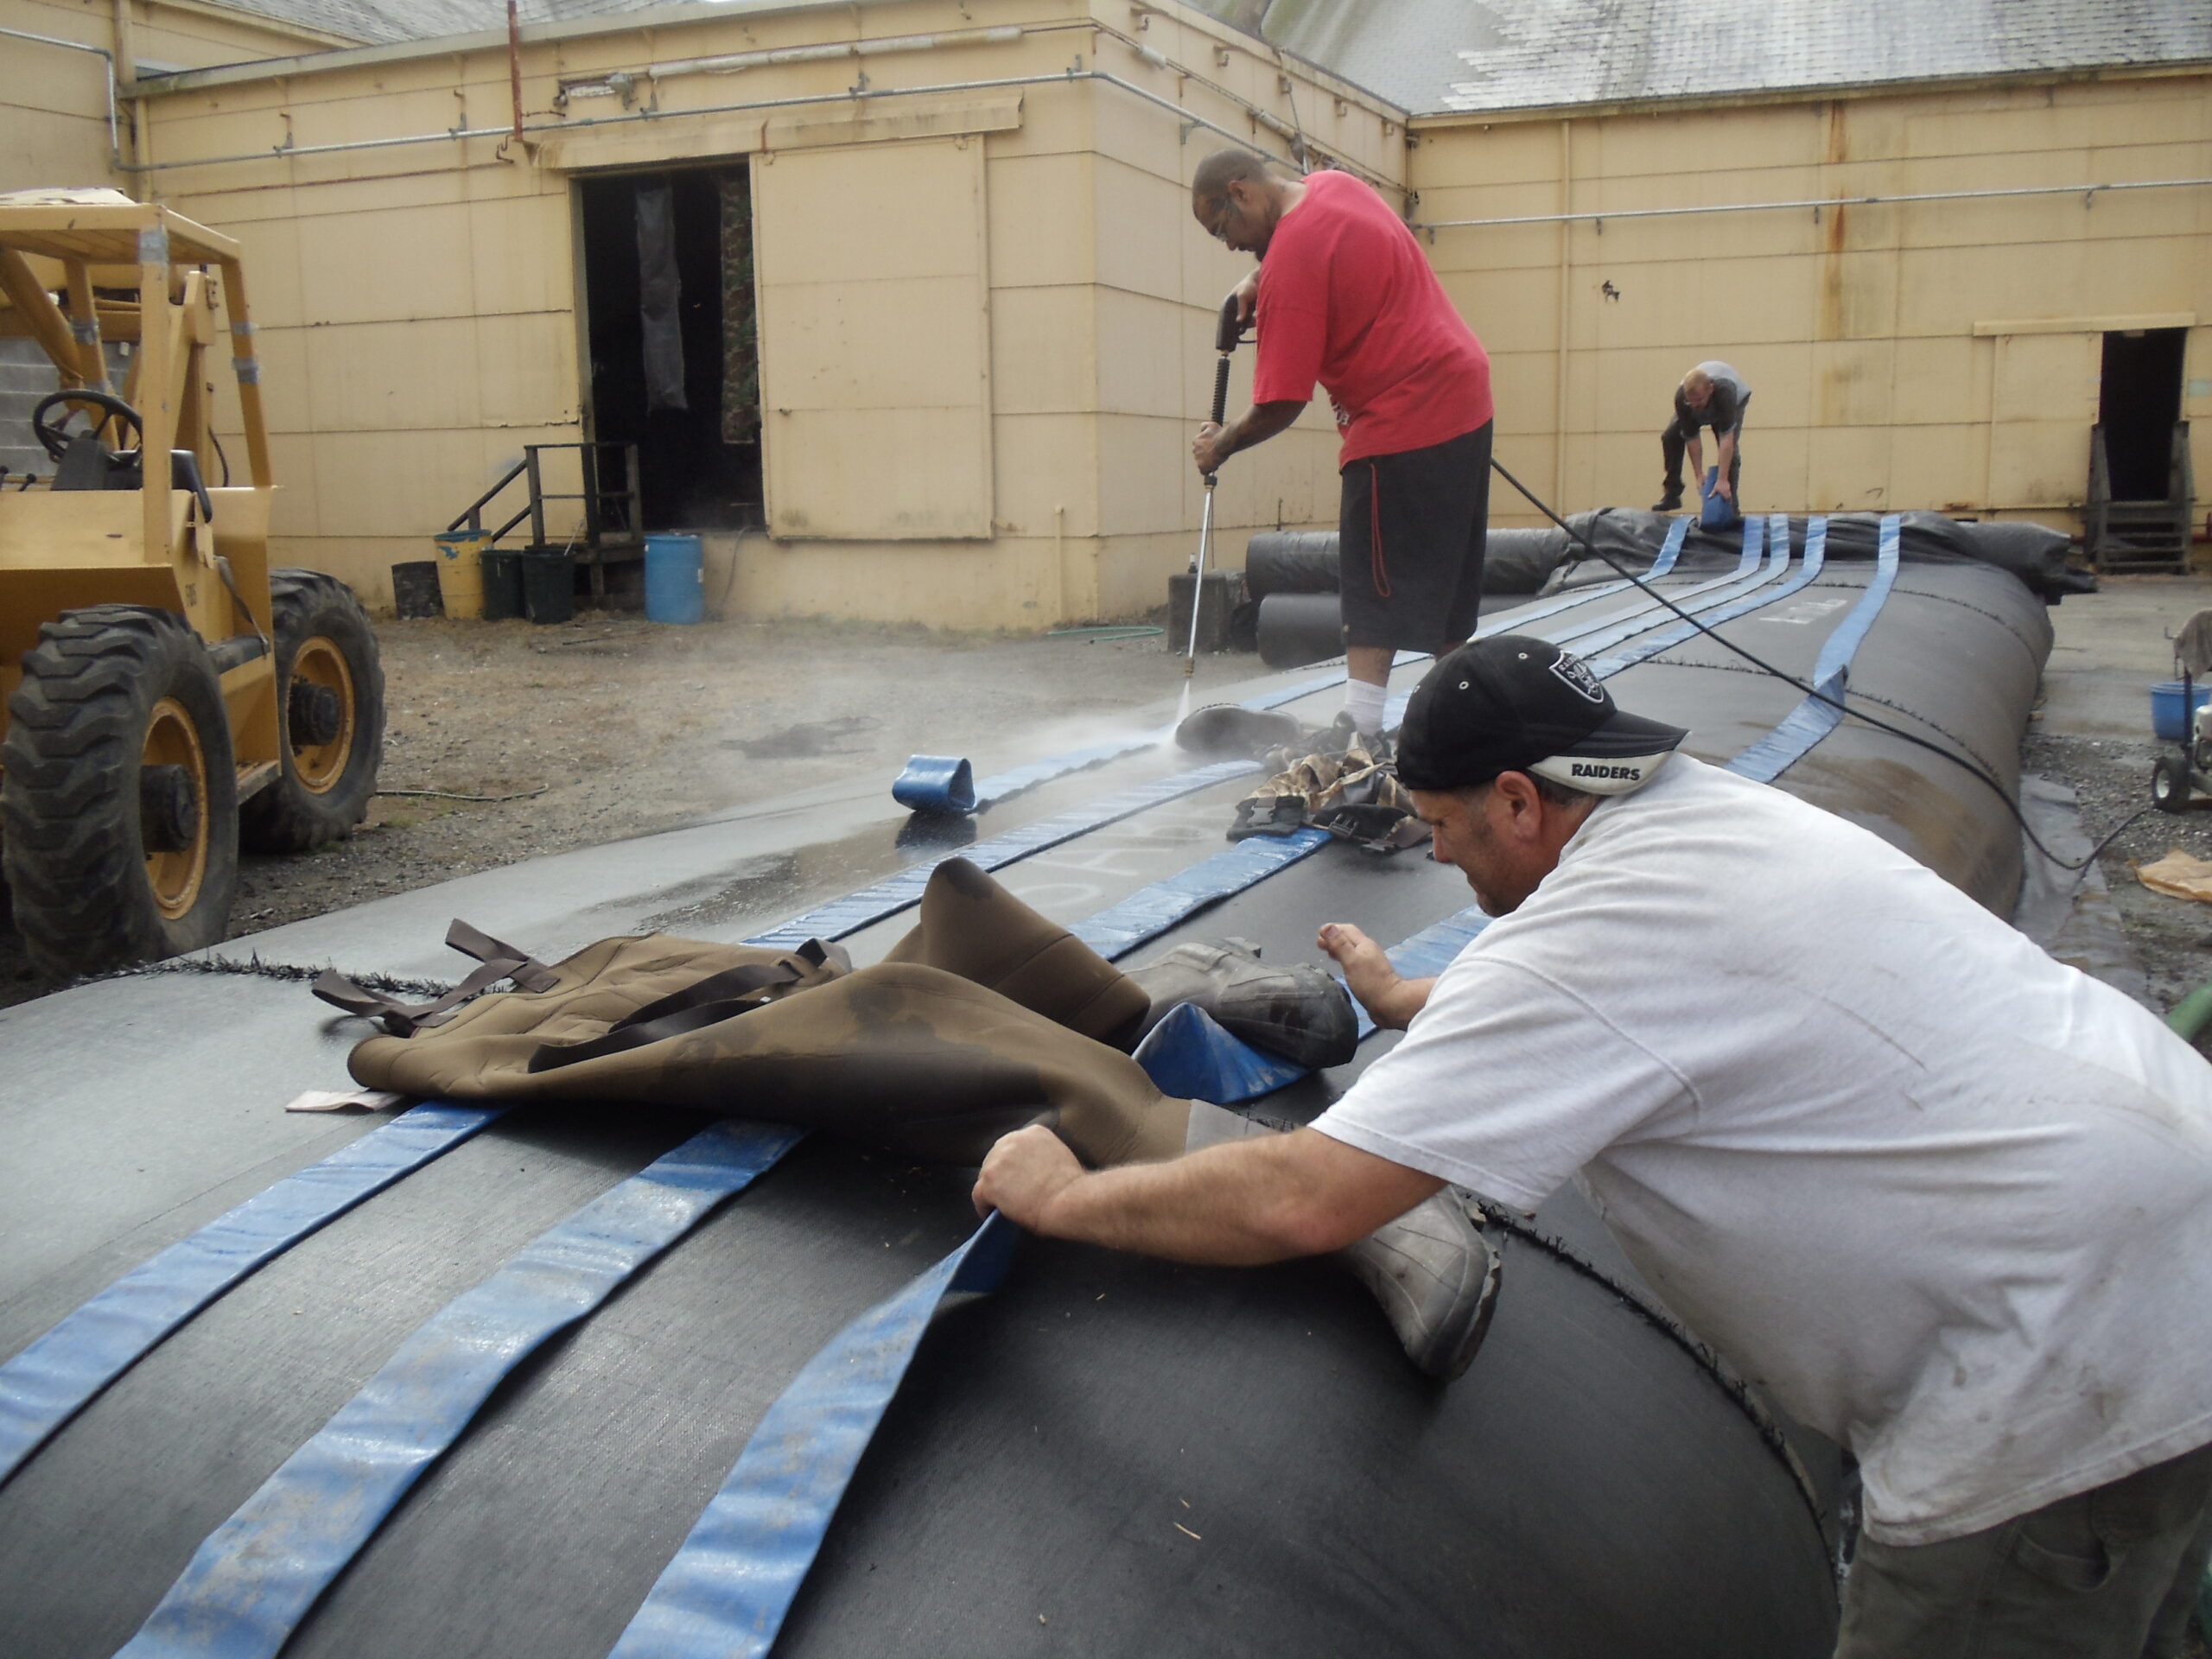
Any equipment that may end up in Independence Lake’s water, including waders and discharge hoses had to be cleaned.
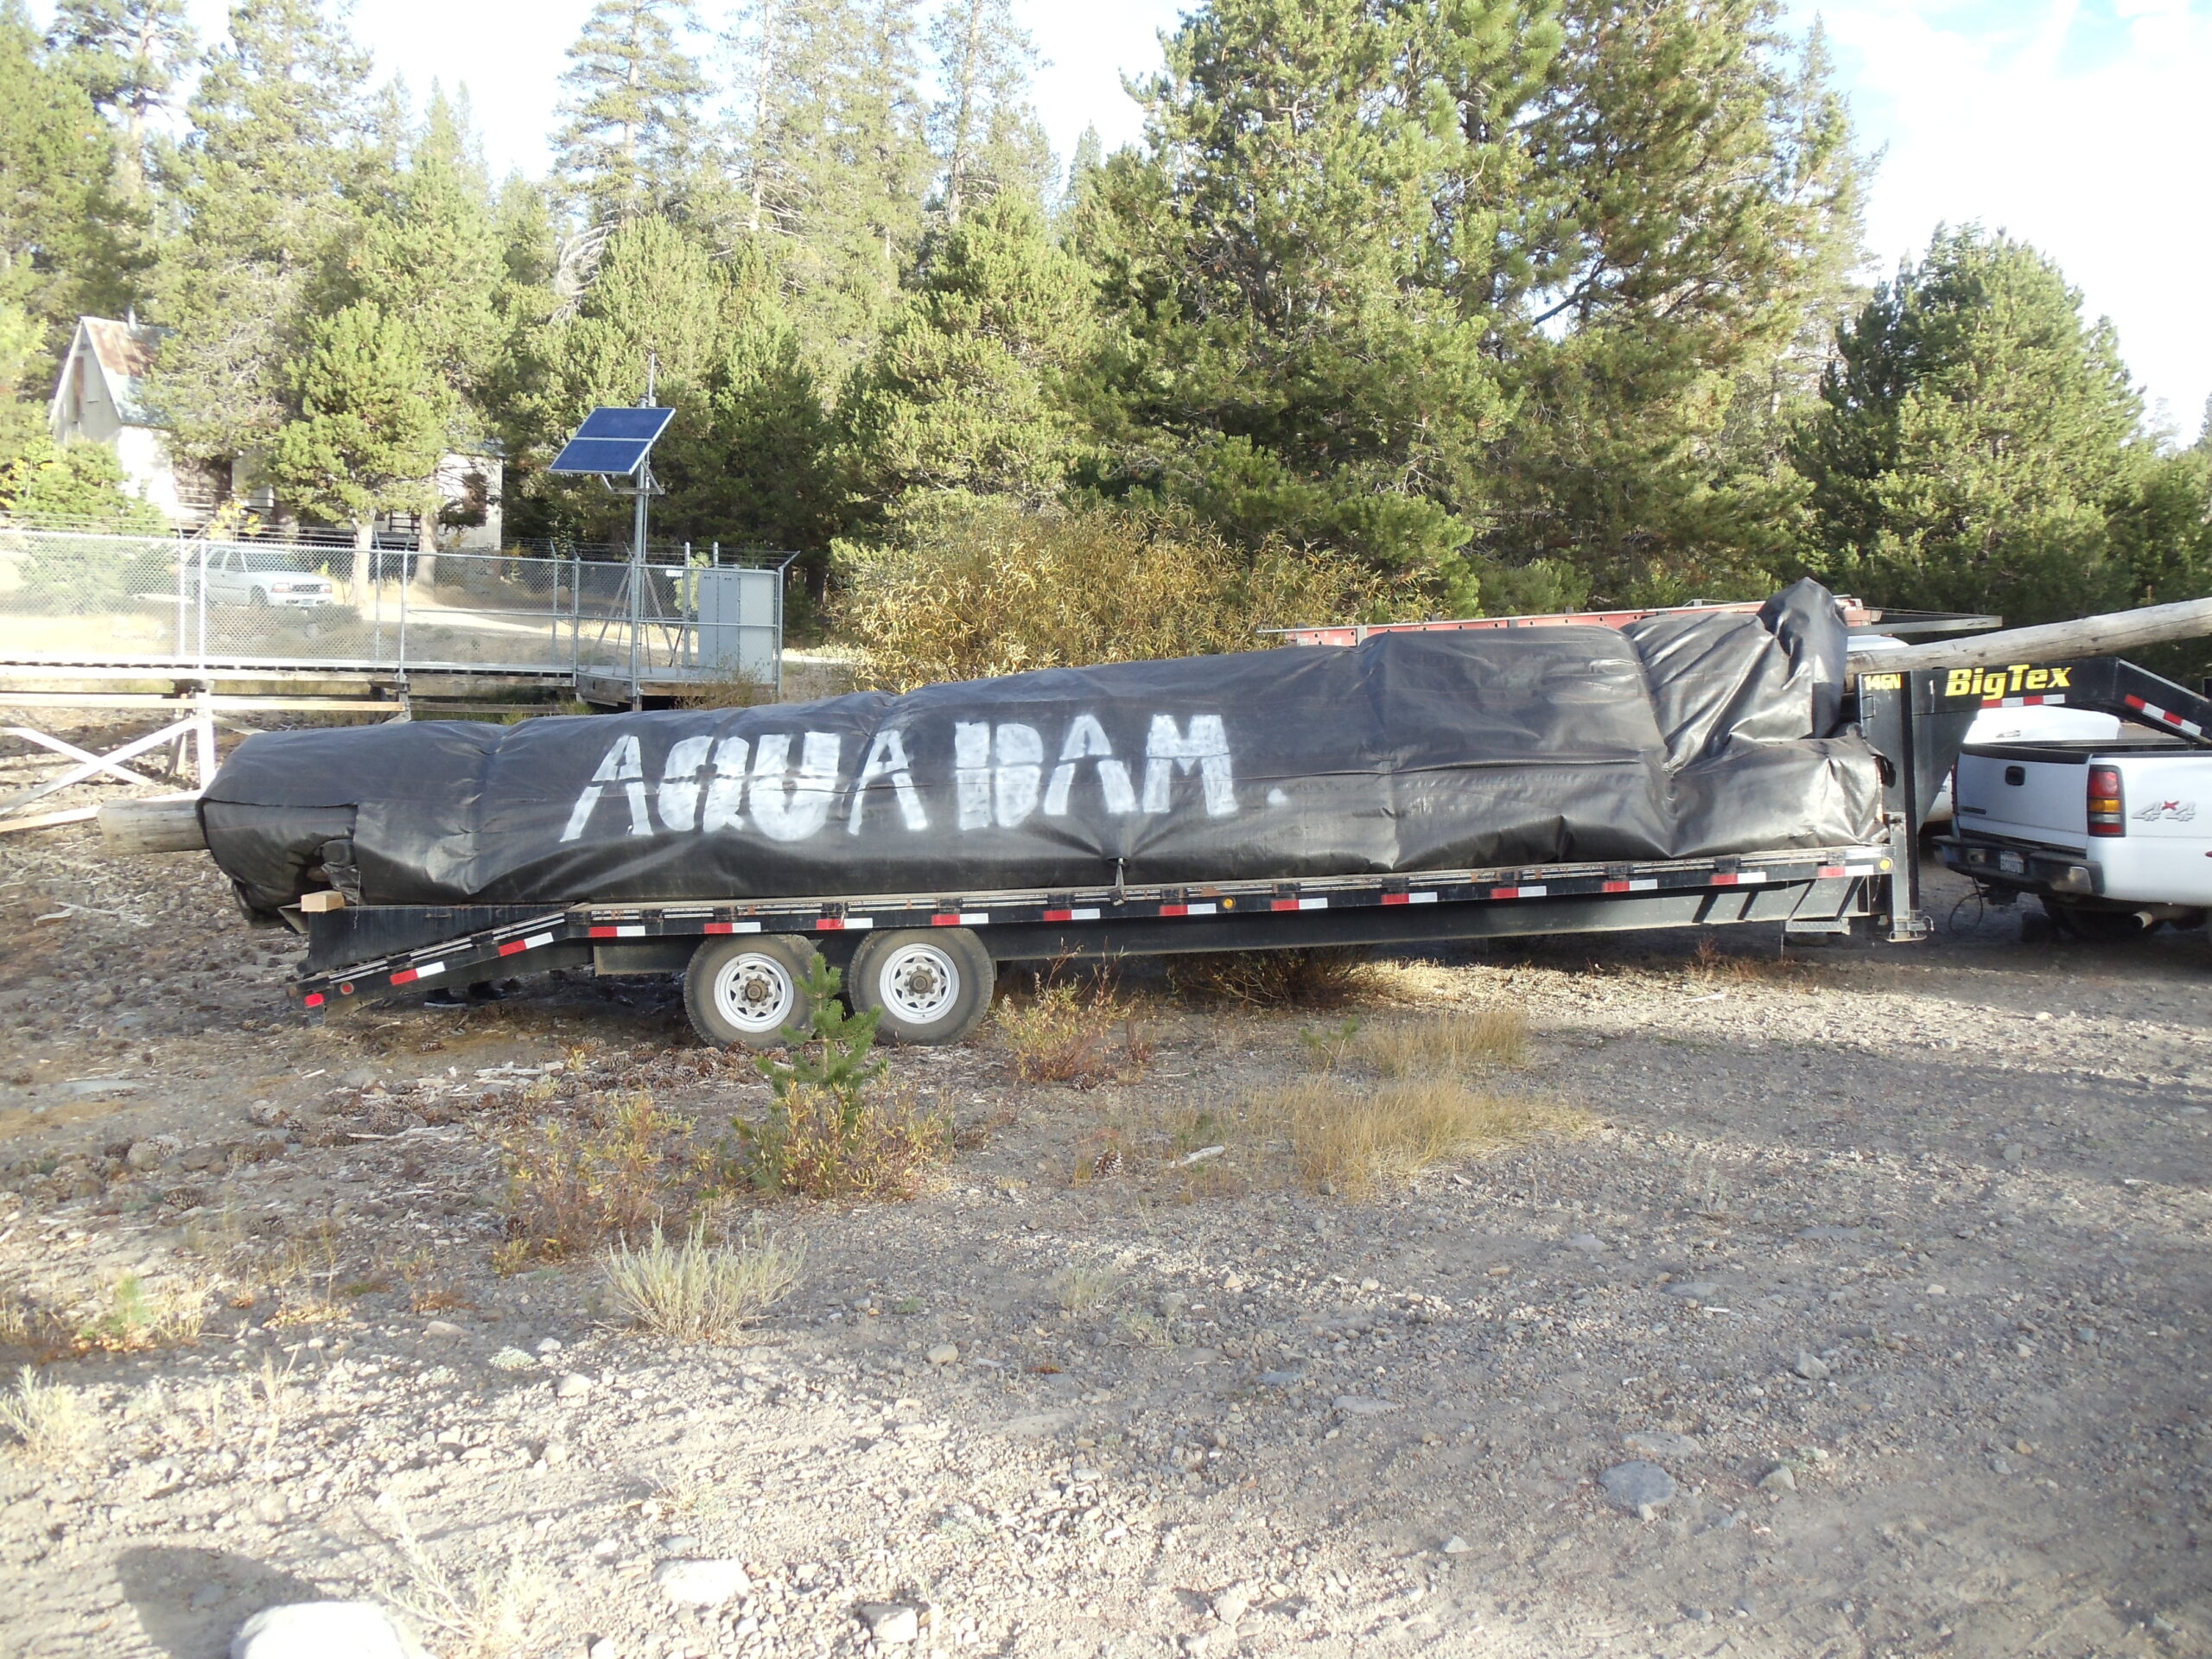
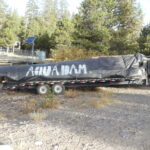
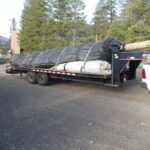
The 21ft tall AquaDam arriving at the job site.
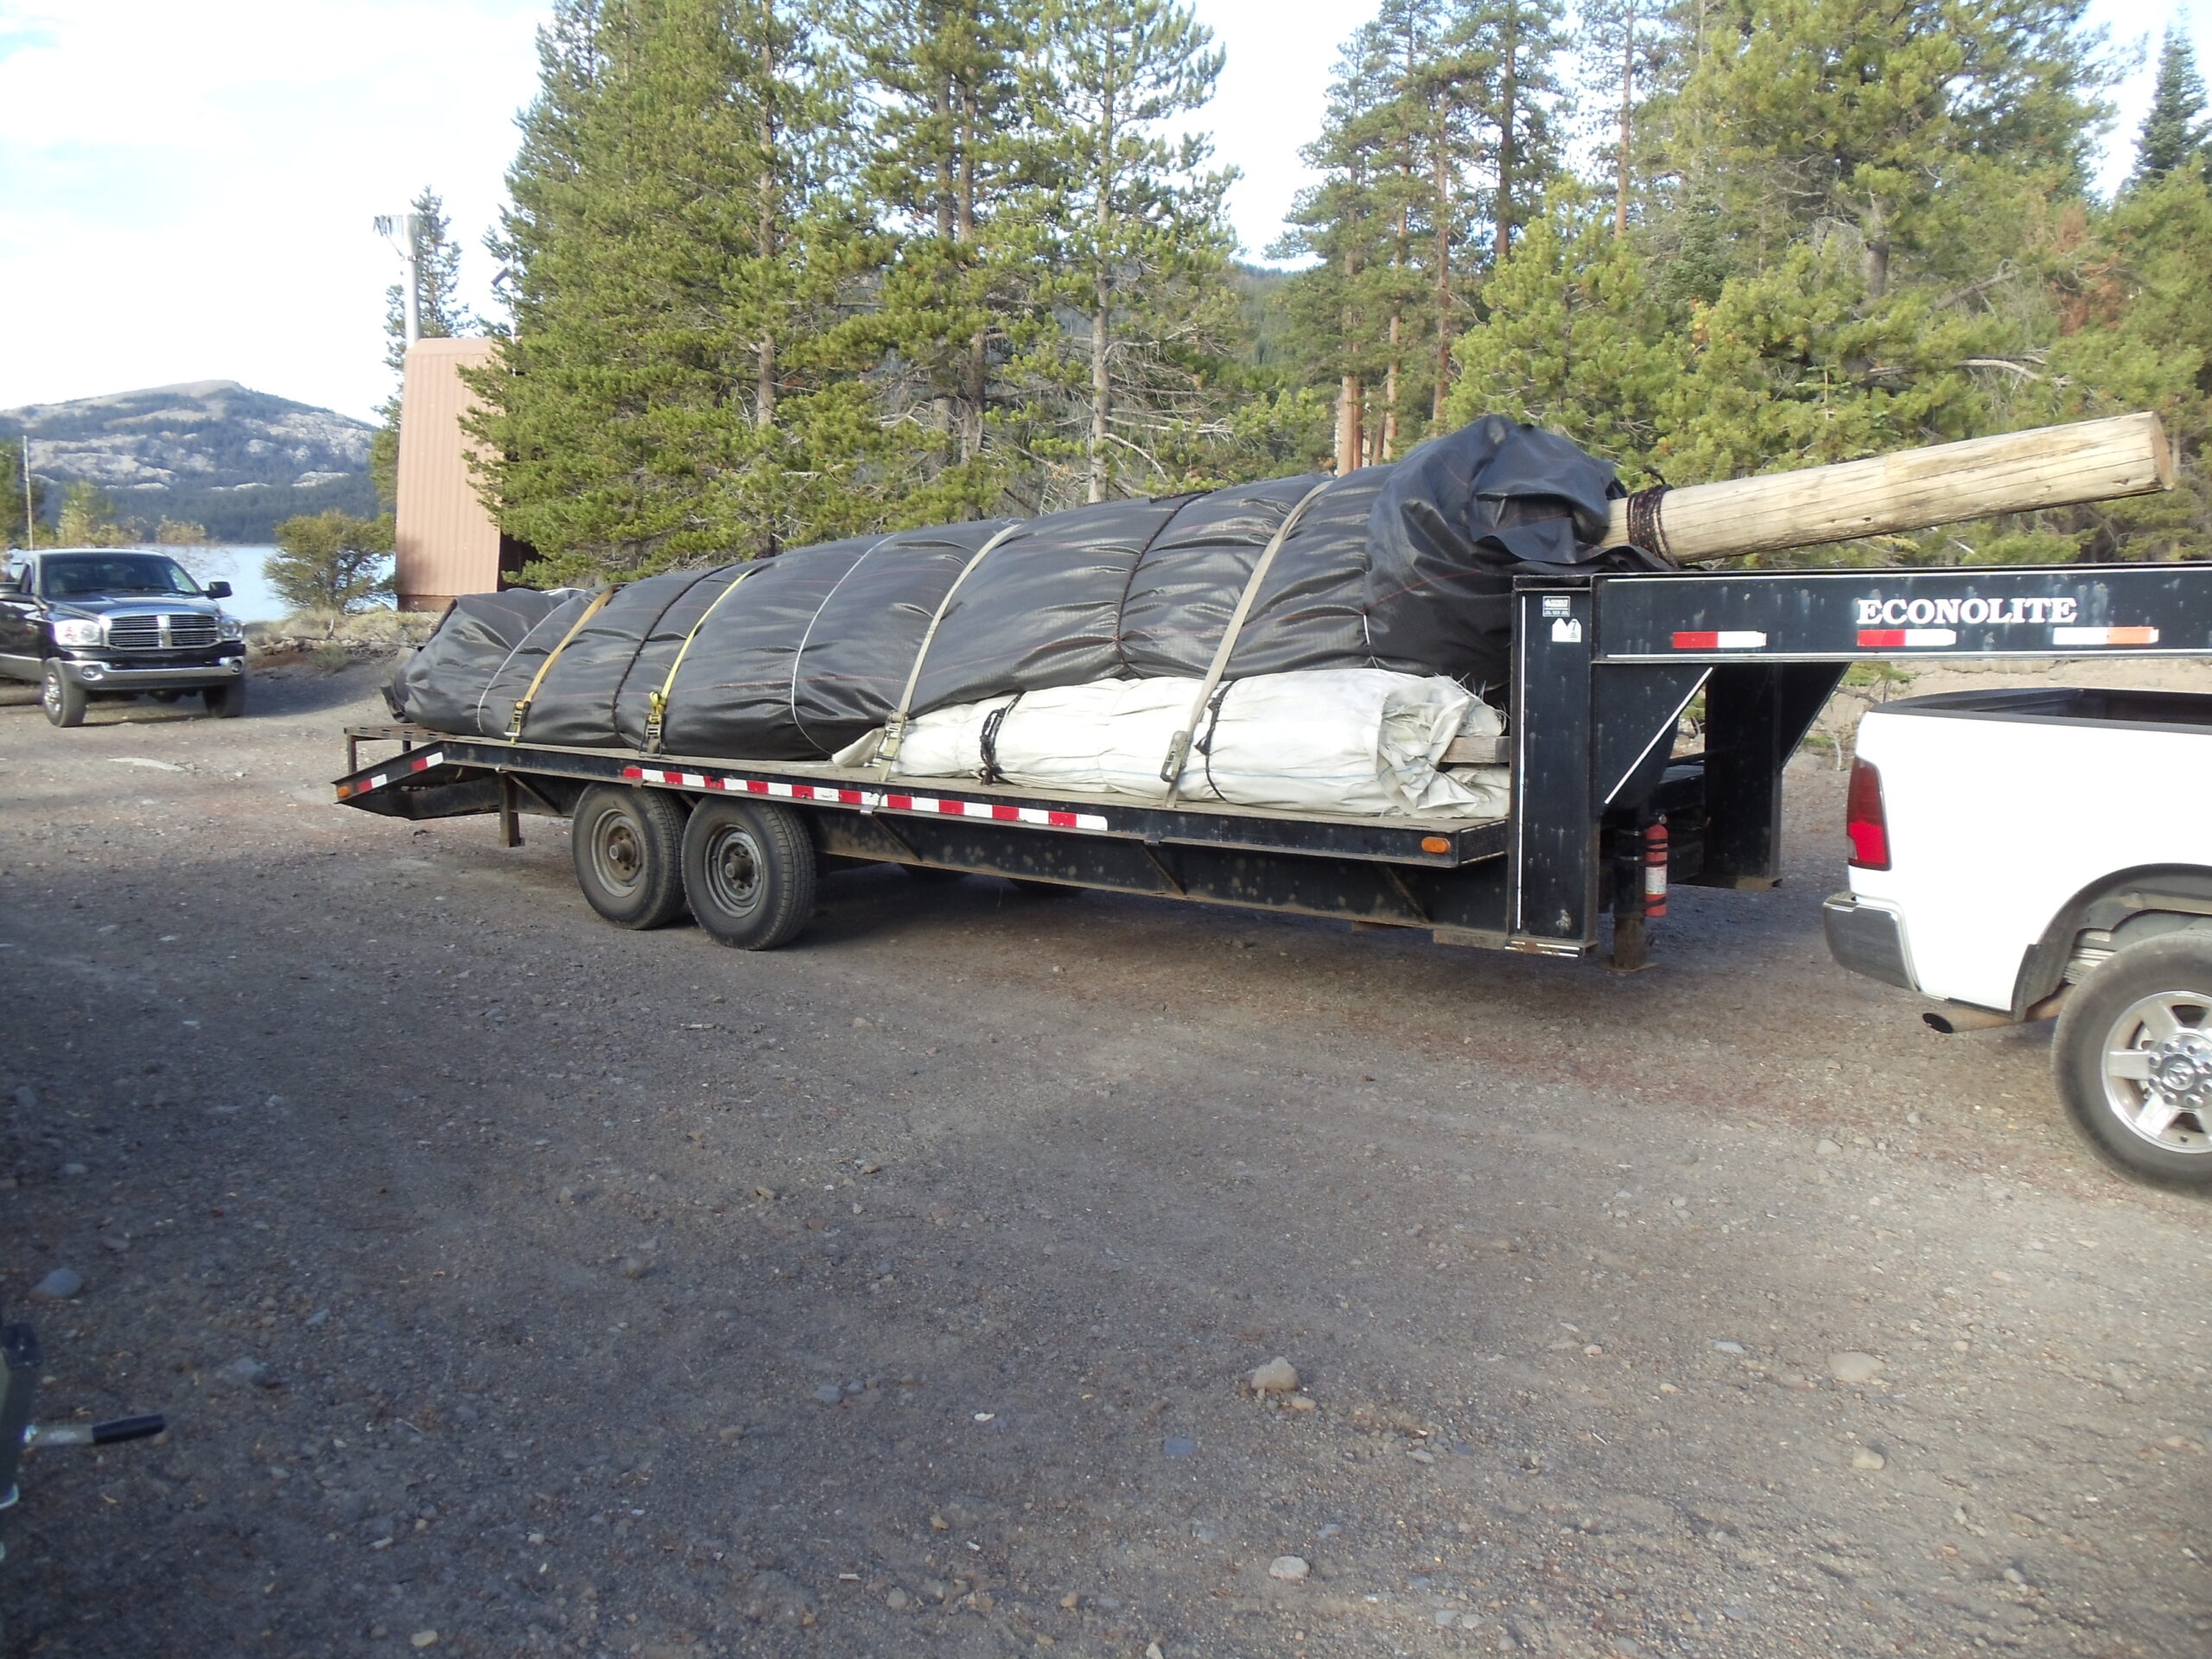
The 16ft and 10ft tall AquaDams were shipped on a second trailer, while other equipment was shipped on a third trailer.
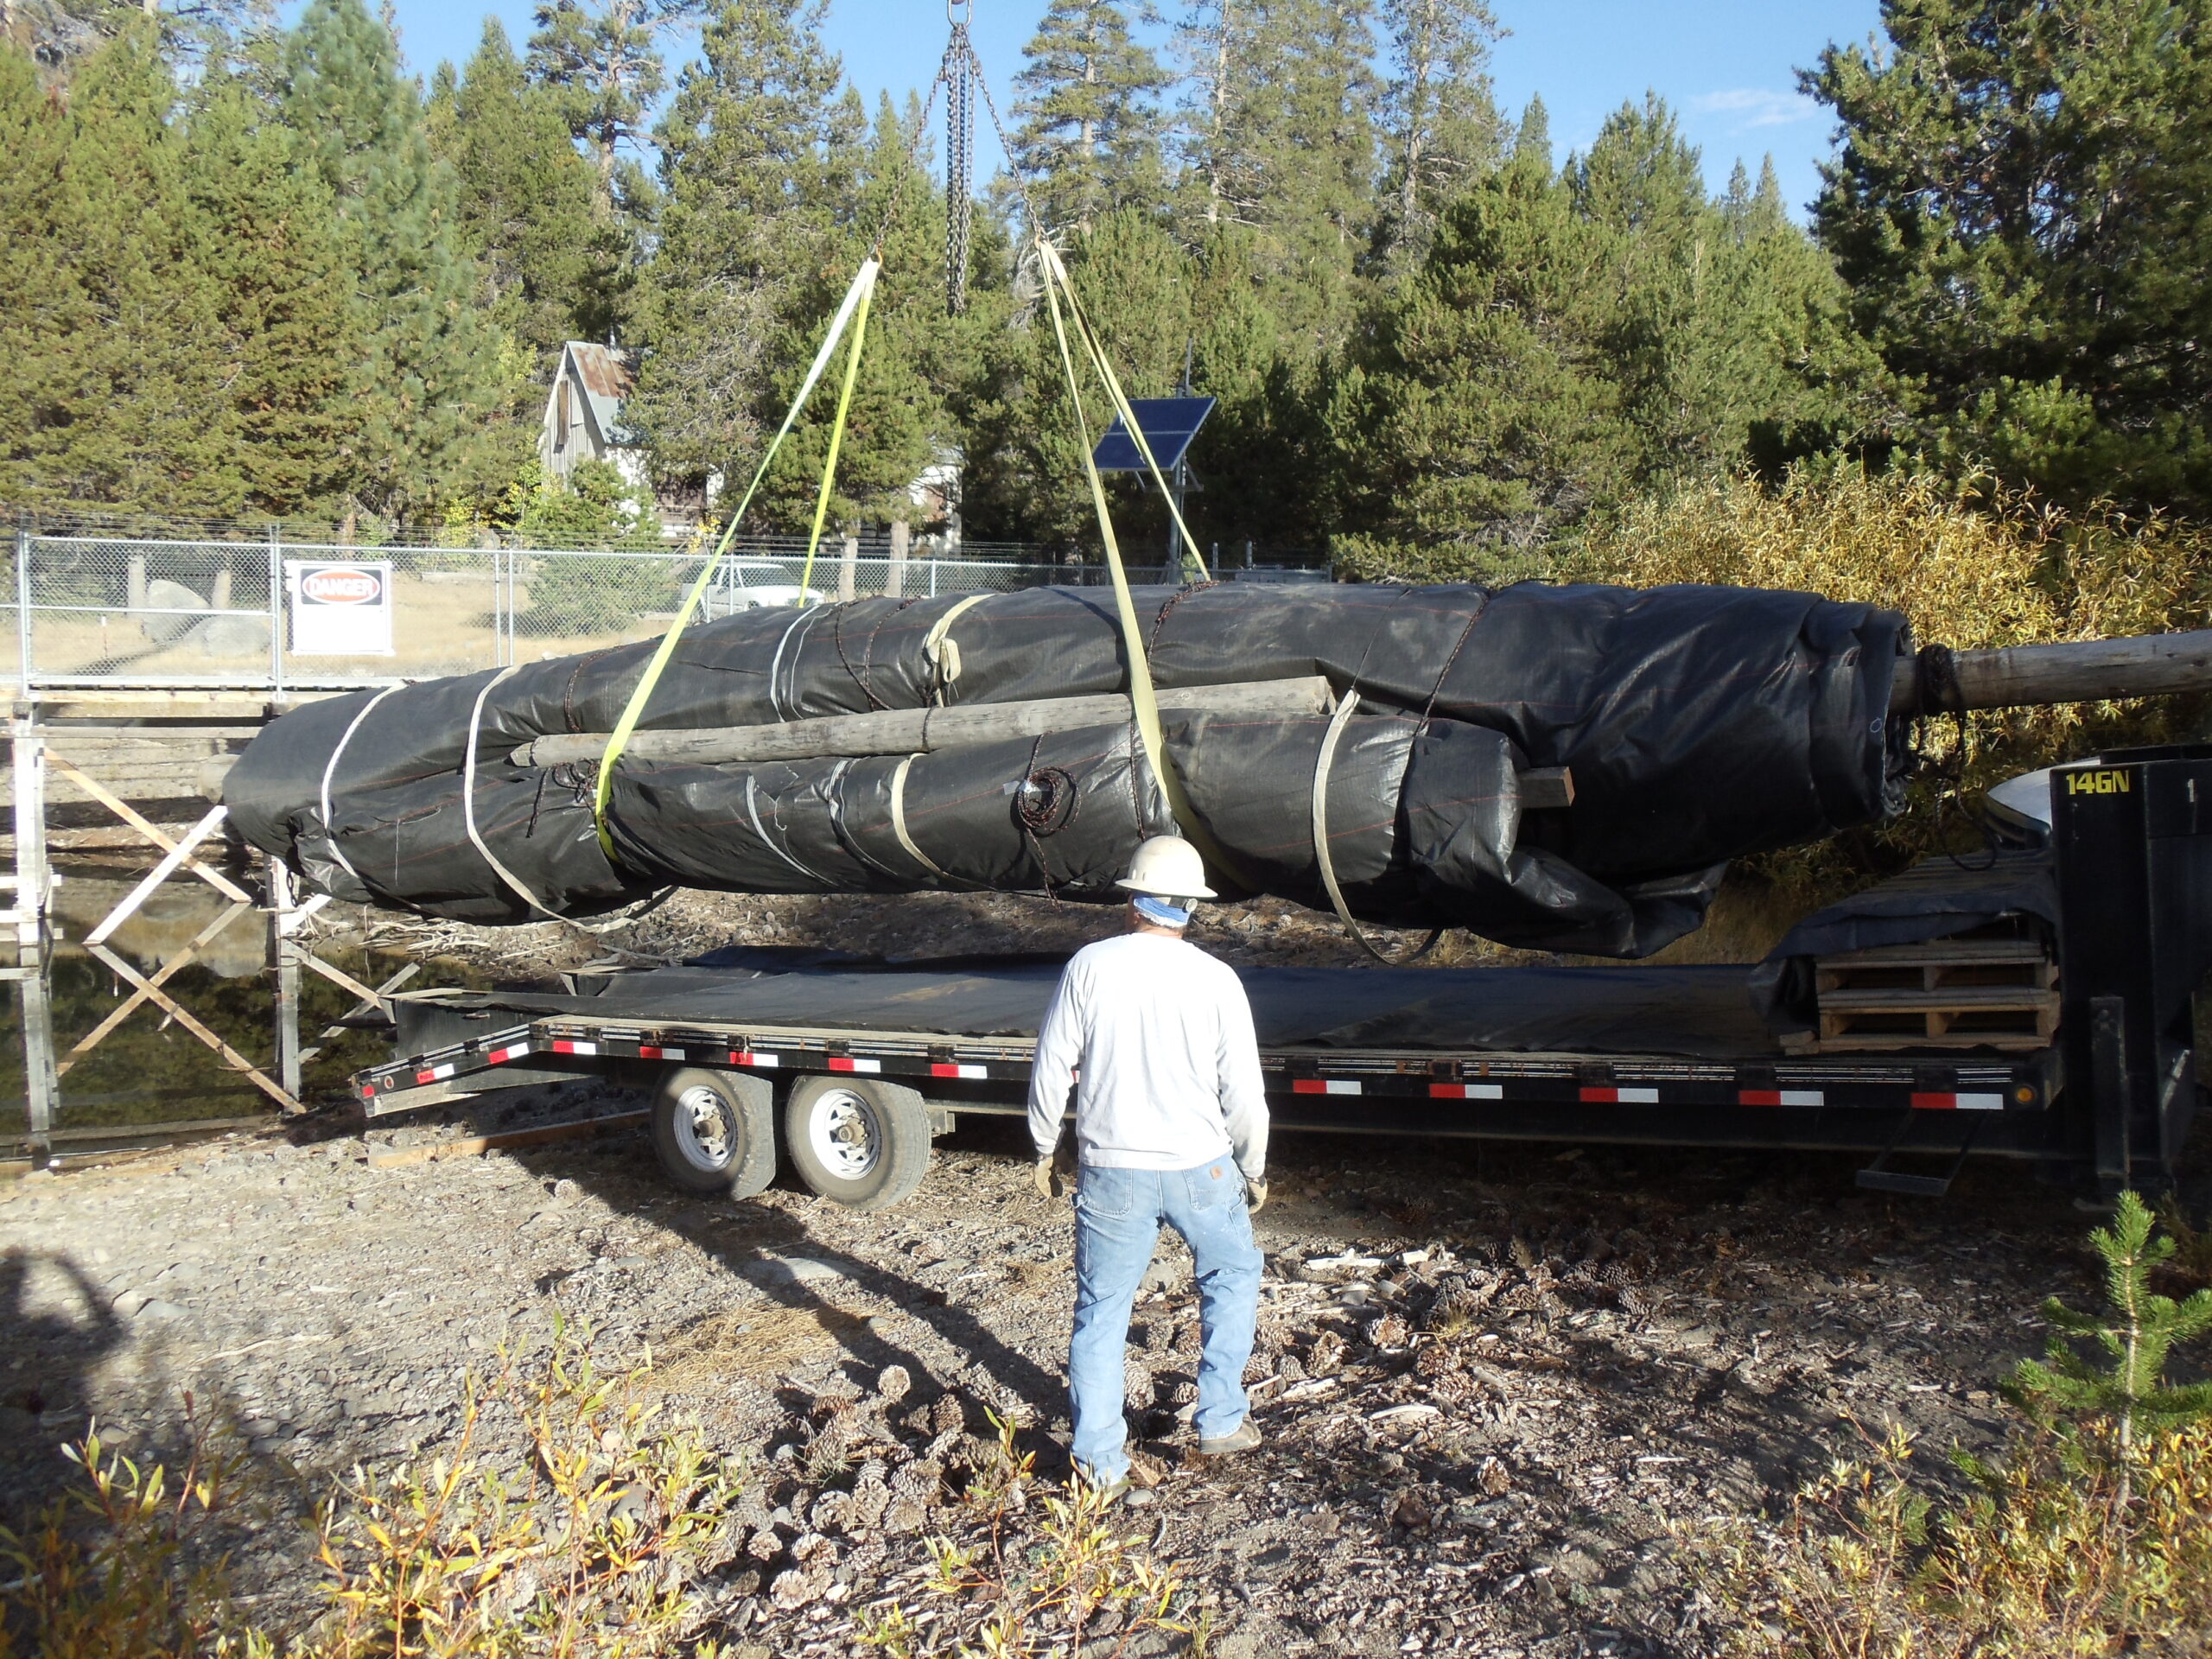
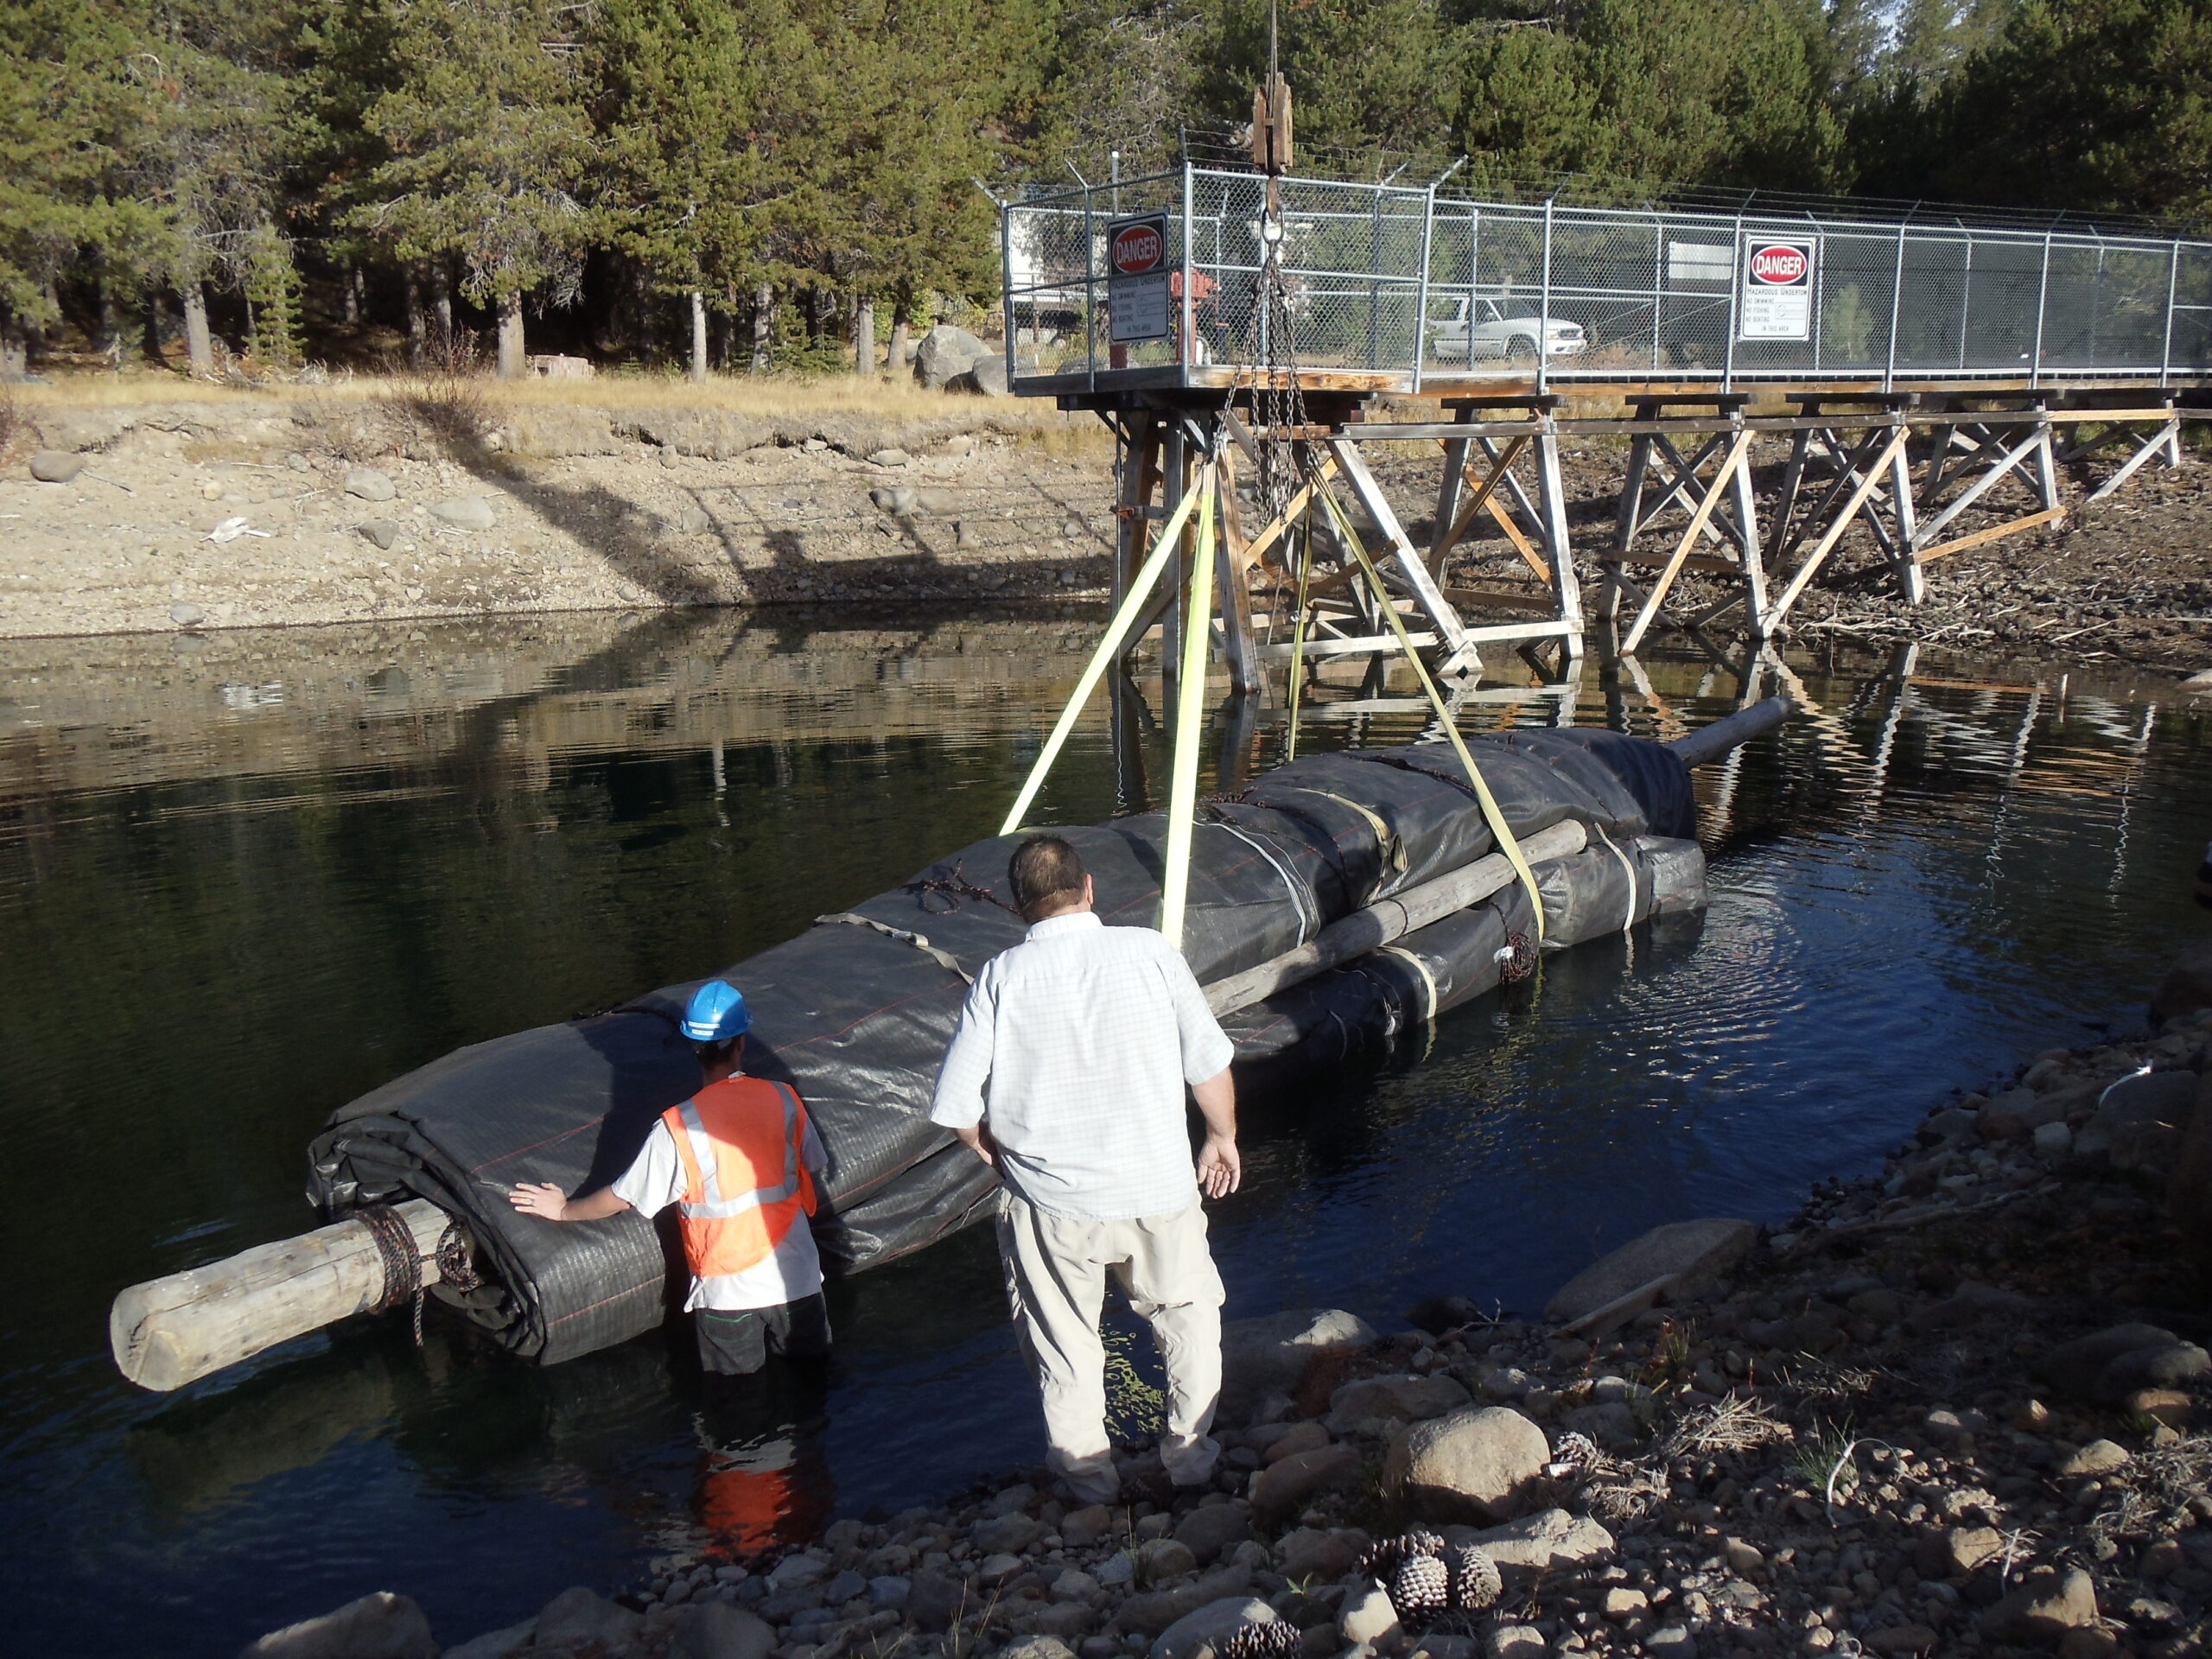
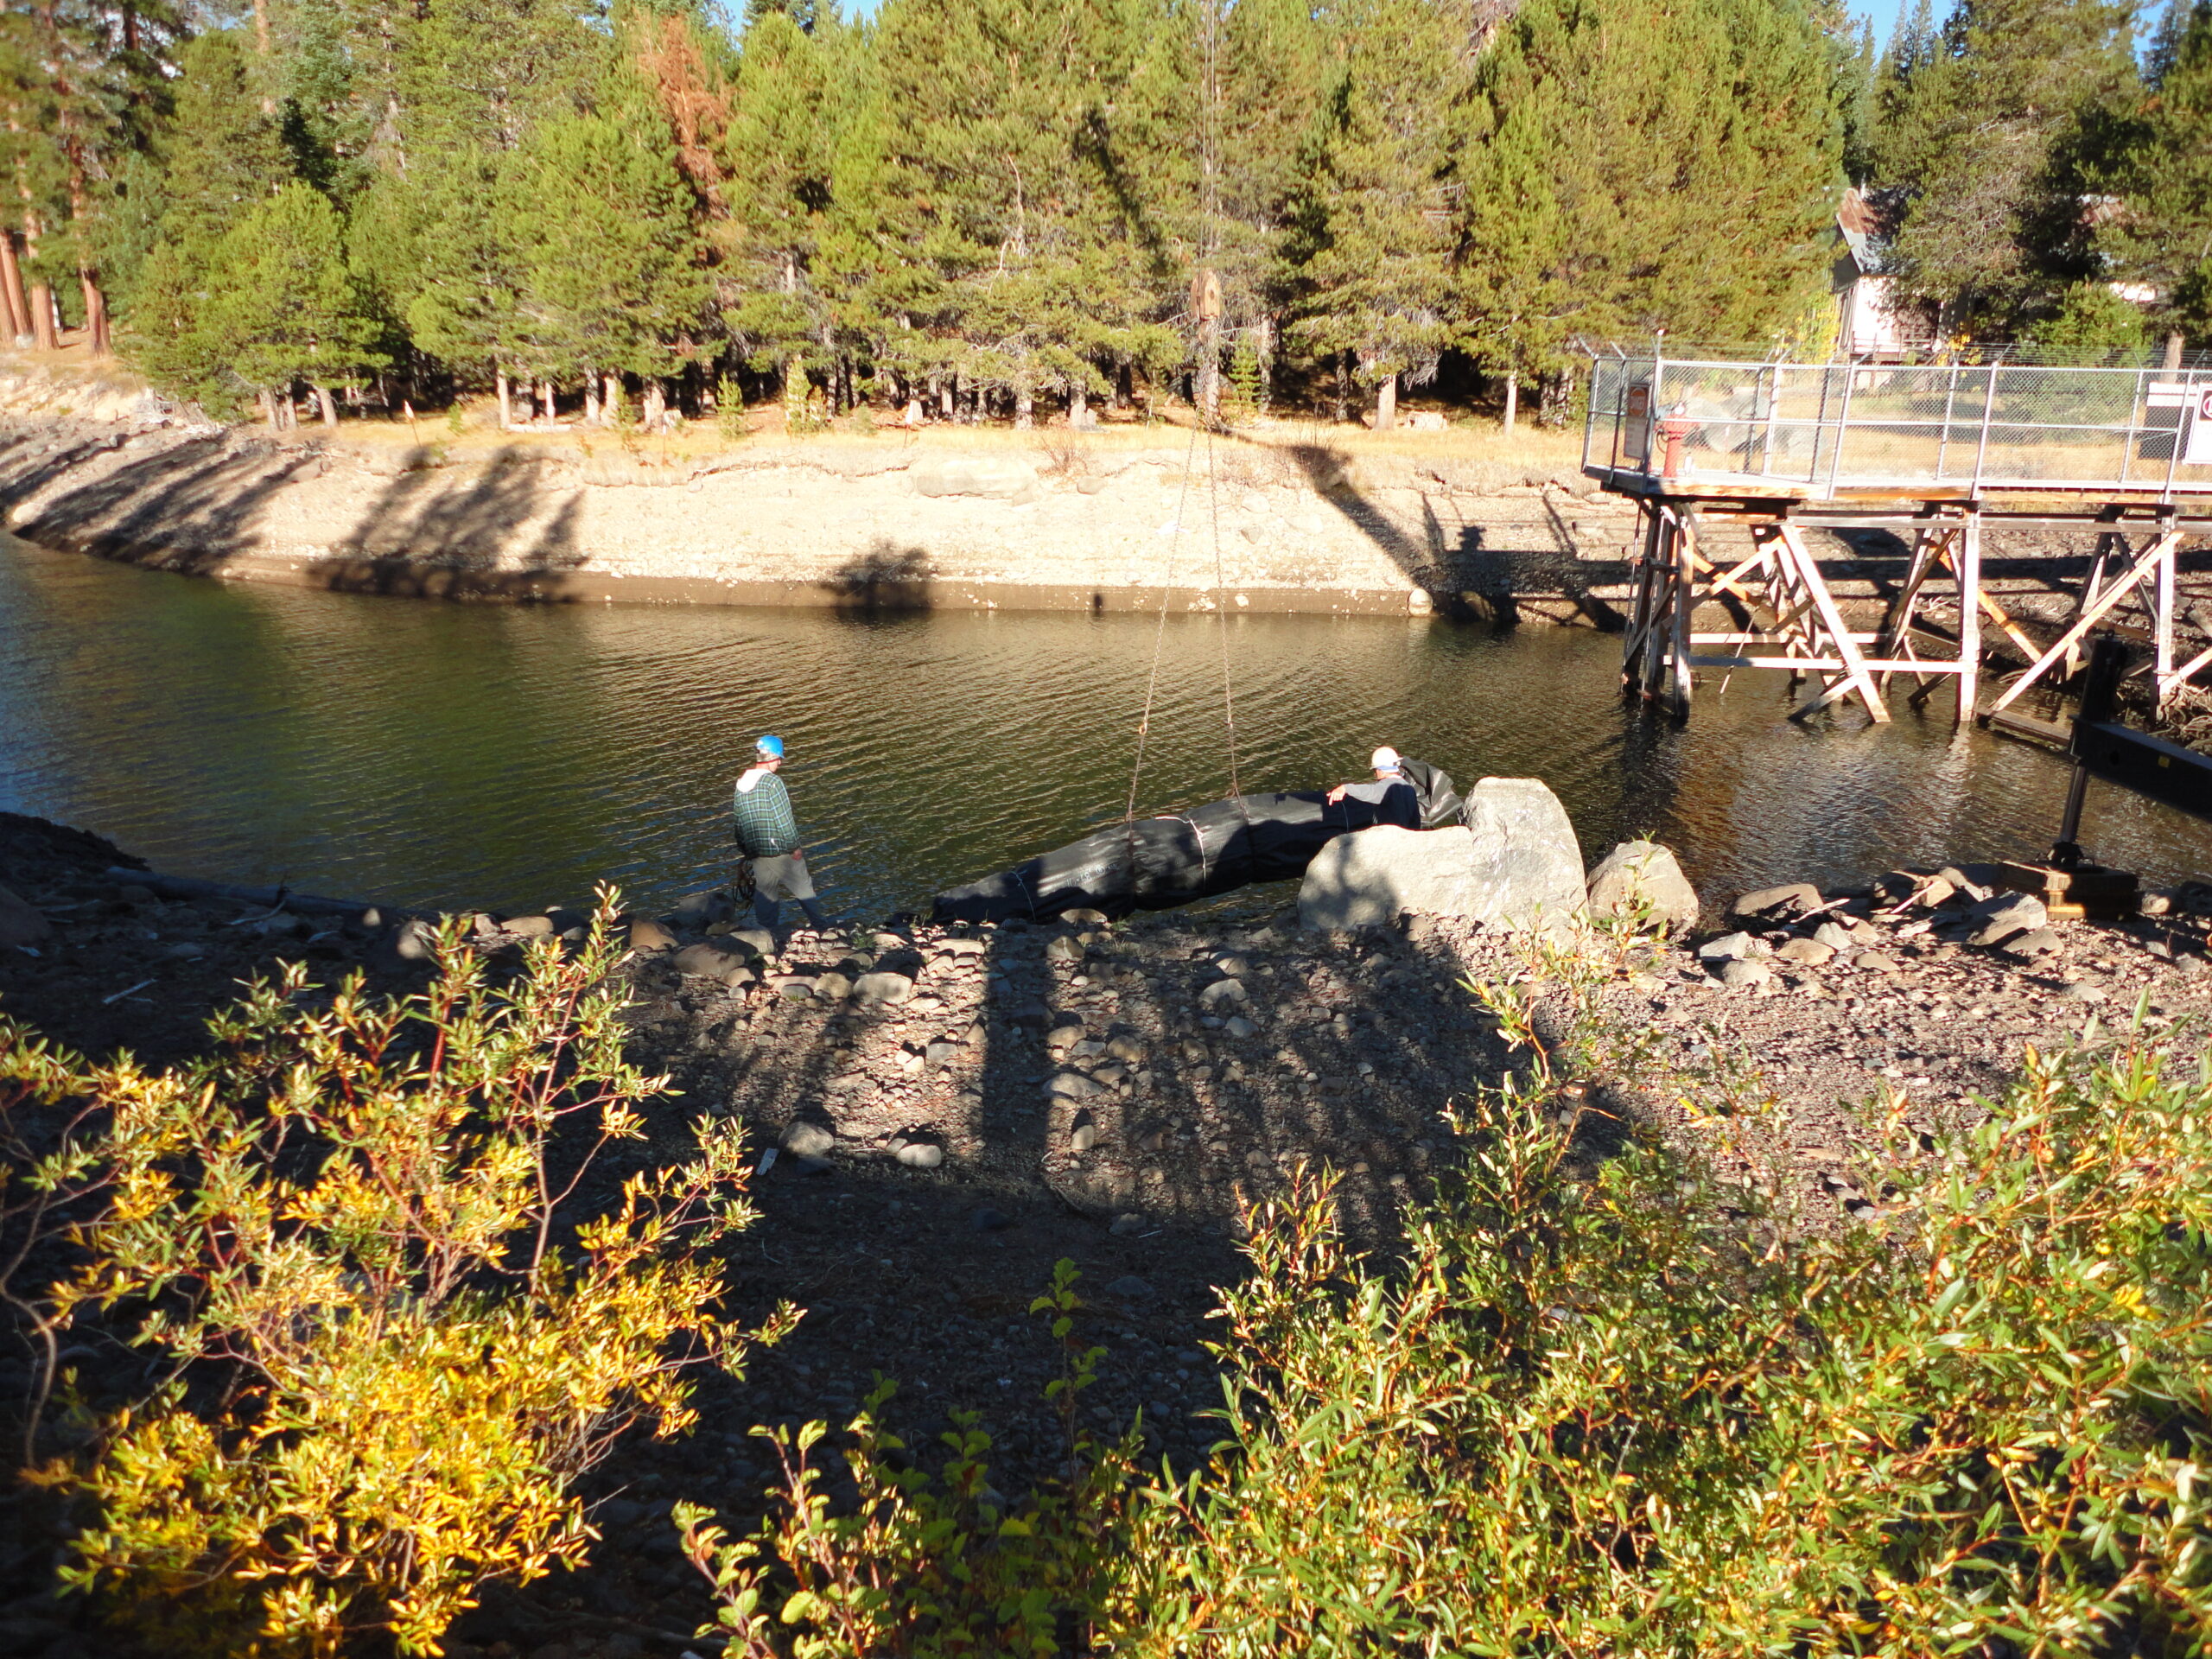
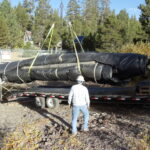
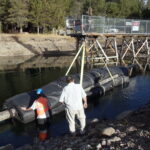
A boom truck was used to set the 21ft tall AquaDam into the water.
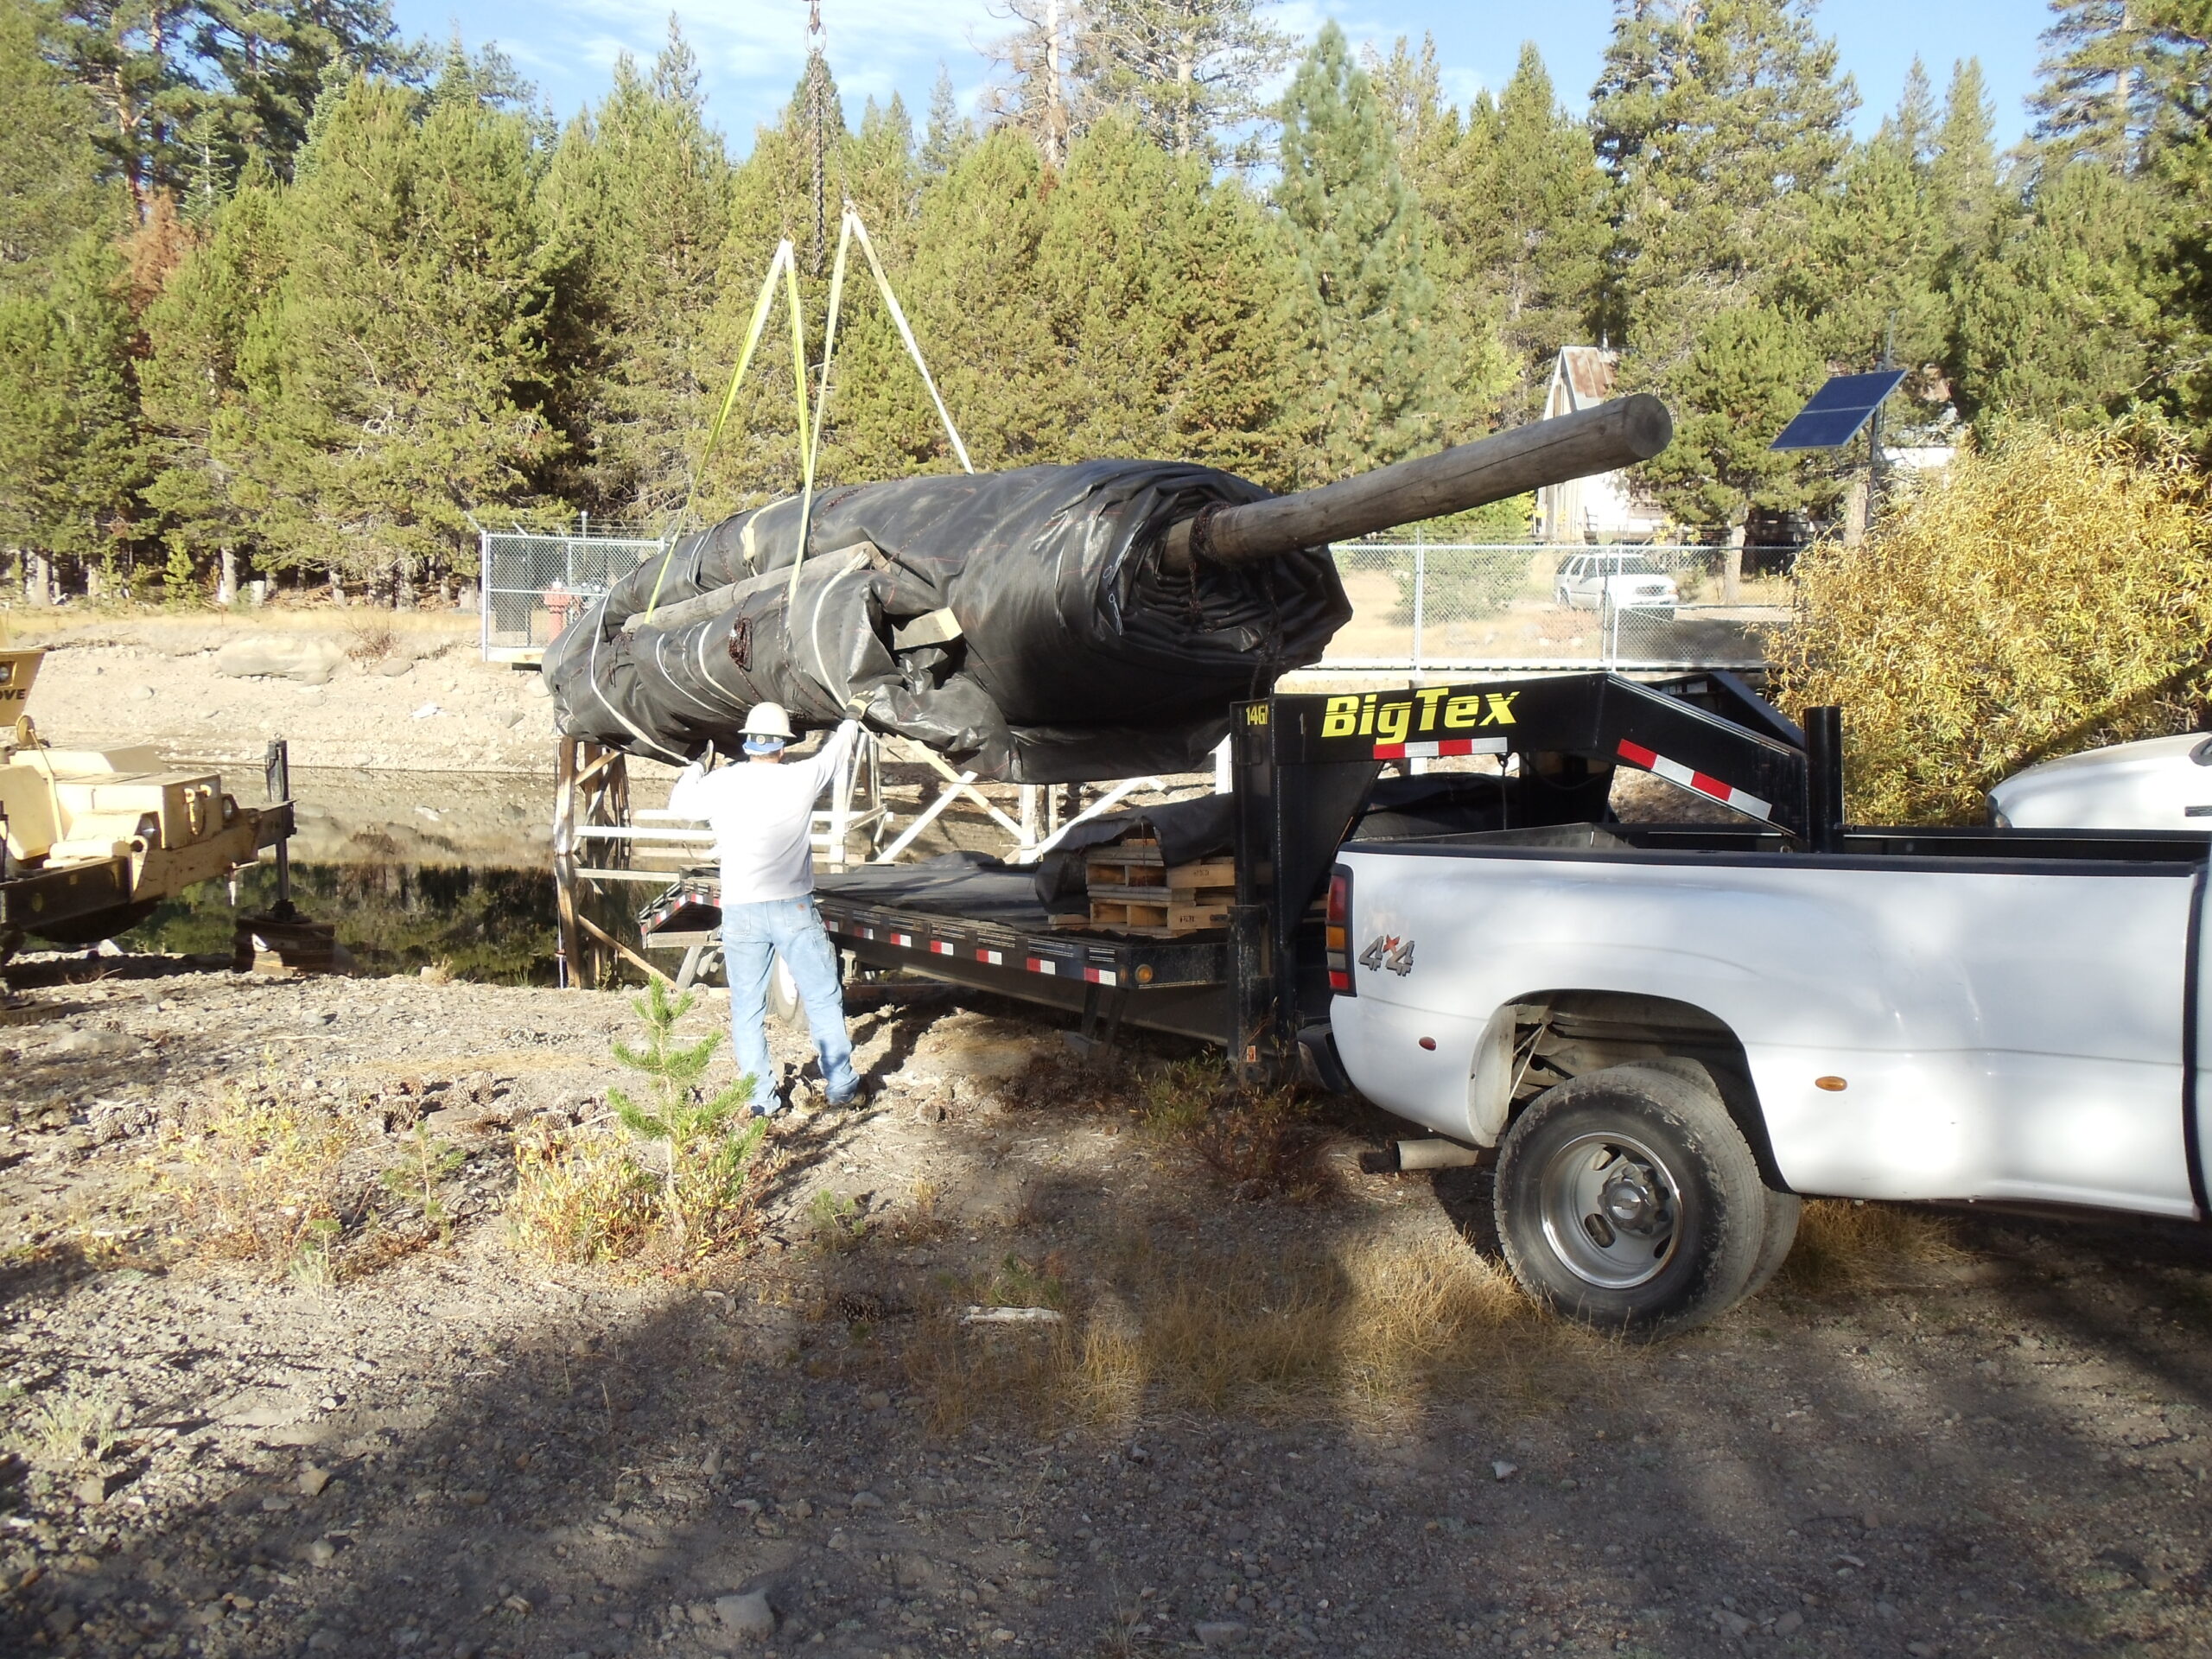
AquaDams are typically shipped rolled up similar to a carpet roll. A wooden core helps for maneuvering and positioning AquaDams.
Heavy duty straps are used for lifting larger AquaDams, when they are still rolled up.
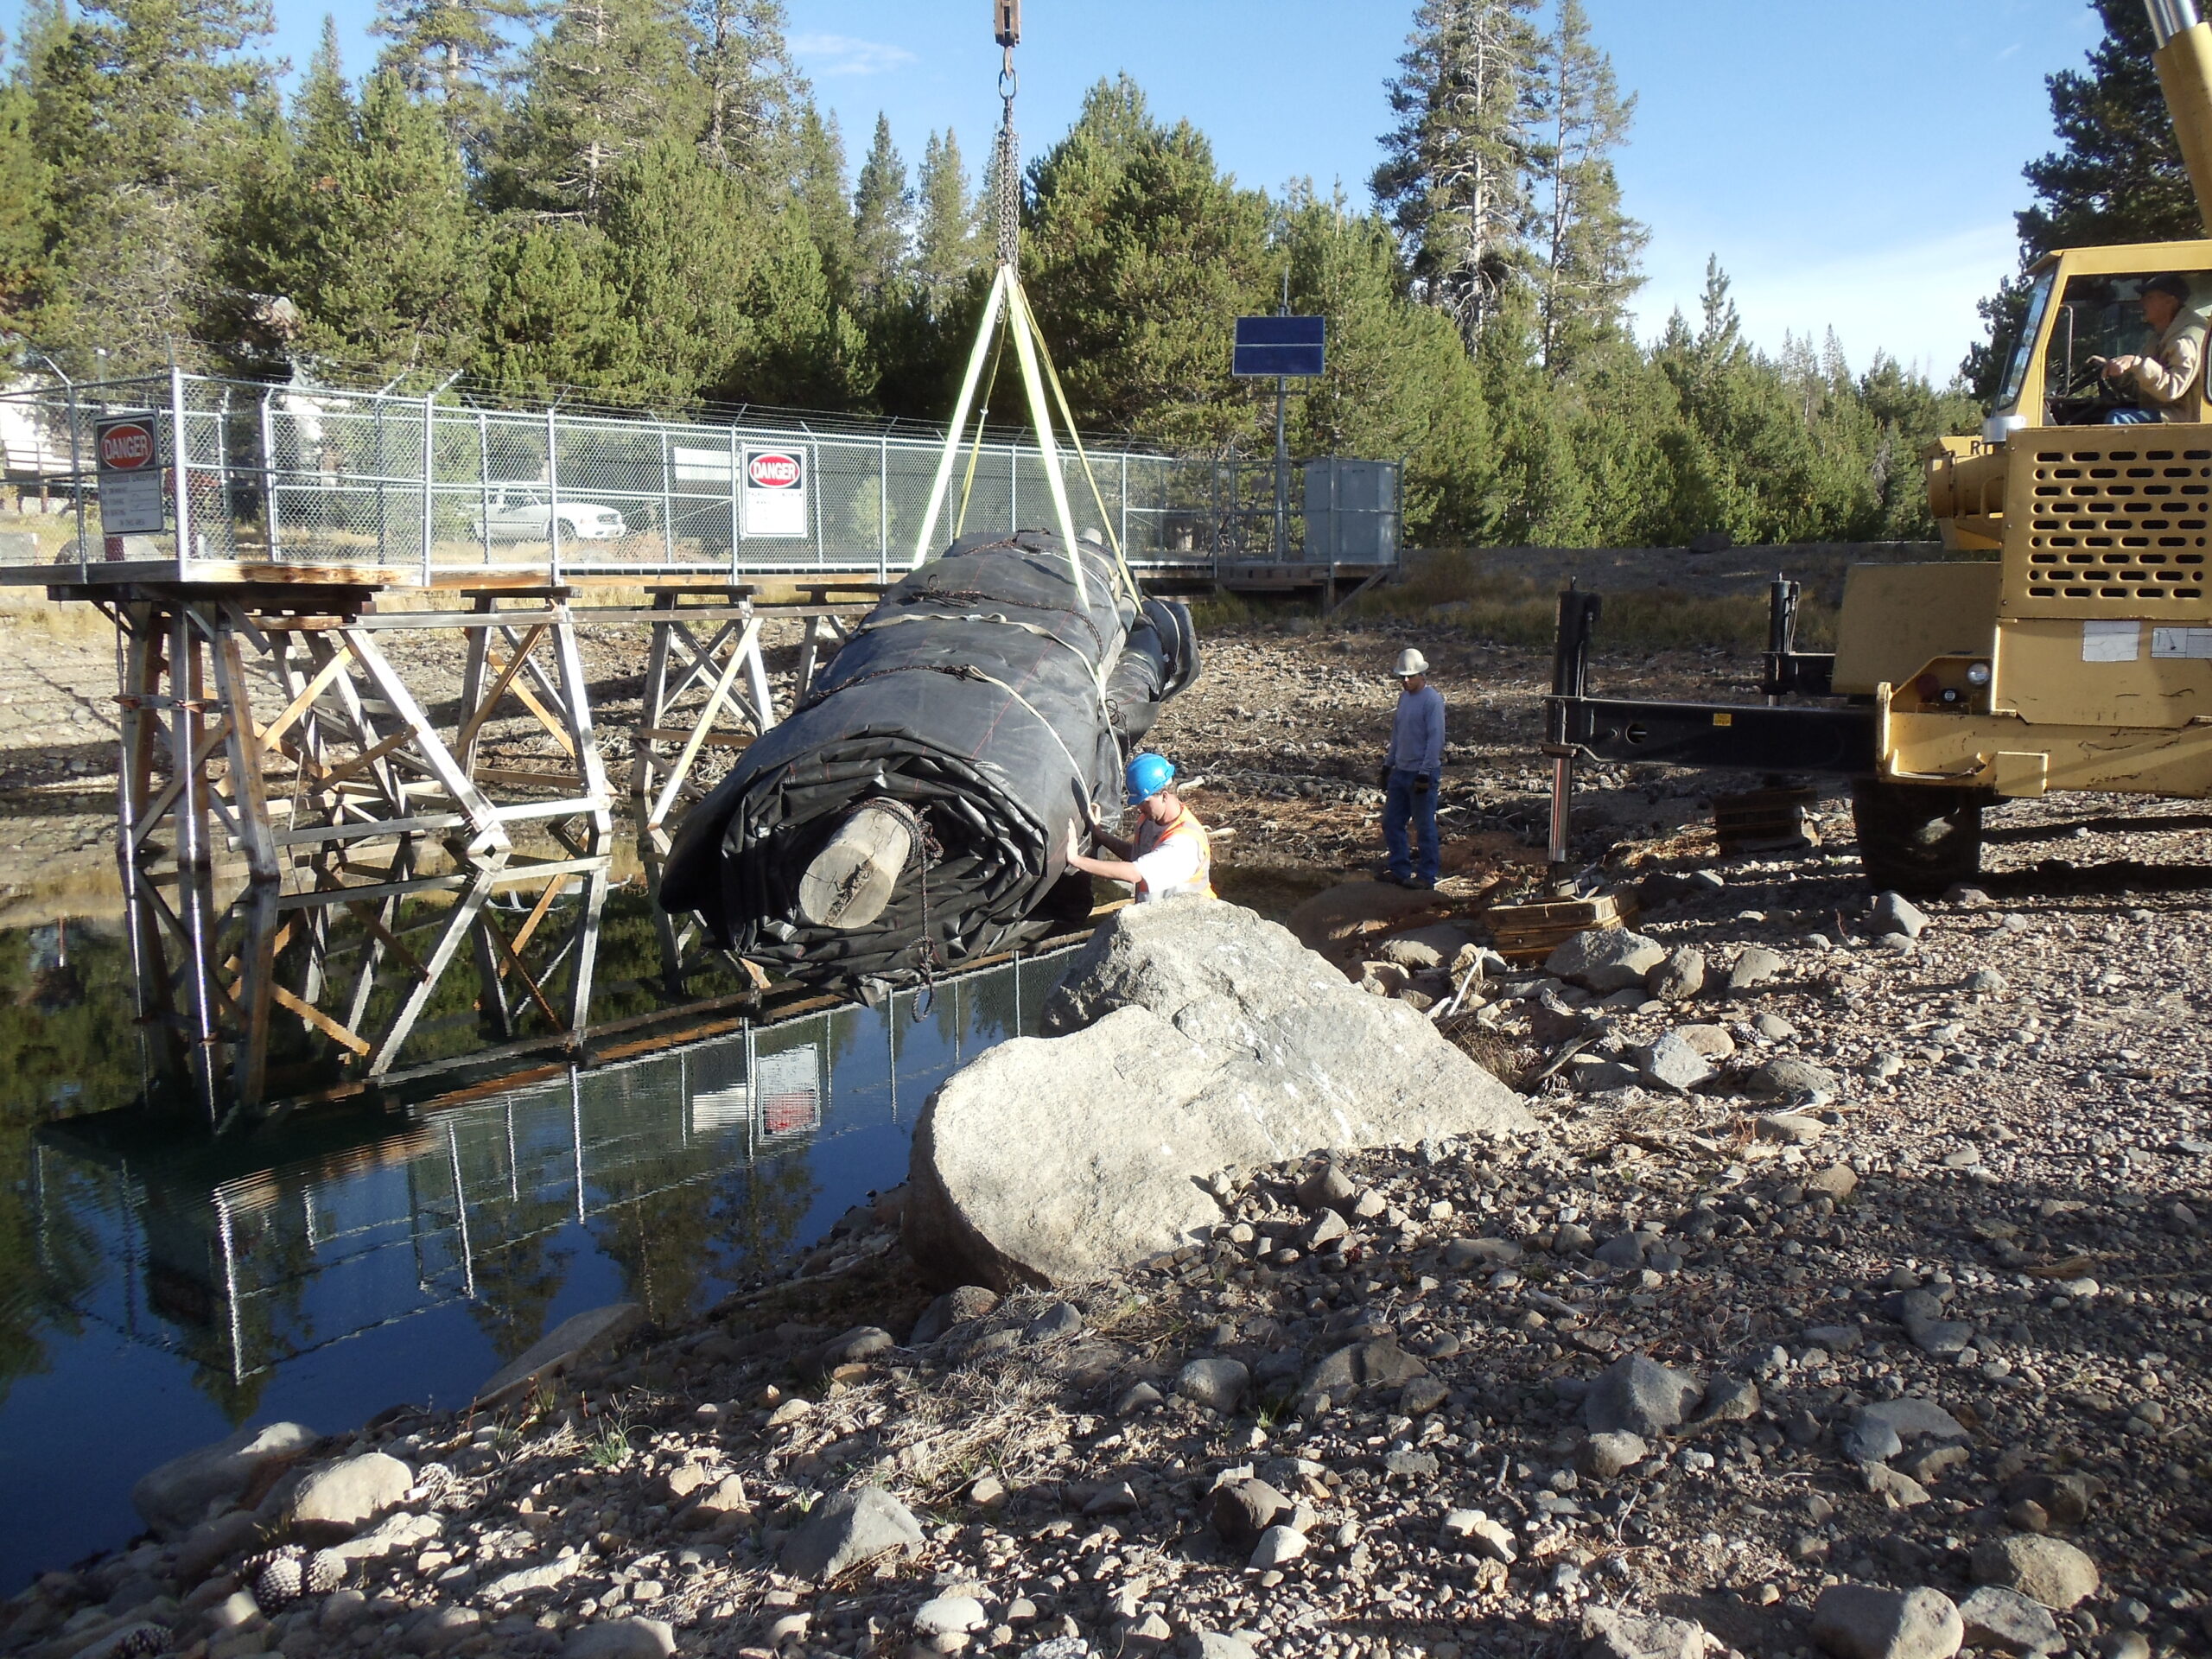
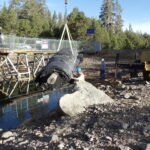
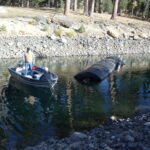
If access to the starting bank of the AquaDam is limited, the unit may need to be floated in.
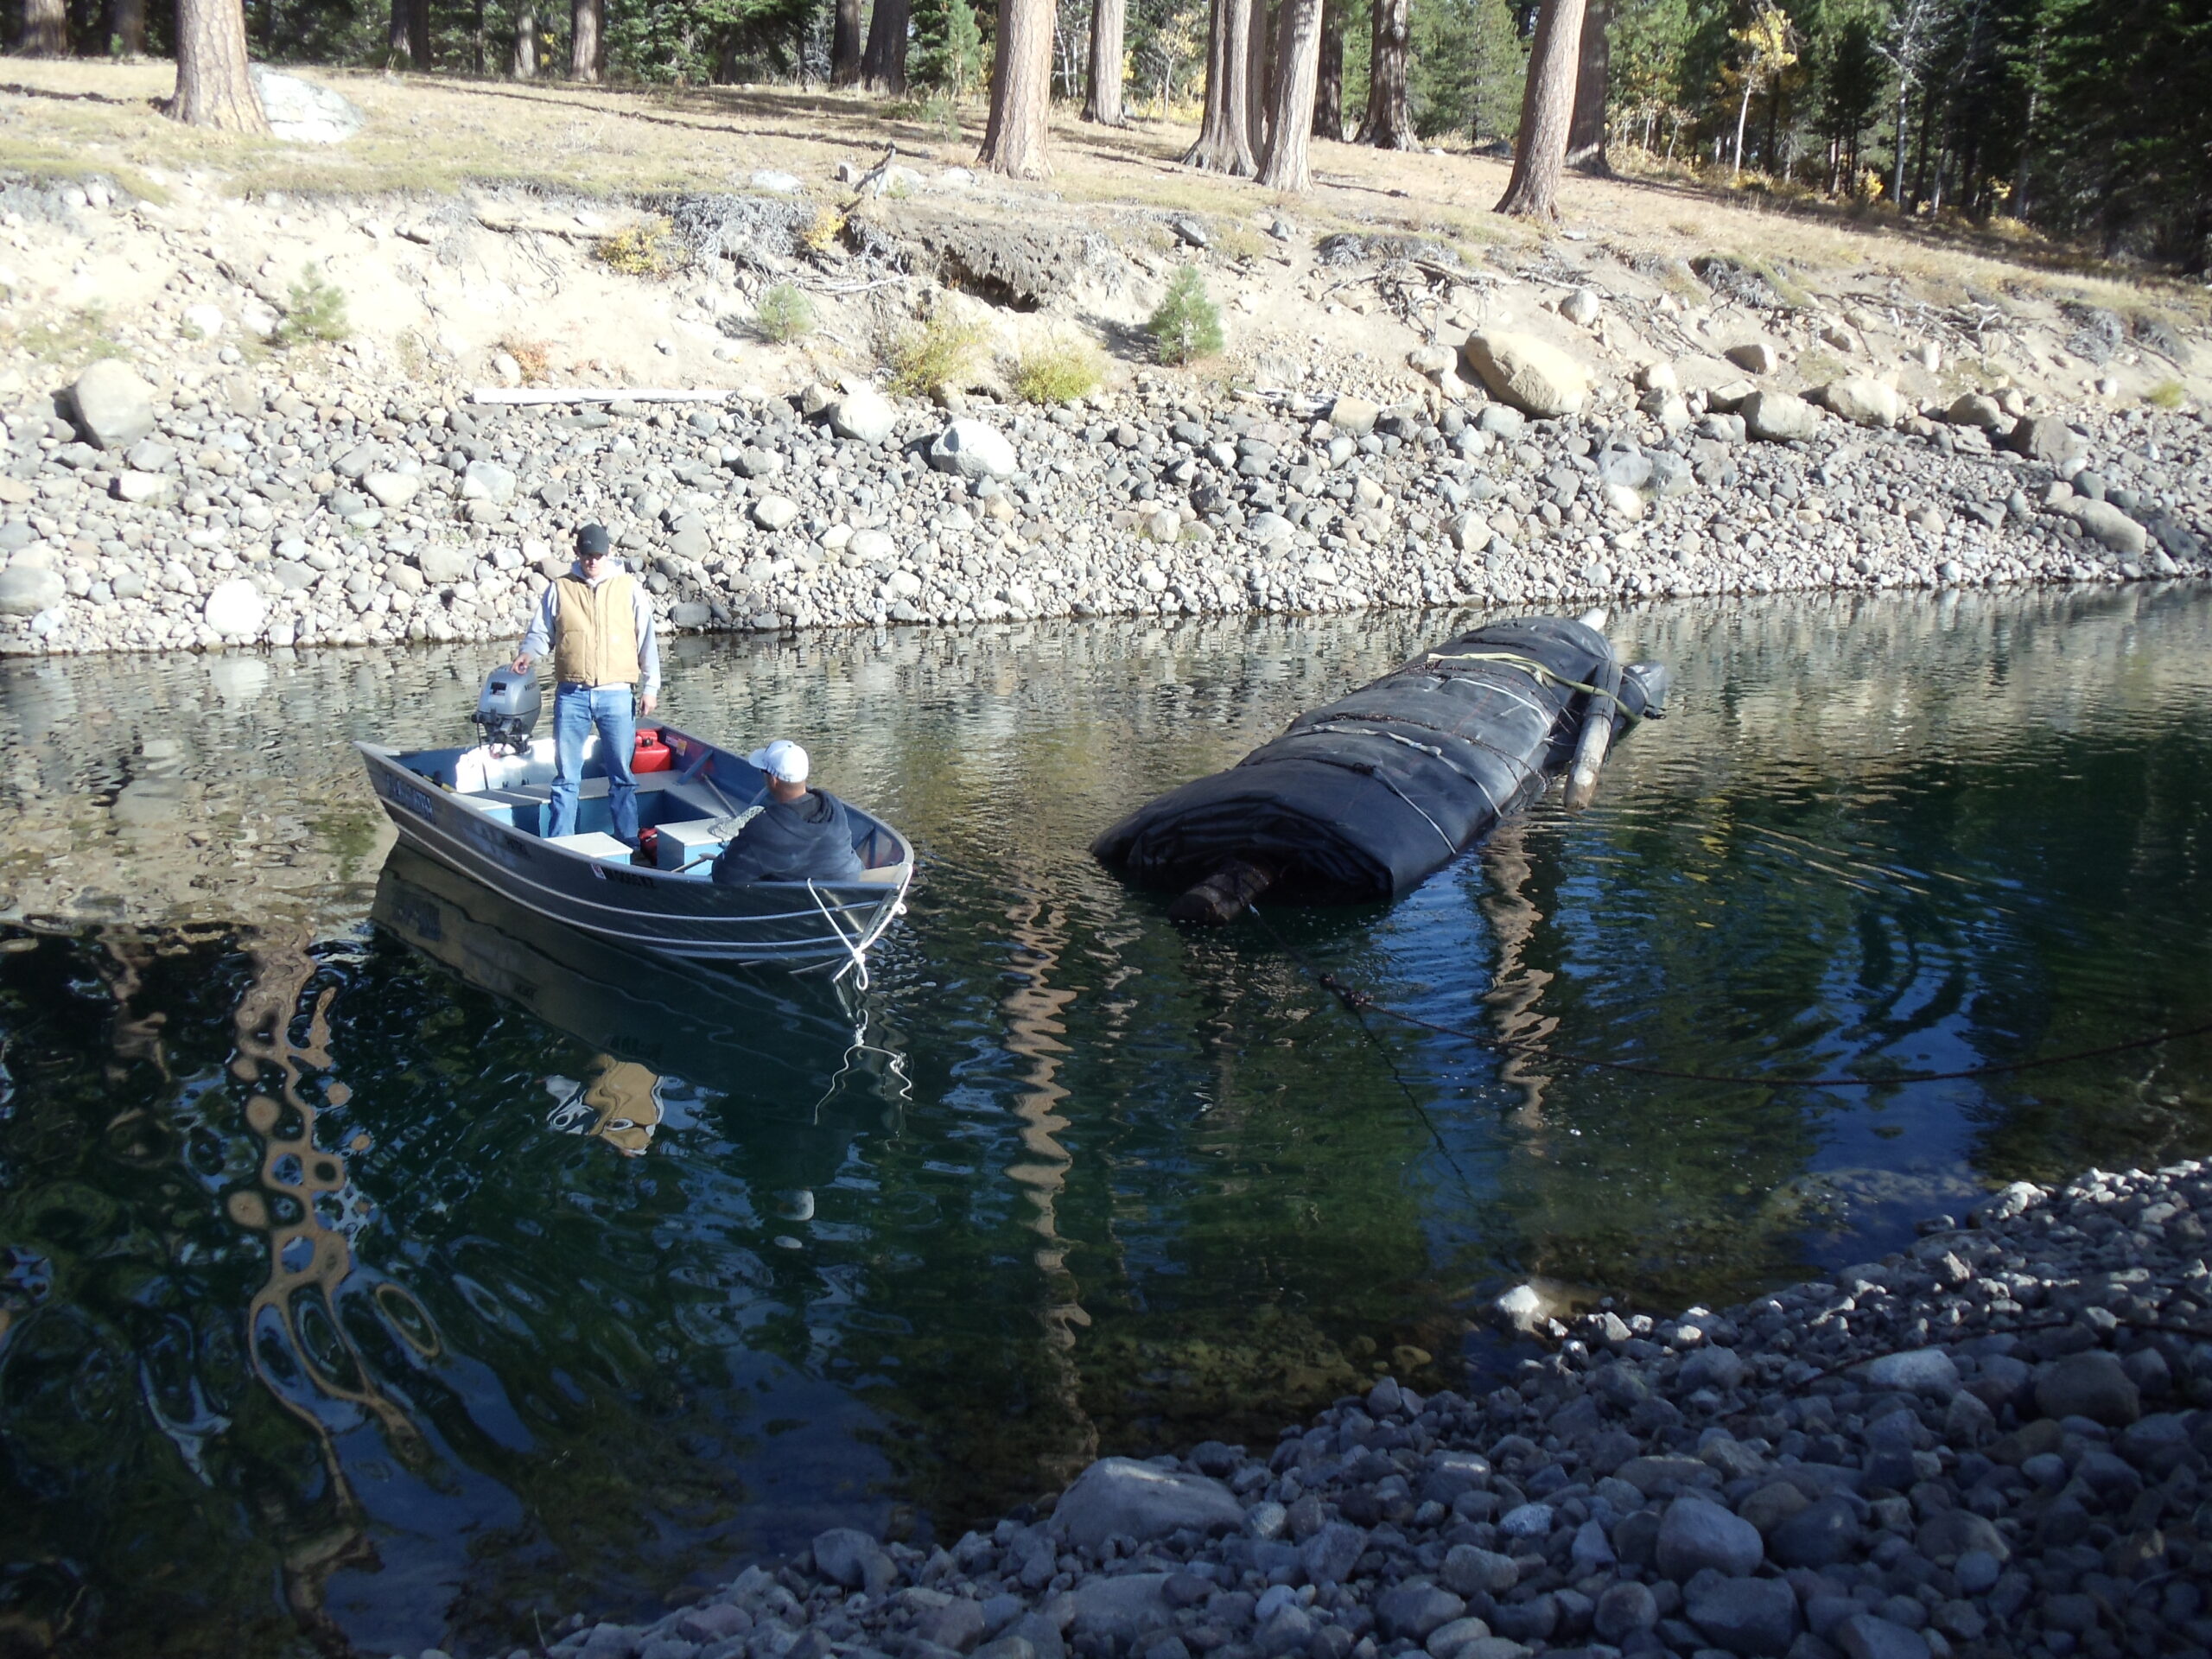
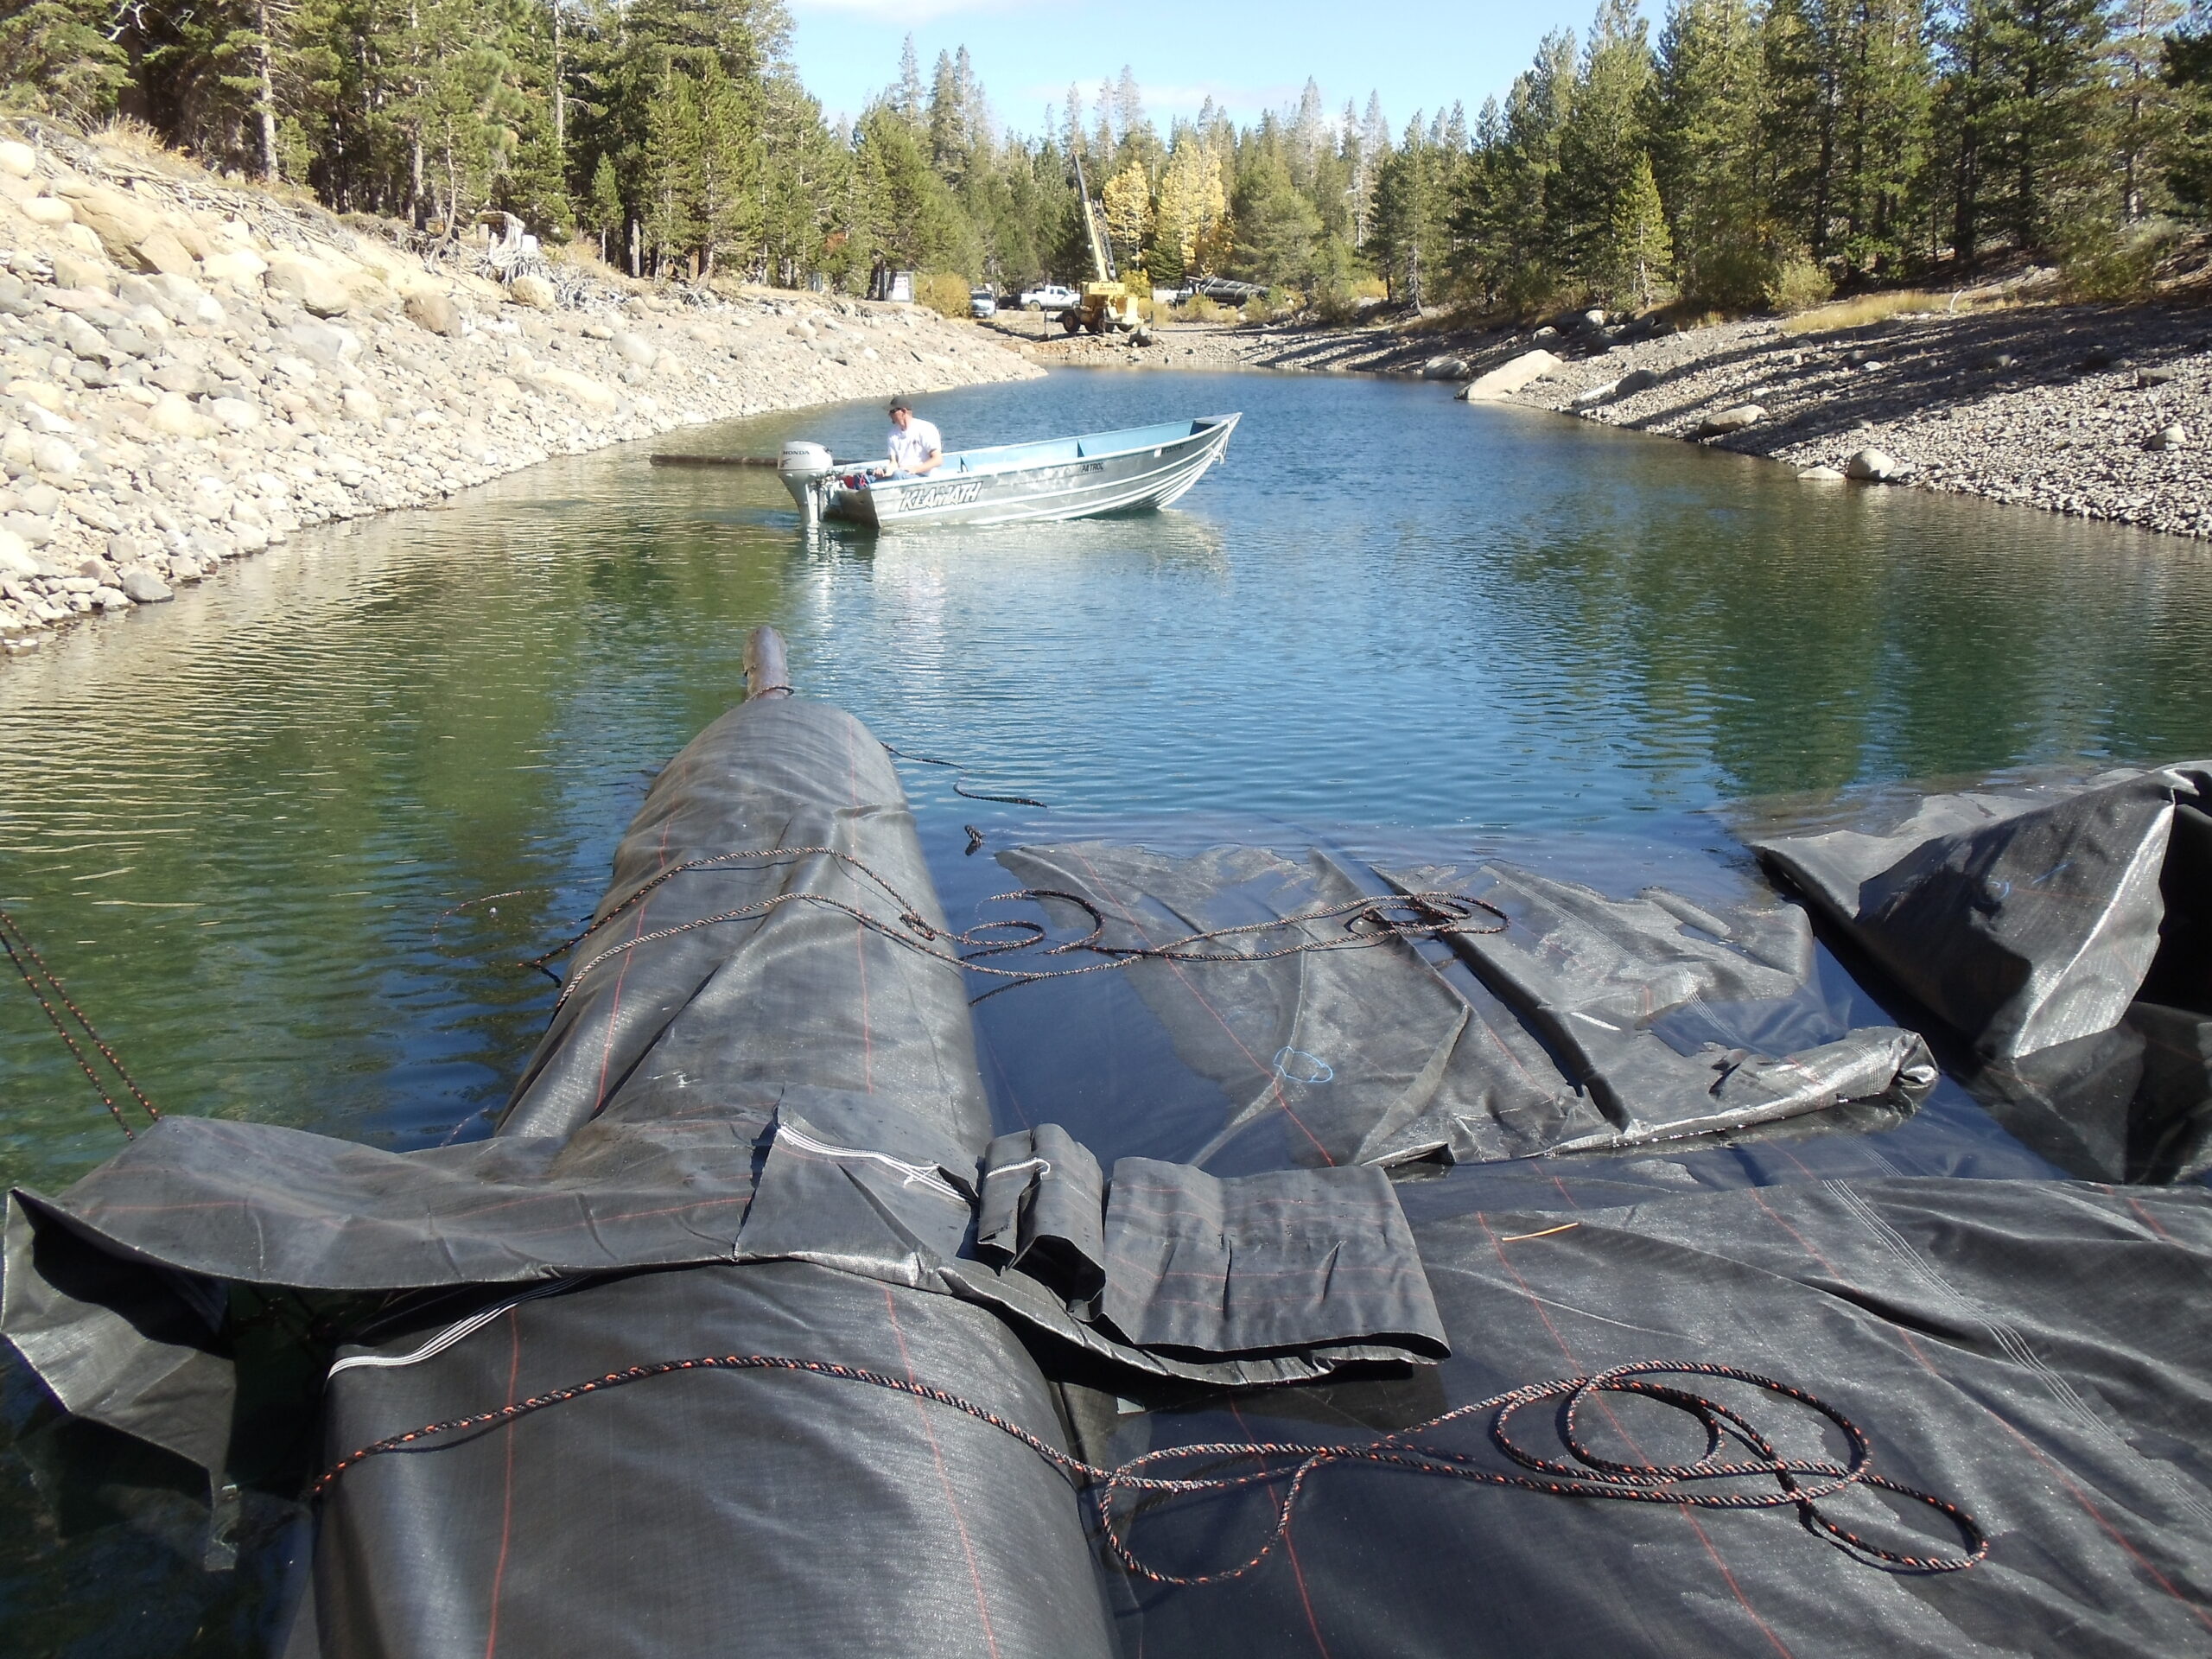
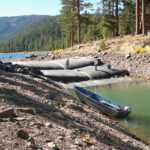
AquaDams float (when empty) in water; this AquaDam was towed into place using a 15hp outboard motorboat.
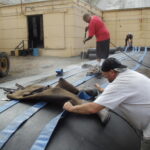
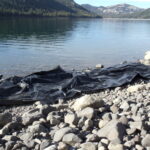
Secondary containment surrounding any potential contaminants was very important. A few large boulders were removed to create "low spots", and the area was covered in watertight poly sheeting.

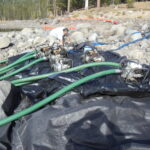
The three (3) inch pumps were placed in secondary containment. There was some incidental water discharge from the pumps into secondary containment, which was removed into temporary holding containers, which were removed daily.
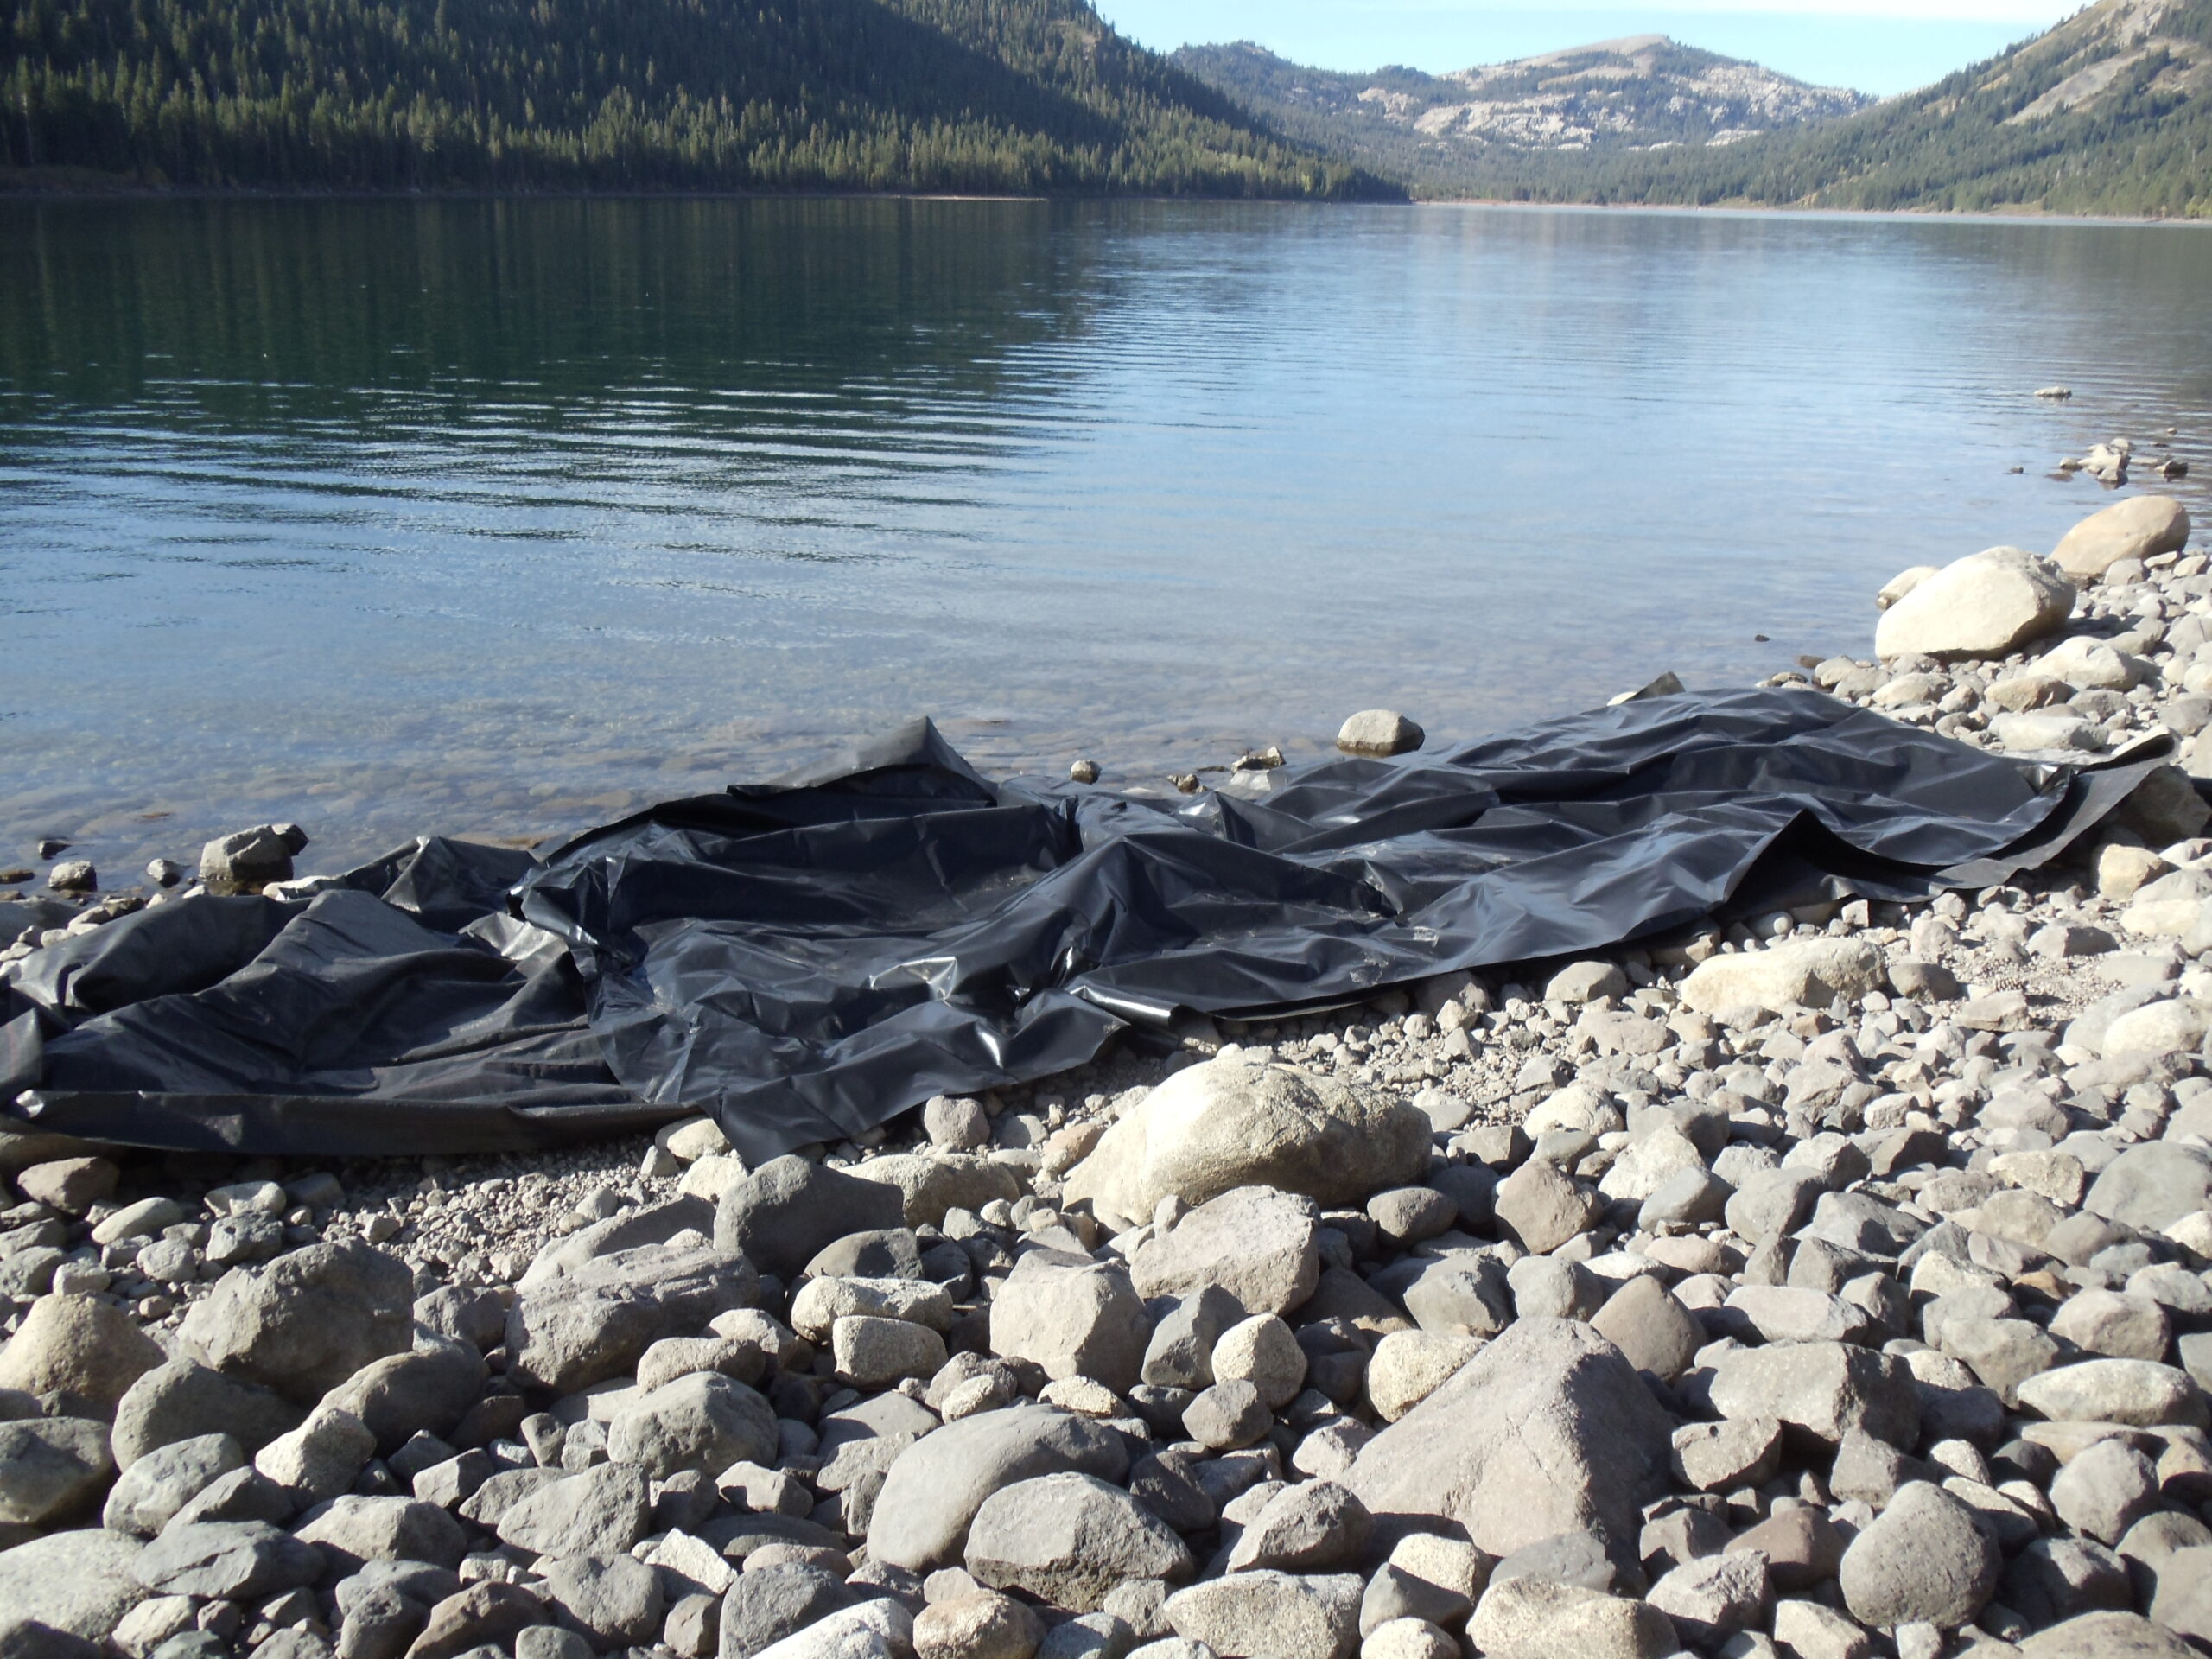
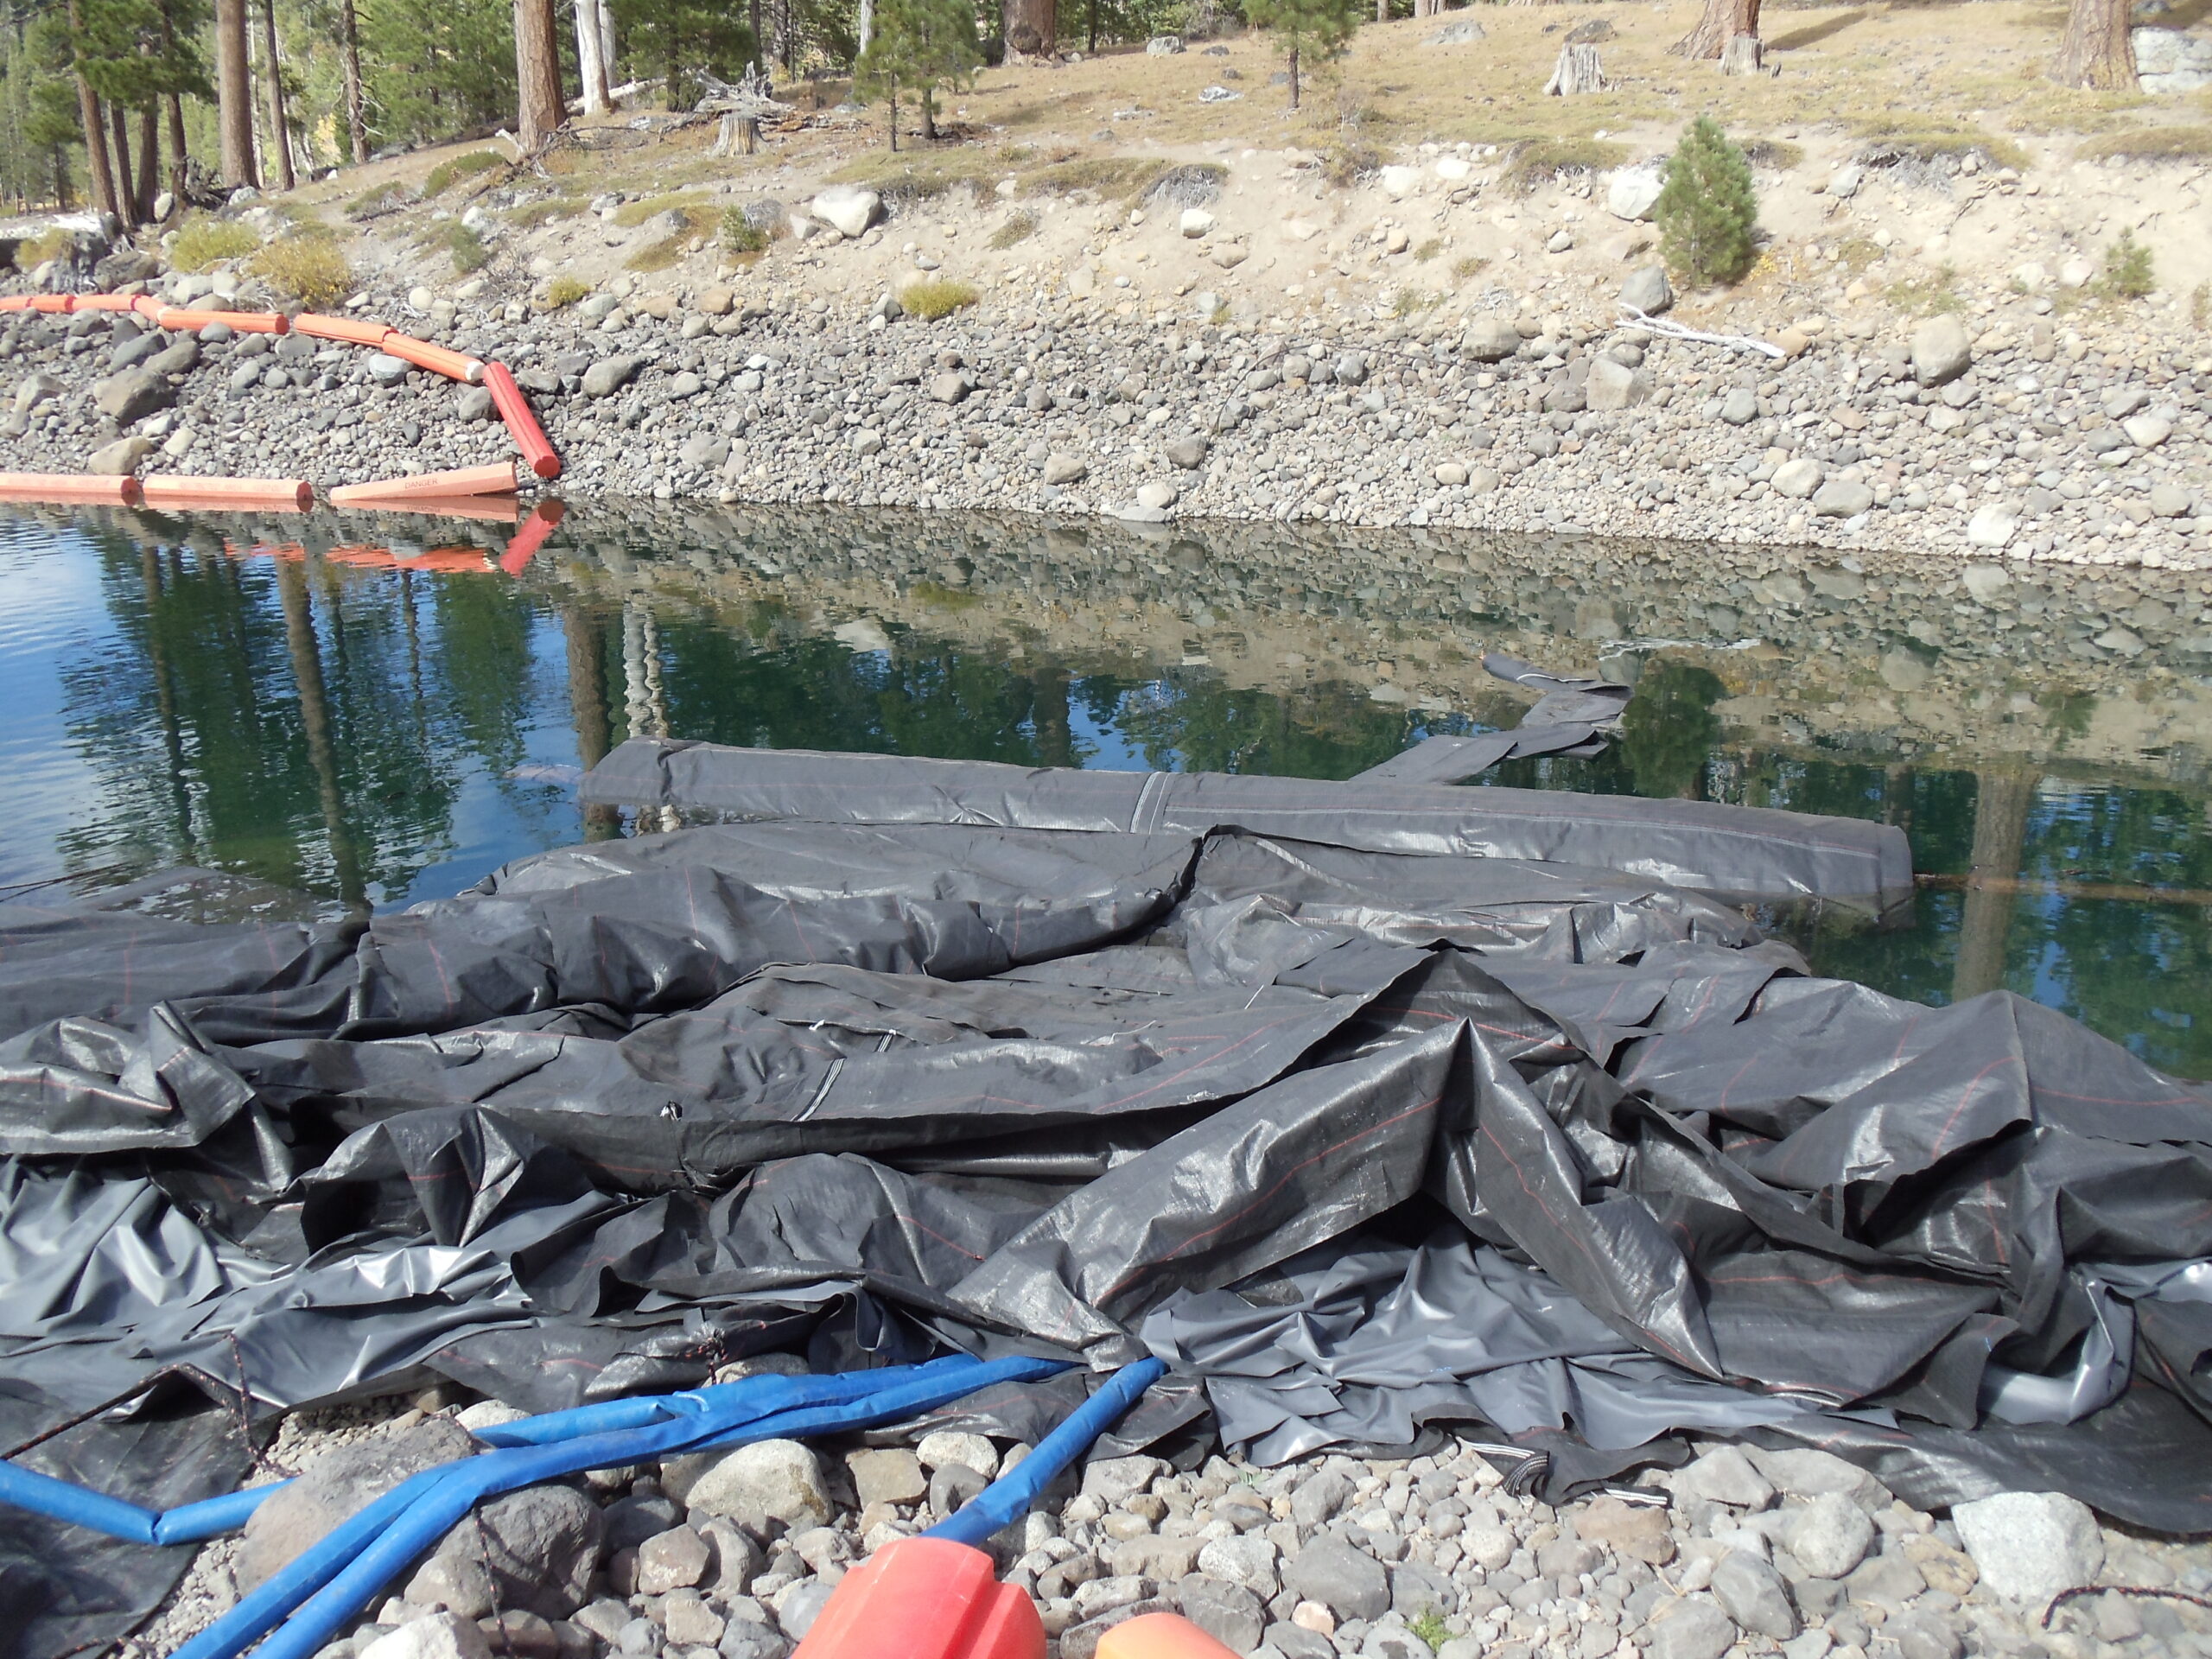
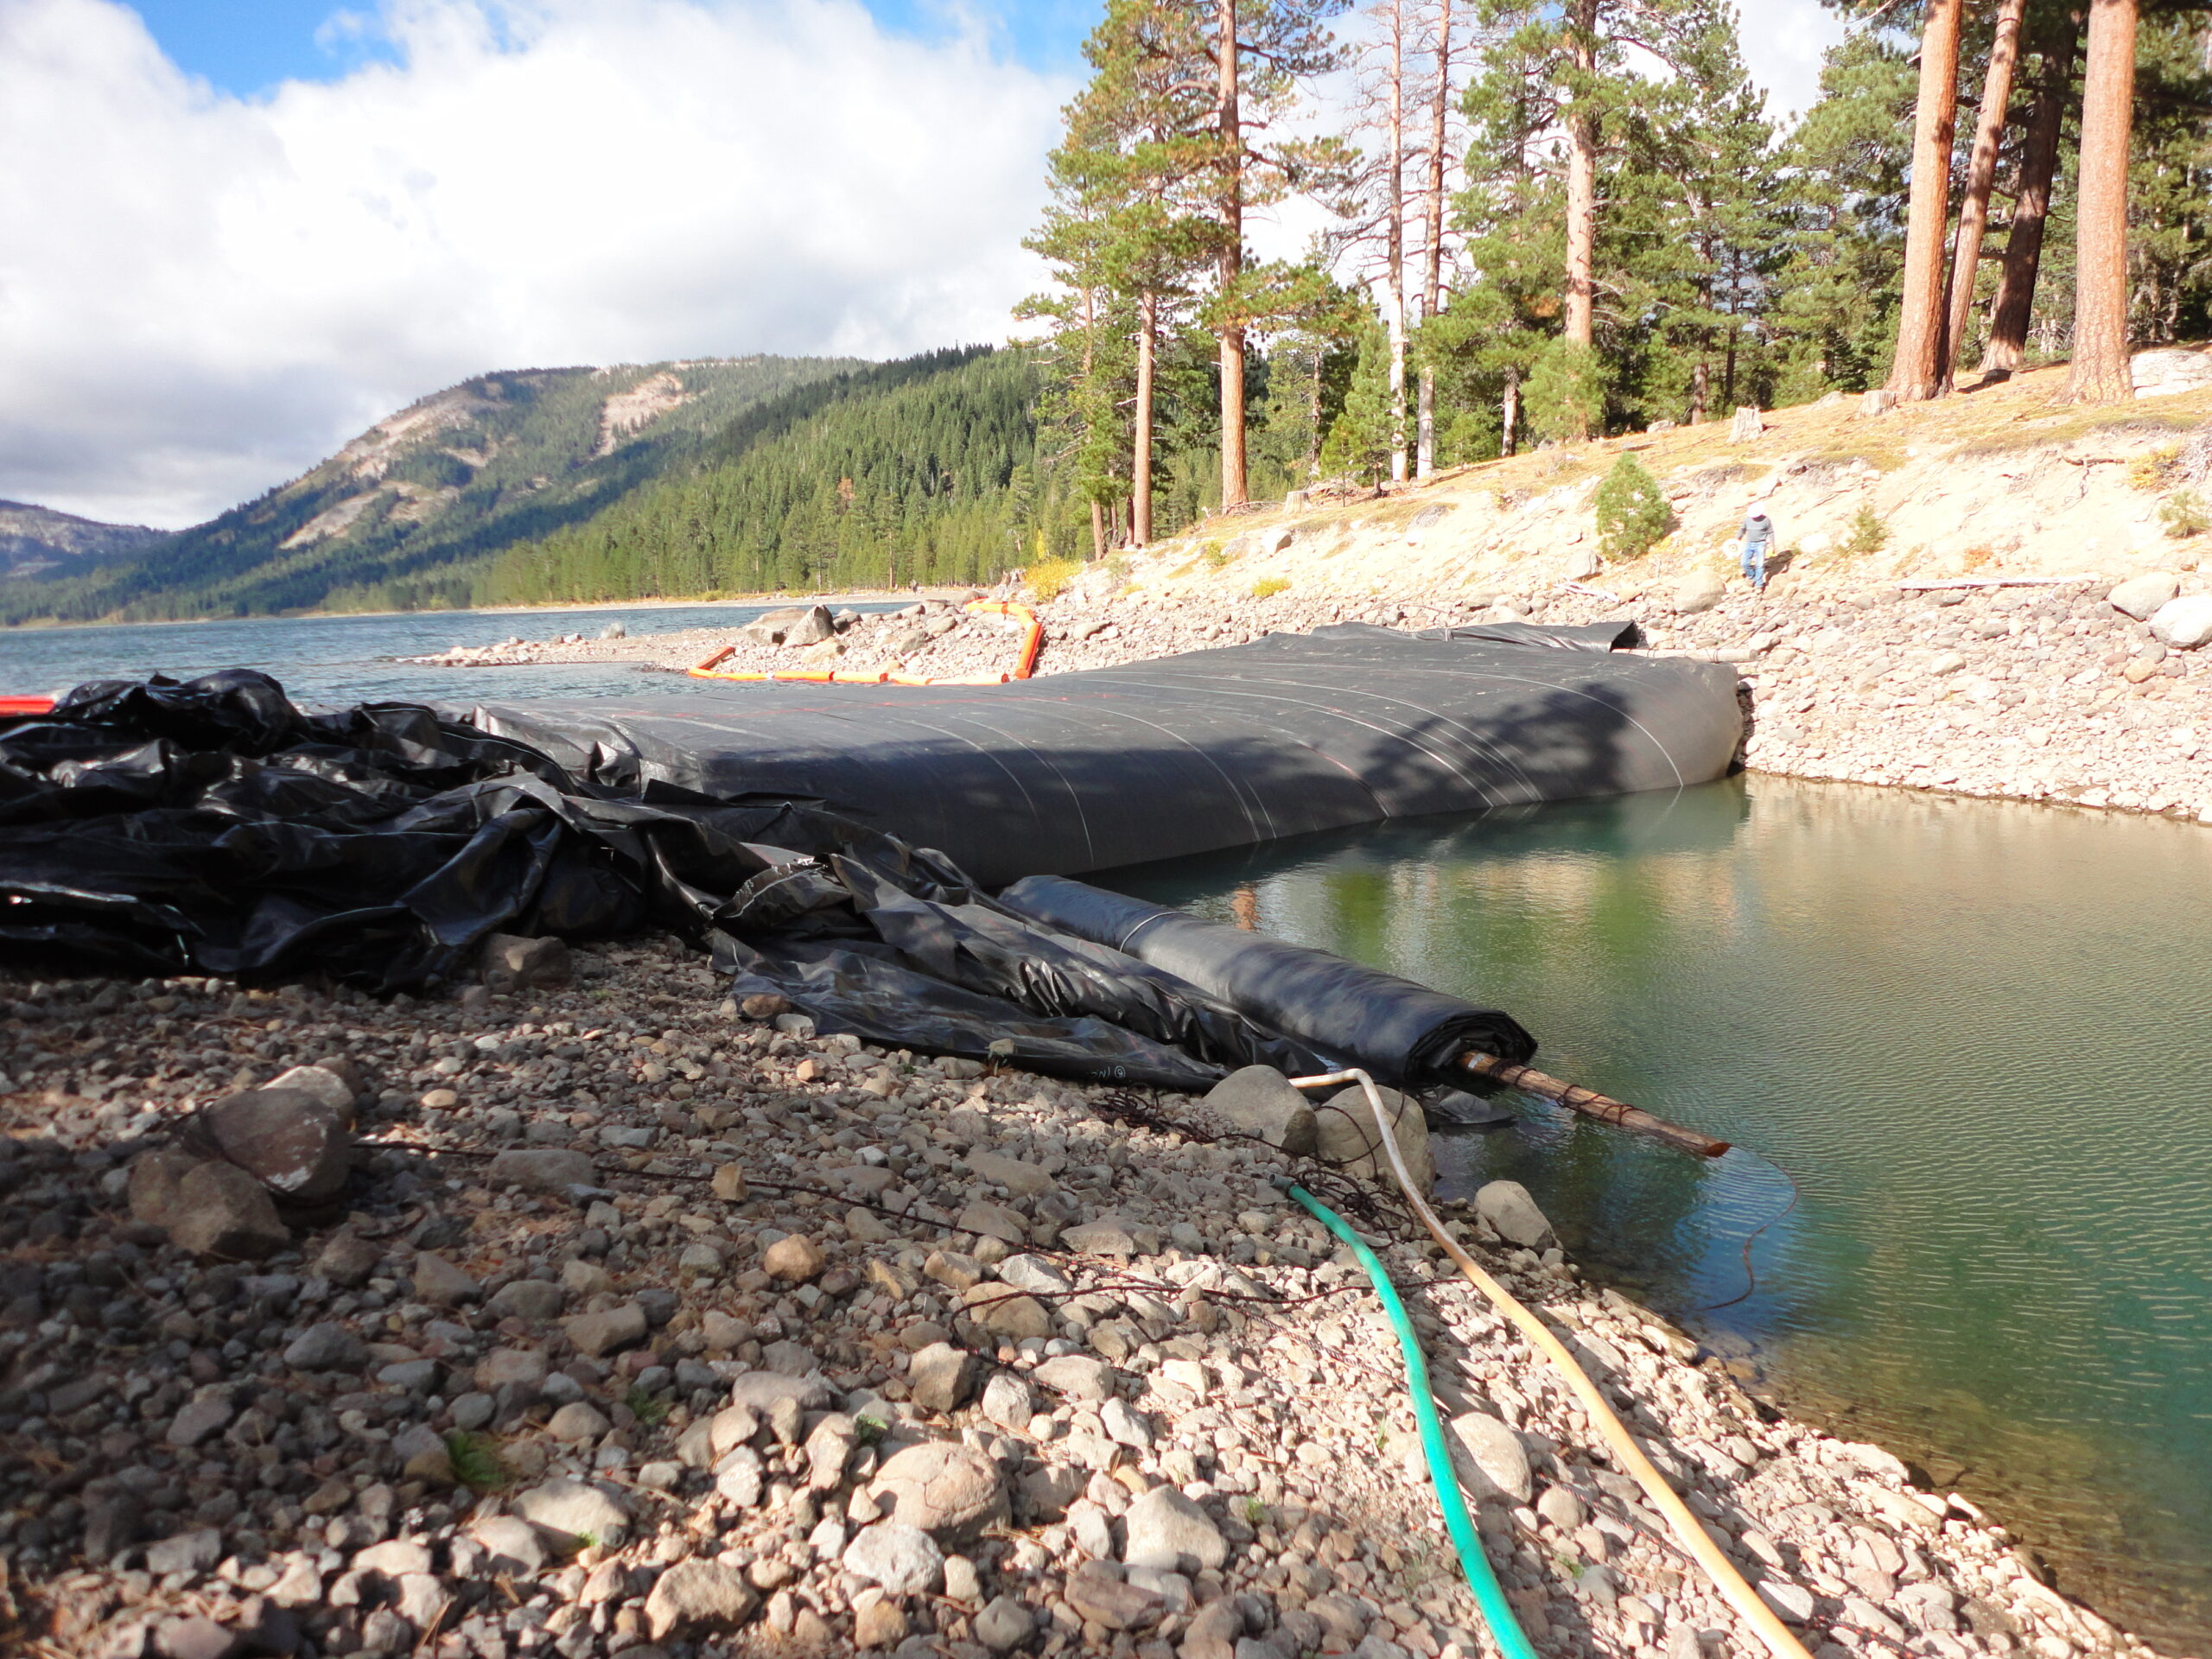
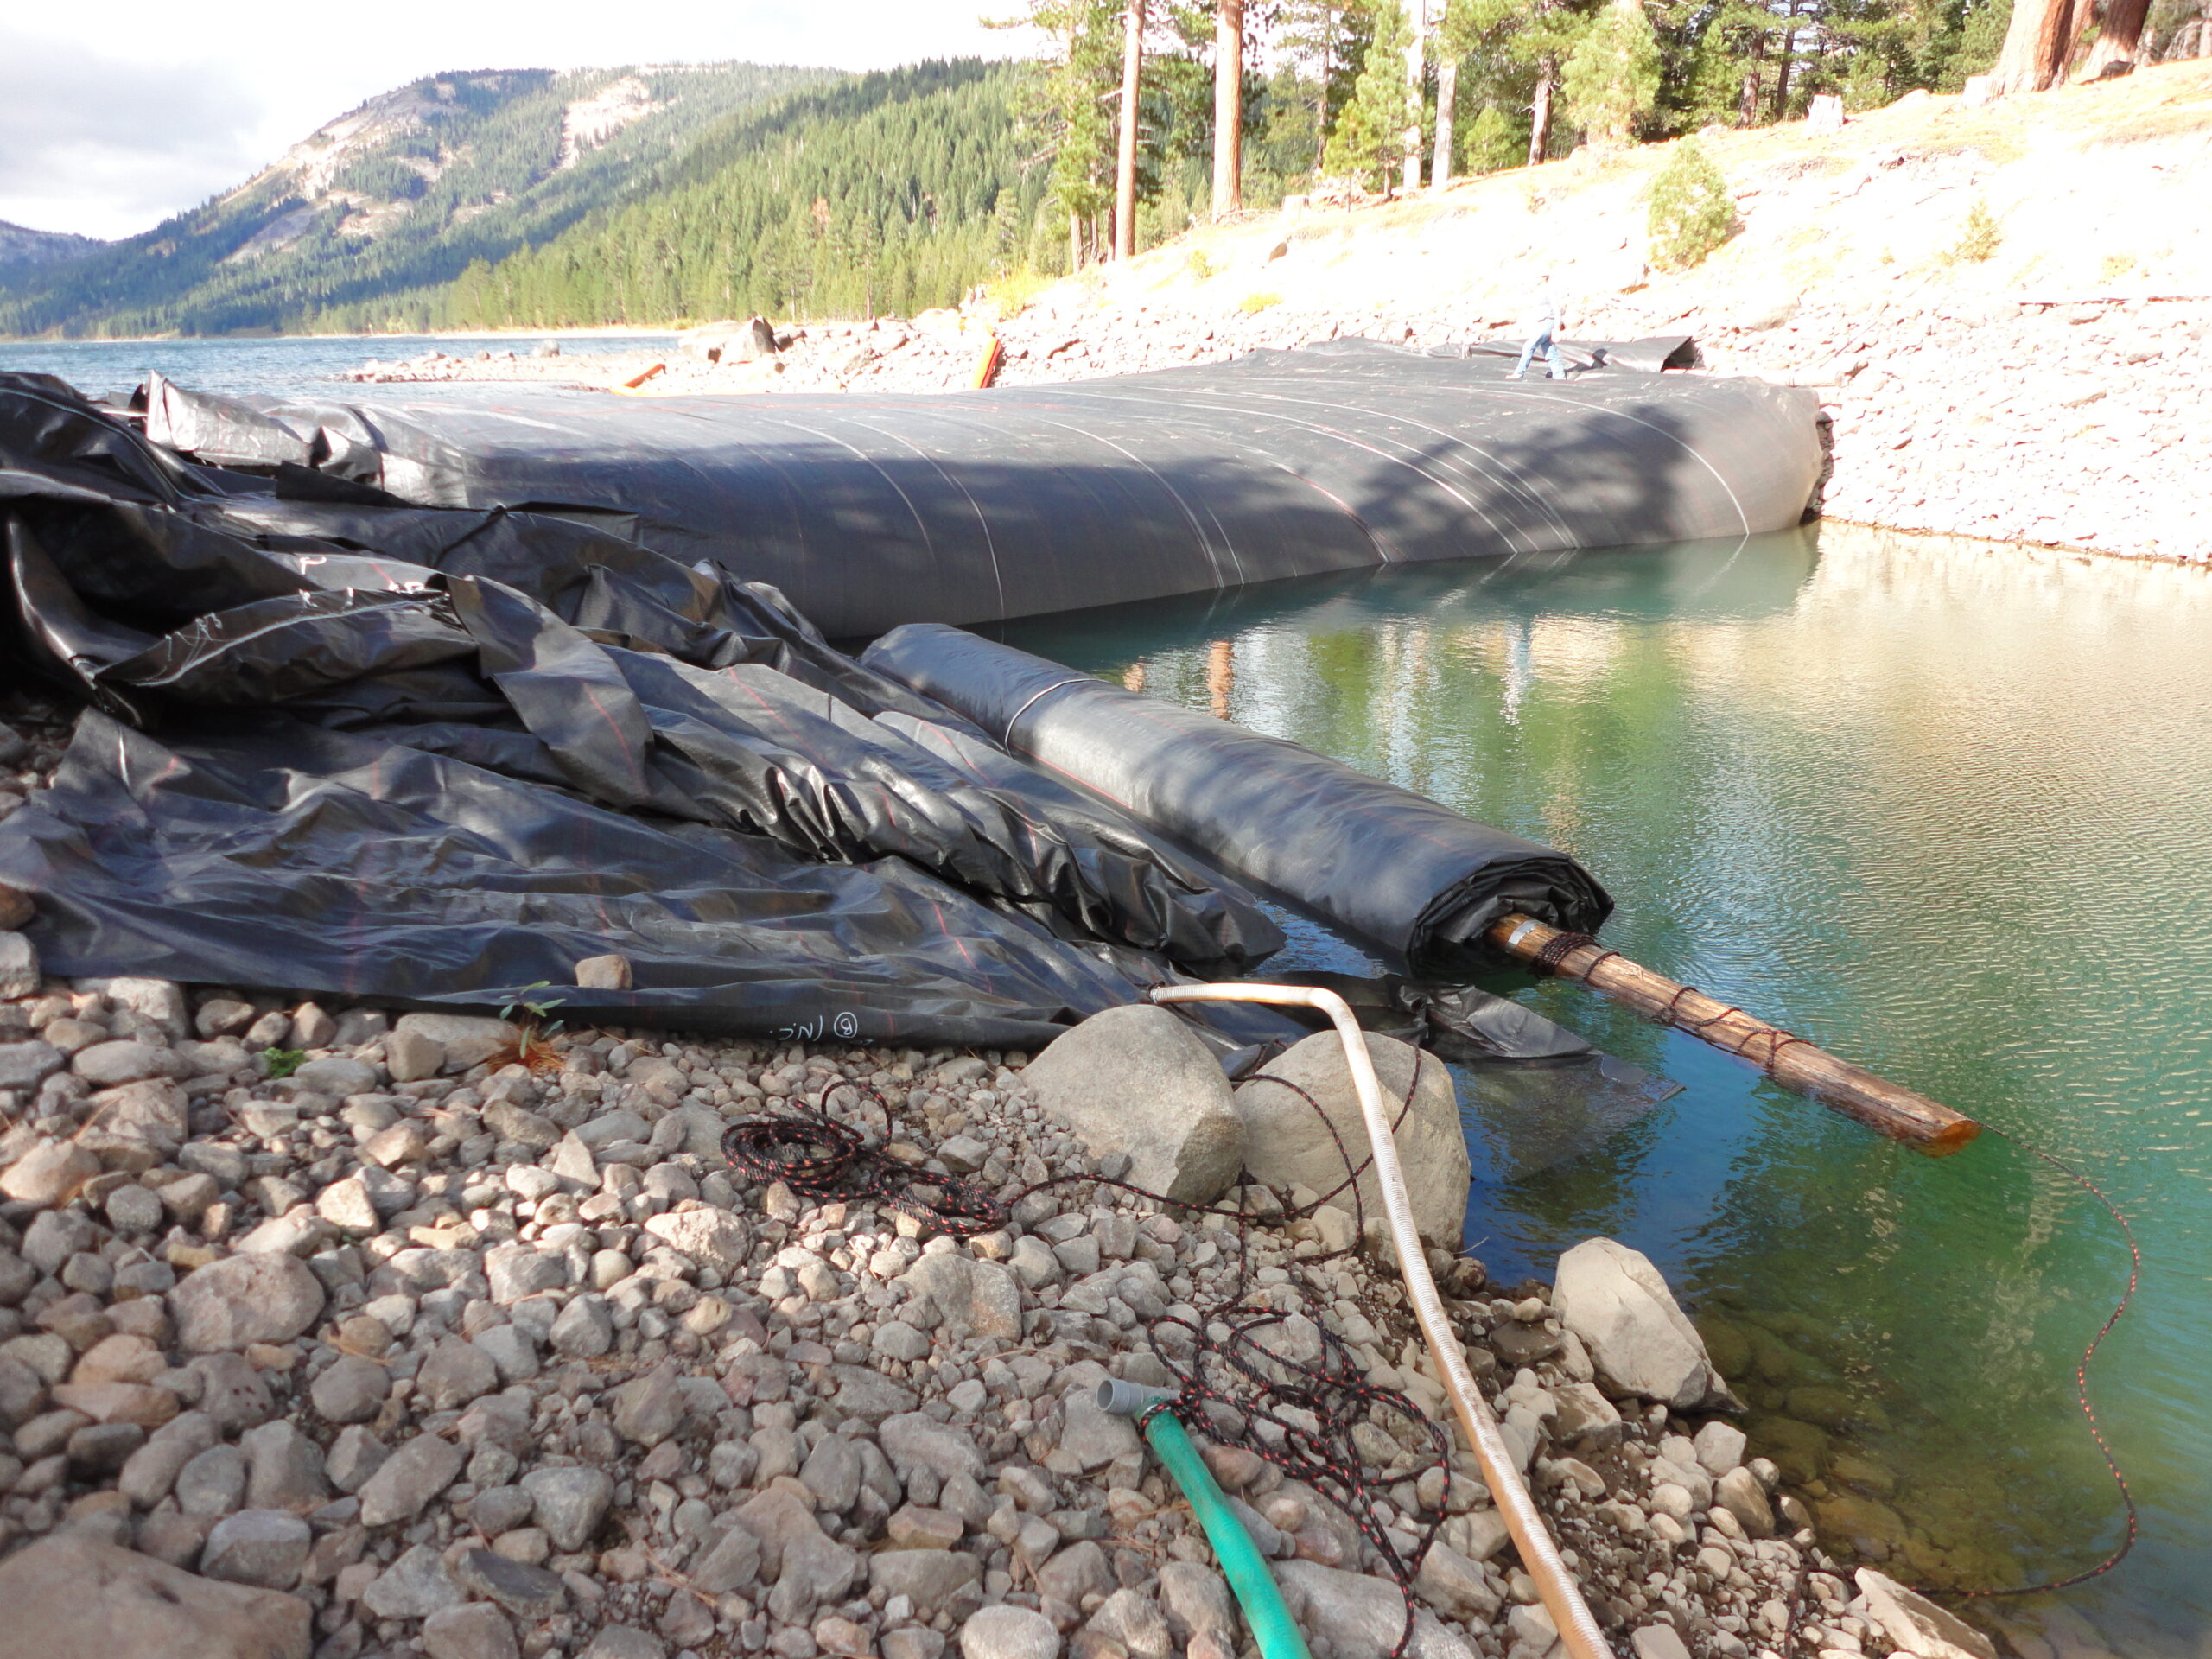
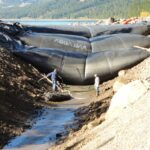
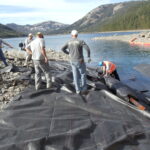
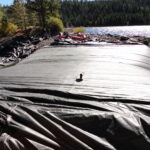
Dunnage material was laid down at the starting point of the primary 21ft tall AquaDam. The primary AquaDam was then unrolled into the water.
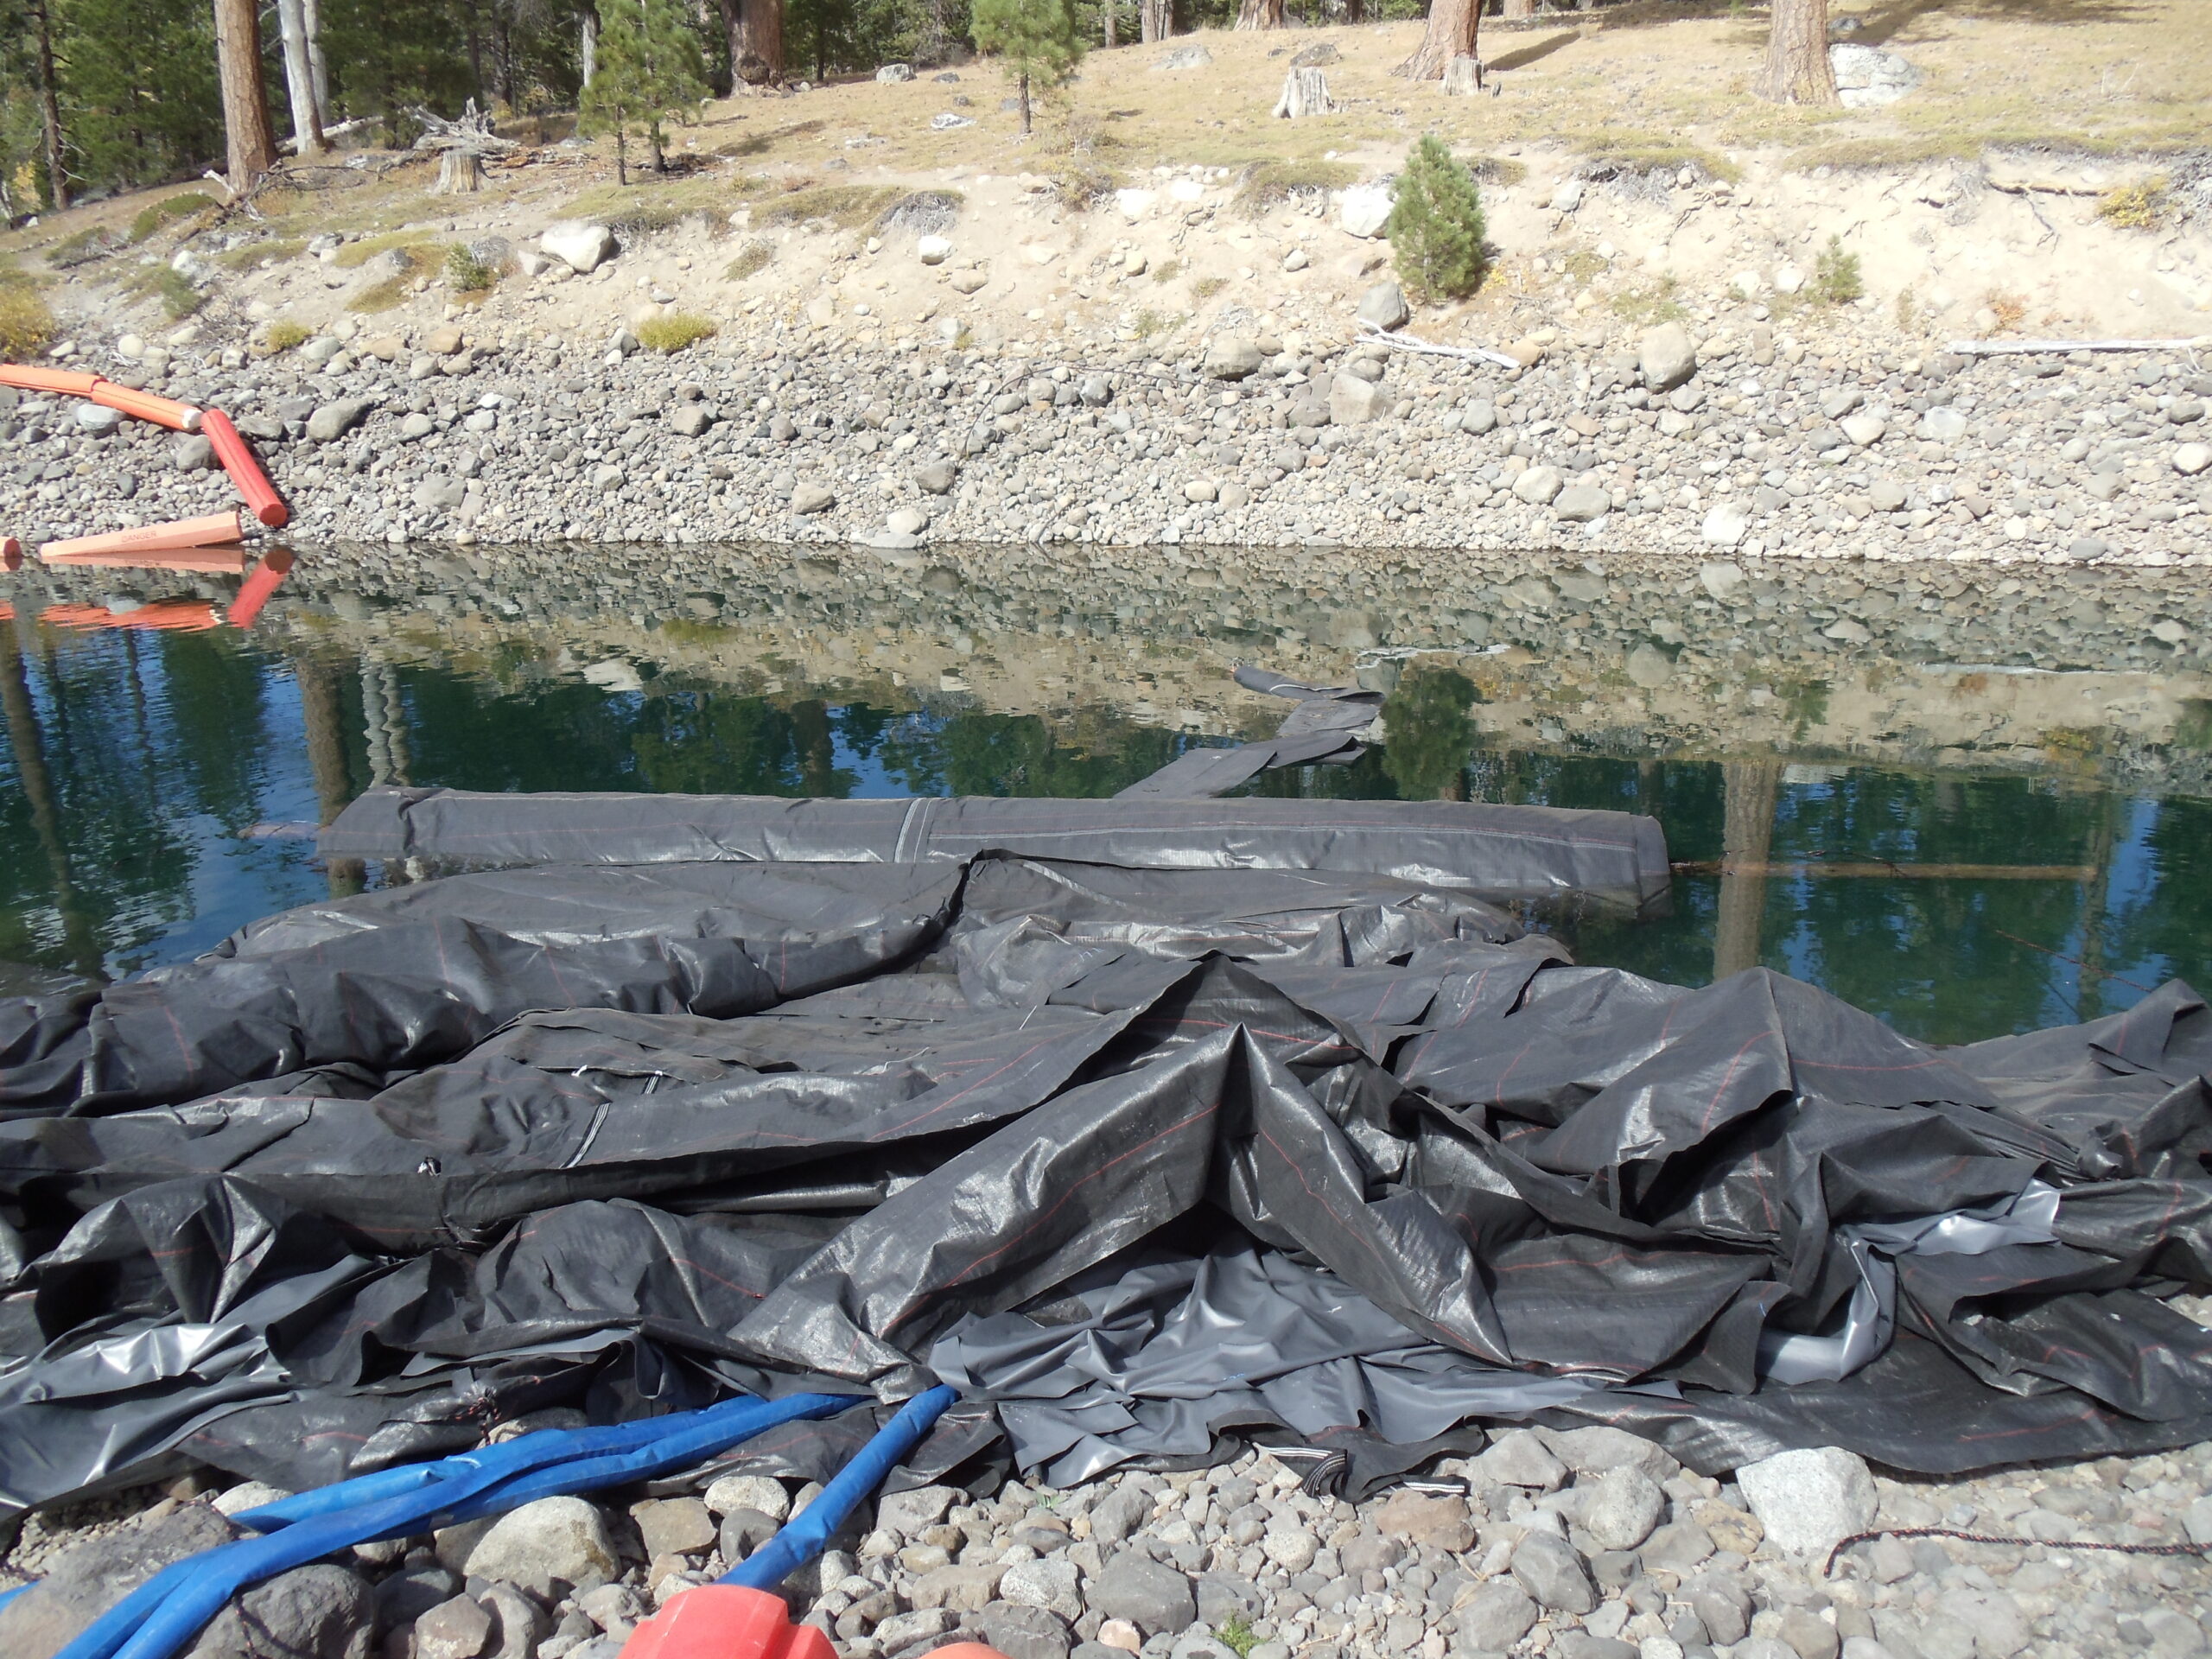
Three inch blue discharge hoses are extend into the fill-tubes, which are the dual water chambers of the AquaDam (the inner tubing), causing the AquaDam to fill and unroll, slowly.
A one (1) foot tall AquaDam was placed below the primary 21ft tall AquaDam. The one (1) foot tall AquaDam was filled after the primary AquaDam was fully filled. The purpose of the small AquaDam was to help conform the cofferdam to the rocky channel bottom, reducing potential seepage into the work area.
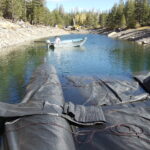
The primary AquaDam continues to unroll. The one (1) foot tall AquaDam is visible, coming back over the roll.
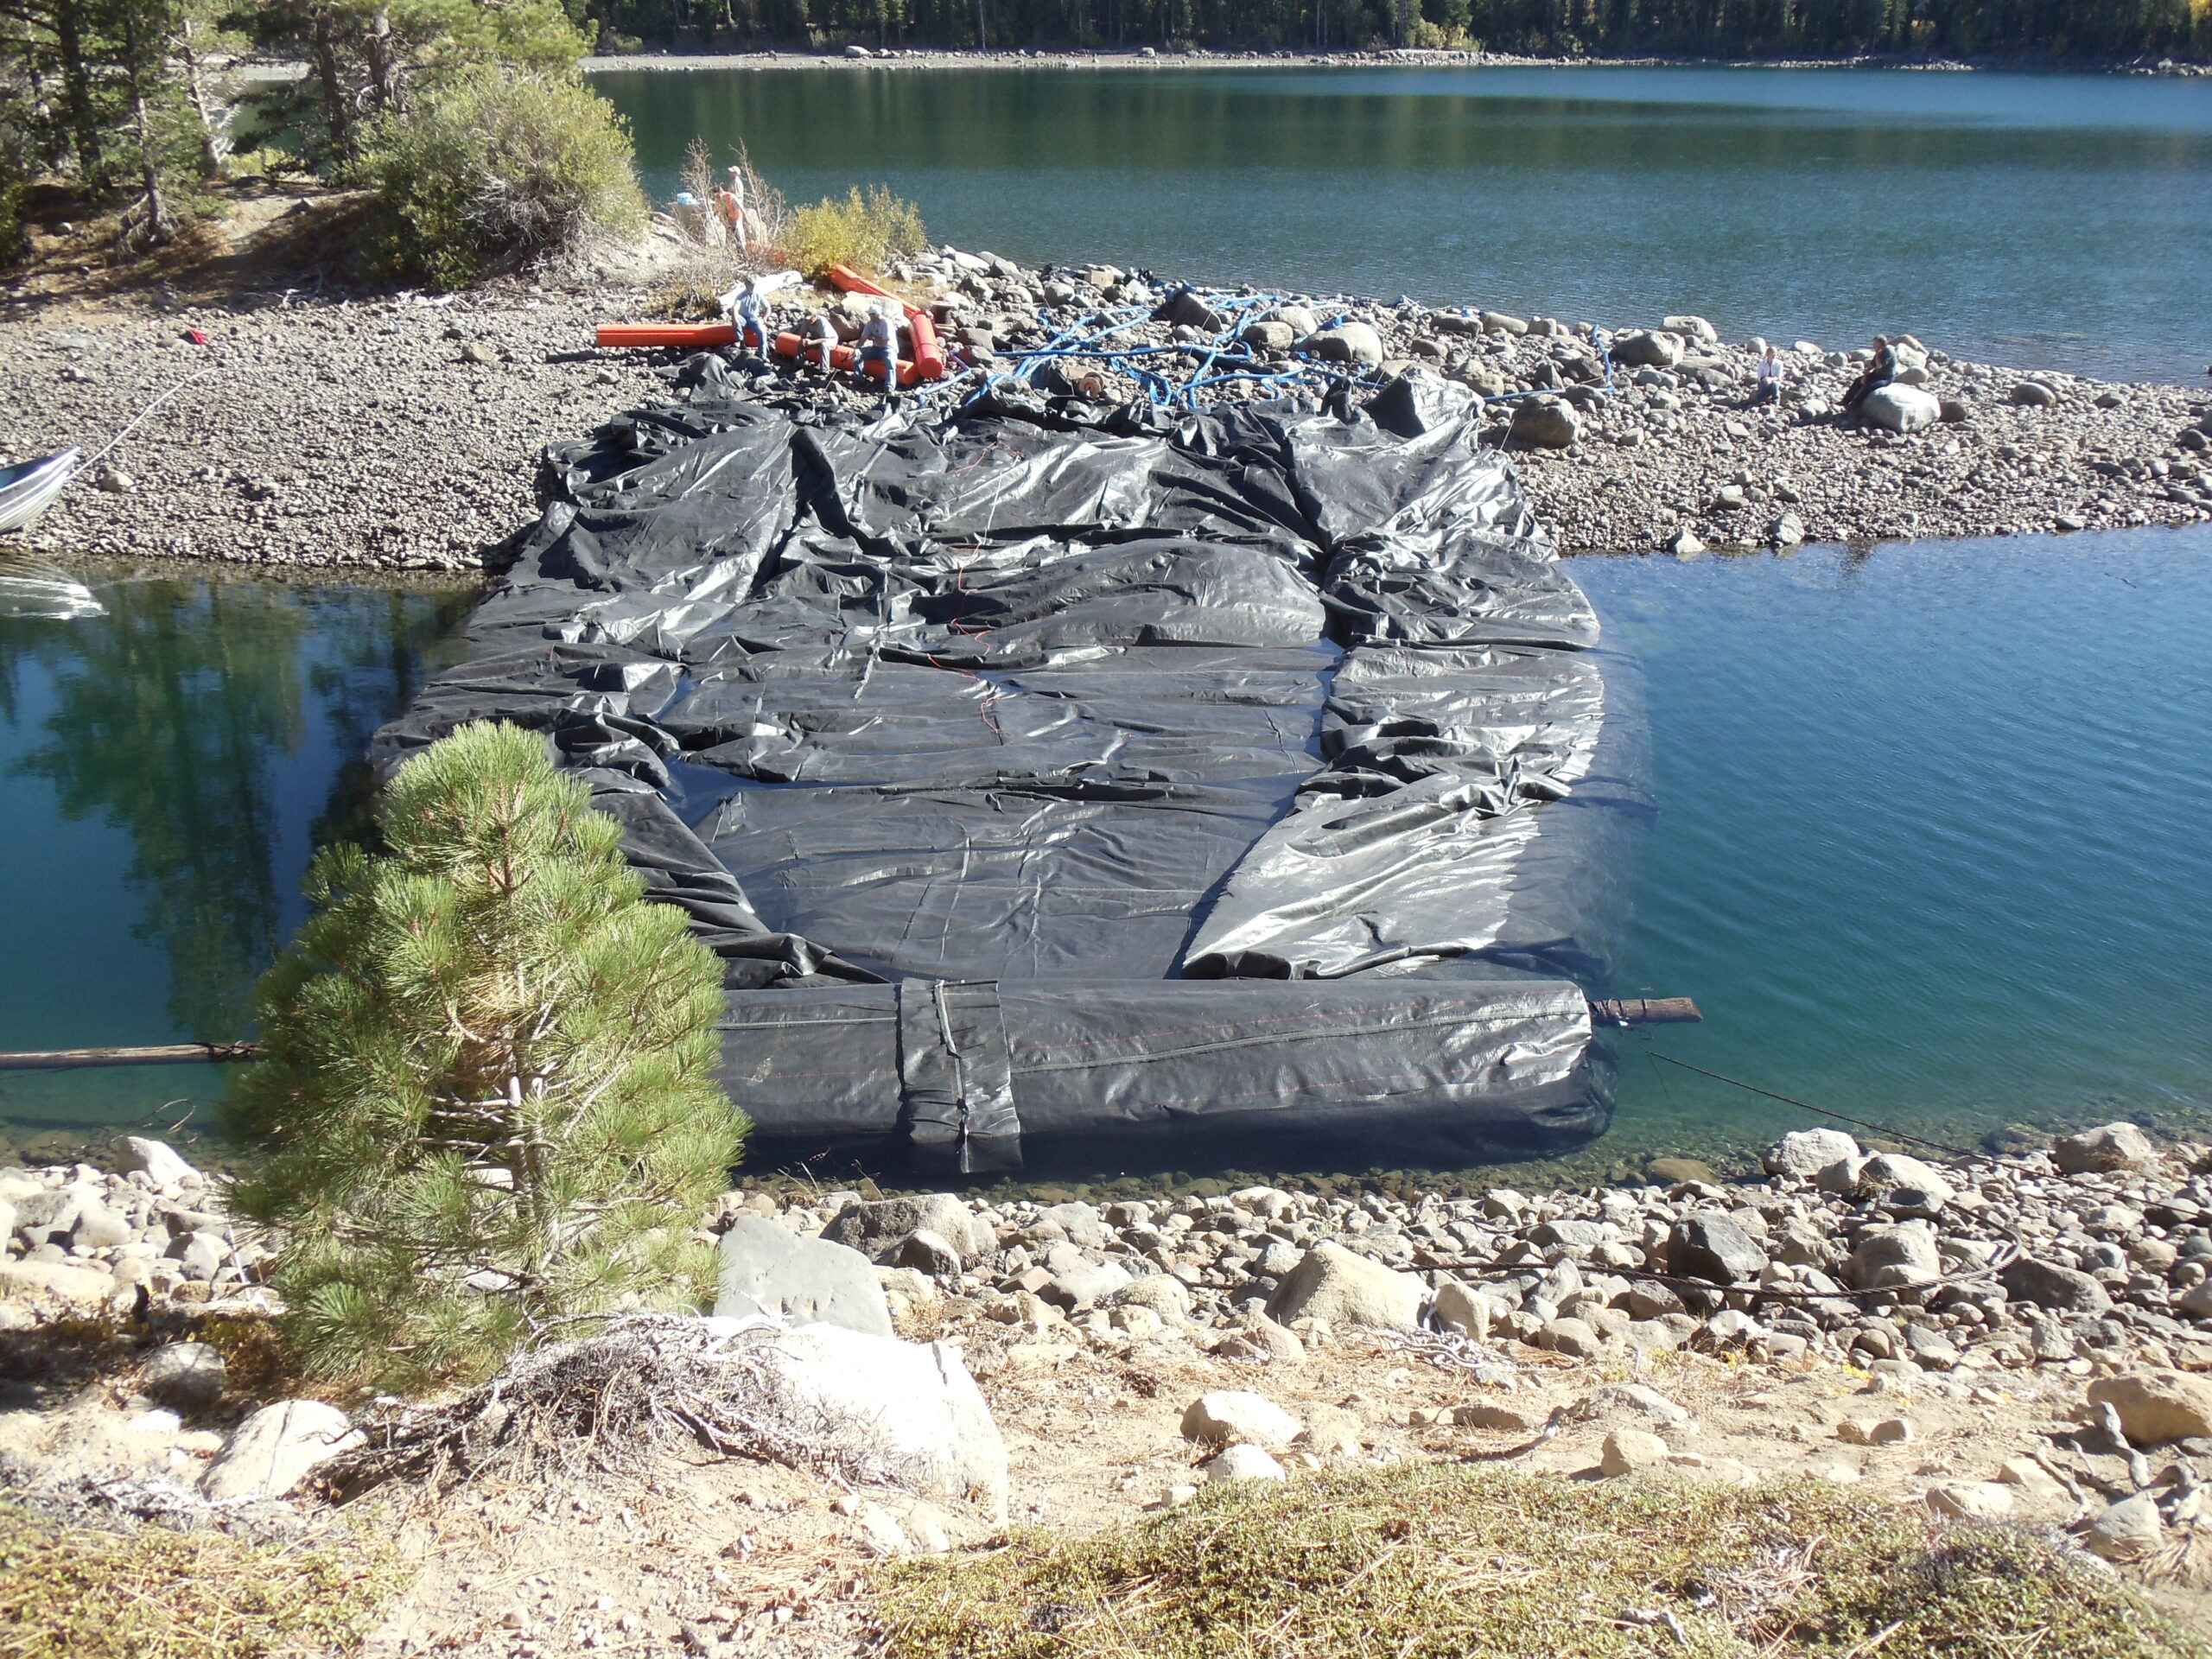
The sides of the primary AquaDam were folded in before being rolled up, to fit the unit on the trailer for transportation. Now as the AquaDam fills and unrolls, the sides of the AquaDam will unfold to it’s full width of 44ft.
The 21ft tall AquaDam is slowly approaching the ending bank.
The one (1) foot tall under-dam was just long enough to reach waters edge at the far end. The sides of the primary AquaDam continue to unfold as the unit fills.
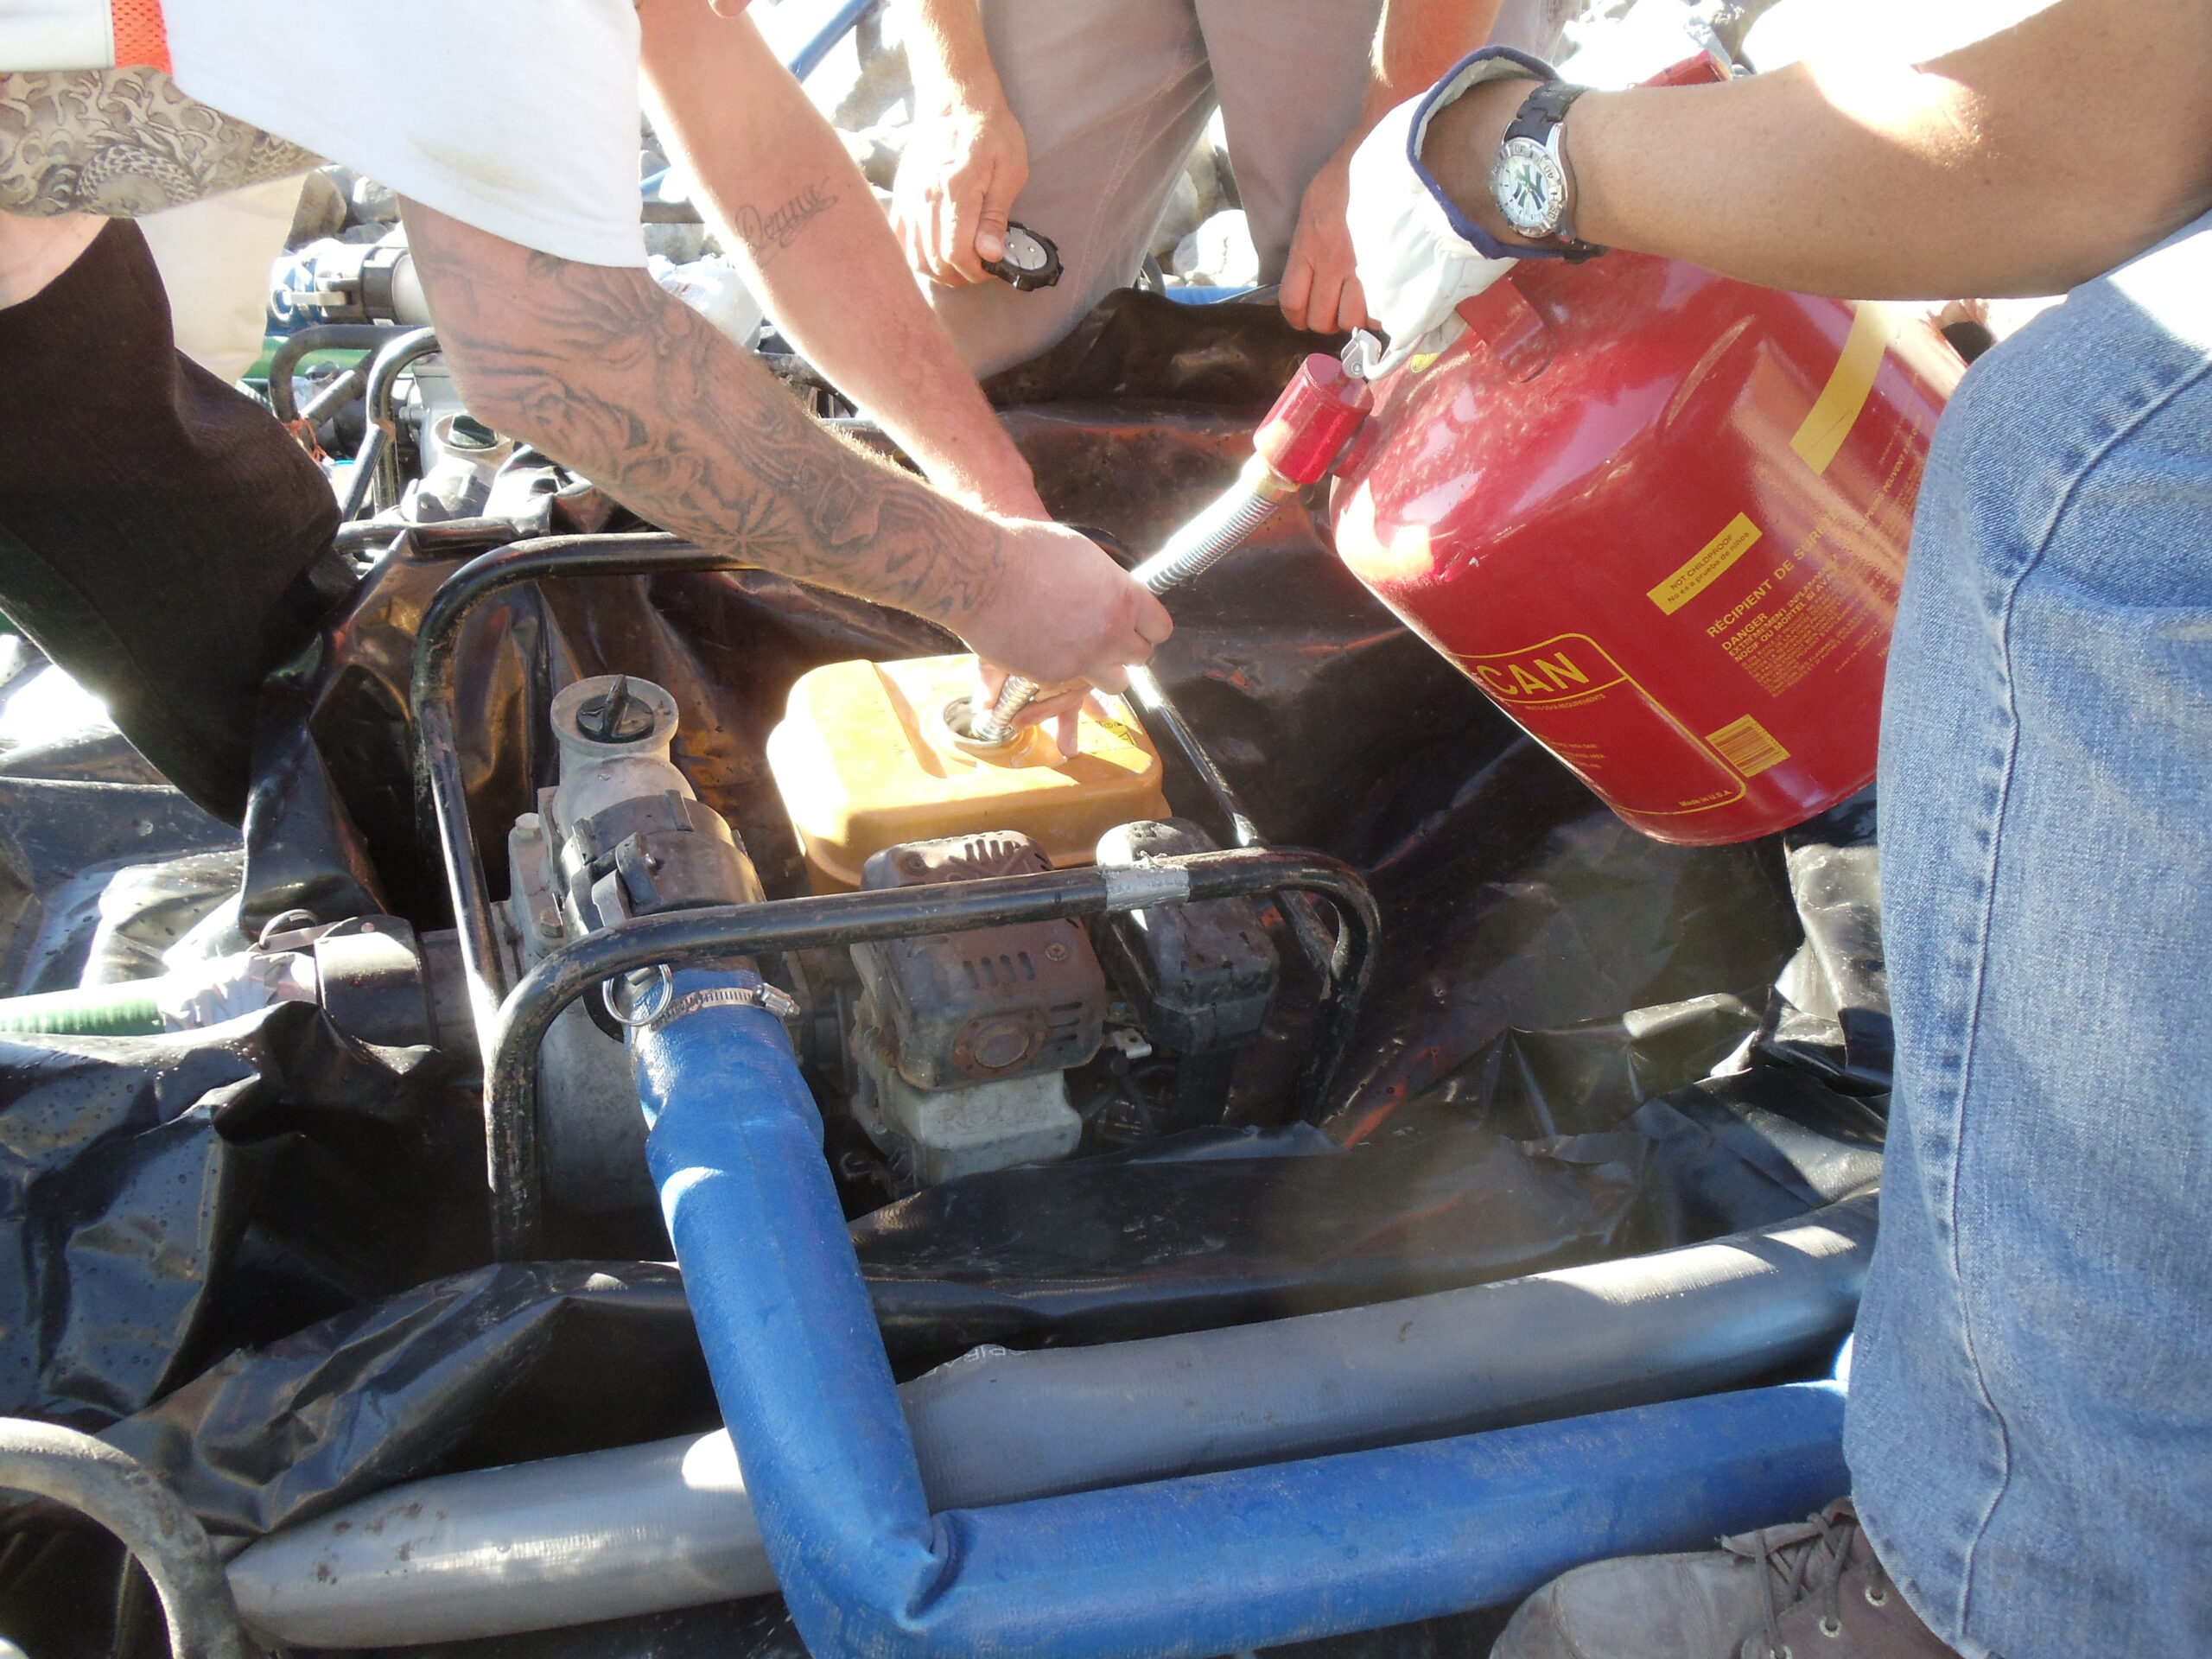
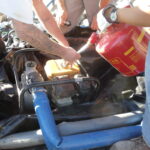
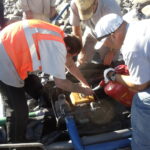
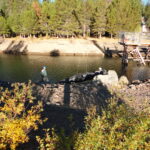
A four (4) person fuel filling procedure was devised and implemented to allow safe, contained refueling of the three (3) inch water pumps.
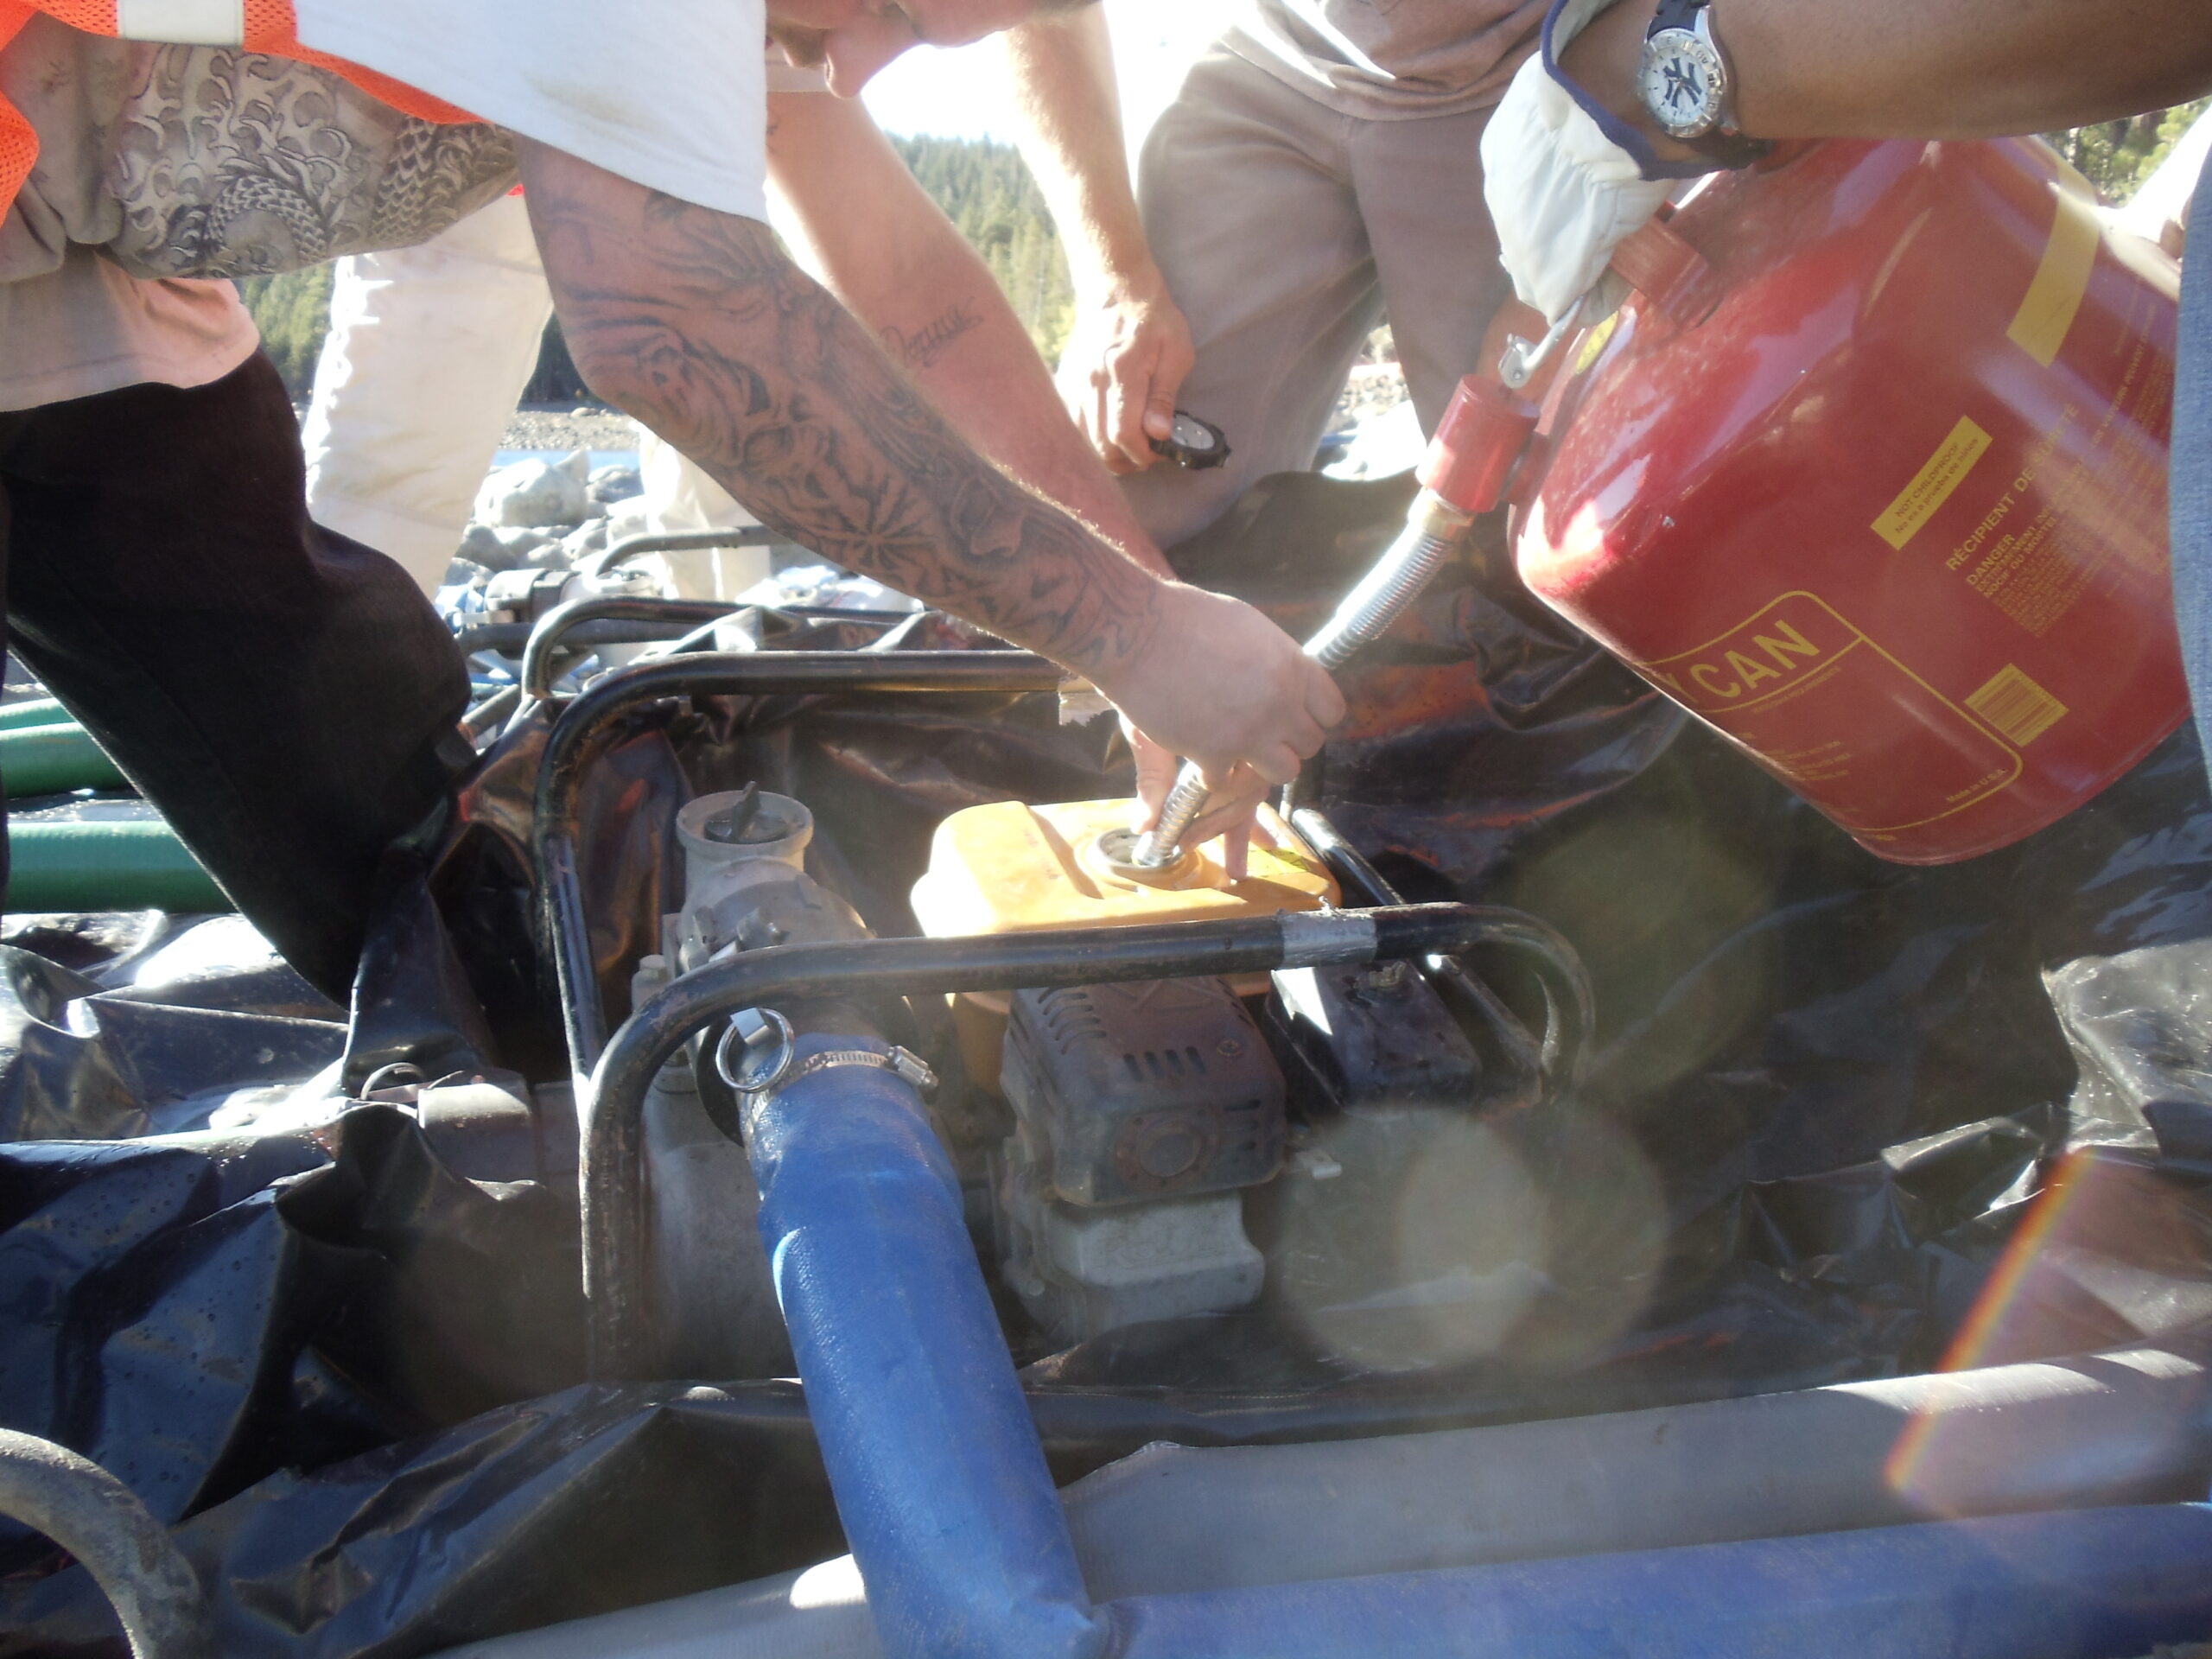
The crew was very cautious not to spill any gasoline while refueling.
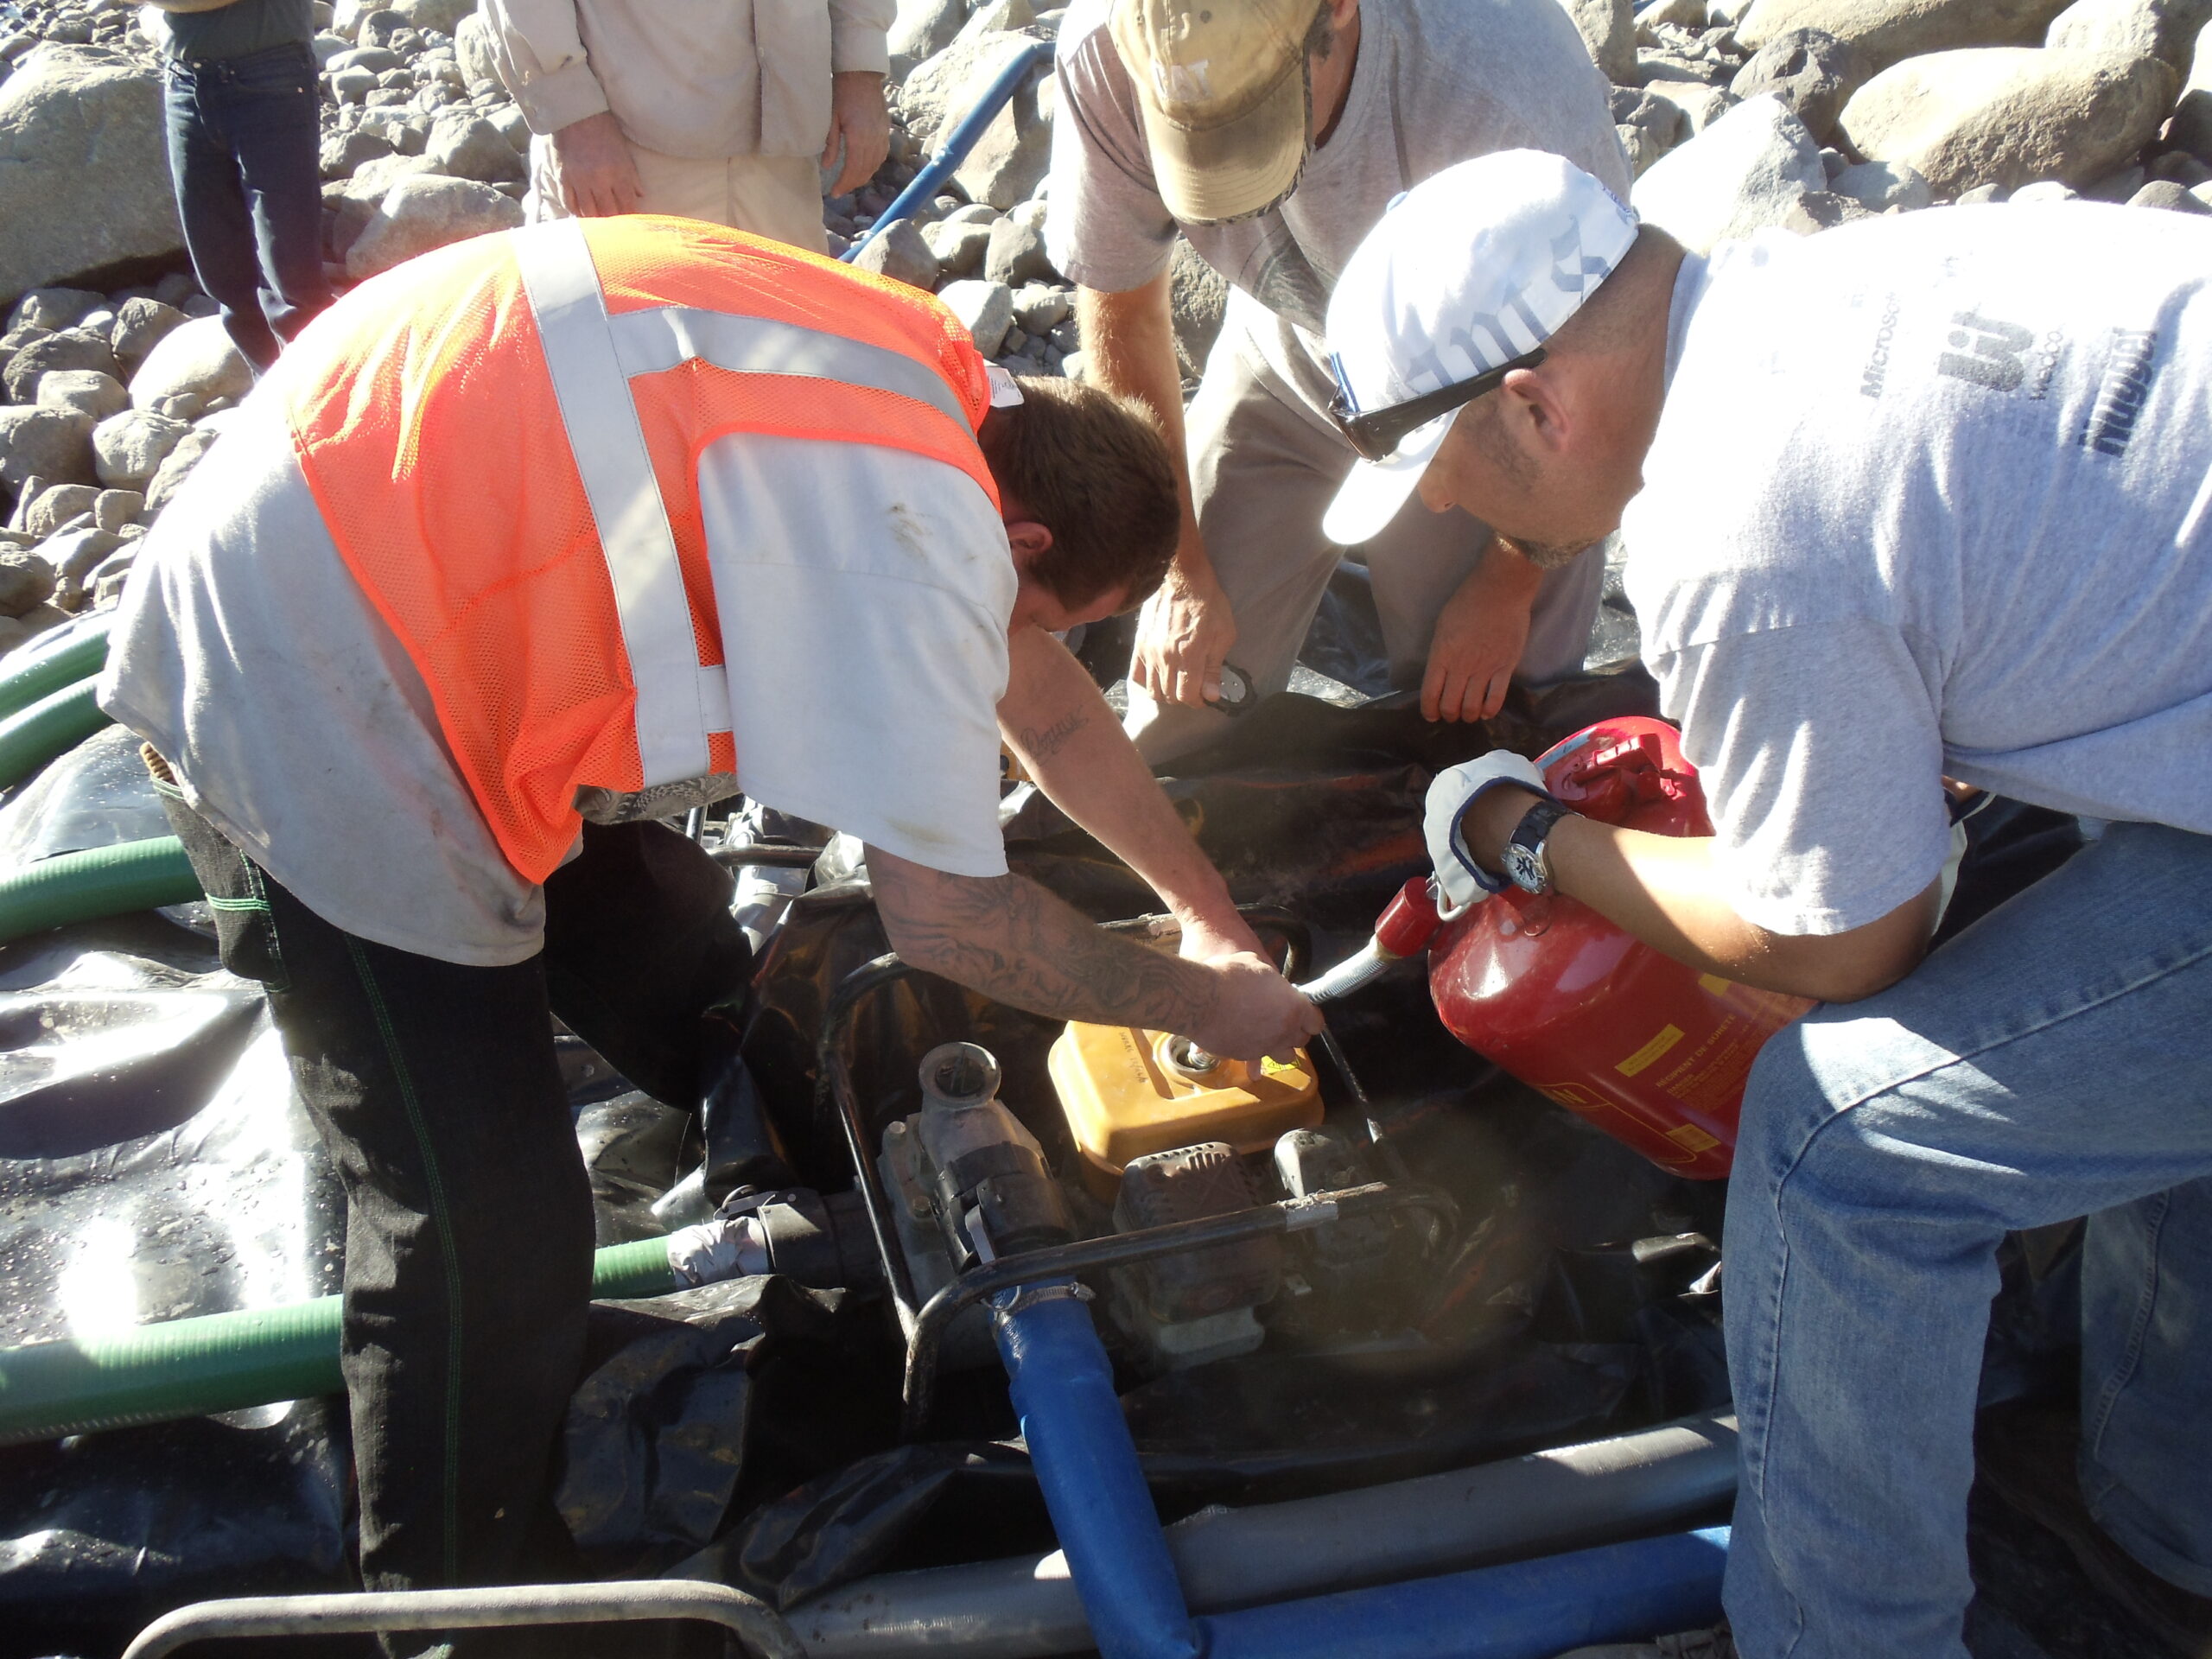
Safety first.
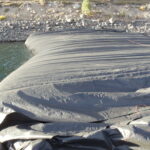
The 21ft tall primary AquaDam is fully unfolded and has head above water level now.
The water level in the work area began to drop immediately, as soon as a cofferdam was achieved, due to the leaky intake structure.
The primary AquaDam is now fully installed. This was done in less than one (1) day.
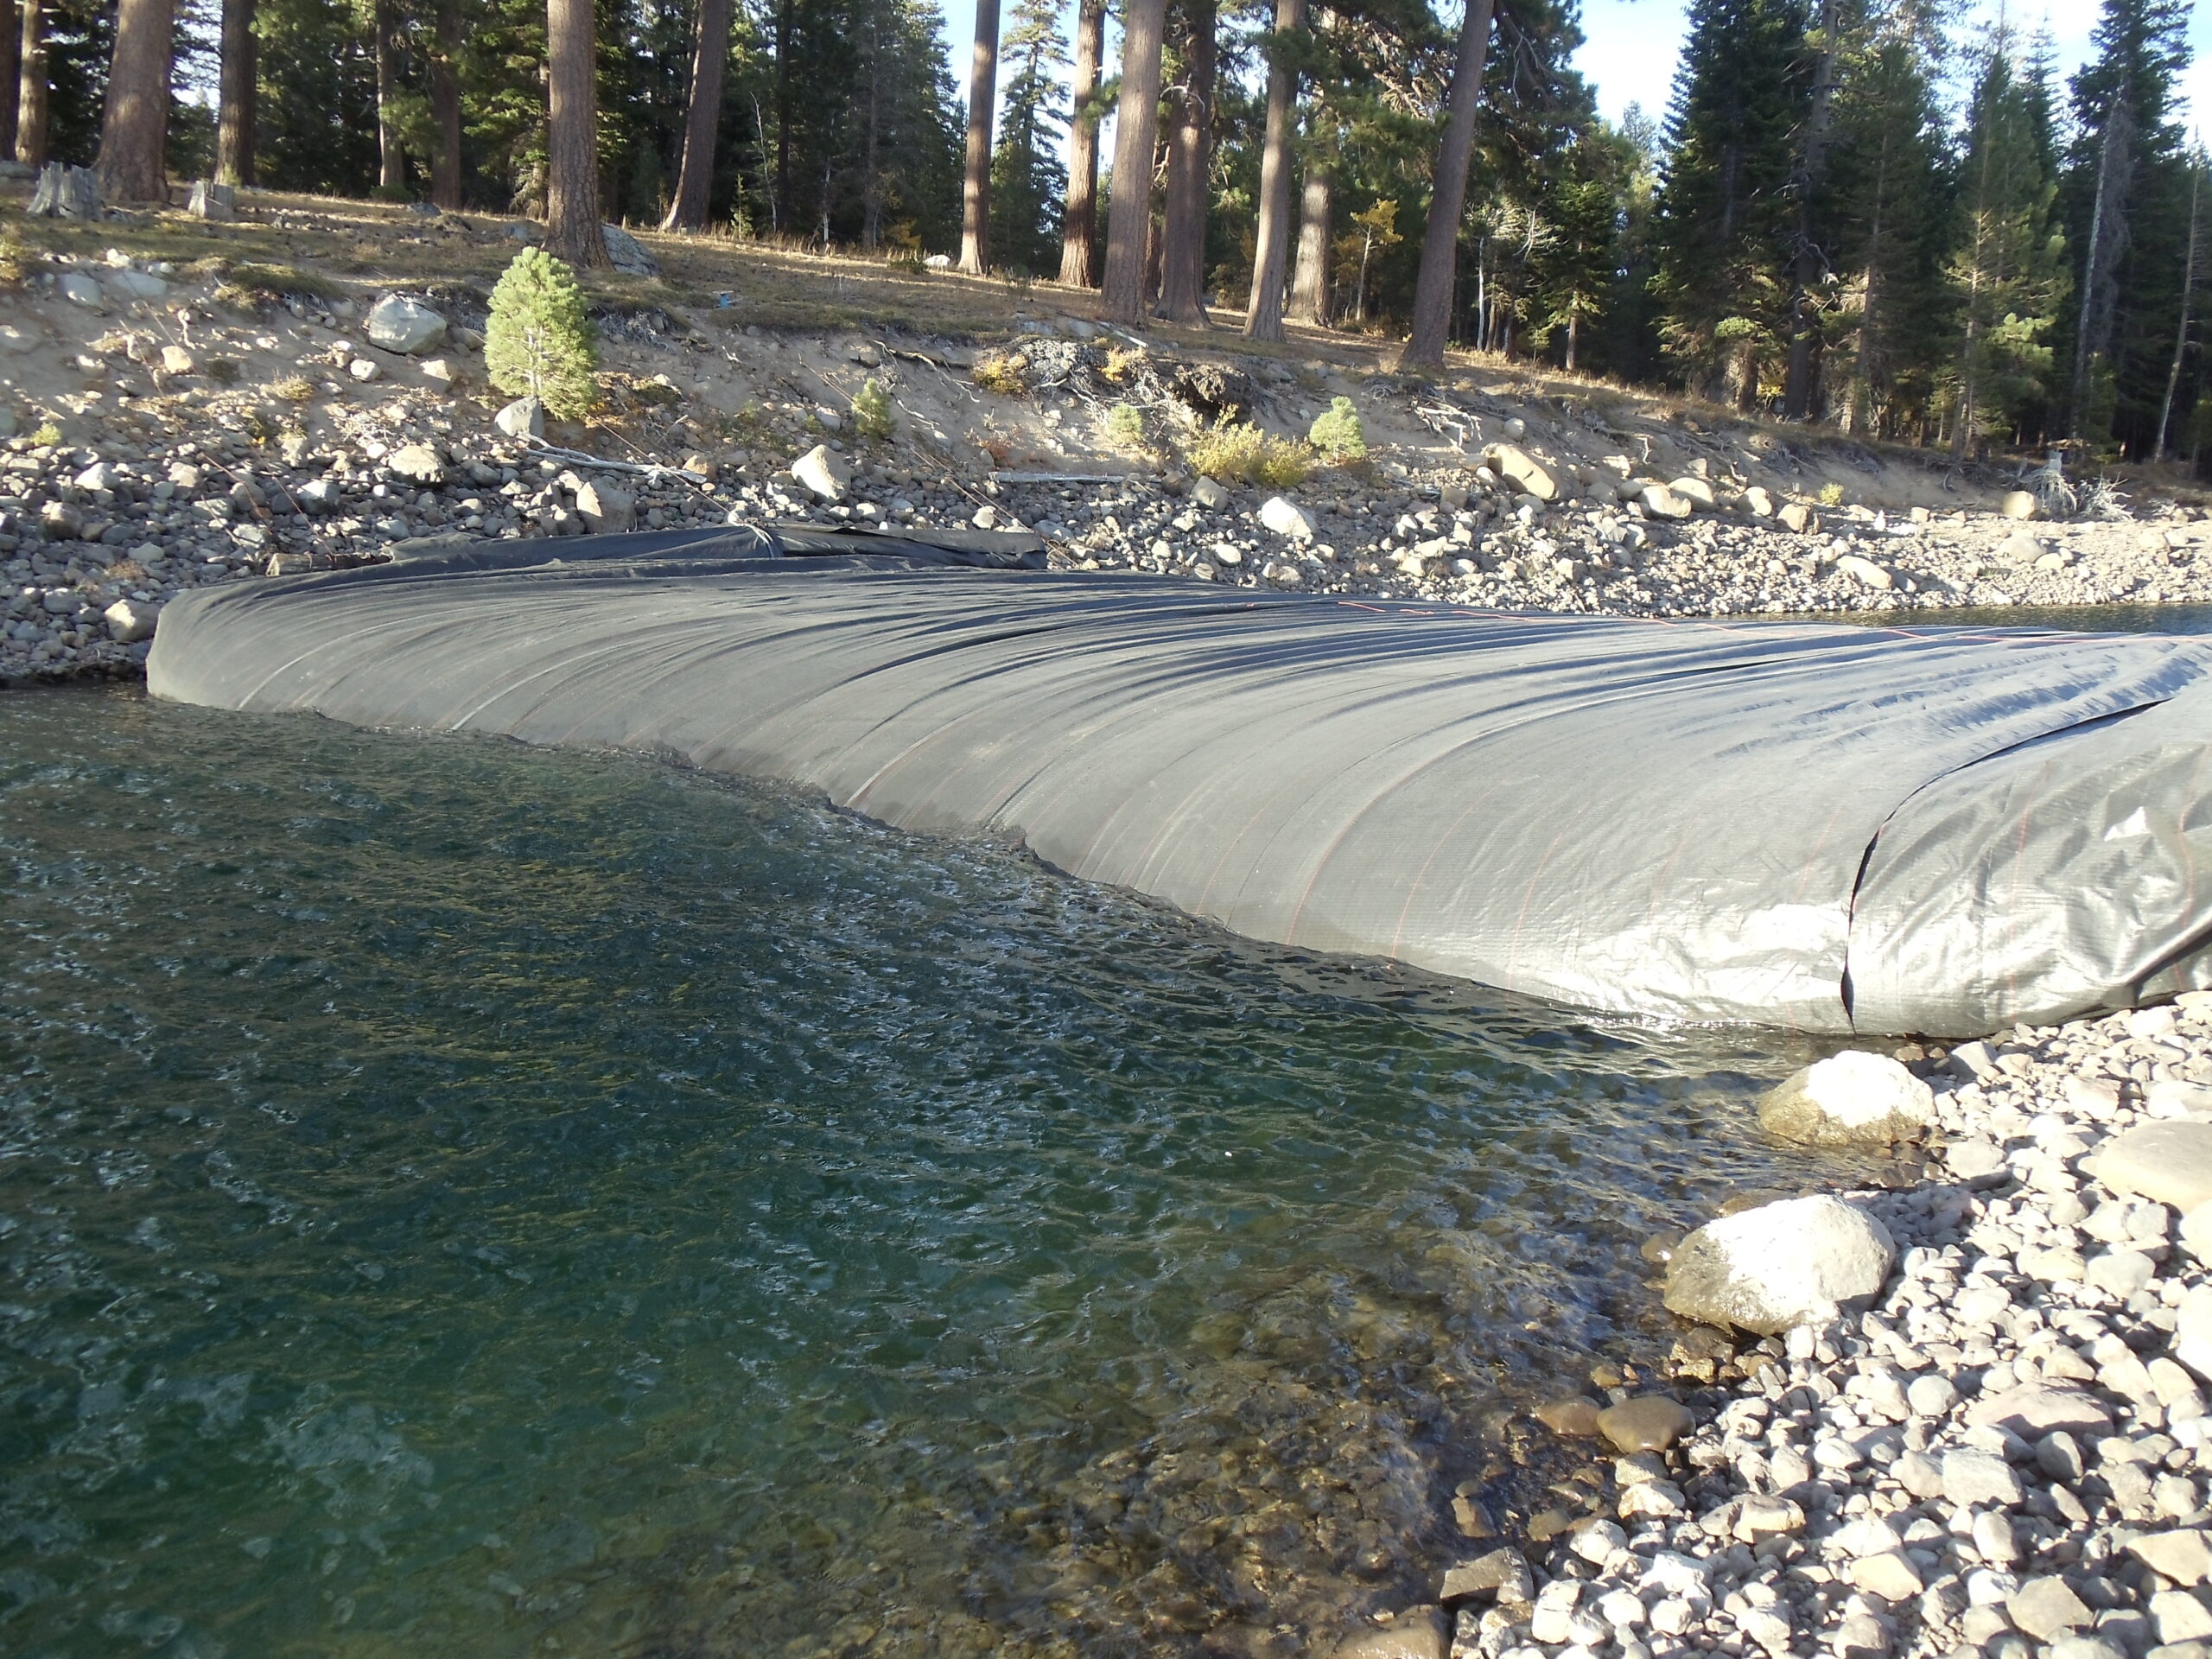
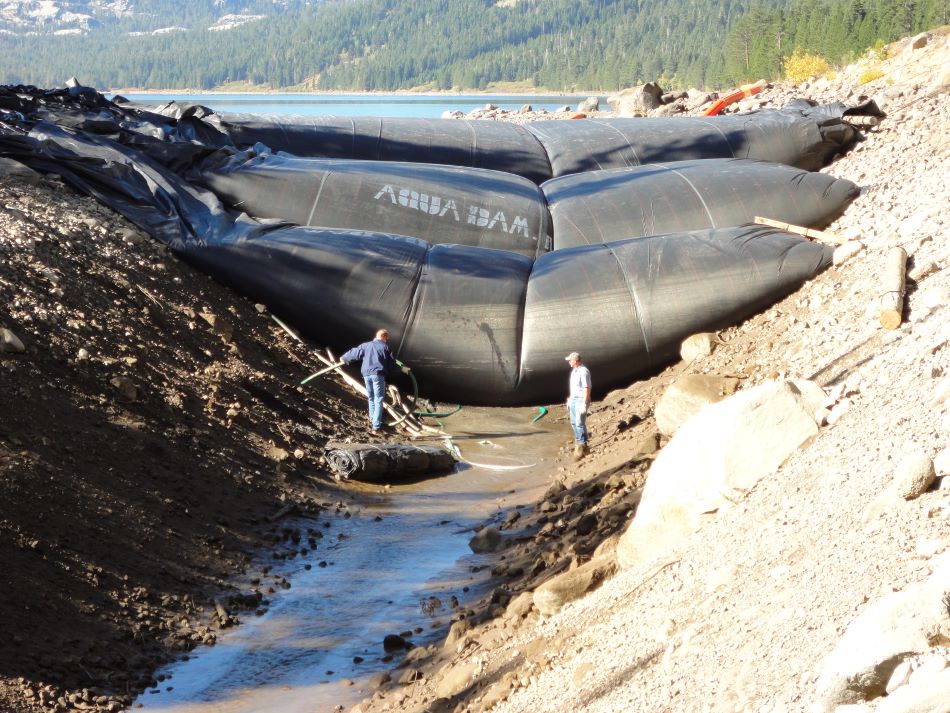
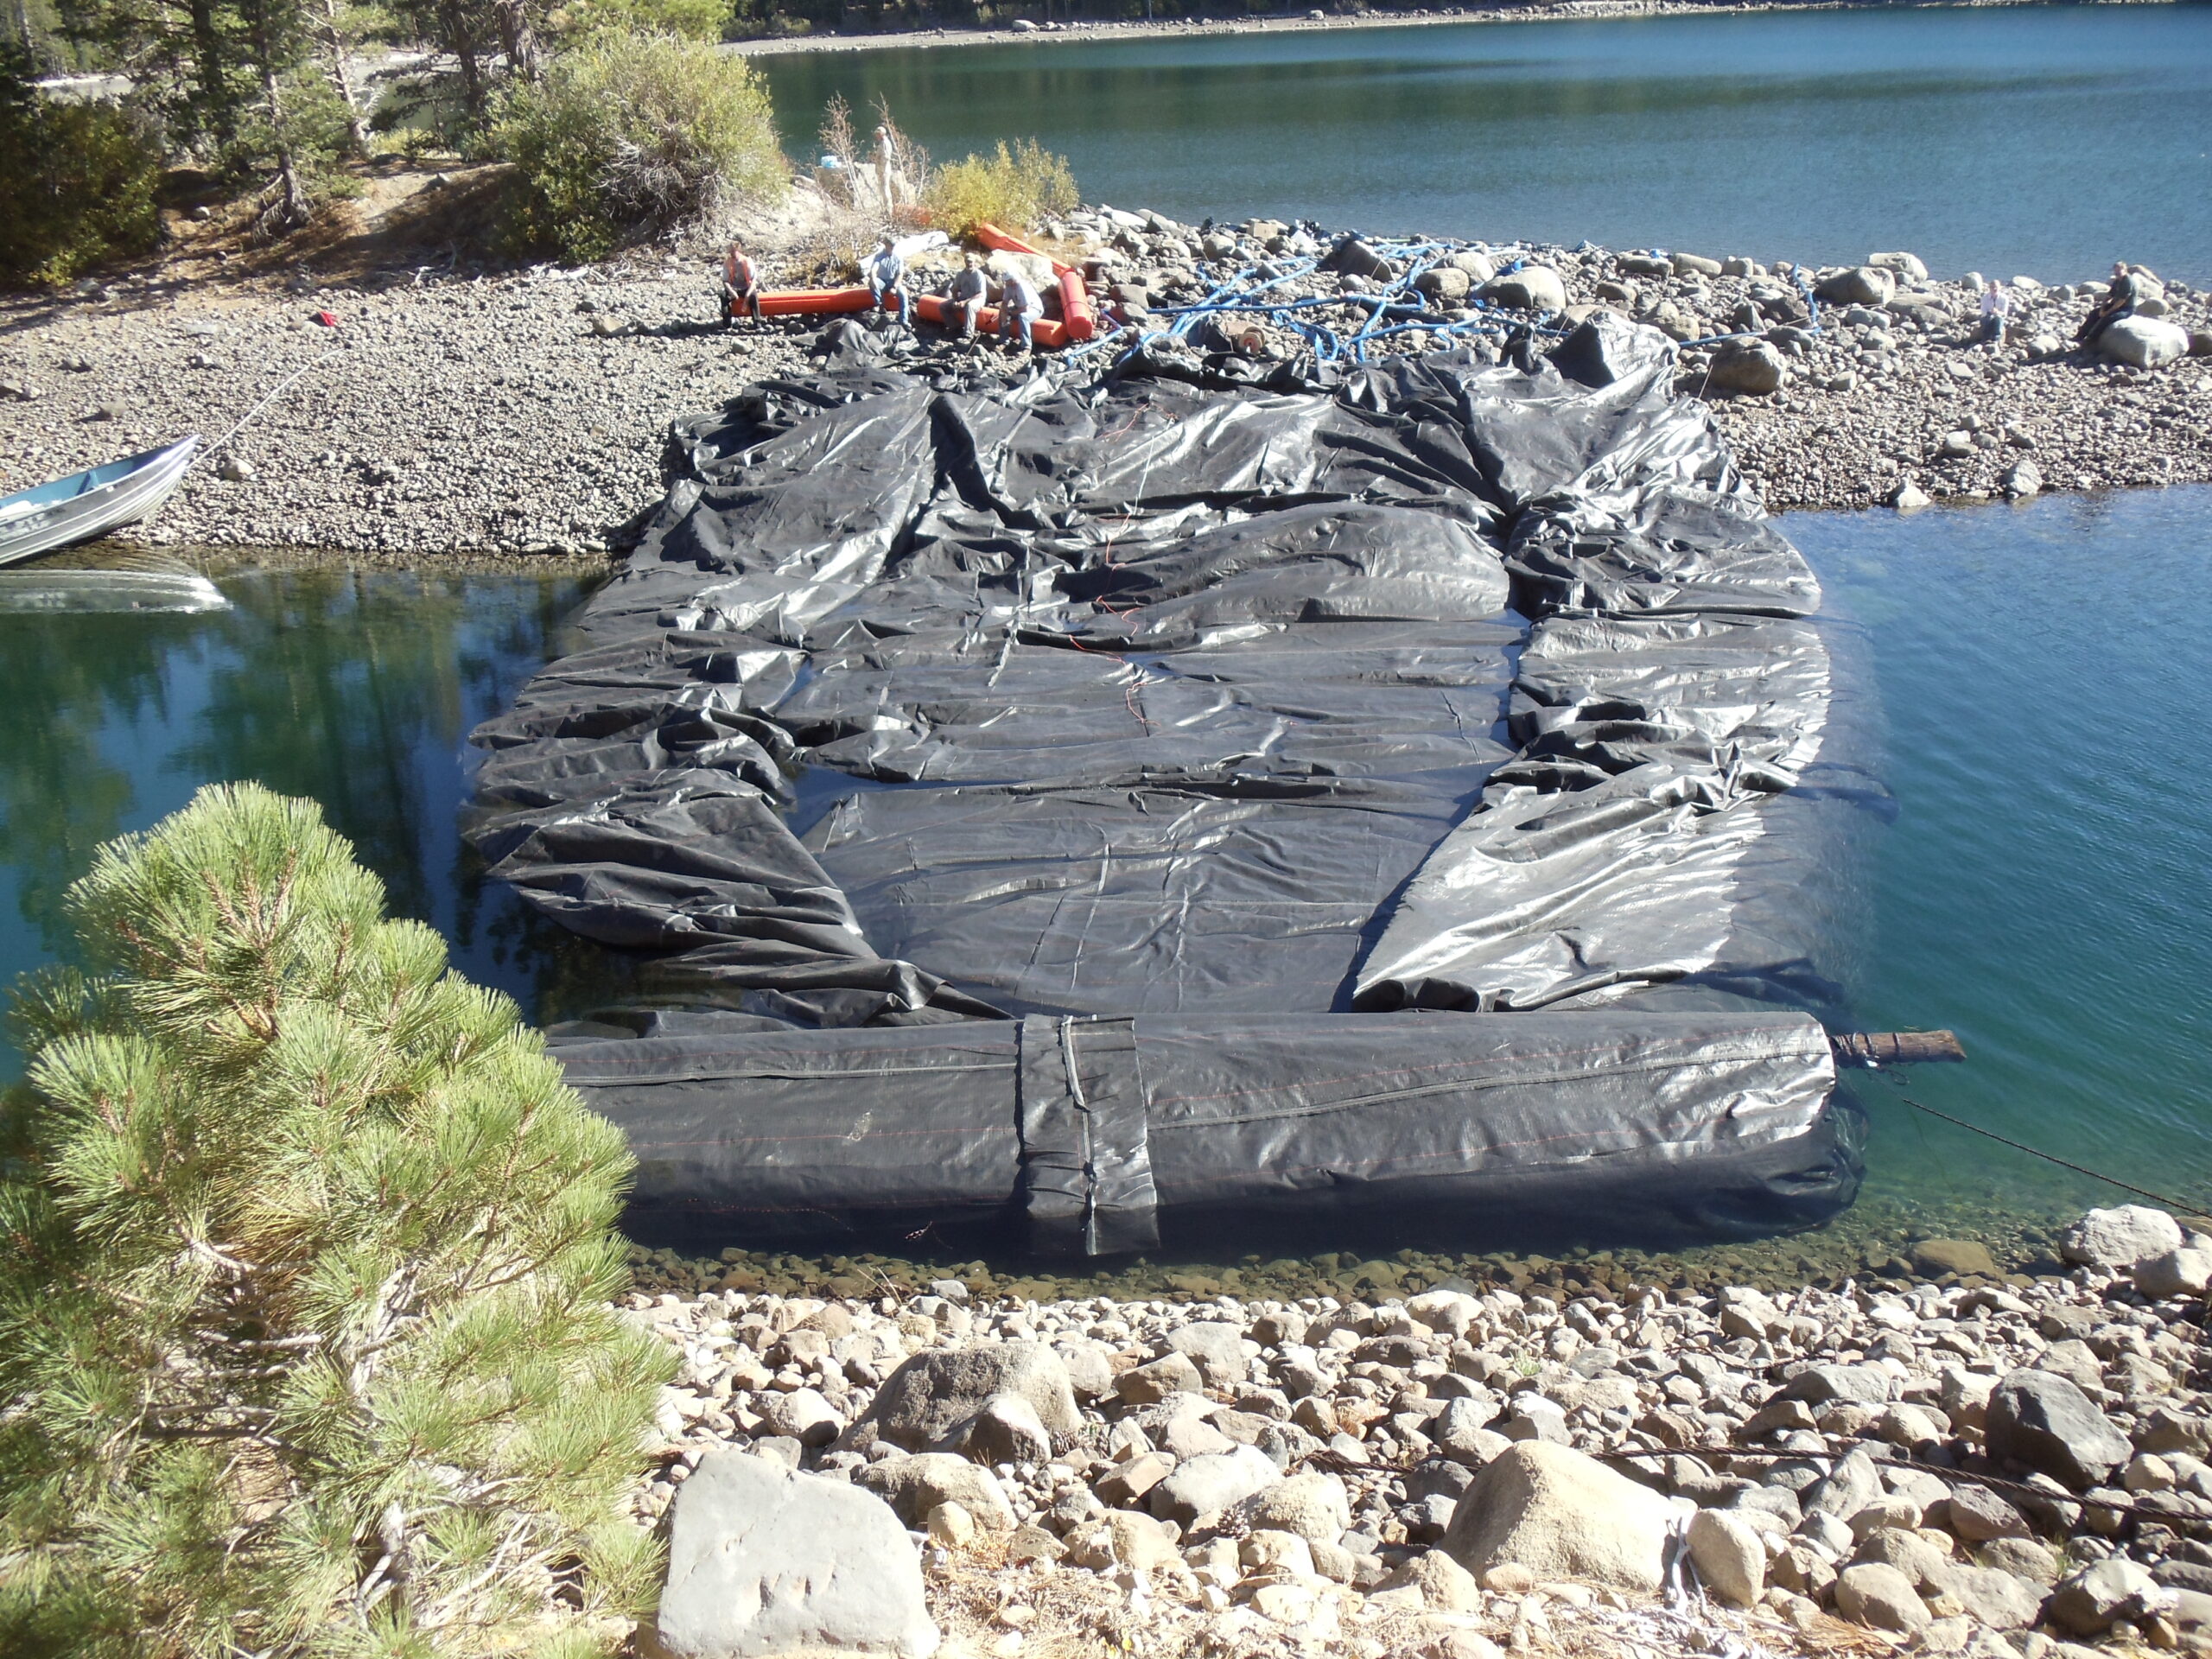
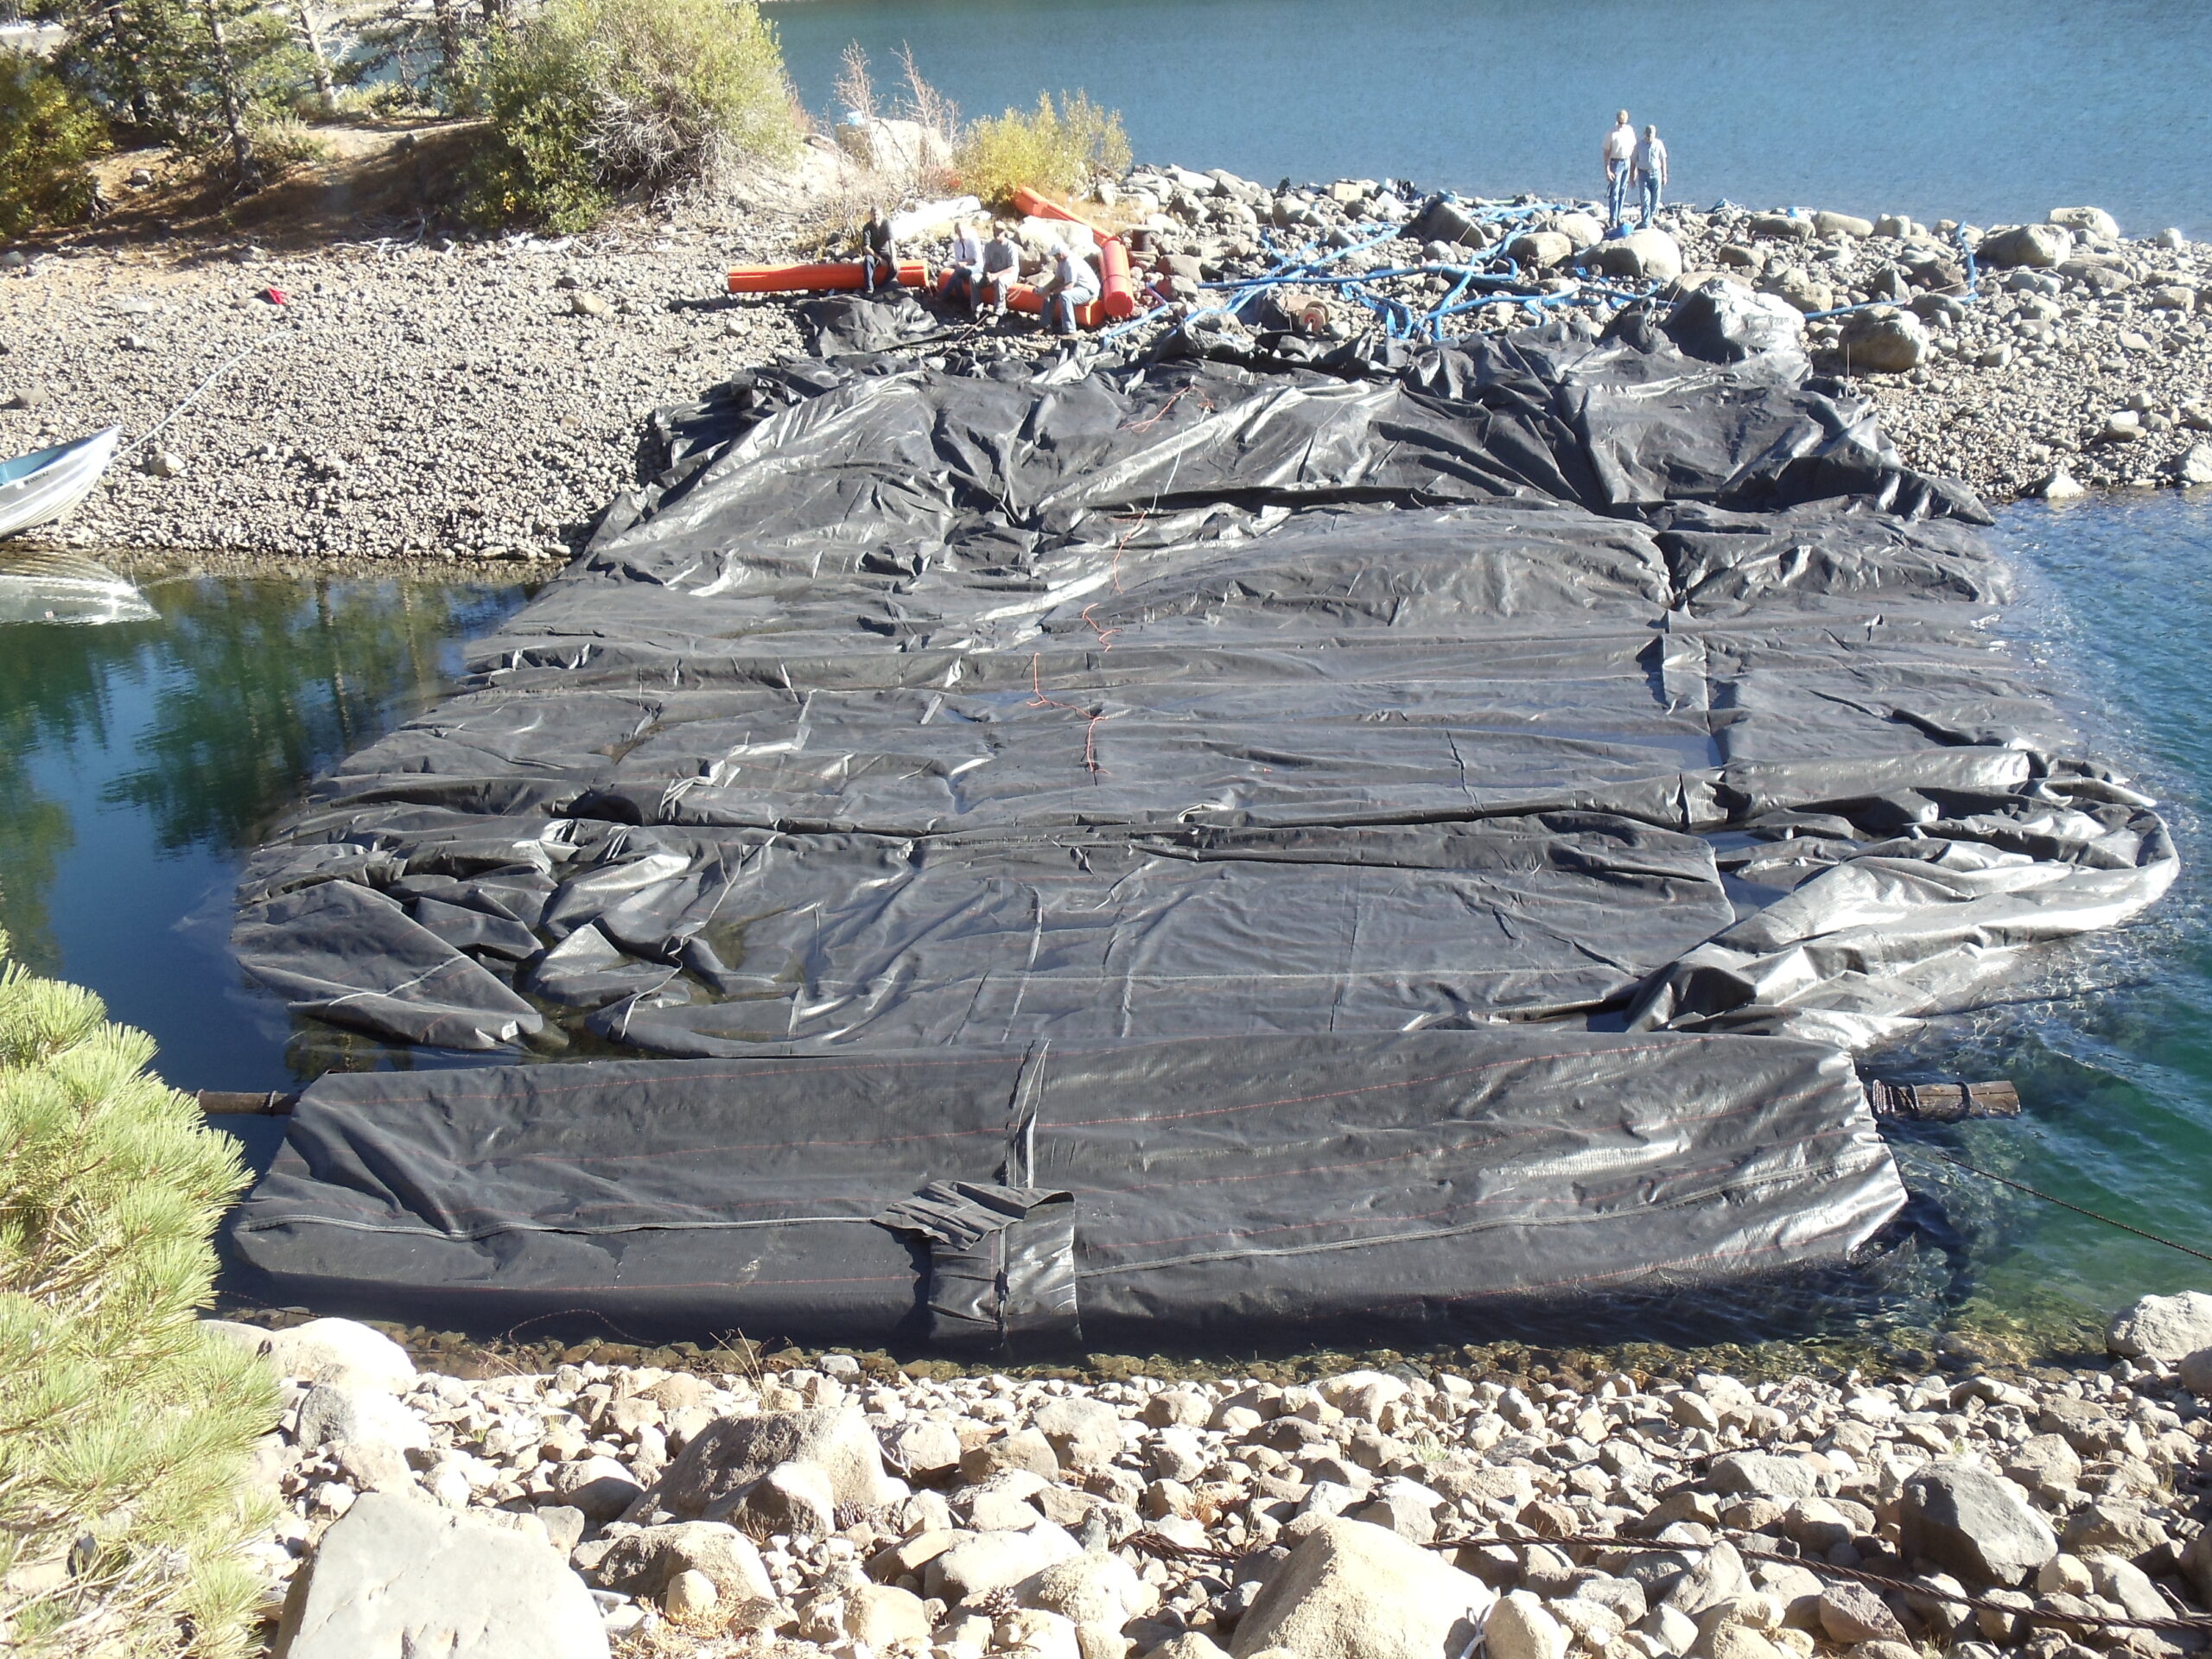
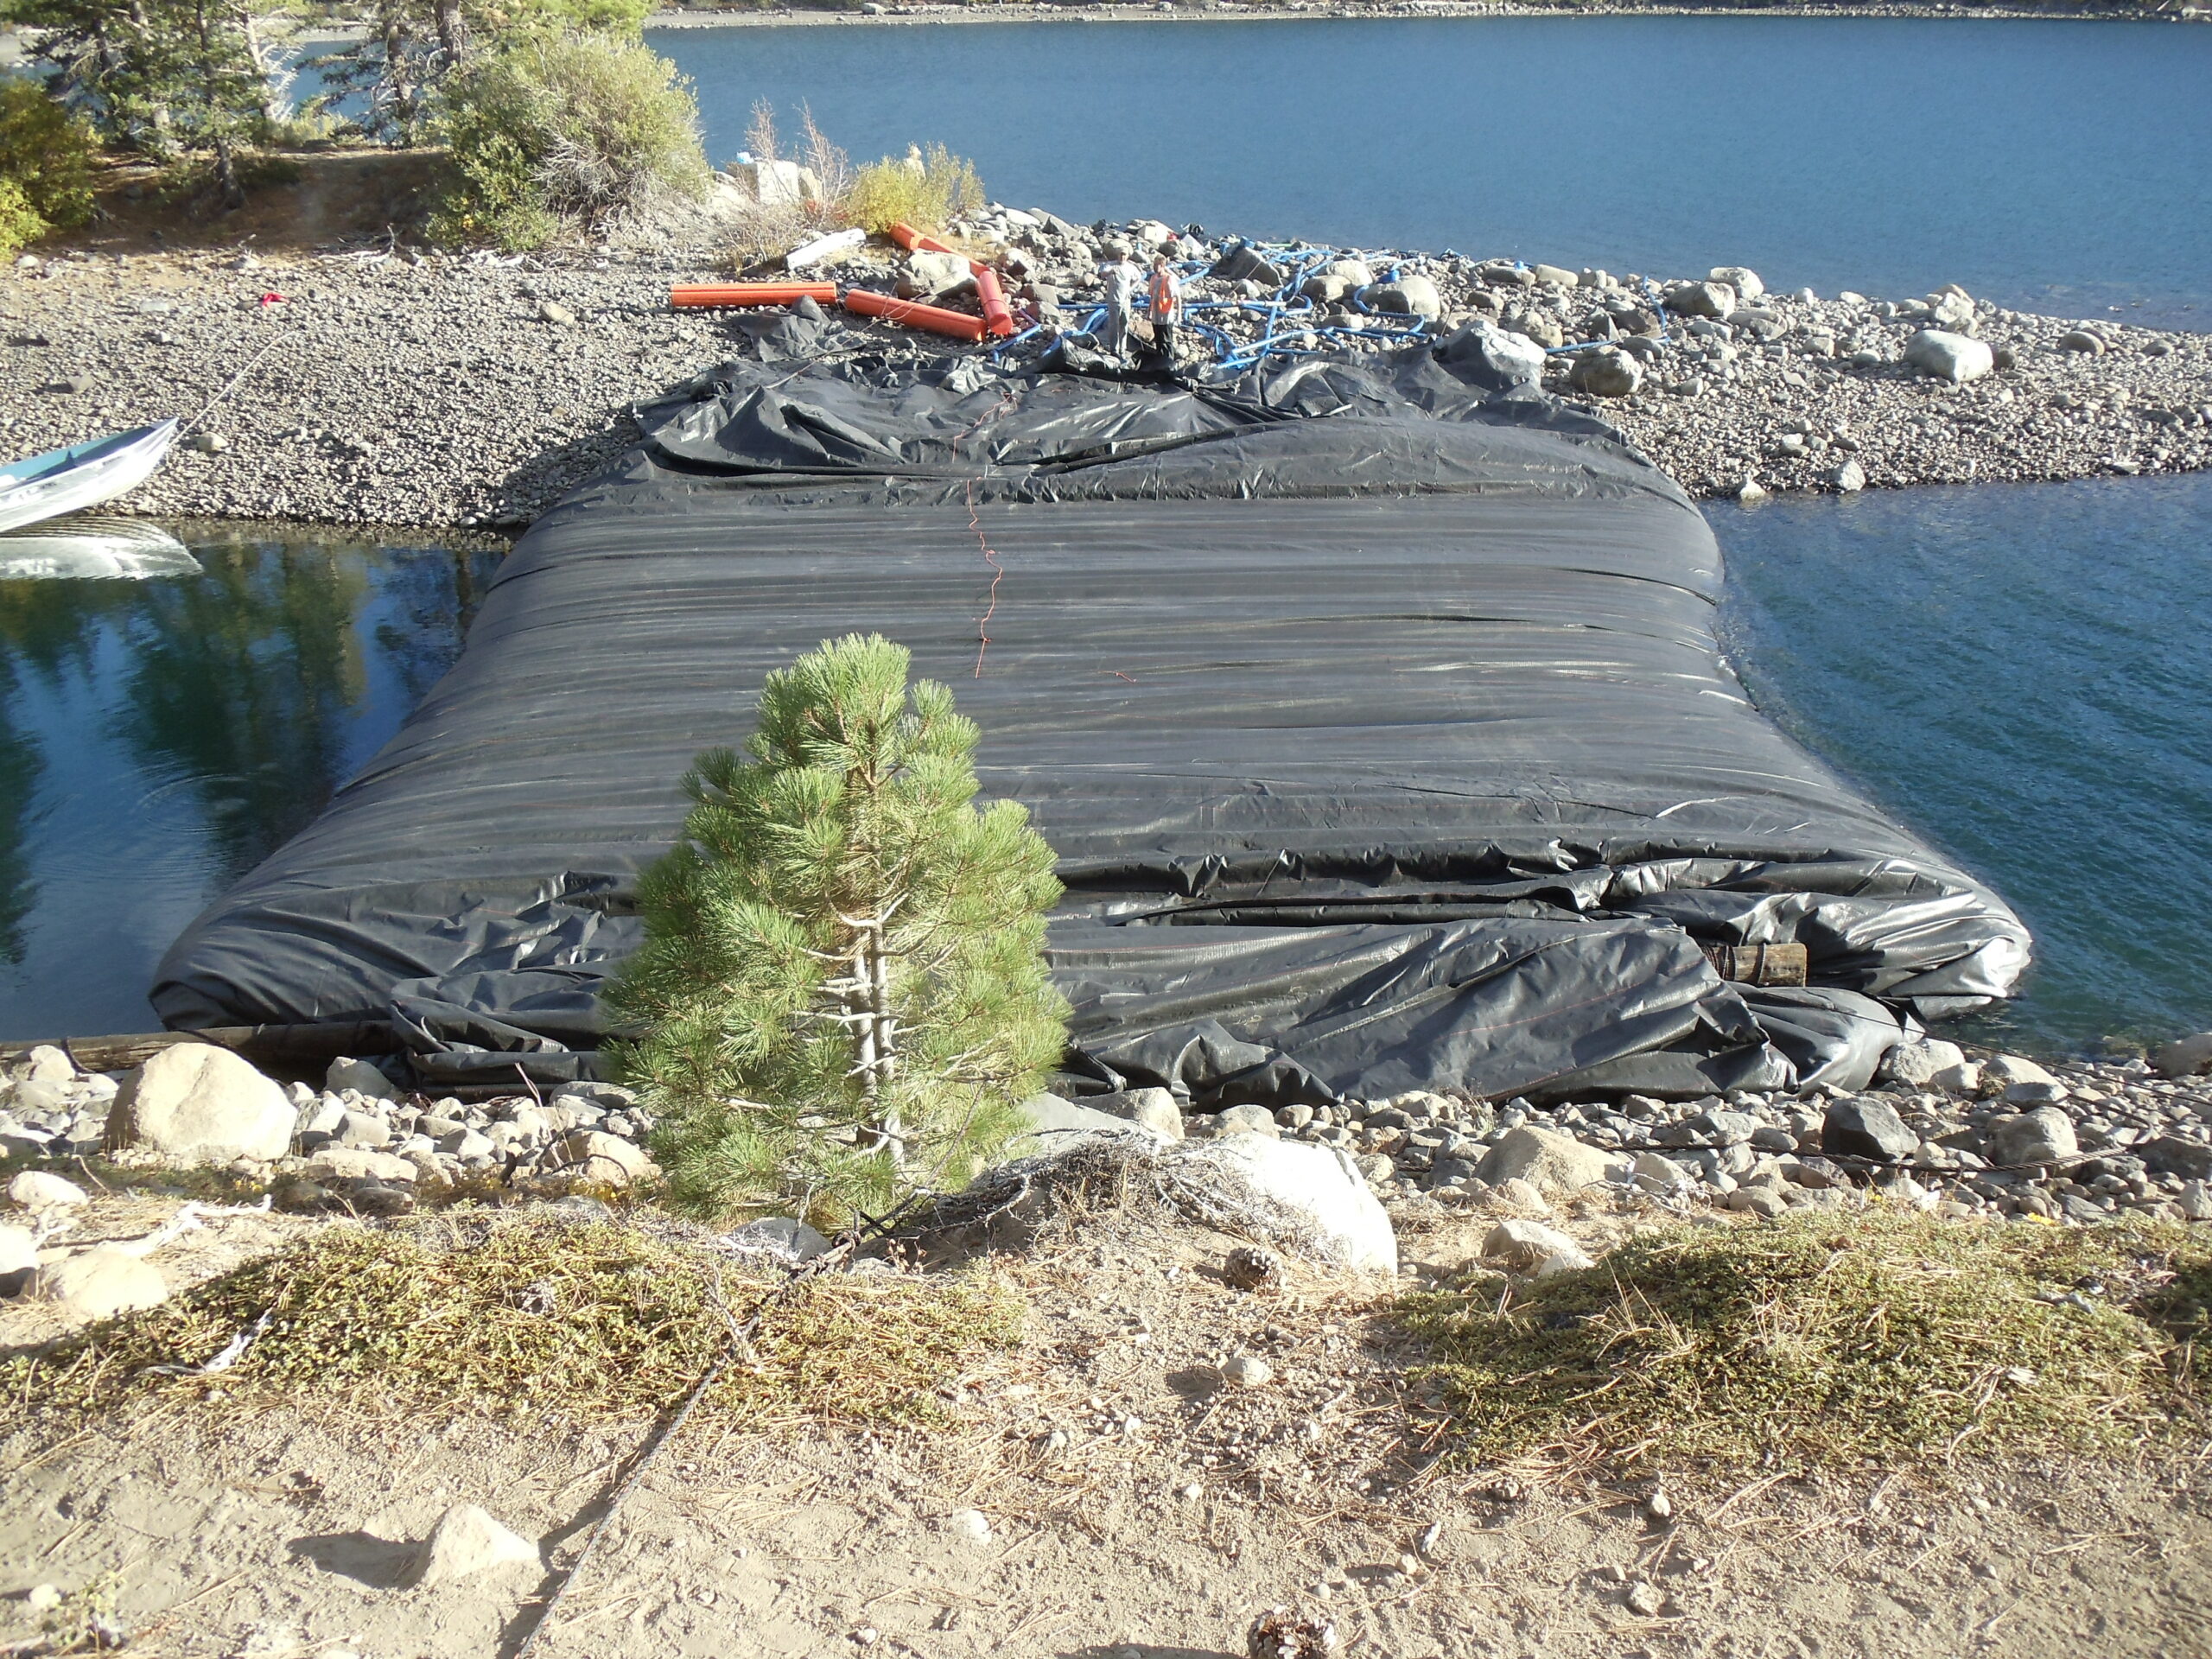
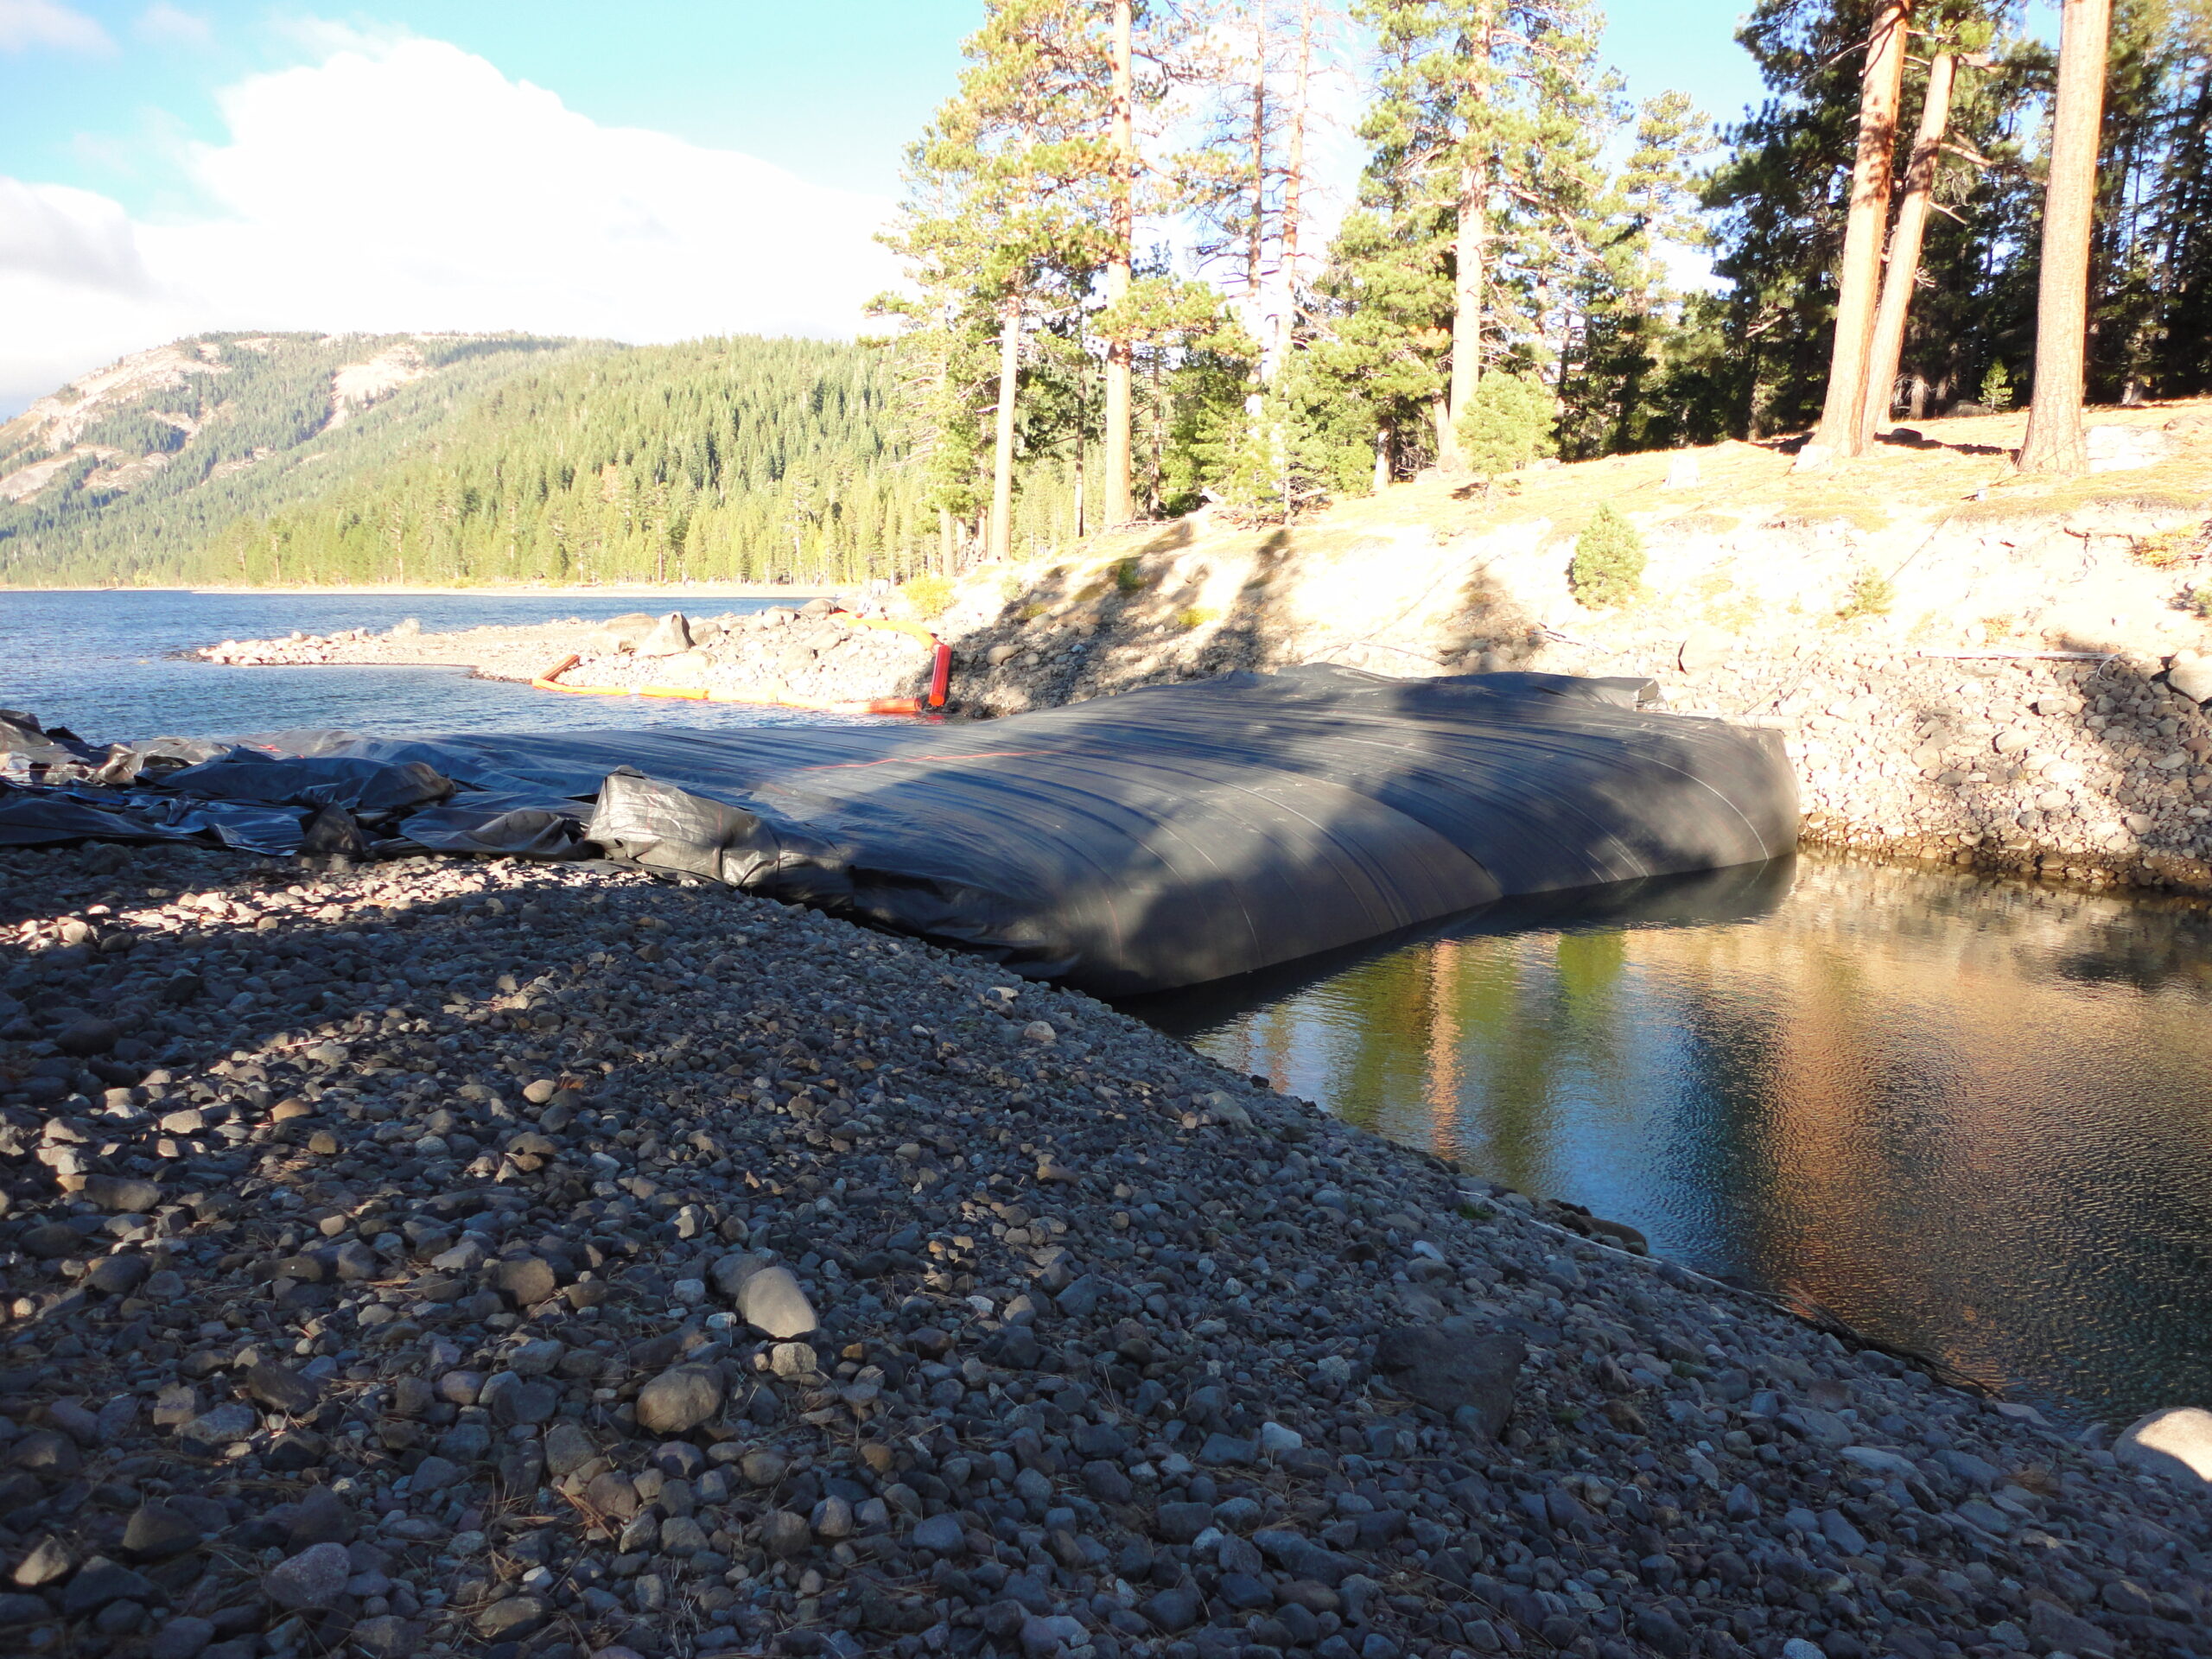
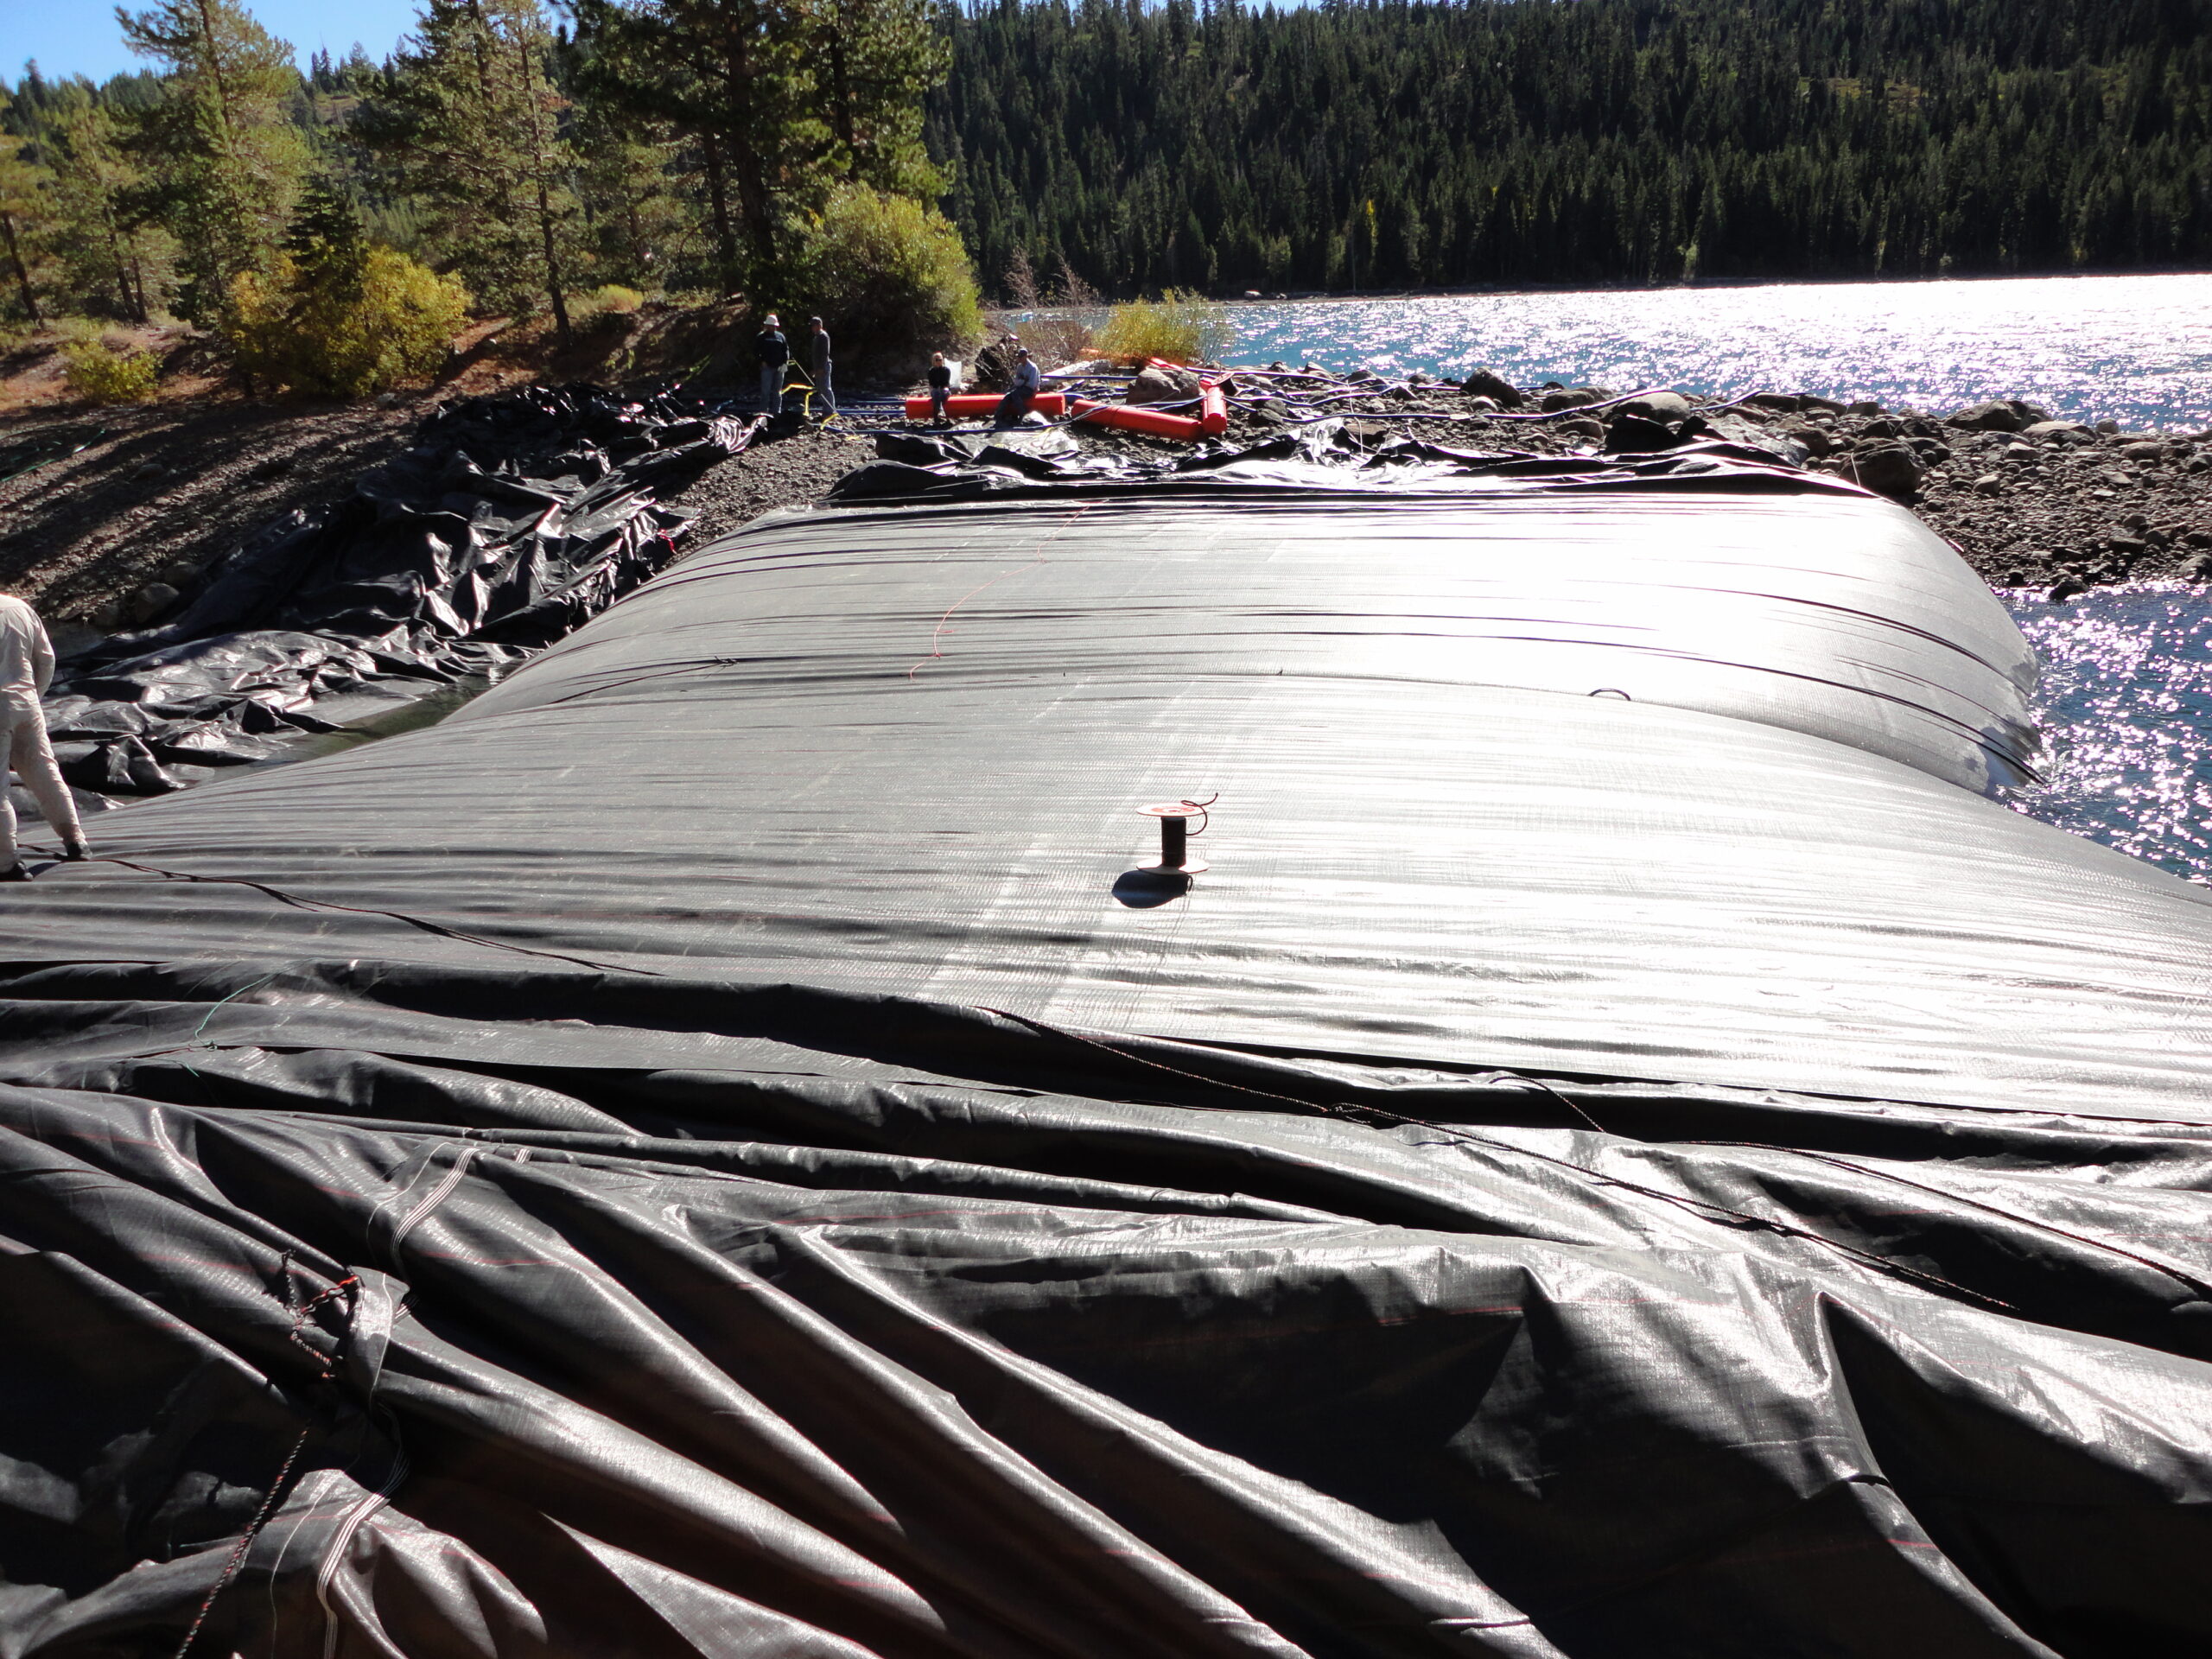
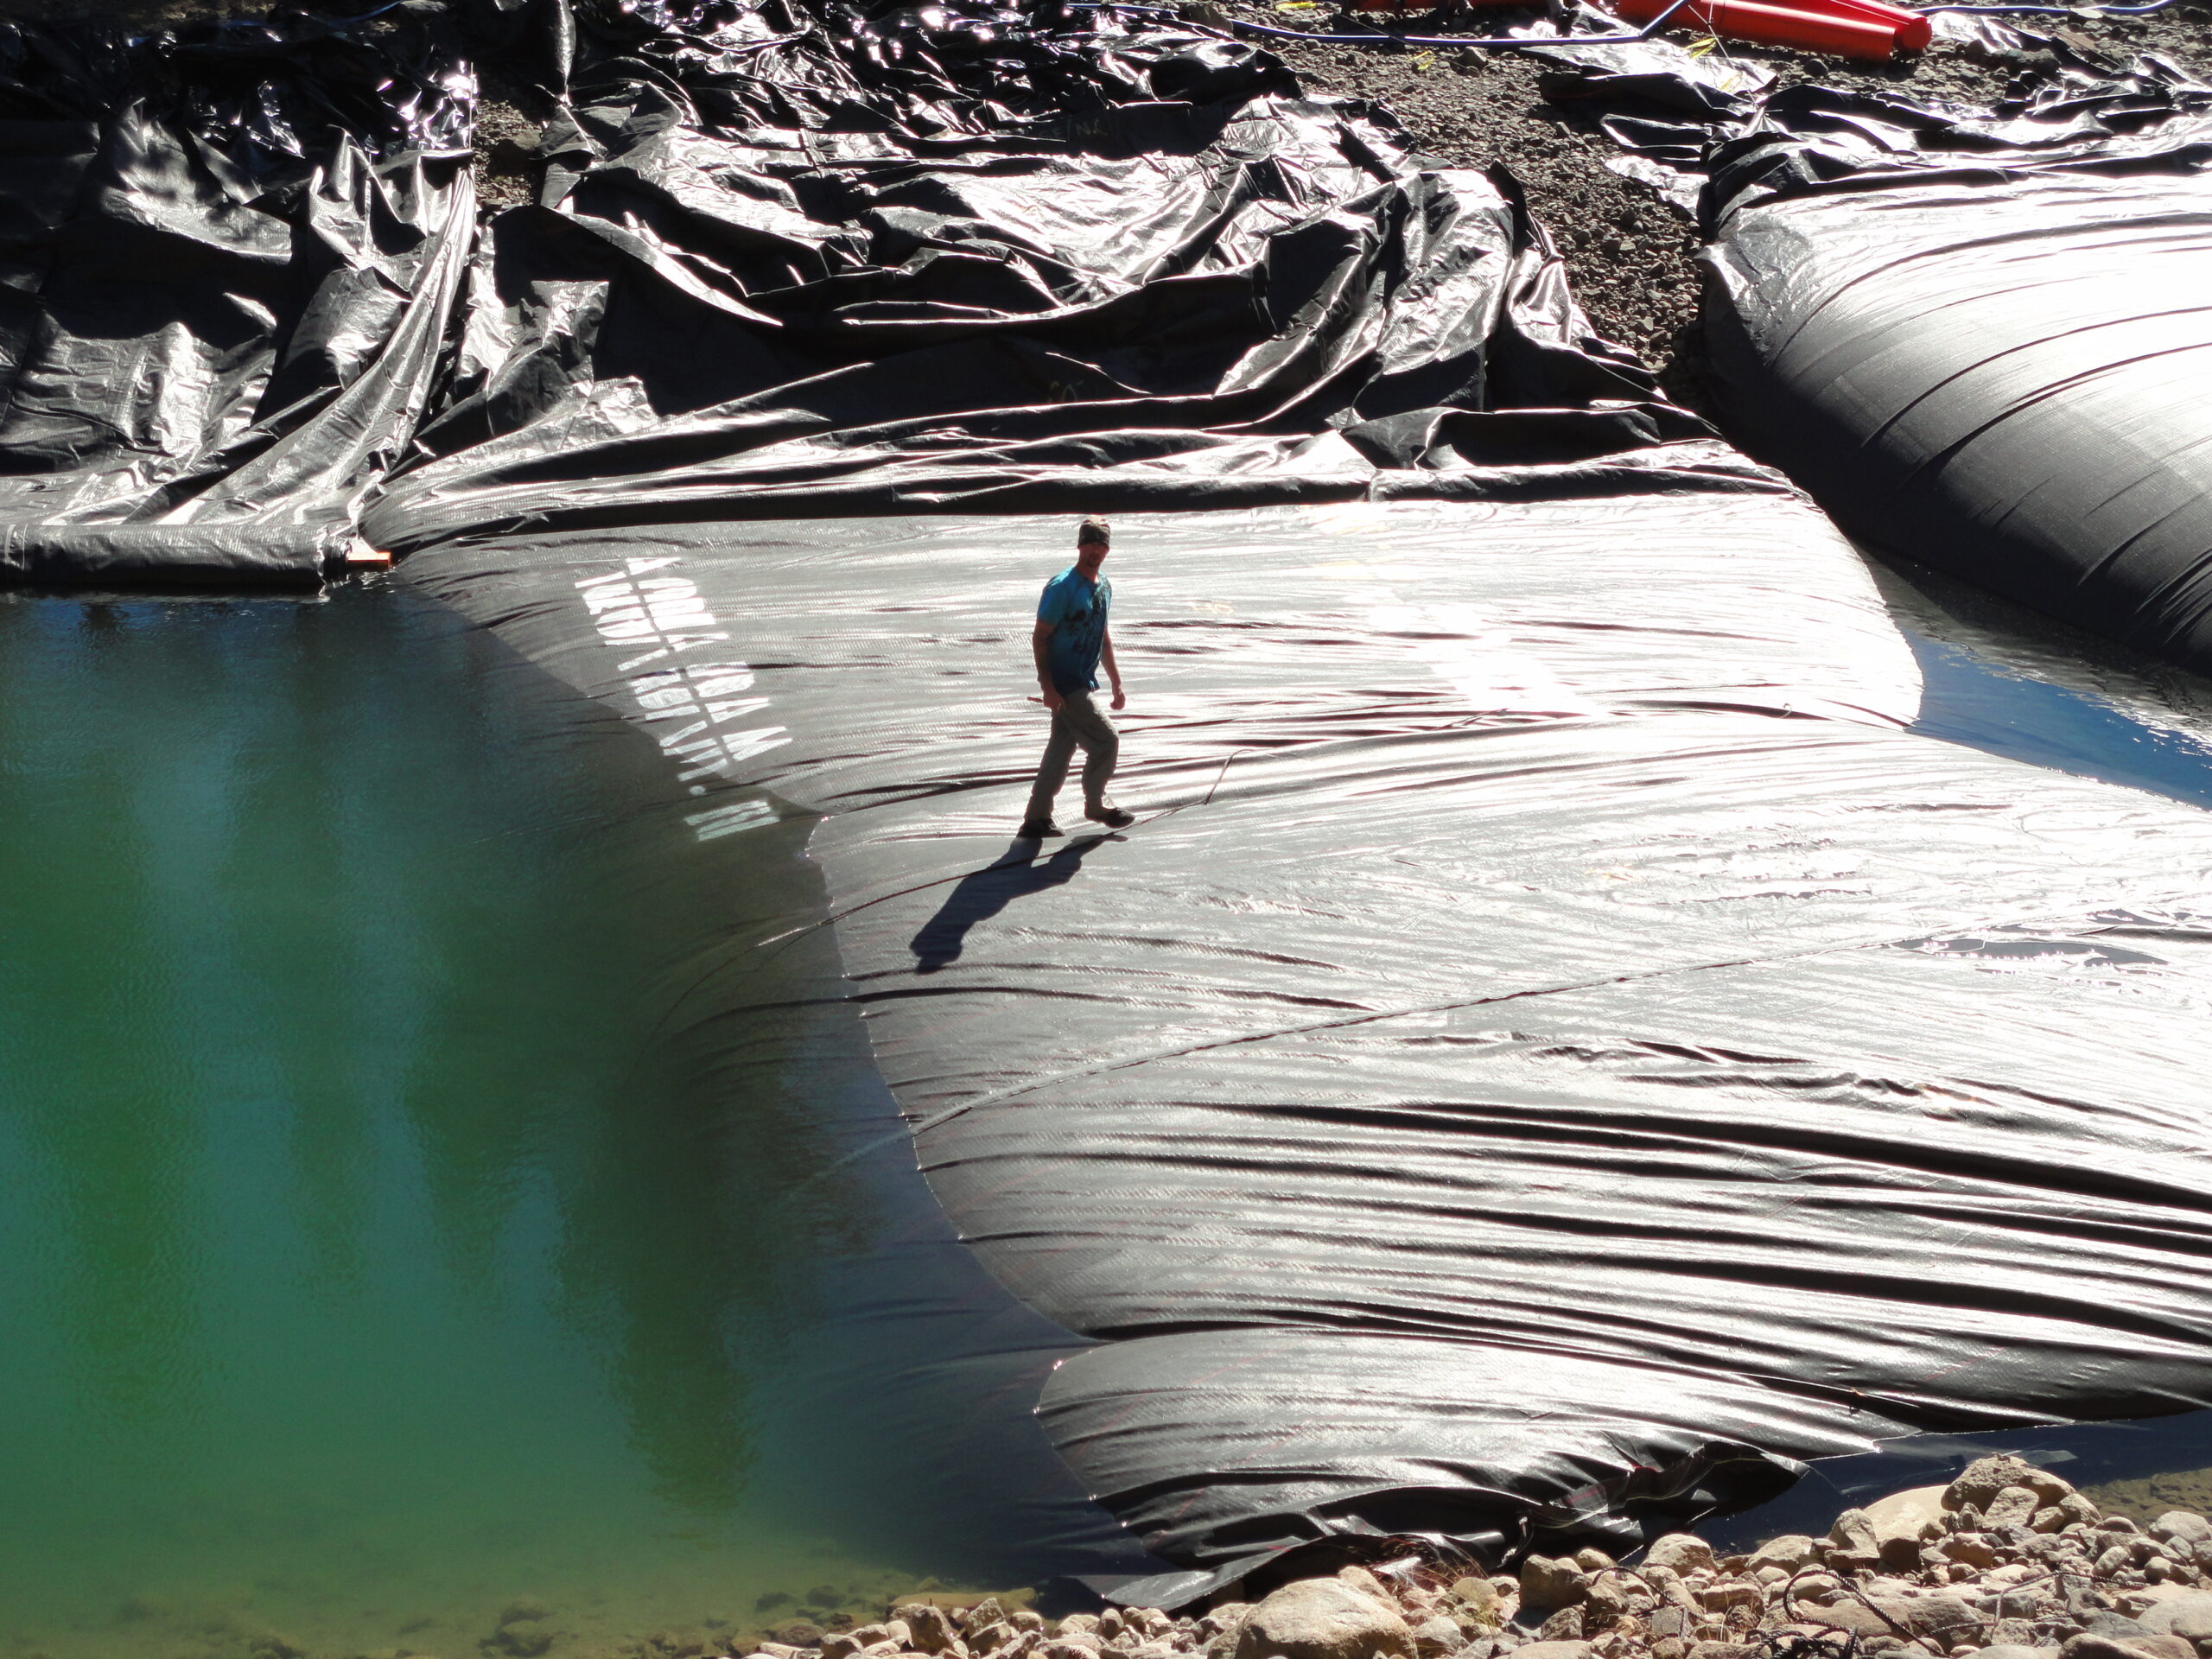
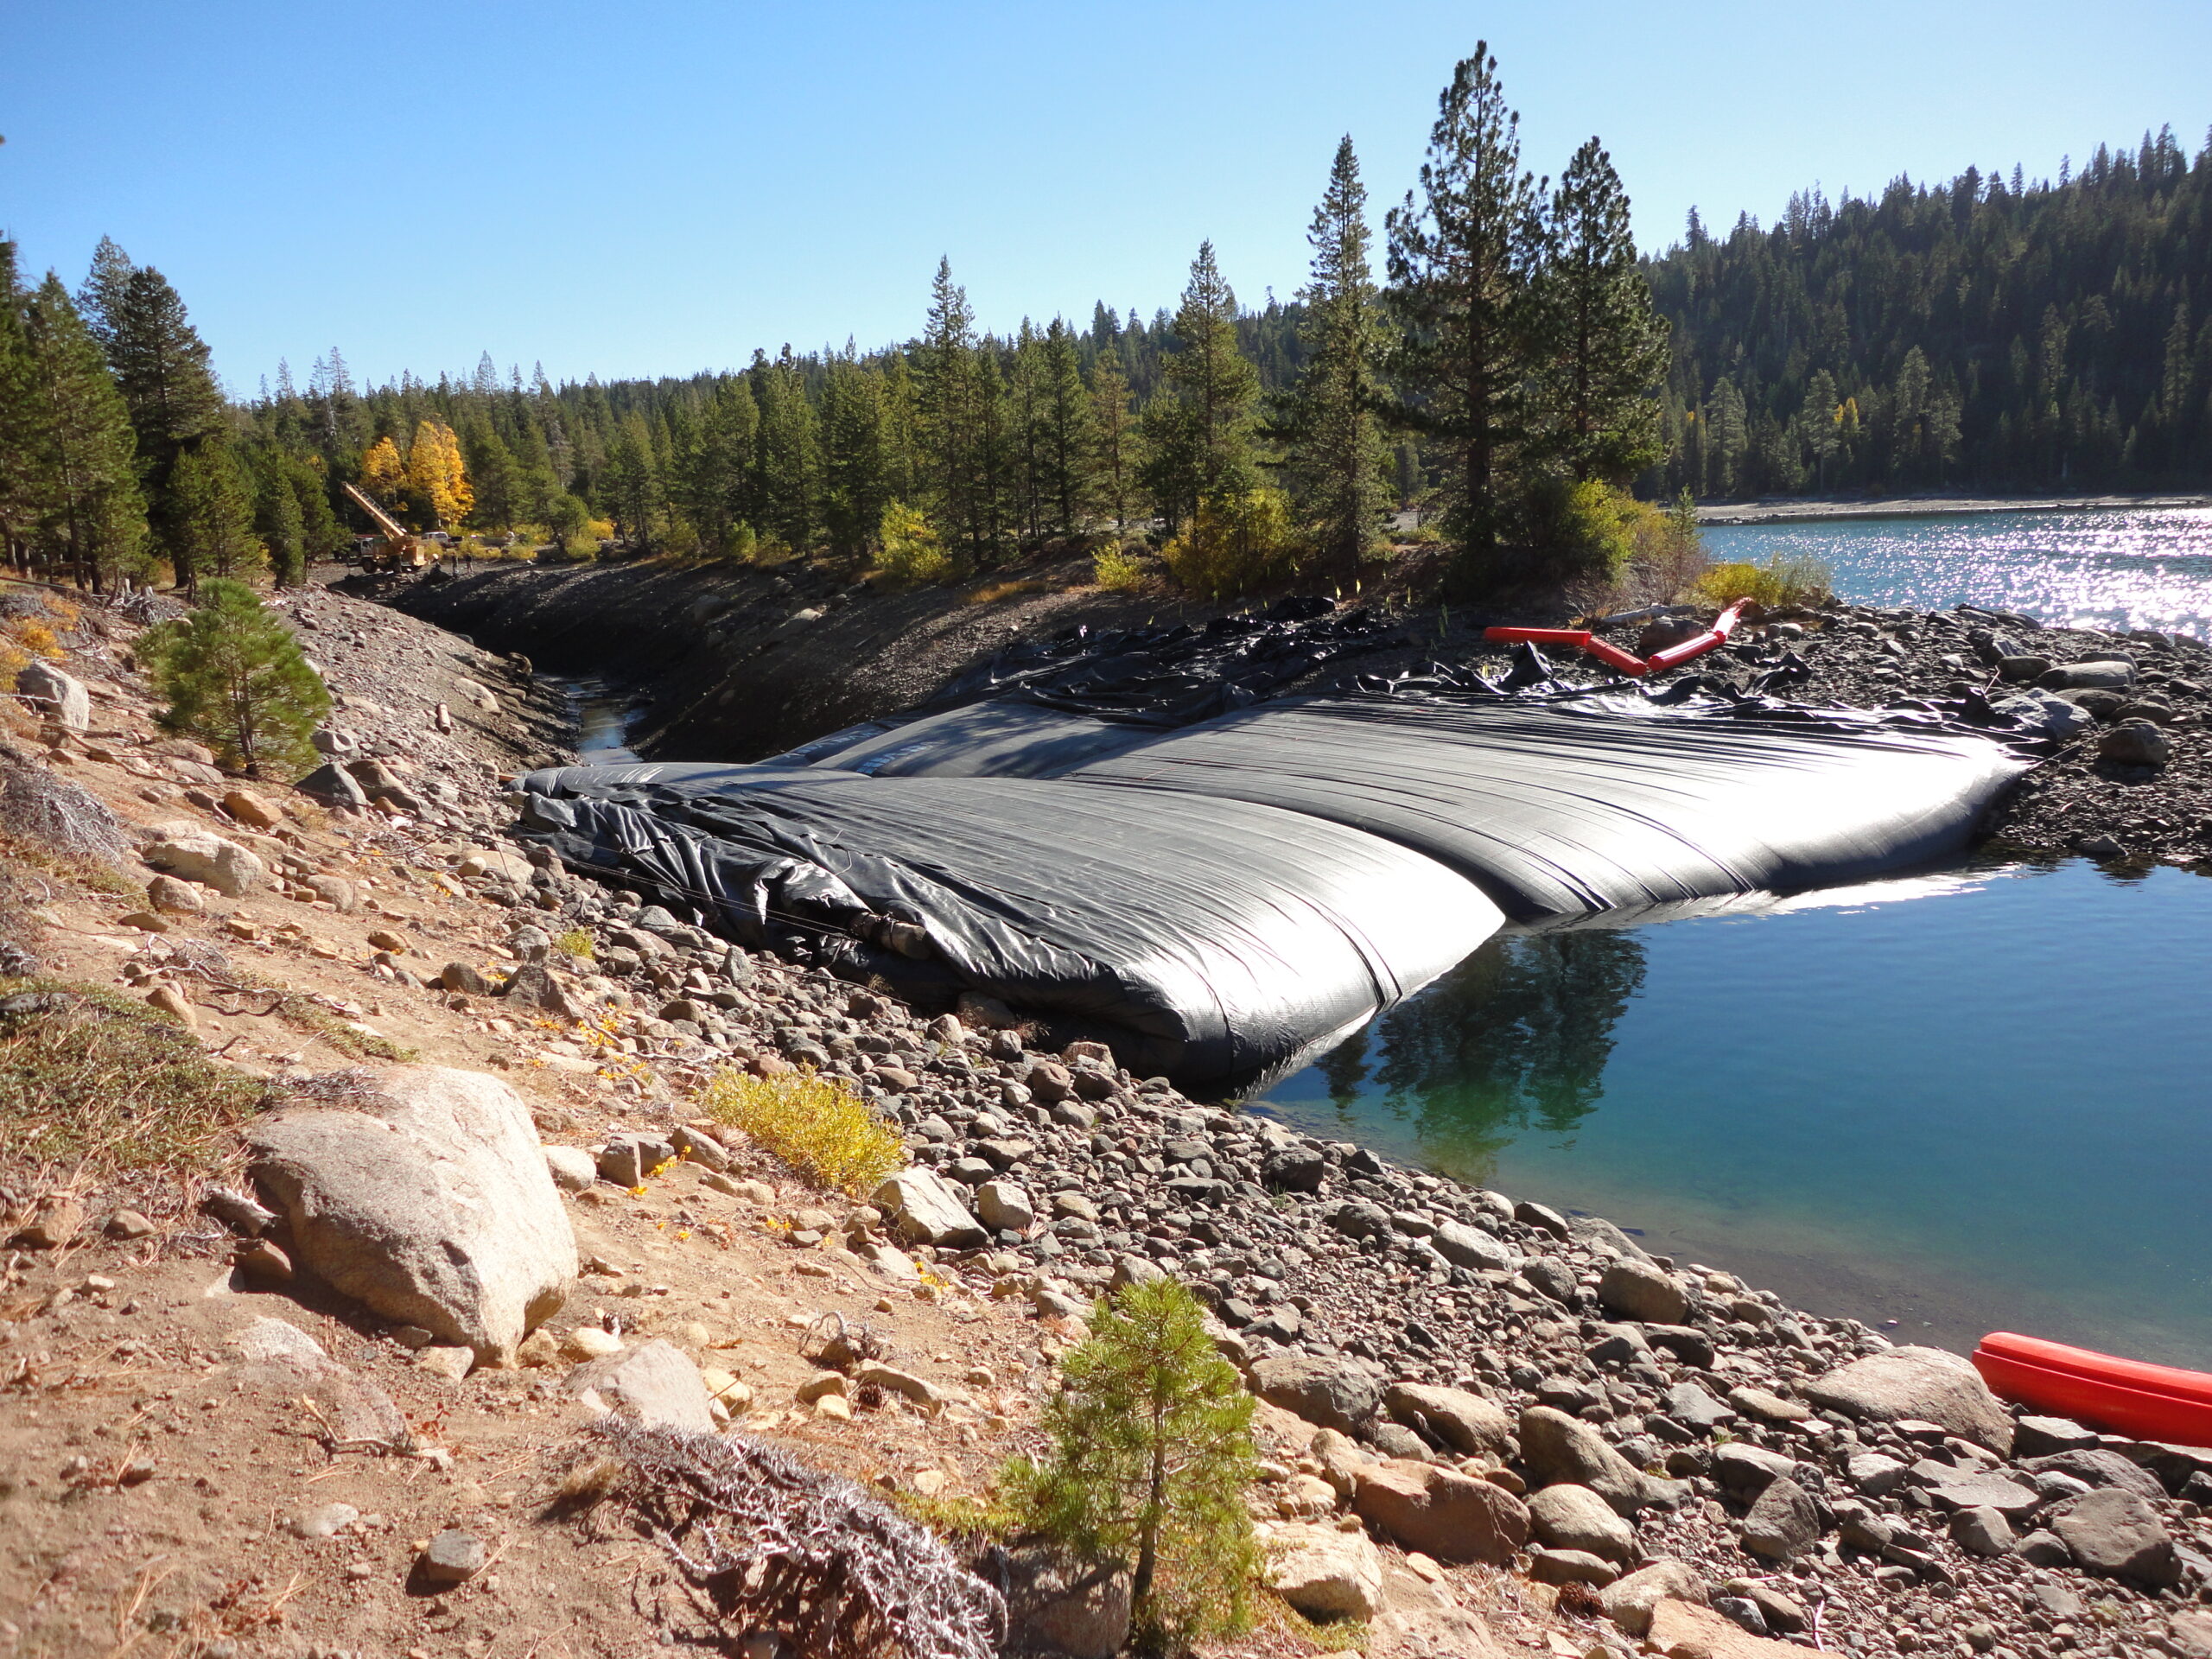
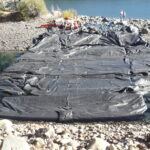
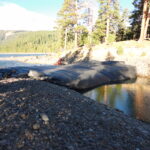
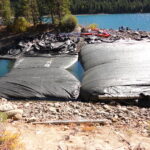
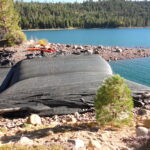
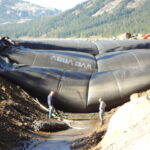
Here we can see the 21ft tall primary AquaDam installed in 15ft of water, at the mouth of the intake canal.
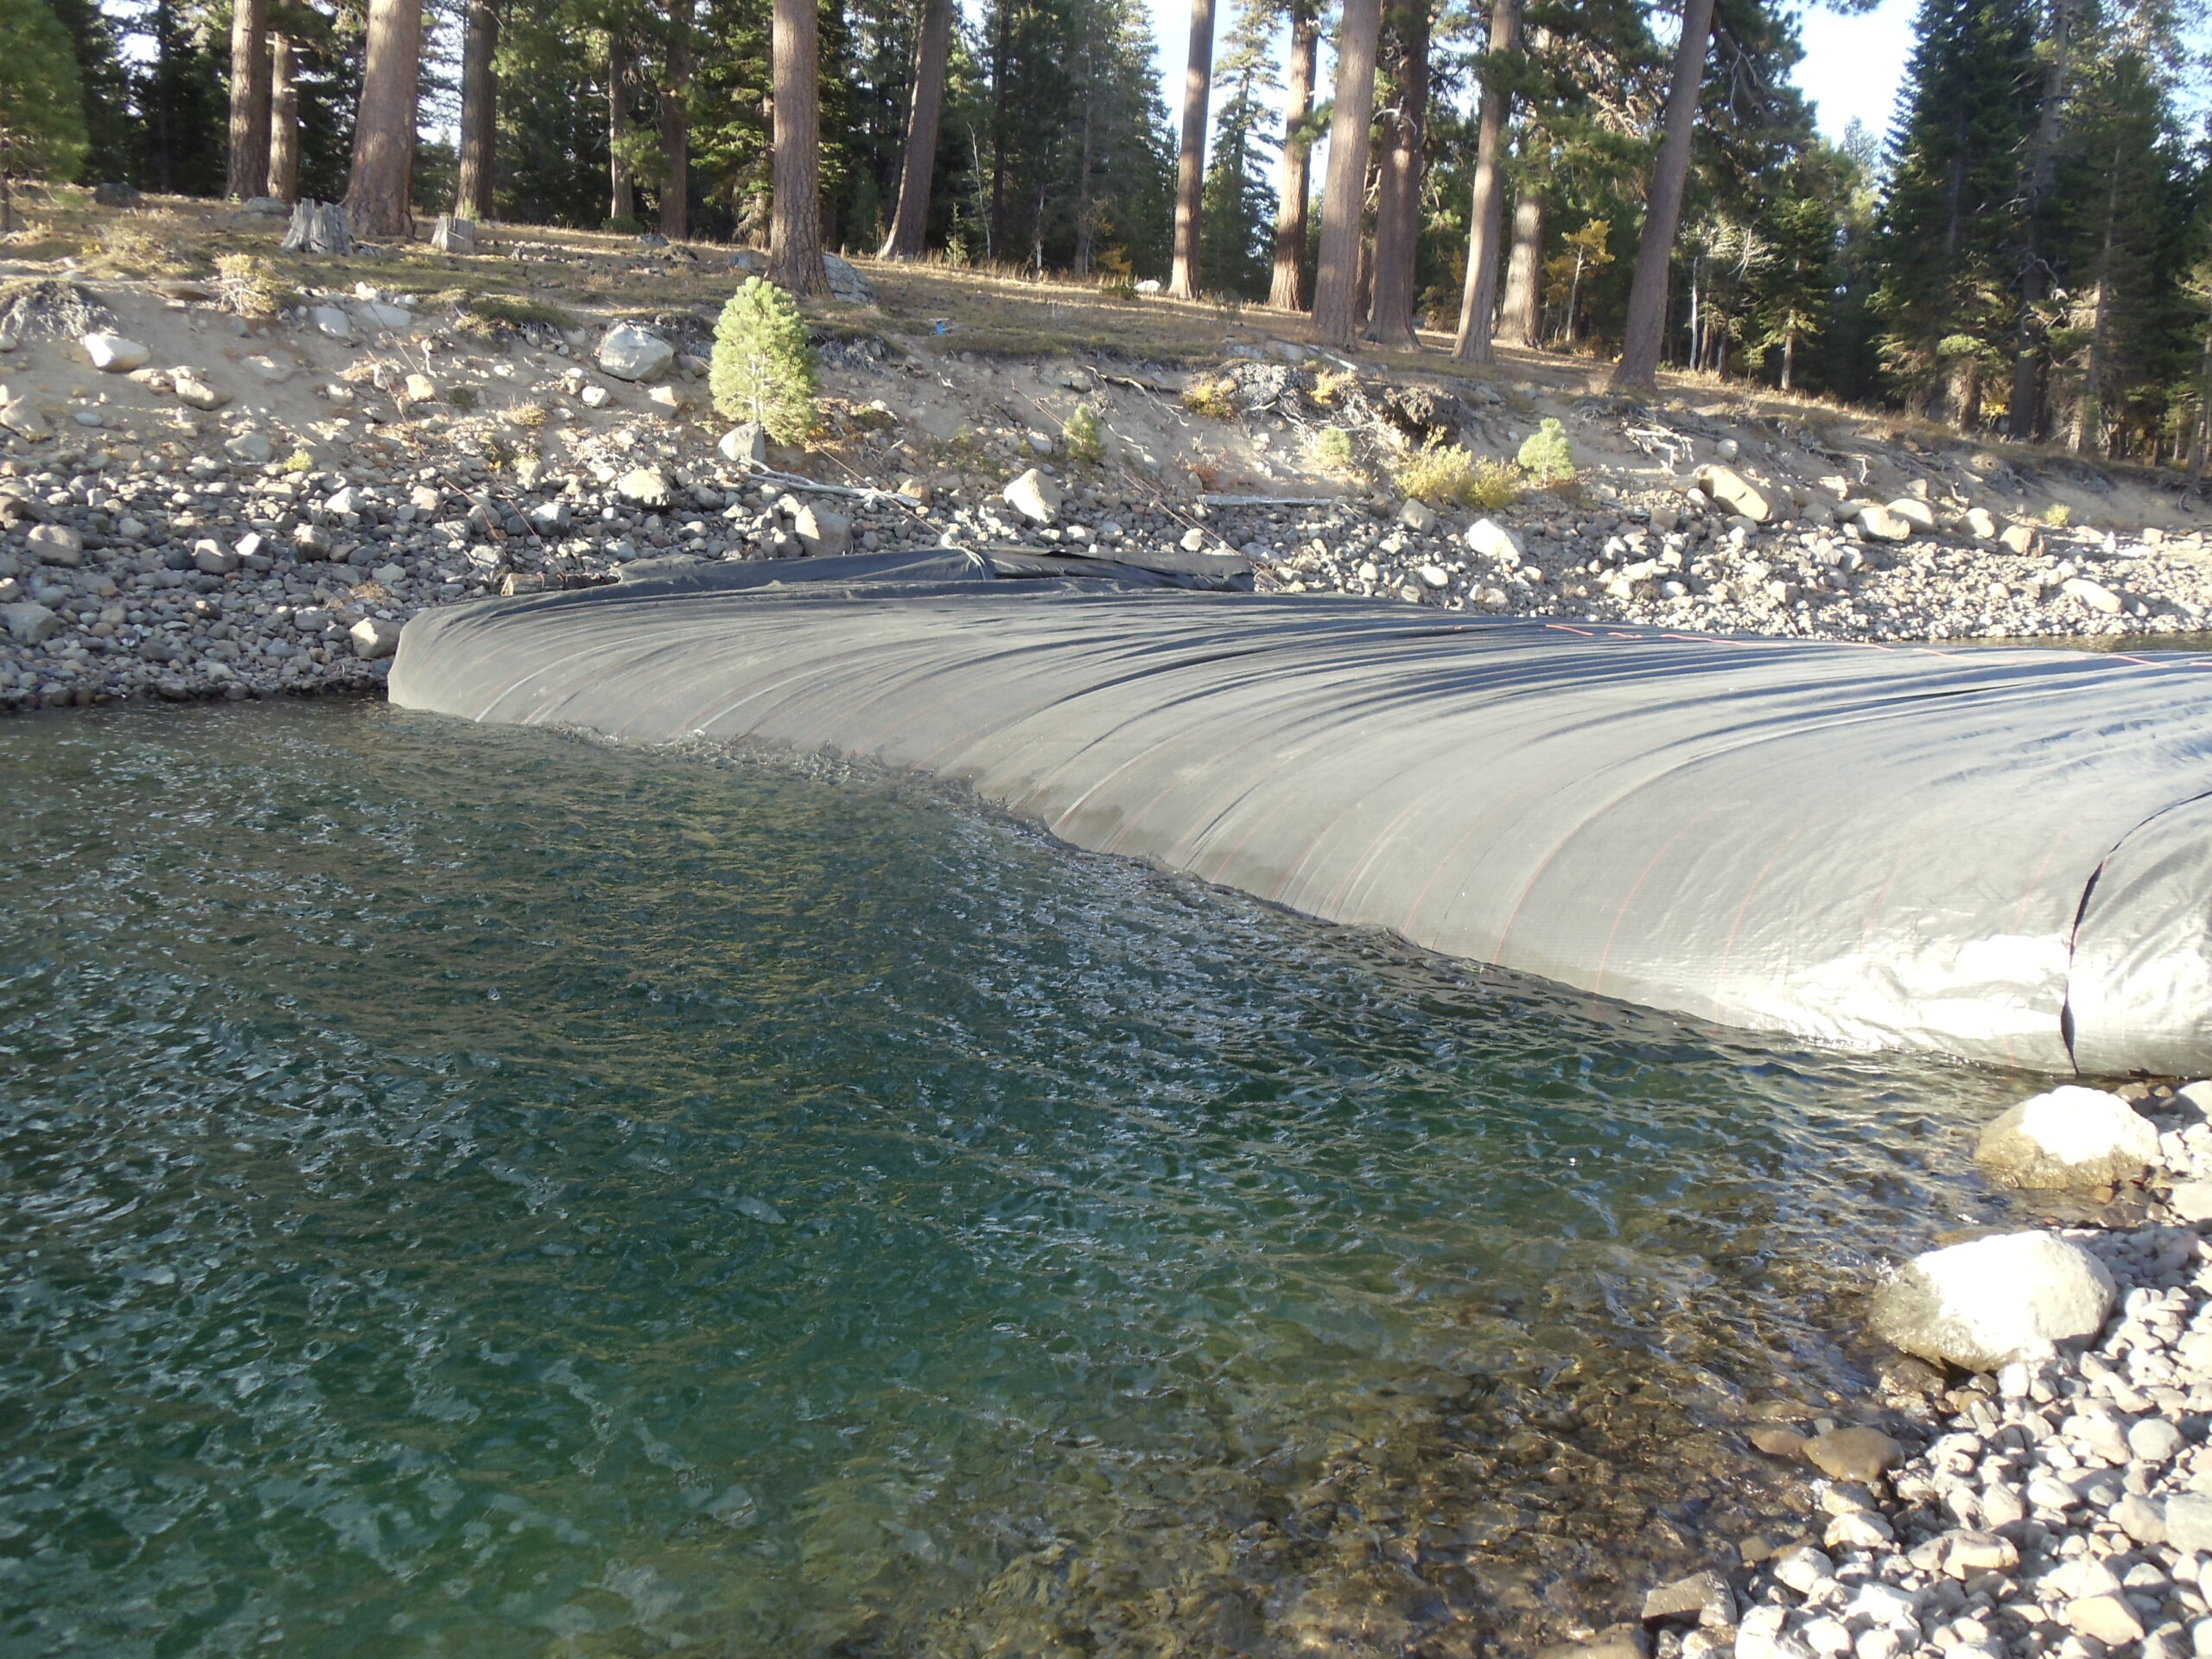
Another photo of the 21ft tall AquaDam after the unit was installed.
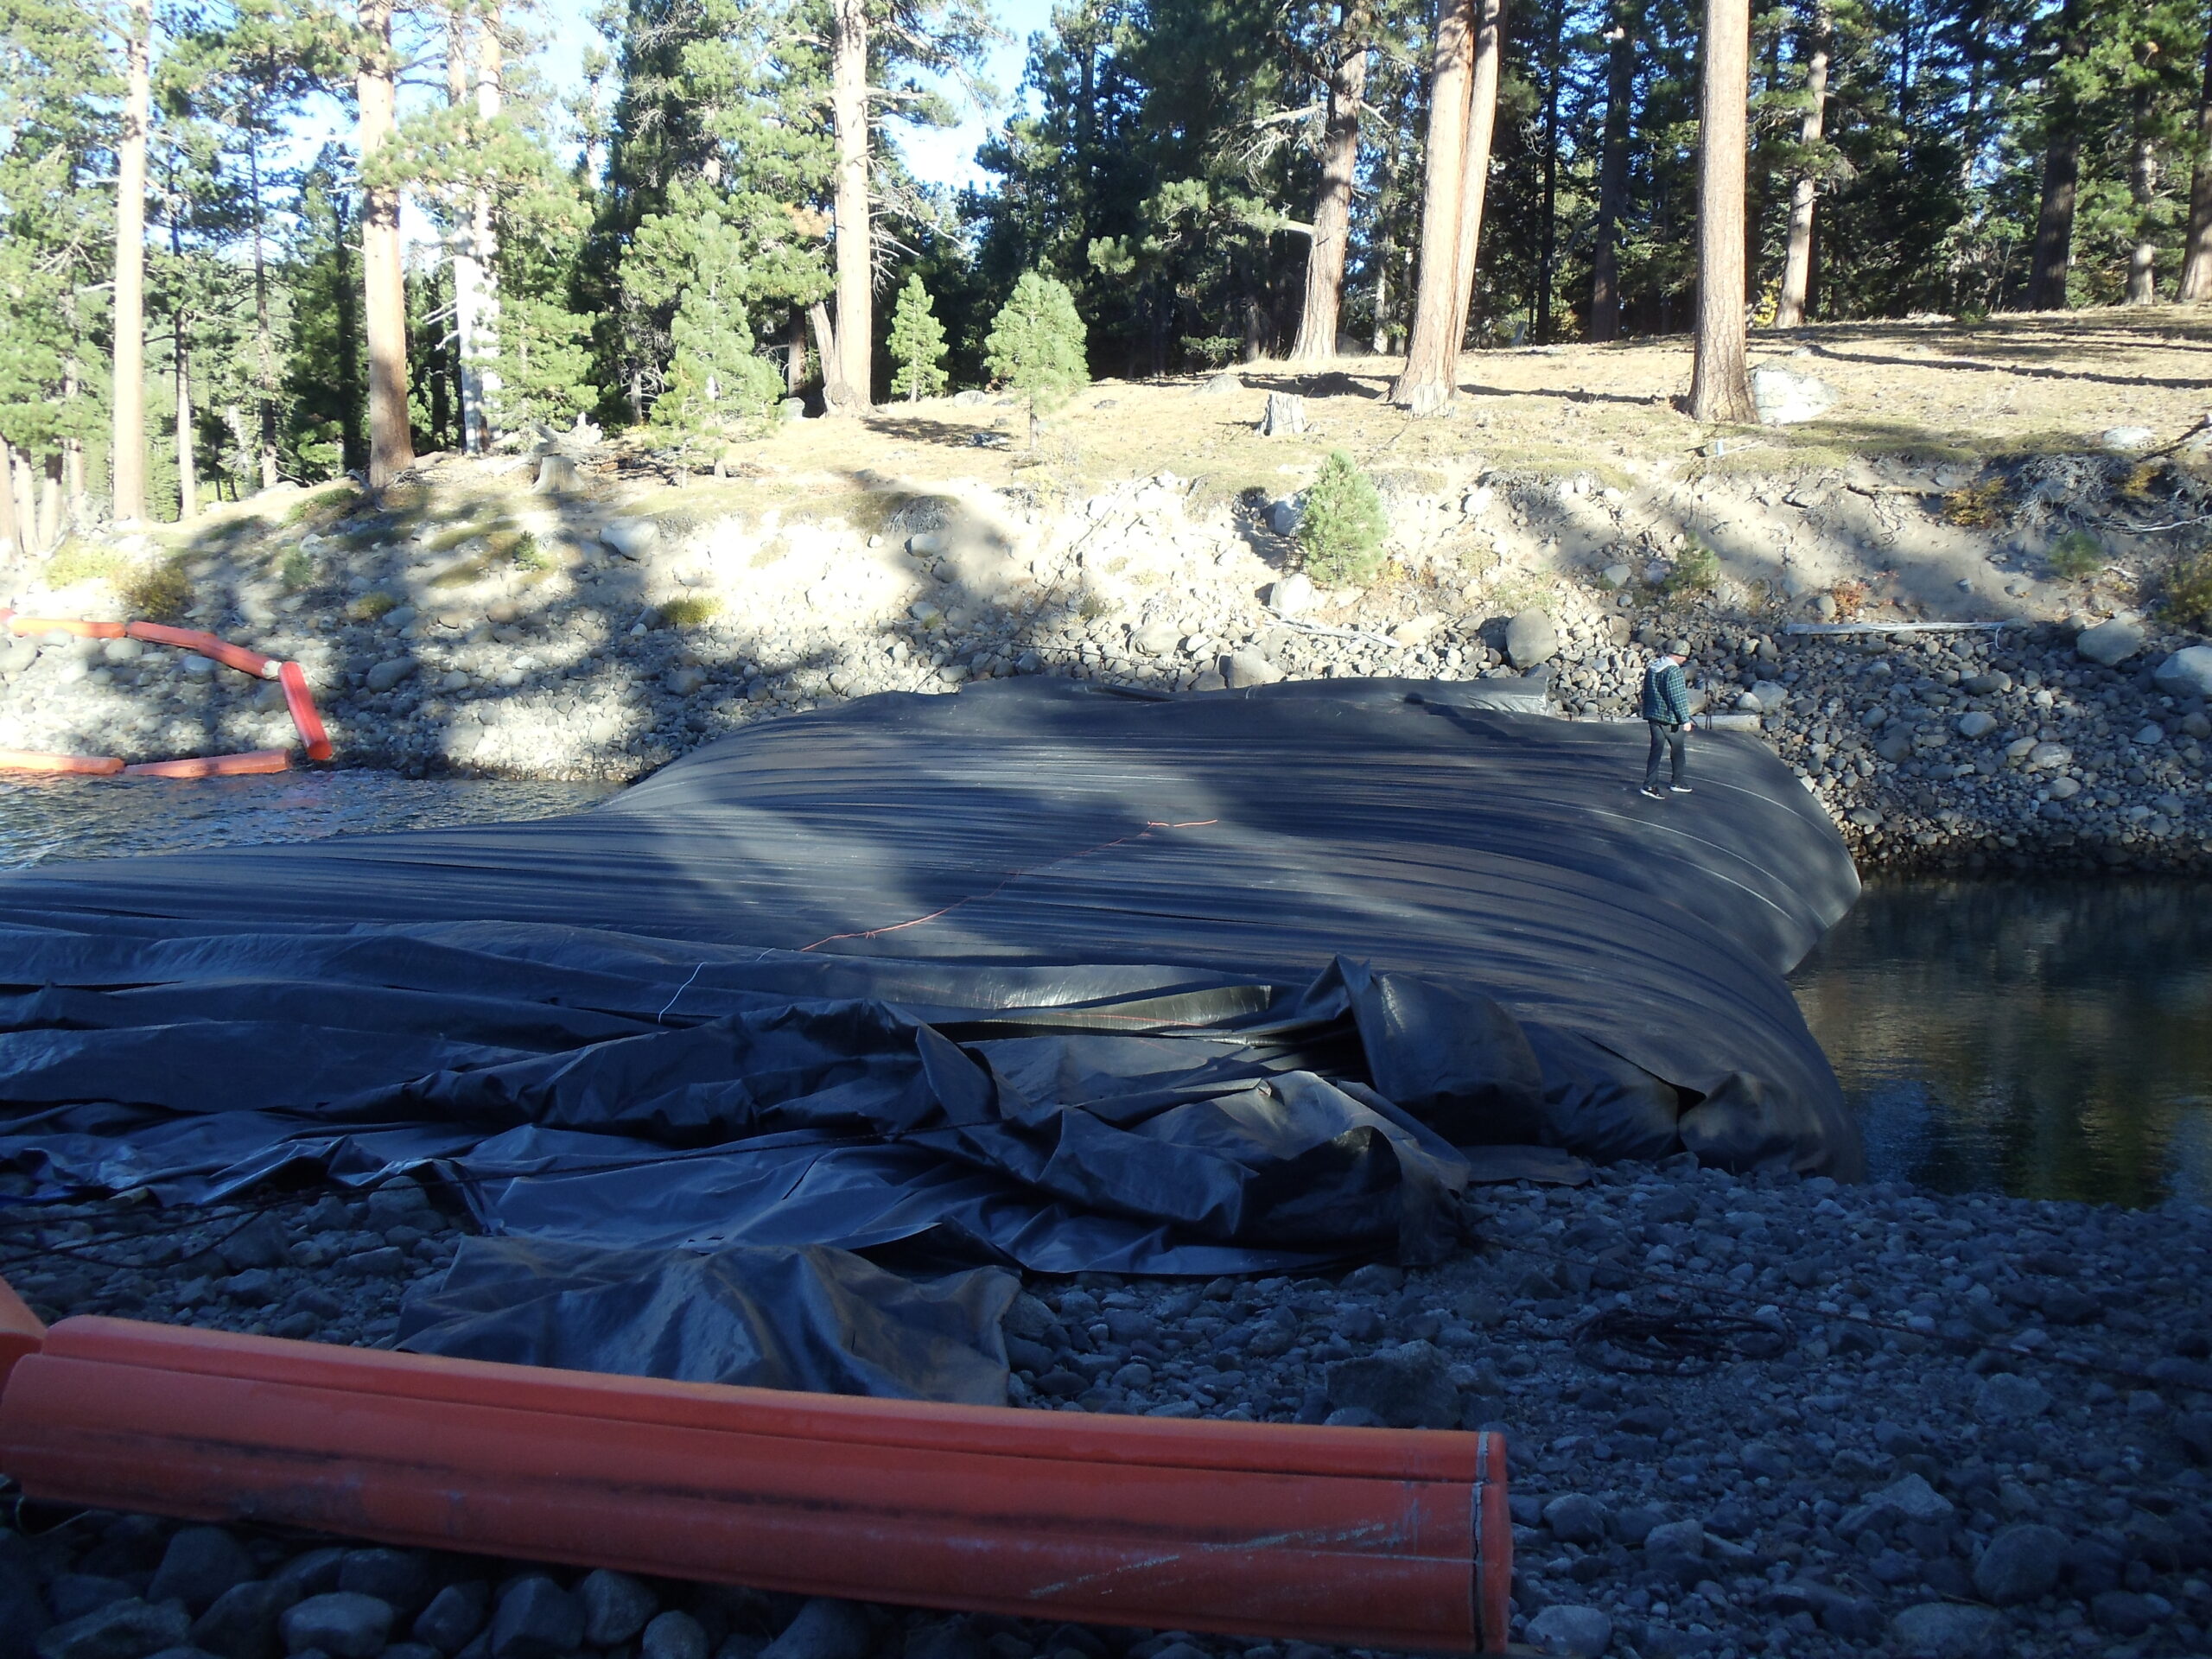
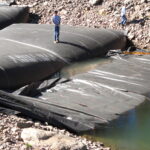
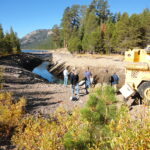
A worker, verifies that the 21ft tall primary AquaDam has not moved and that the area is ready for the next two (2) support AquaDams.
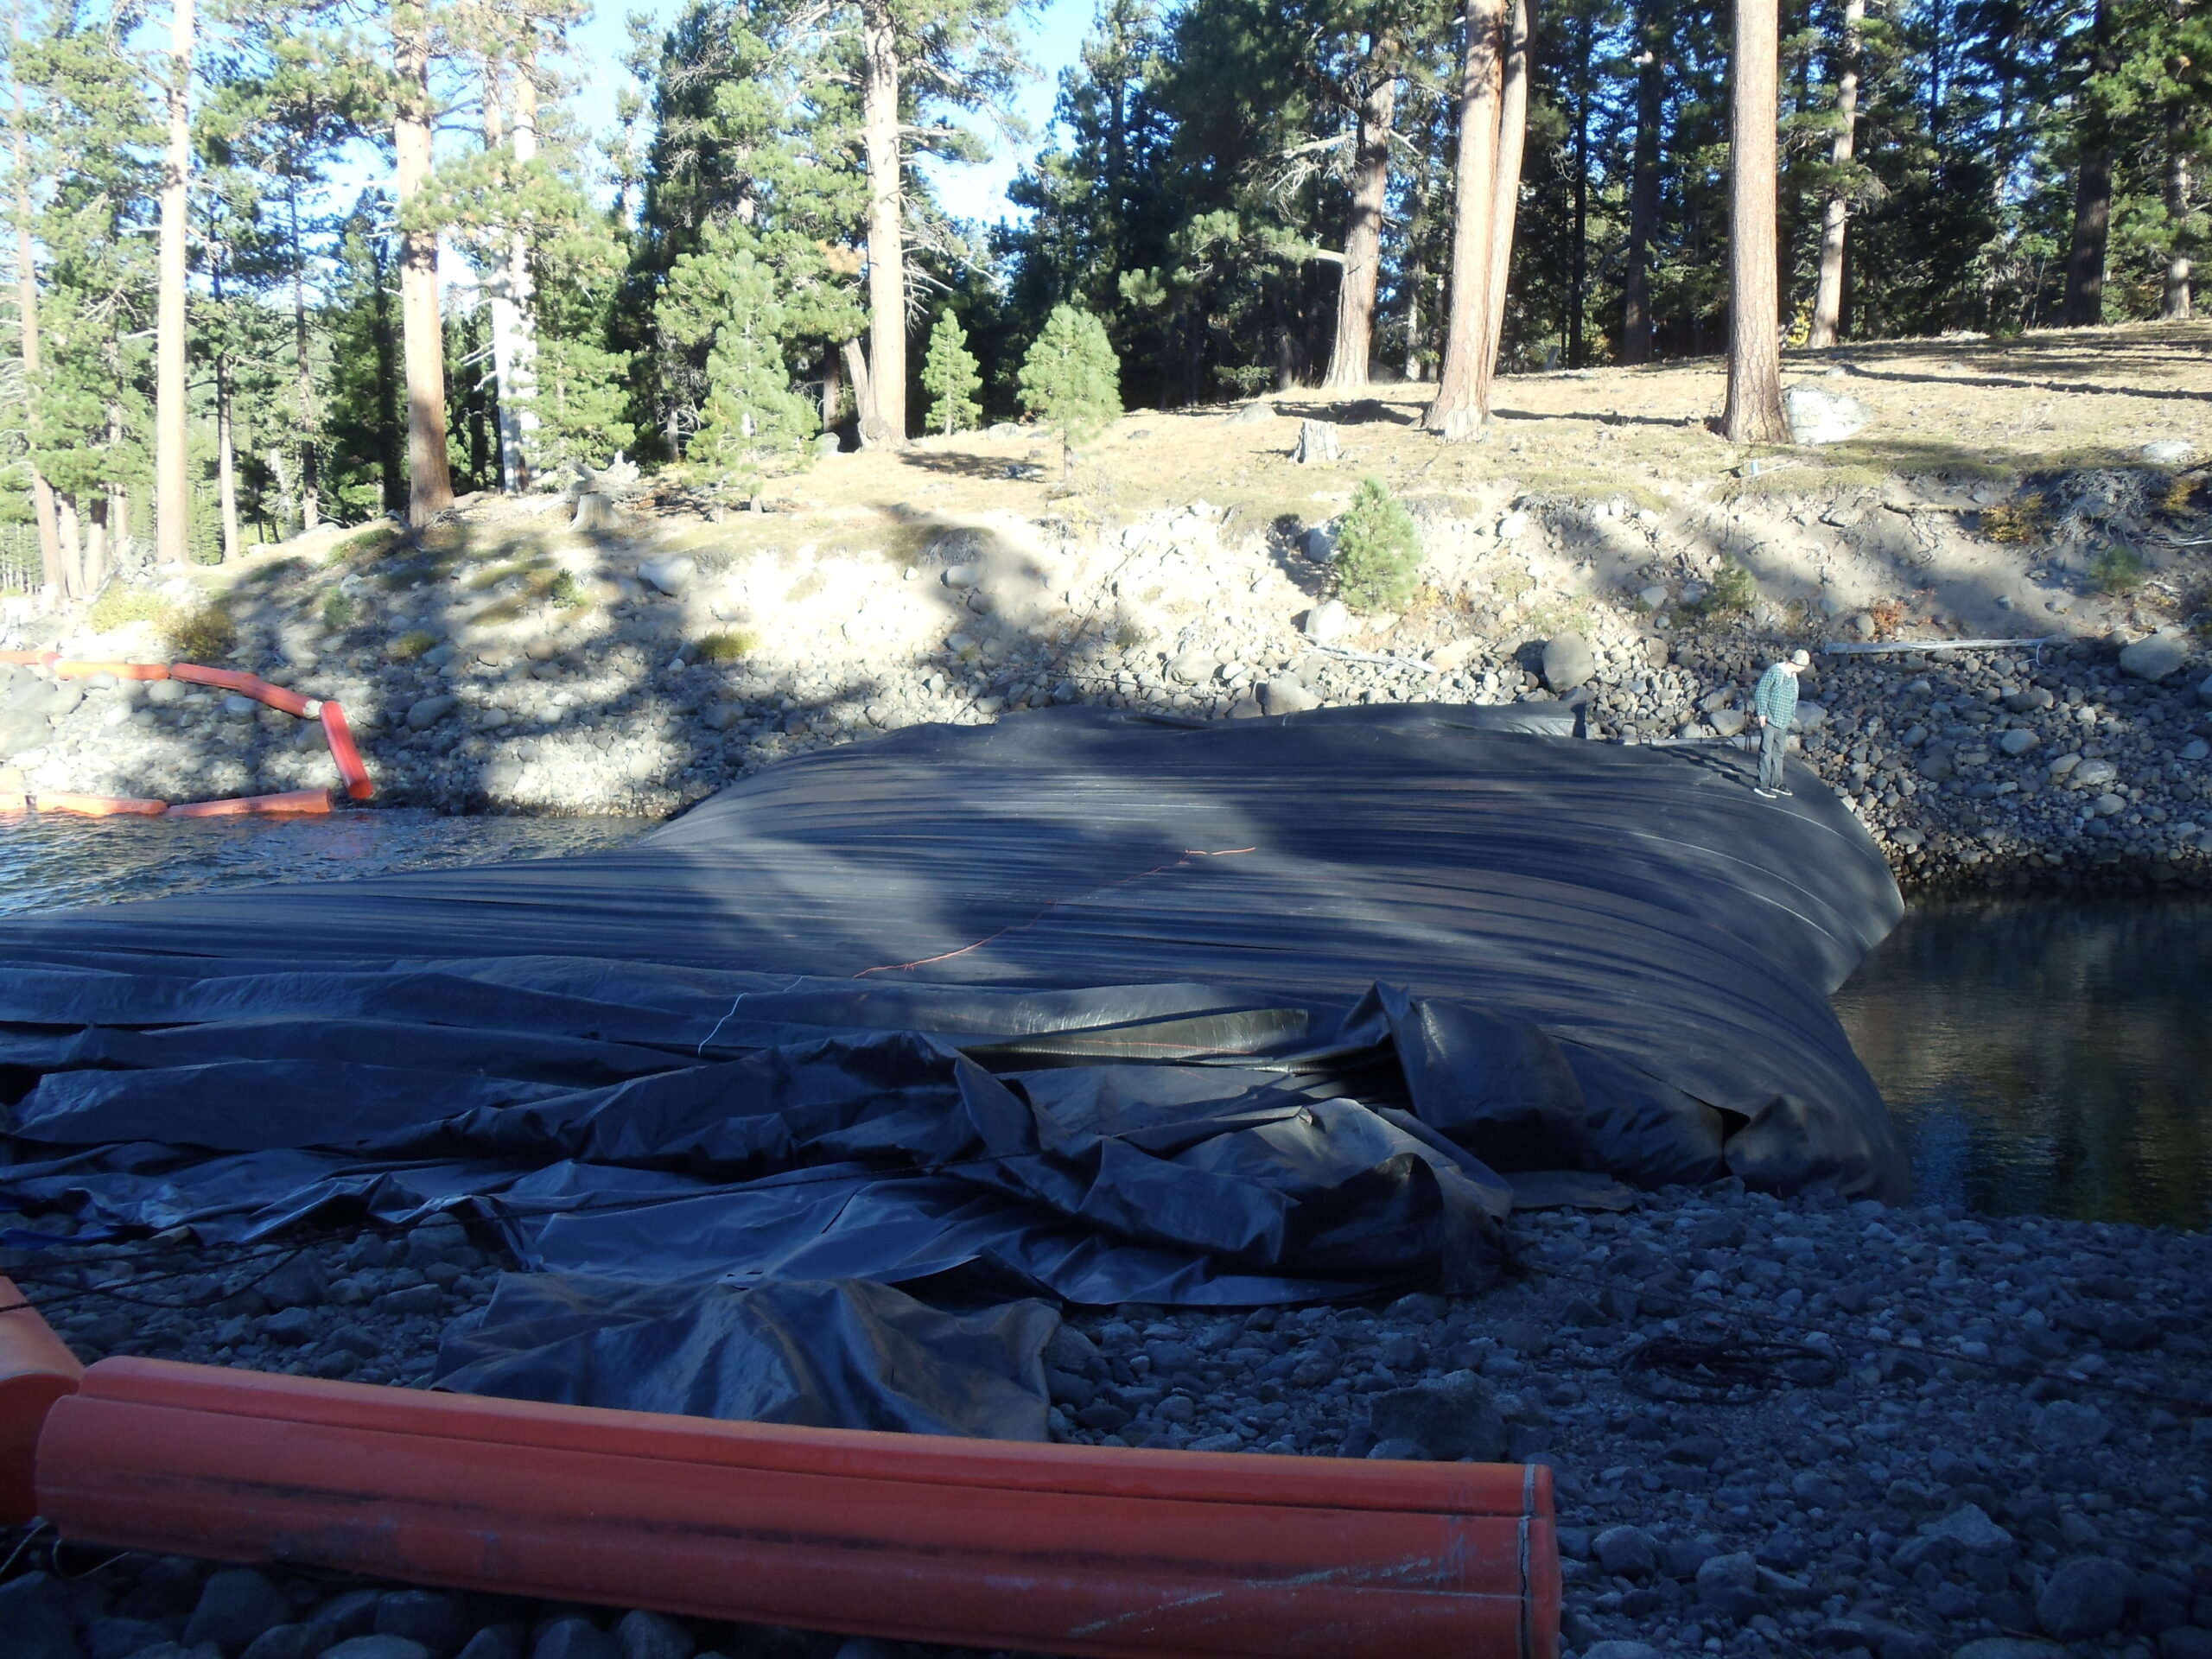
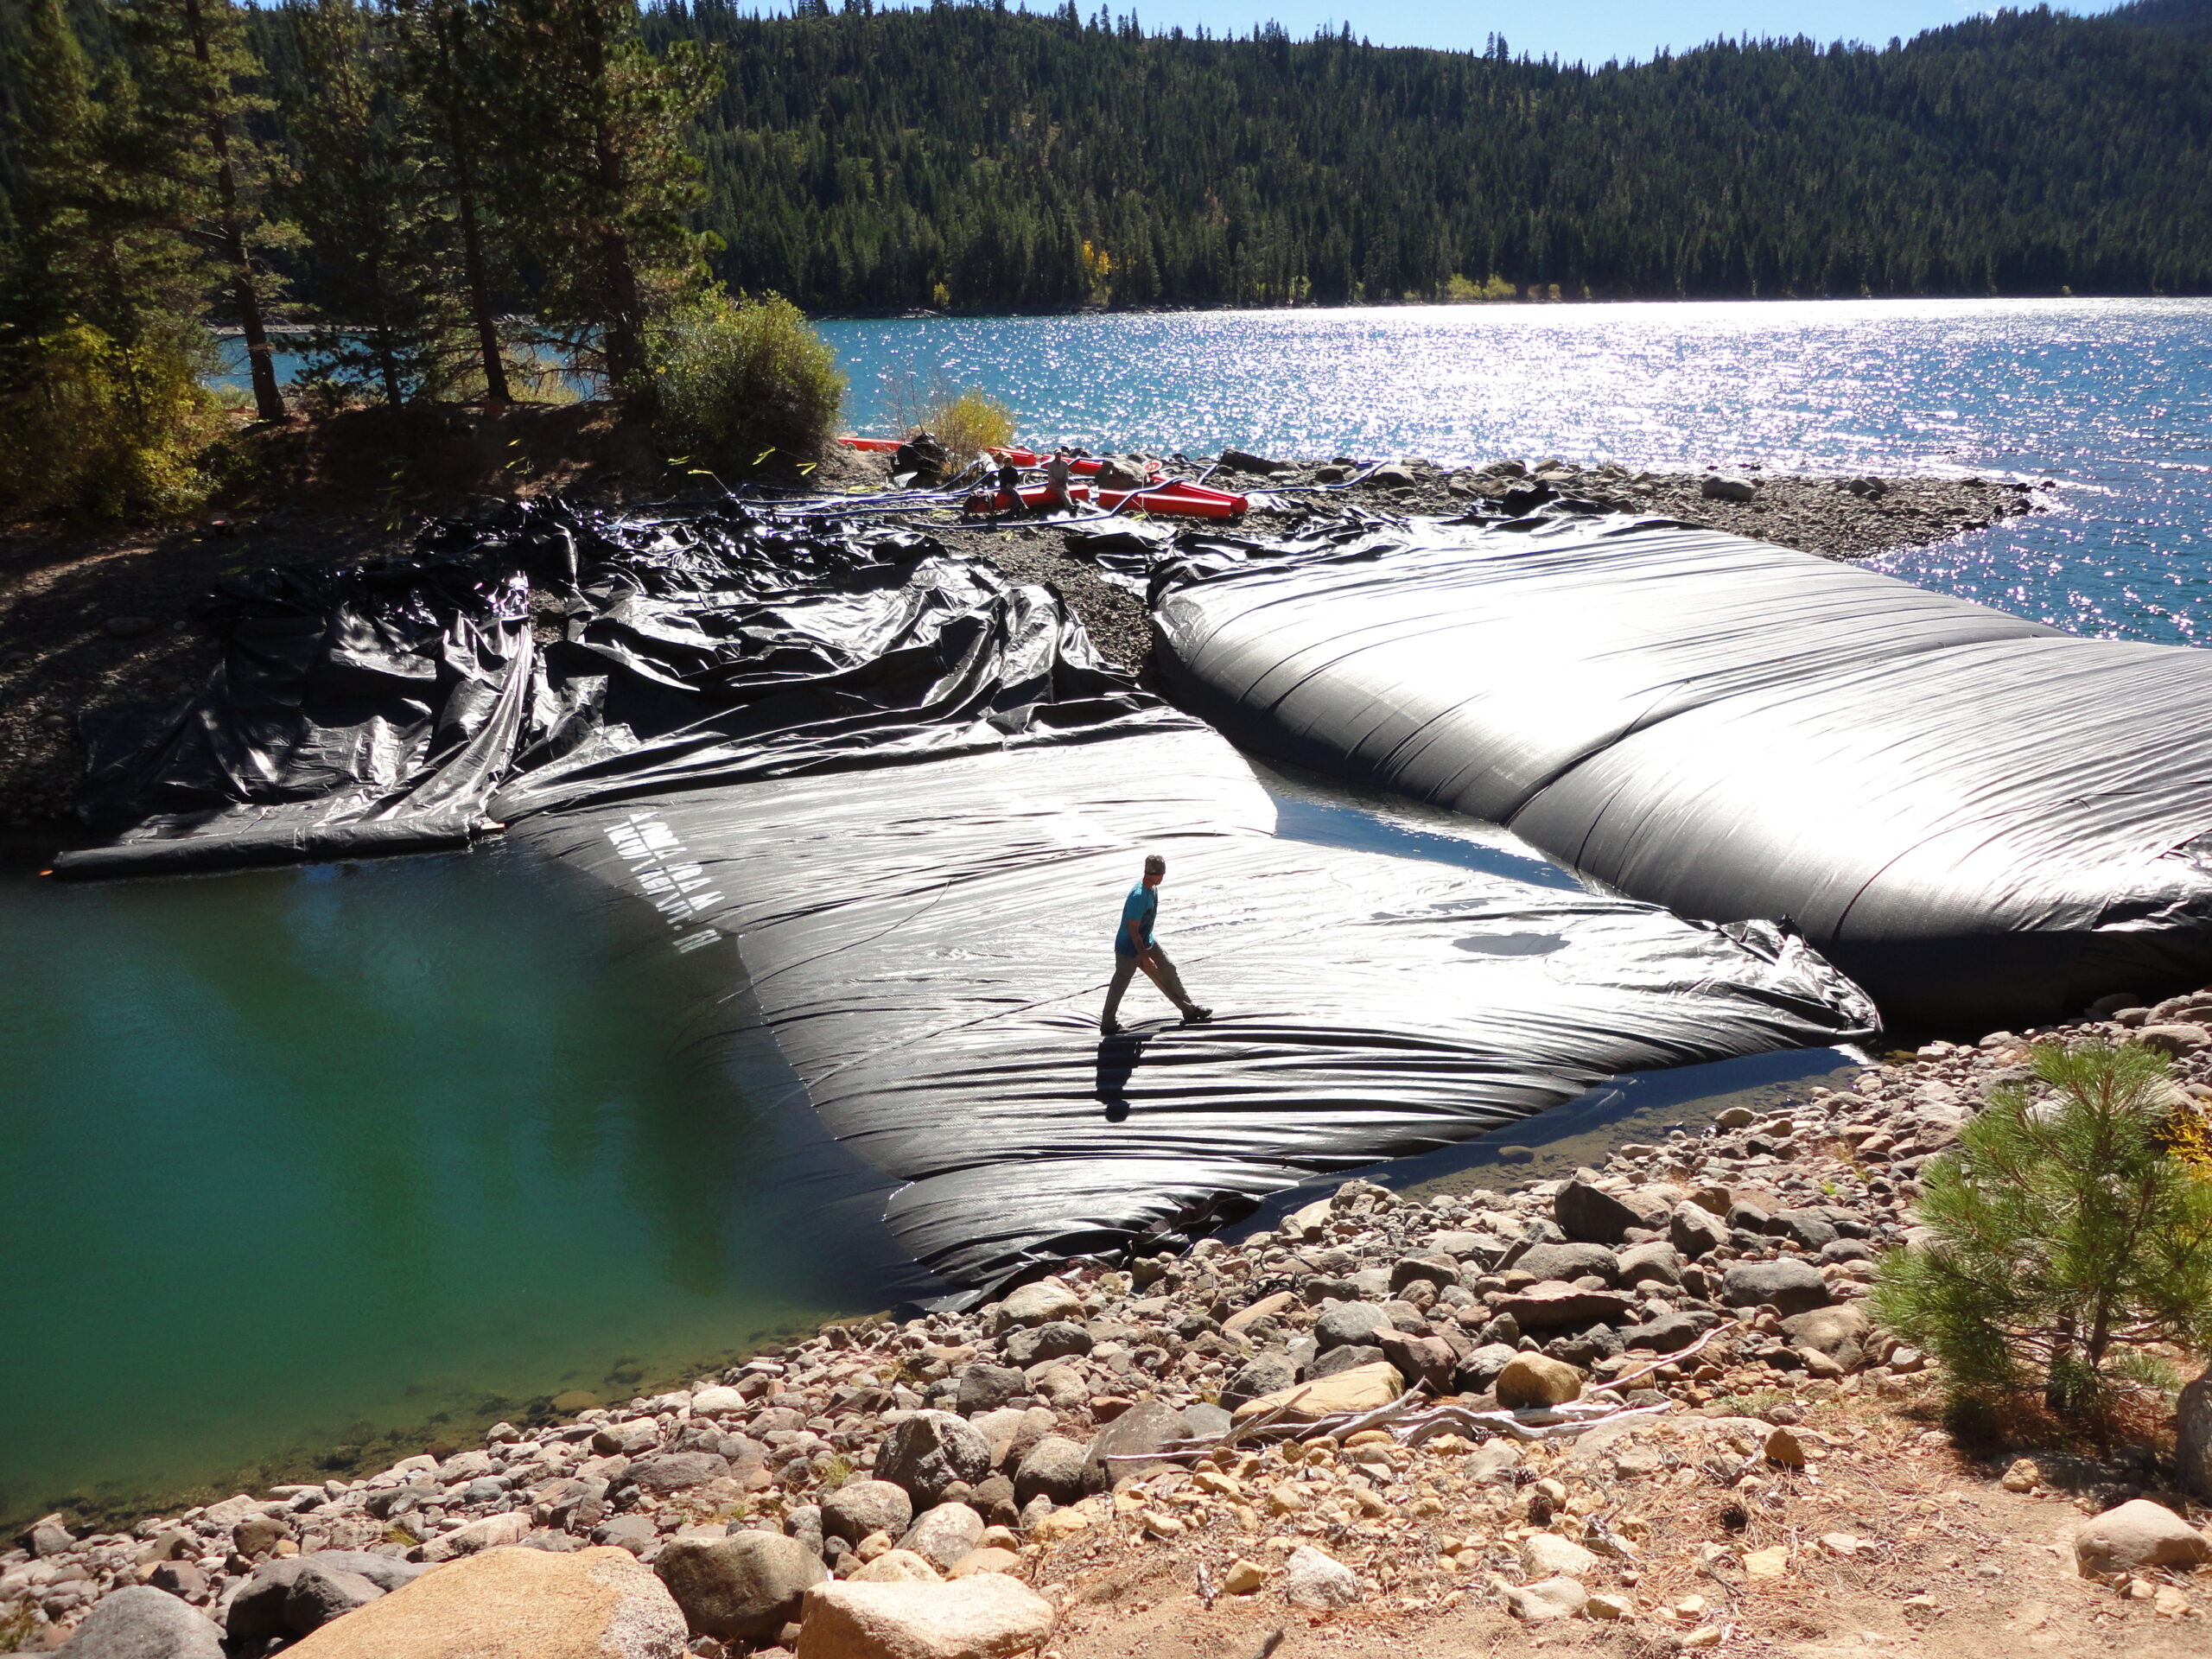
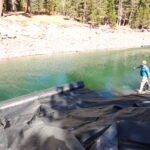
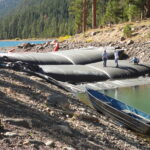
The person standing on the edge of the AquaDam is roughly 6ft tall, just to give an idea of how large this AquaDam is.
Next morning, the 16ft and 10ft tall AquaDams will be installed as support to the primary 21ft tall AquaDam. After the cofferdam system (composed of these three (3) AquaDams) is installed the work area can be dewatered.
Setting the 16ft tall 33ft wide (fully filled) AquaDam into the water just before towing the unit into place, adjacent to the primary AquaDam.
The 16ft tall support AquaDam has been put into place and is now filling.
The support AquaDams will lay parallel with the primary AquaDam acting as additional mass to help support the 21ft tall primary AquaDam on the dewatered side.
A photo from the ending bank of the 21ft tall primary AquaDam.
The secondary 16ft tall support AquaDam fills much more quickly than its larger brother.
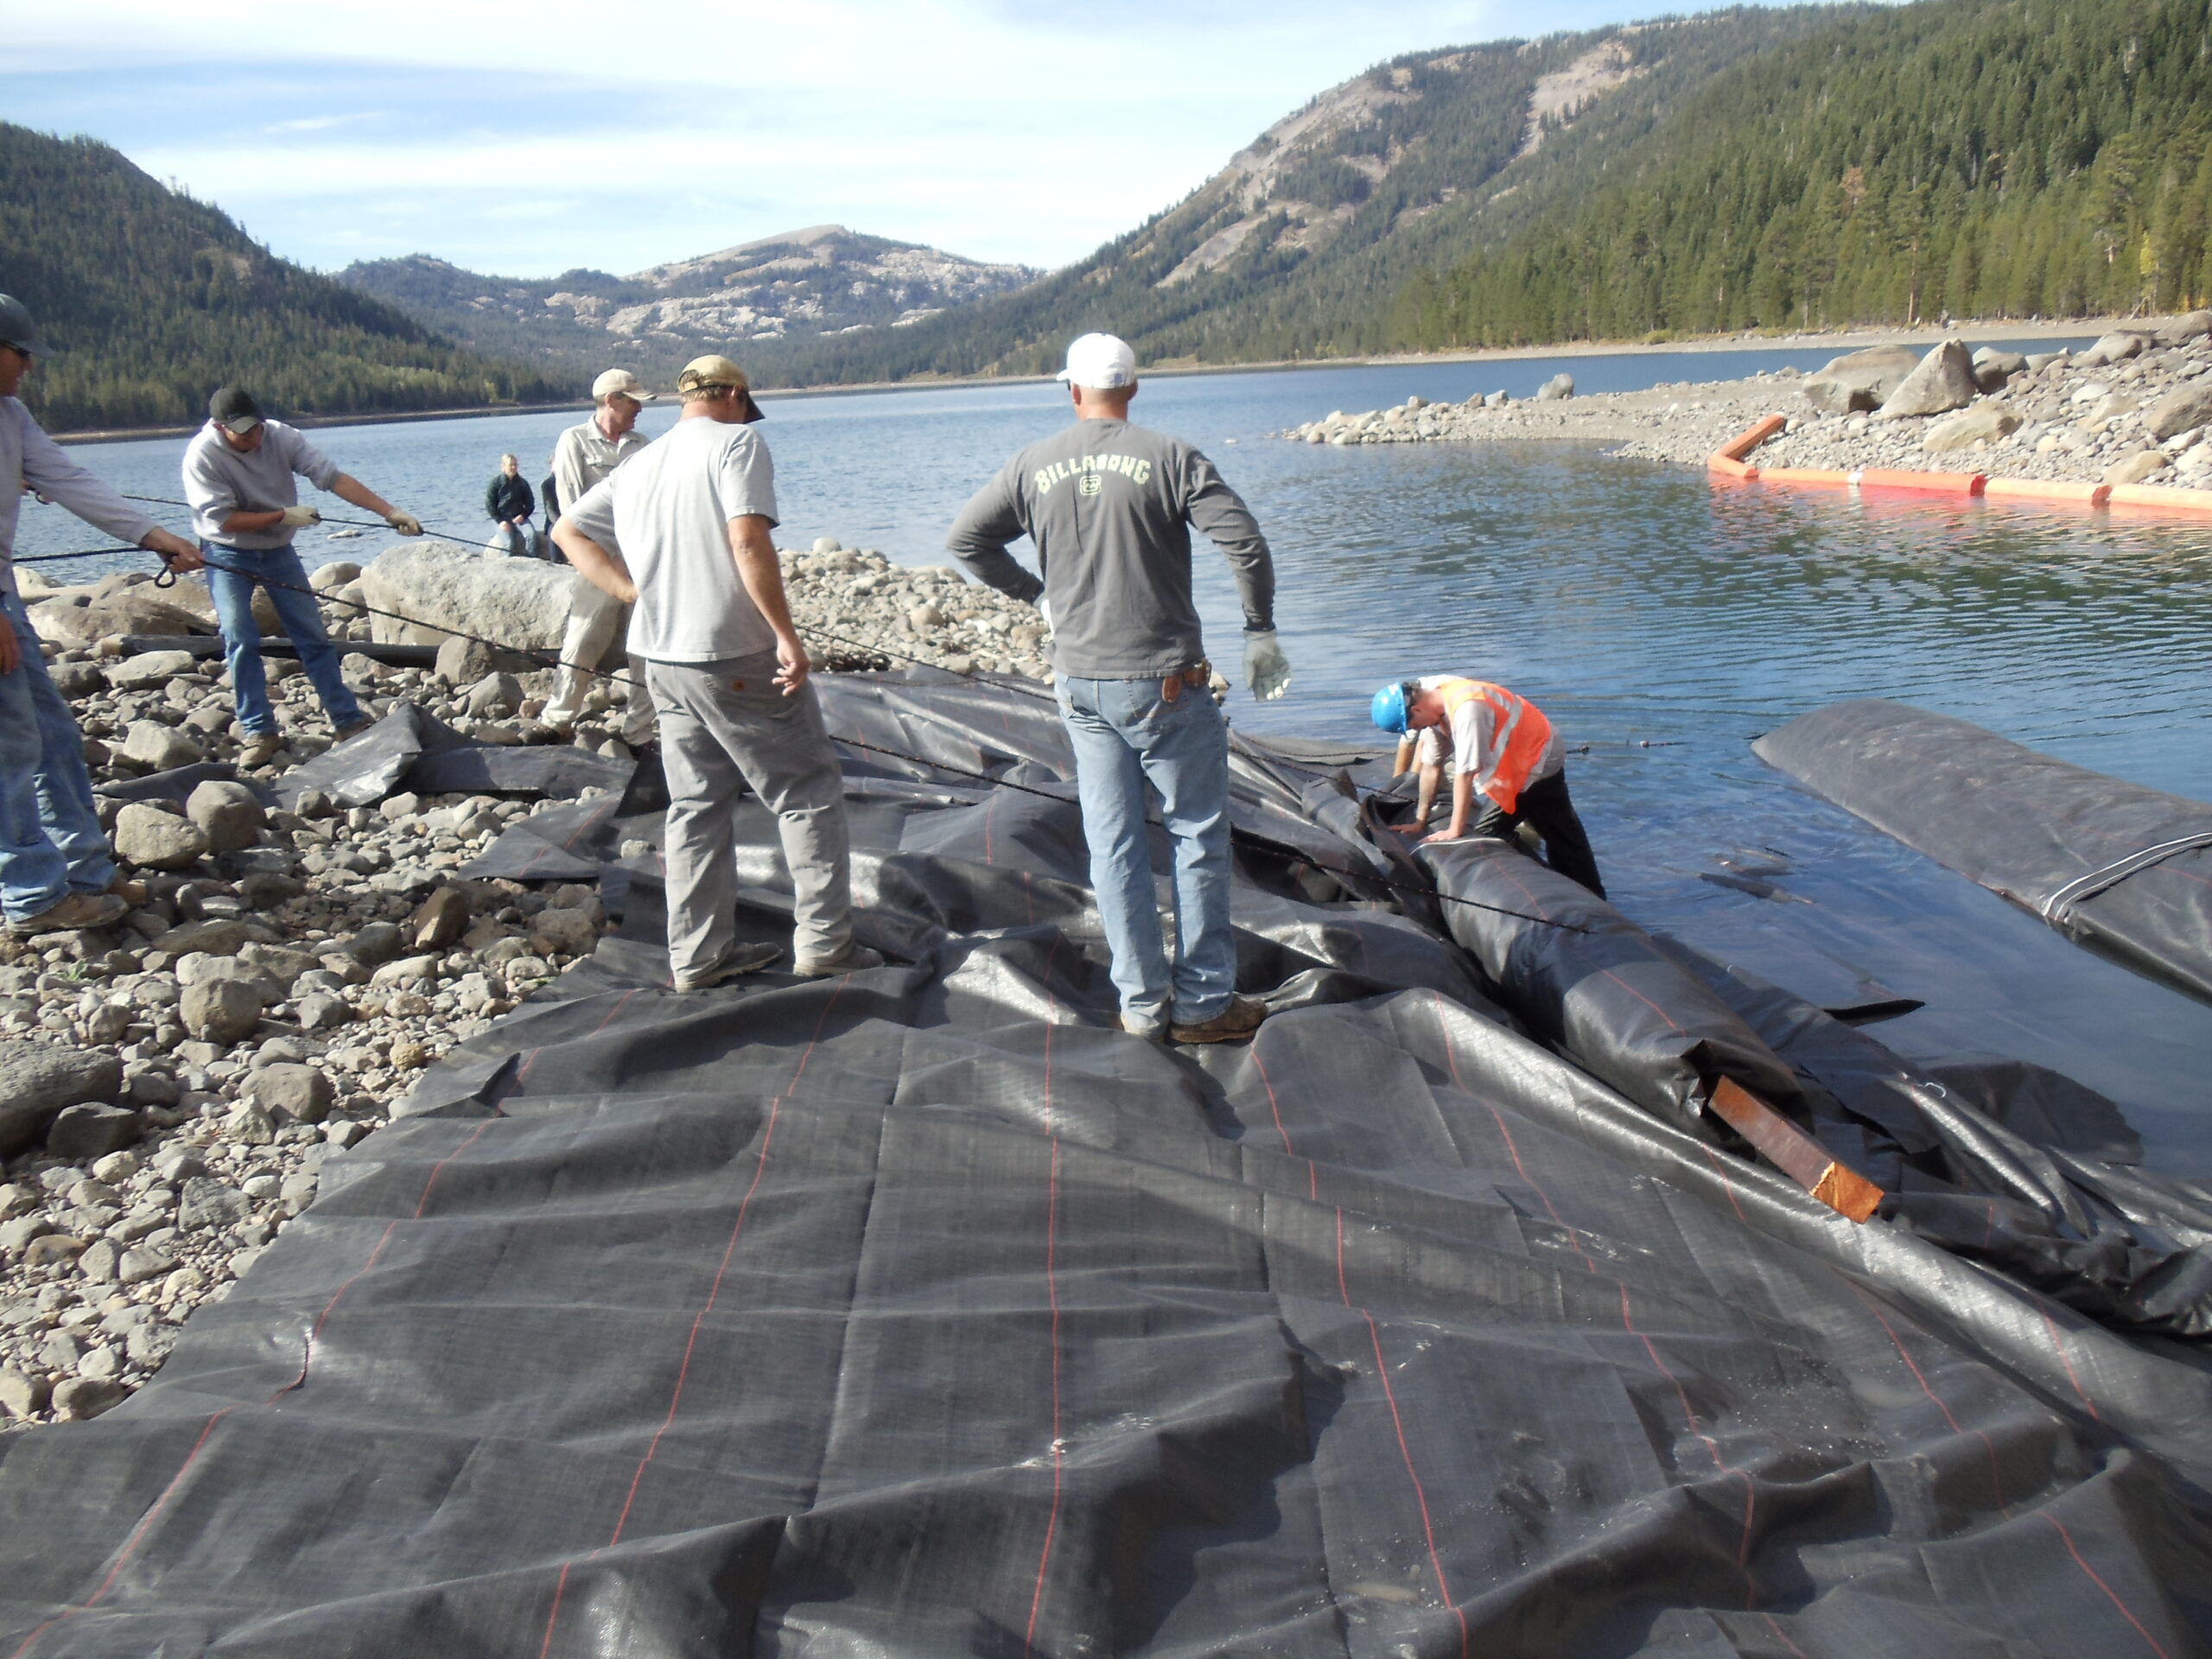
Ropes were used to help steer the AquaDam as it unrolled.
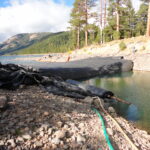
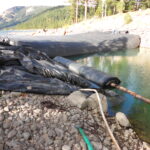
Here we can see the rope used to help put the 16ft tall support AquaDam into the desired place. Also, several two (2) inch rigid suction hoses were laid beneath this AquaDam, to allow any water to flow through, rather than build up between the AquaDams.
The 16ft tall support AquaDam was installed directly next to (parallel with) the primary 21ft tall AquaDam.
The rocky substrate is shown to continue underwater.
The 16ft tall support AquaDam also had it’s sides folded in when it was rolled up.

Now that the AquaDam is filling, the sides will unfold to directly contact the primary.

The tertiary 10ft tall support AquaDam installation was next.
The 16ft tall support AquaDam (middle) is fully filled, but due to the 15ft water depth, the unit has only one (1) foot of head above the surrounding water, with water encroaching in the middle, at the deepest point.
The 15ft of water pressure is not a problem at this point, because the work area has not been dewatered yet.

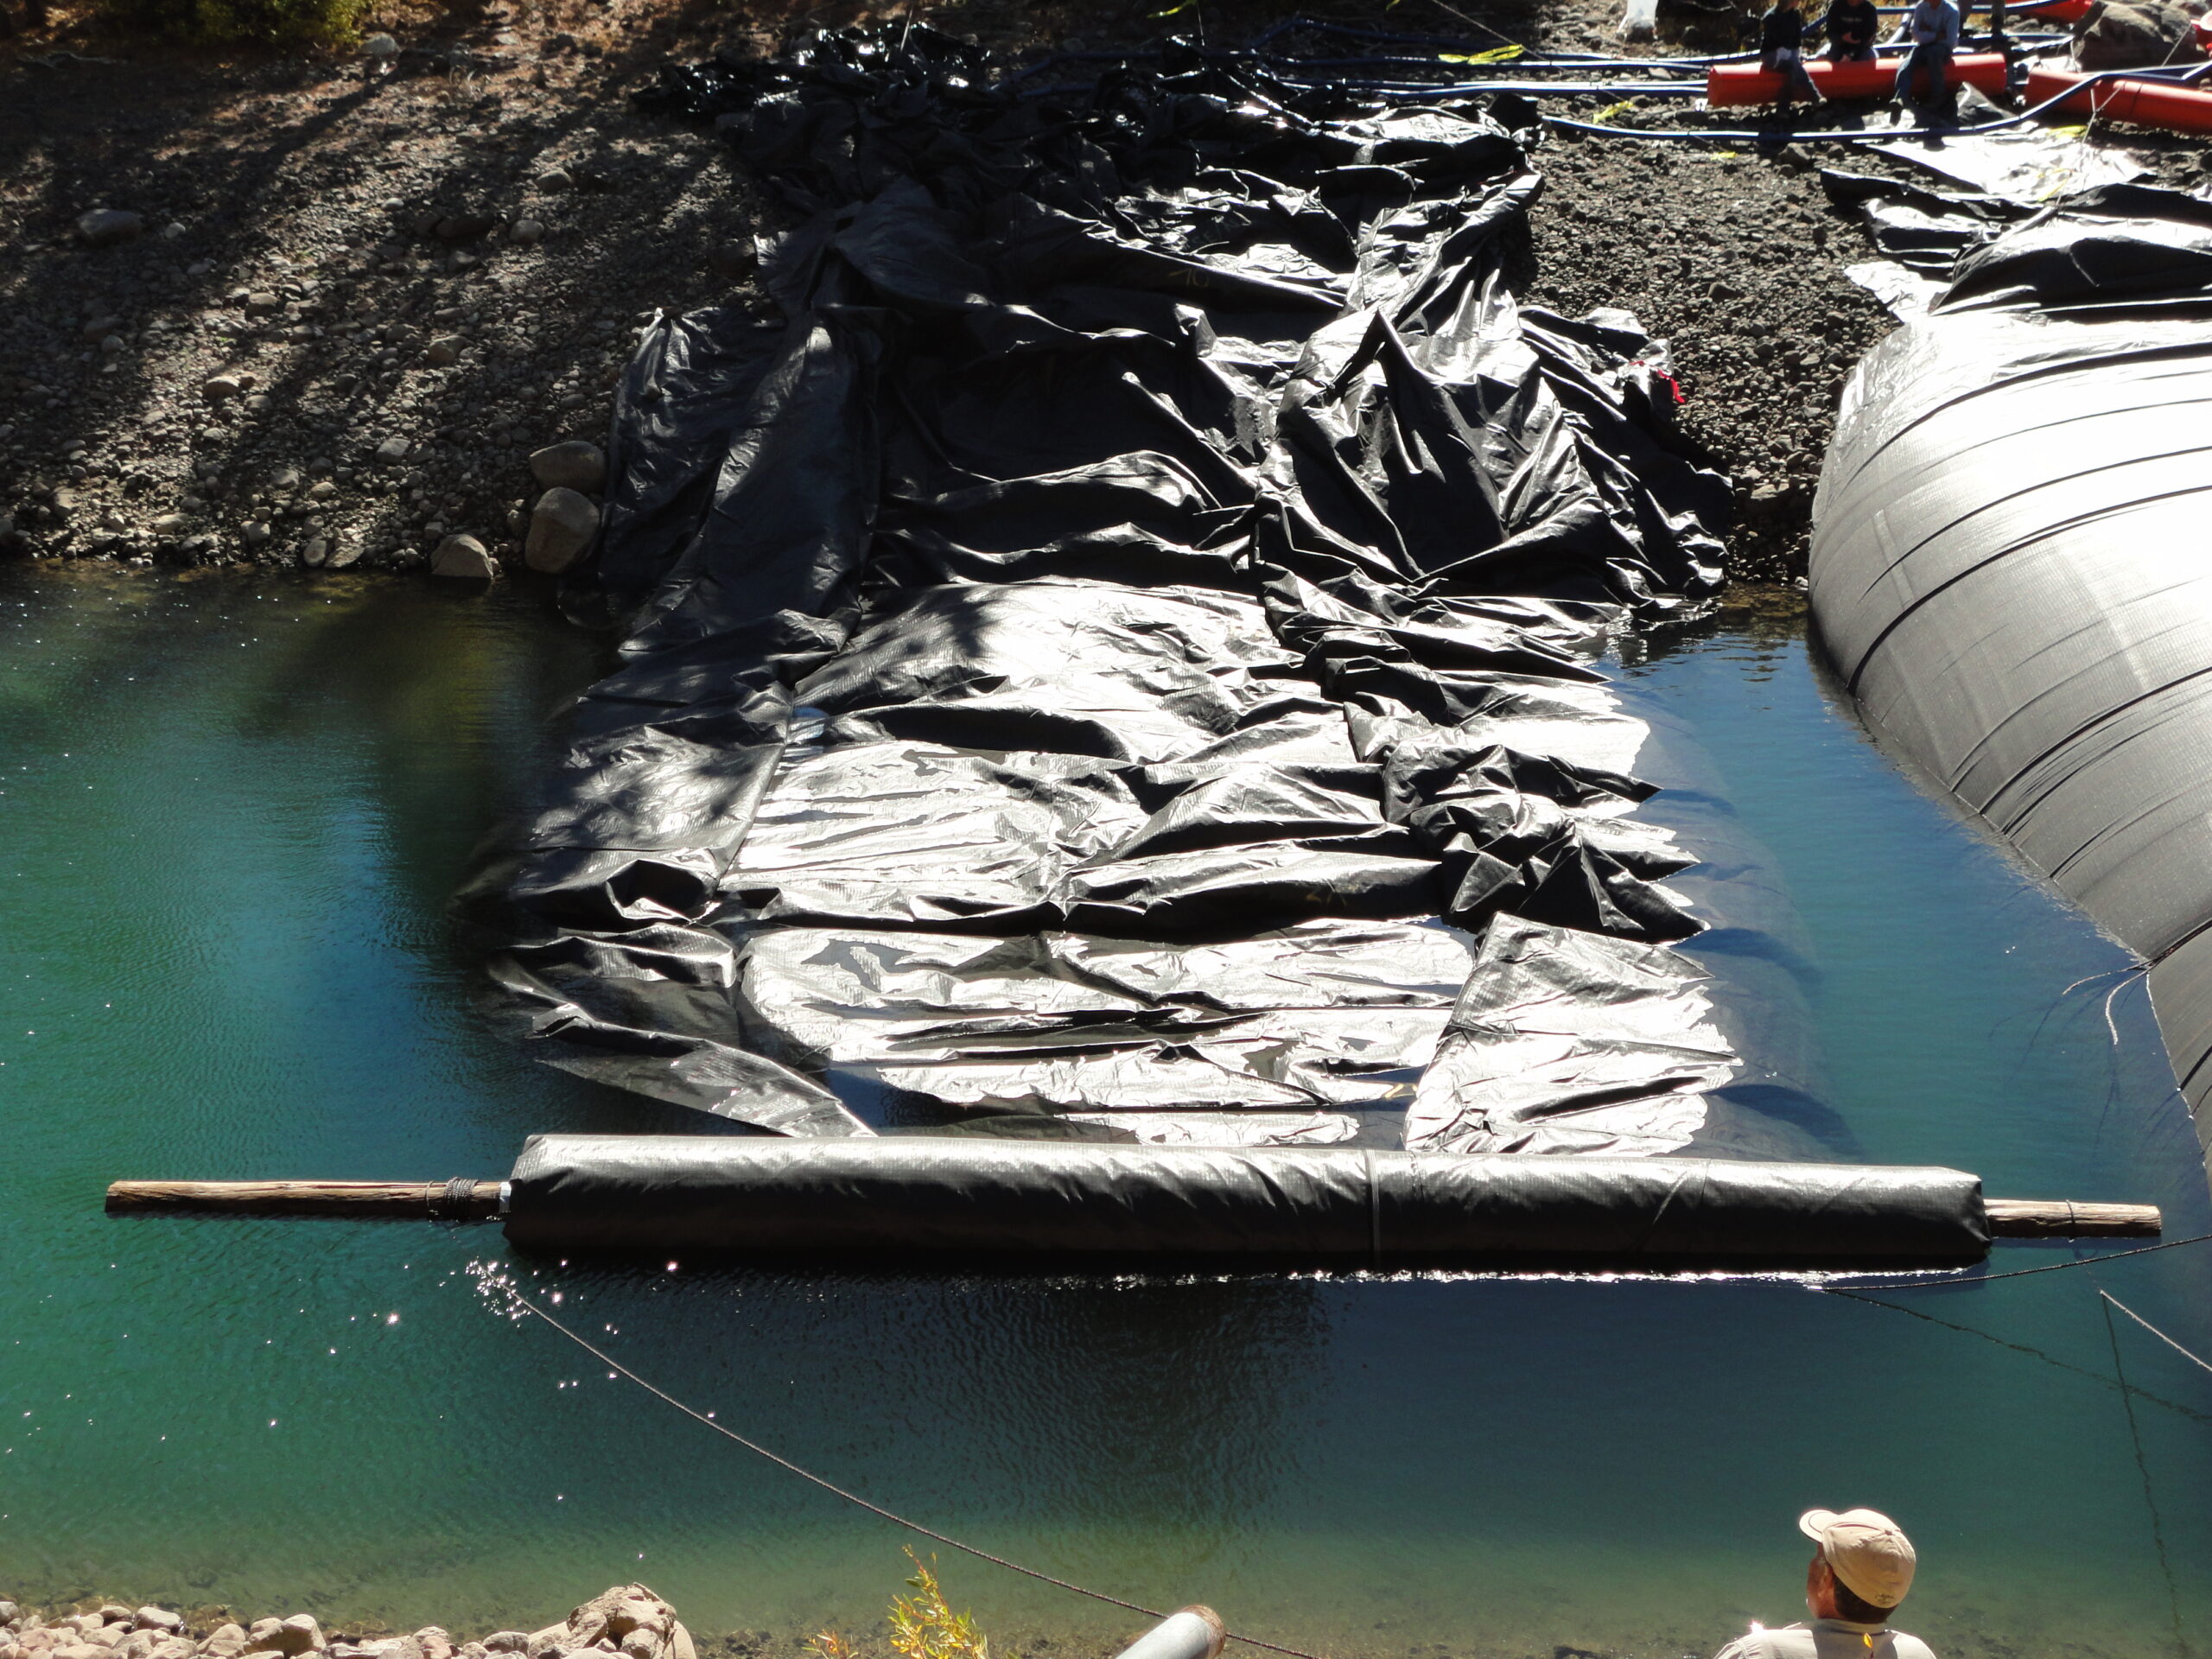
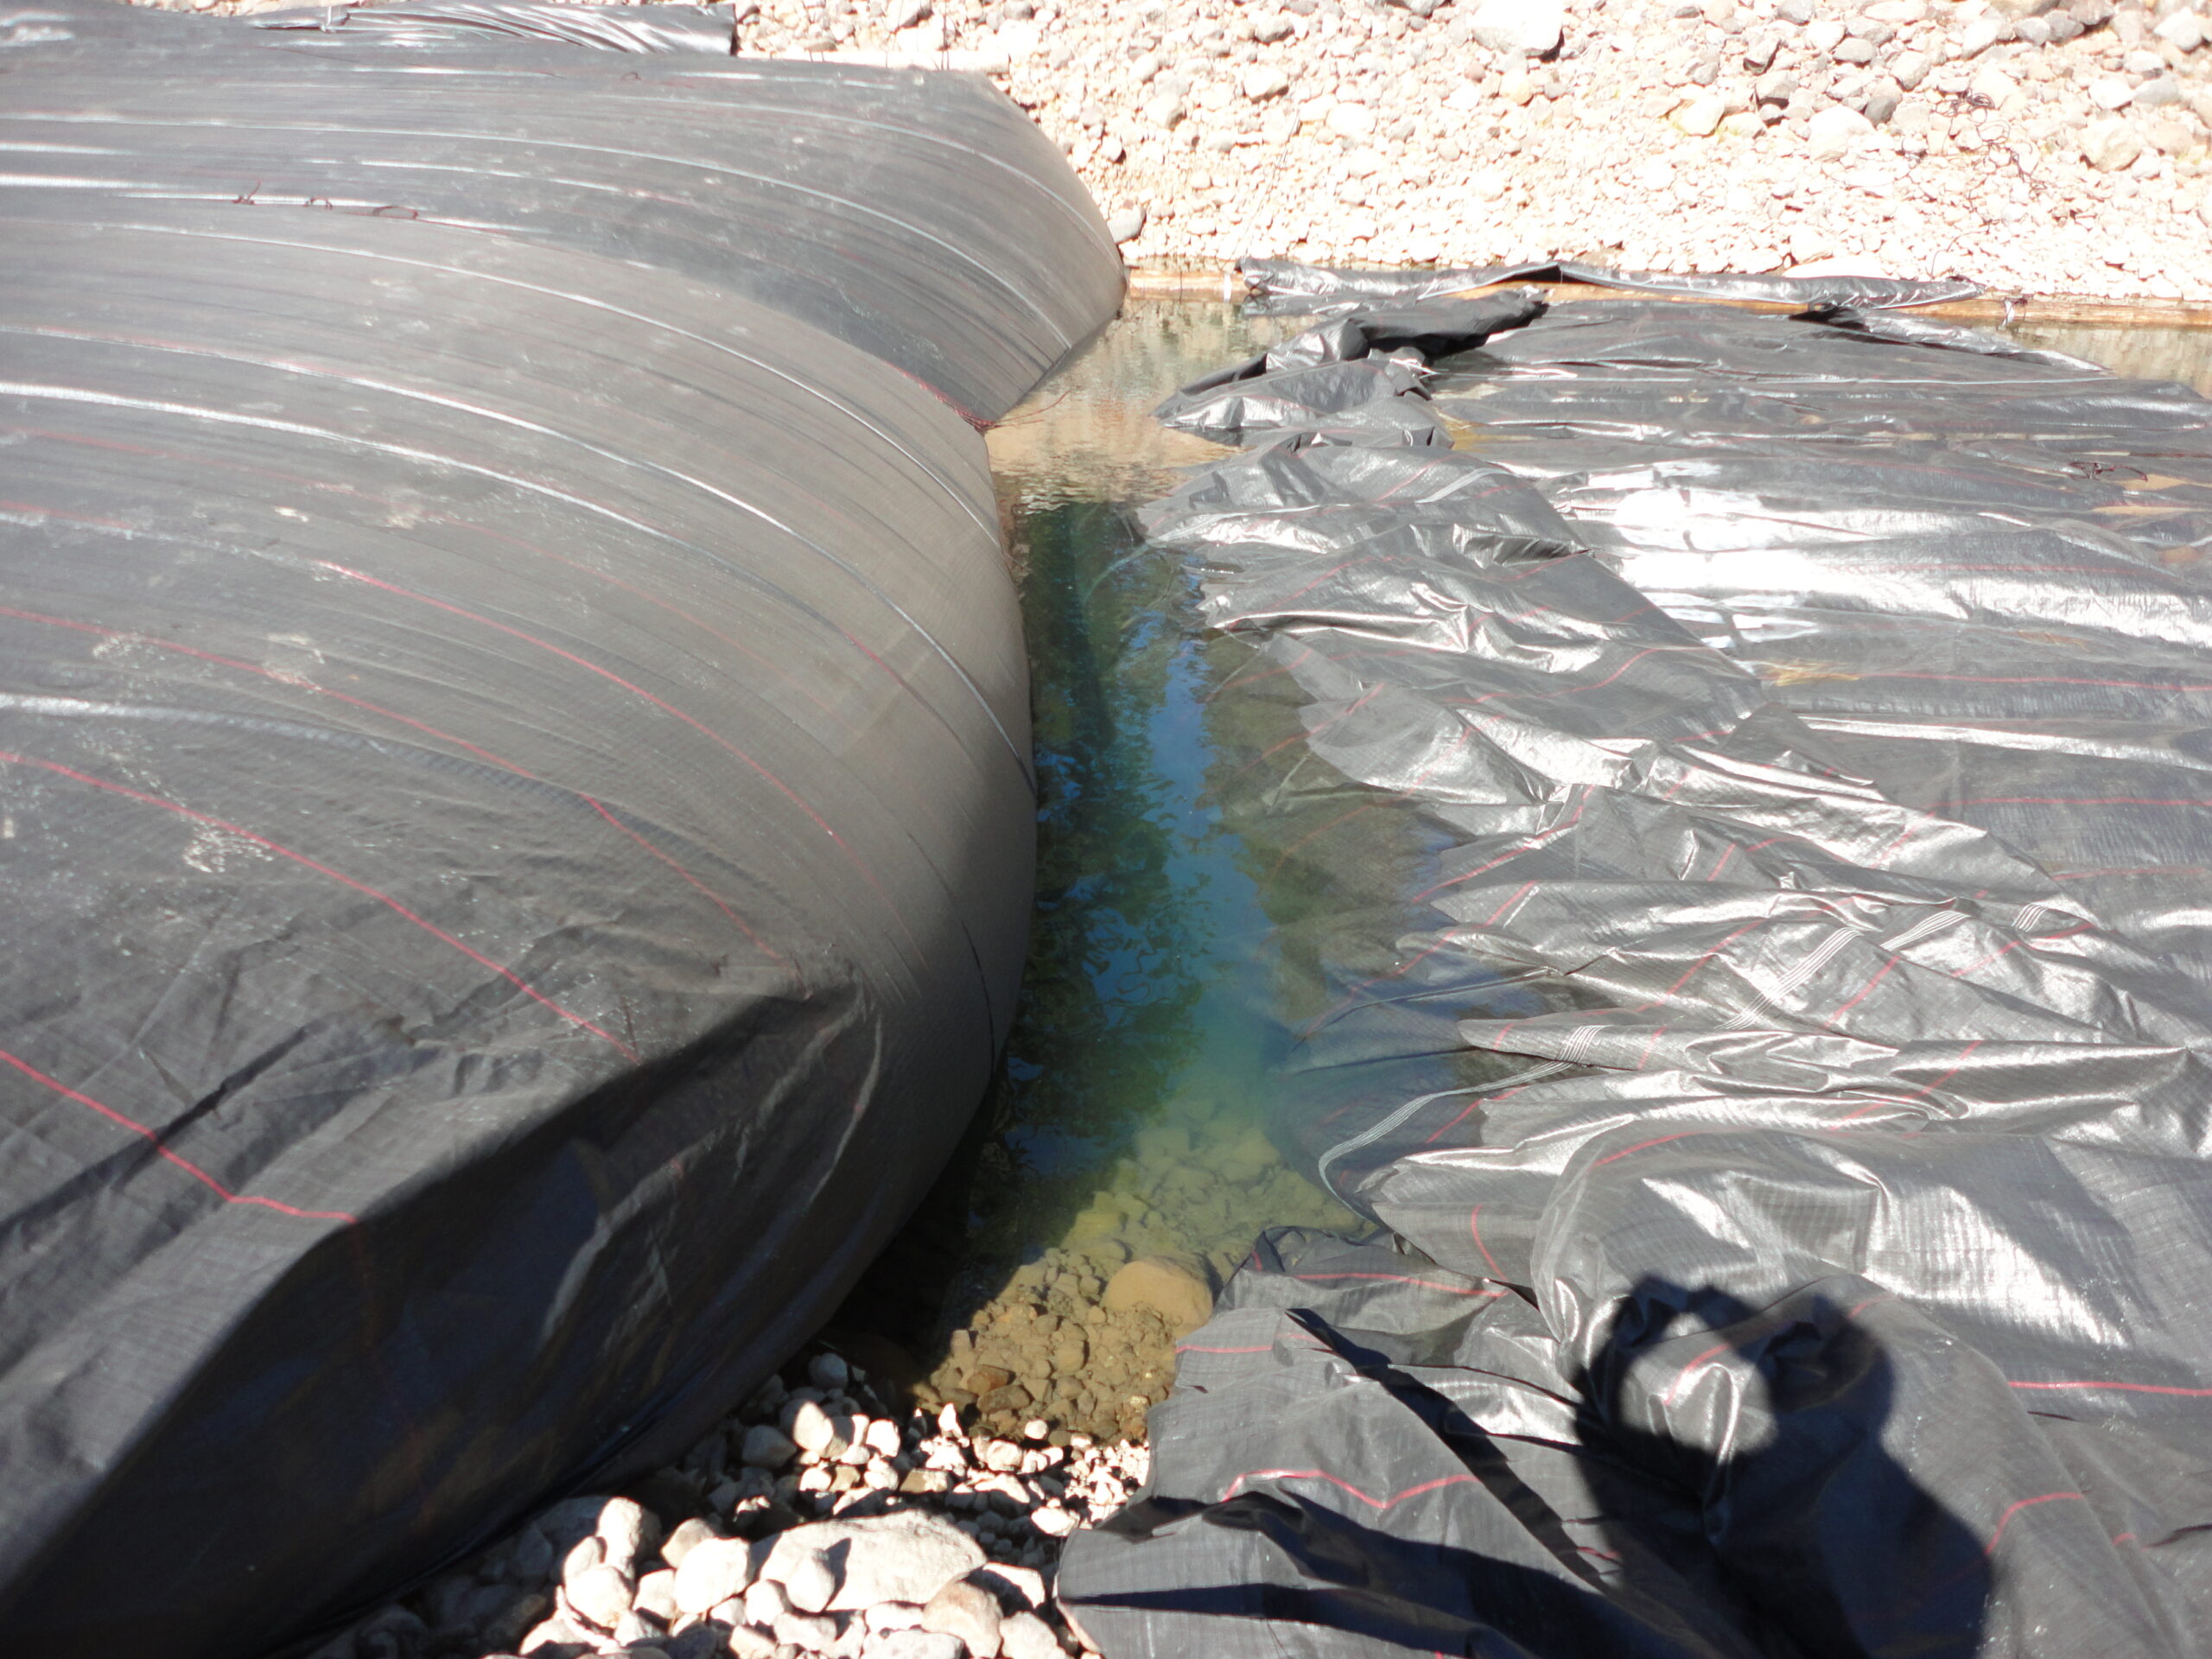
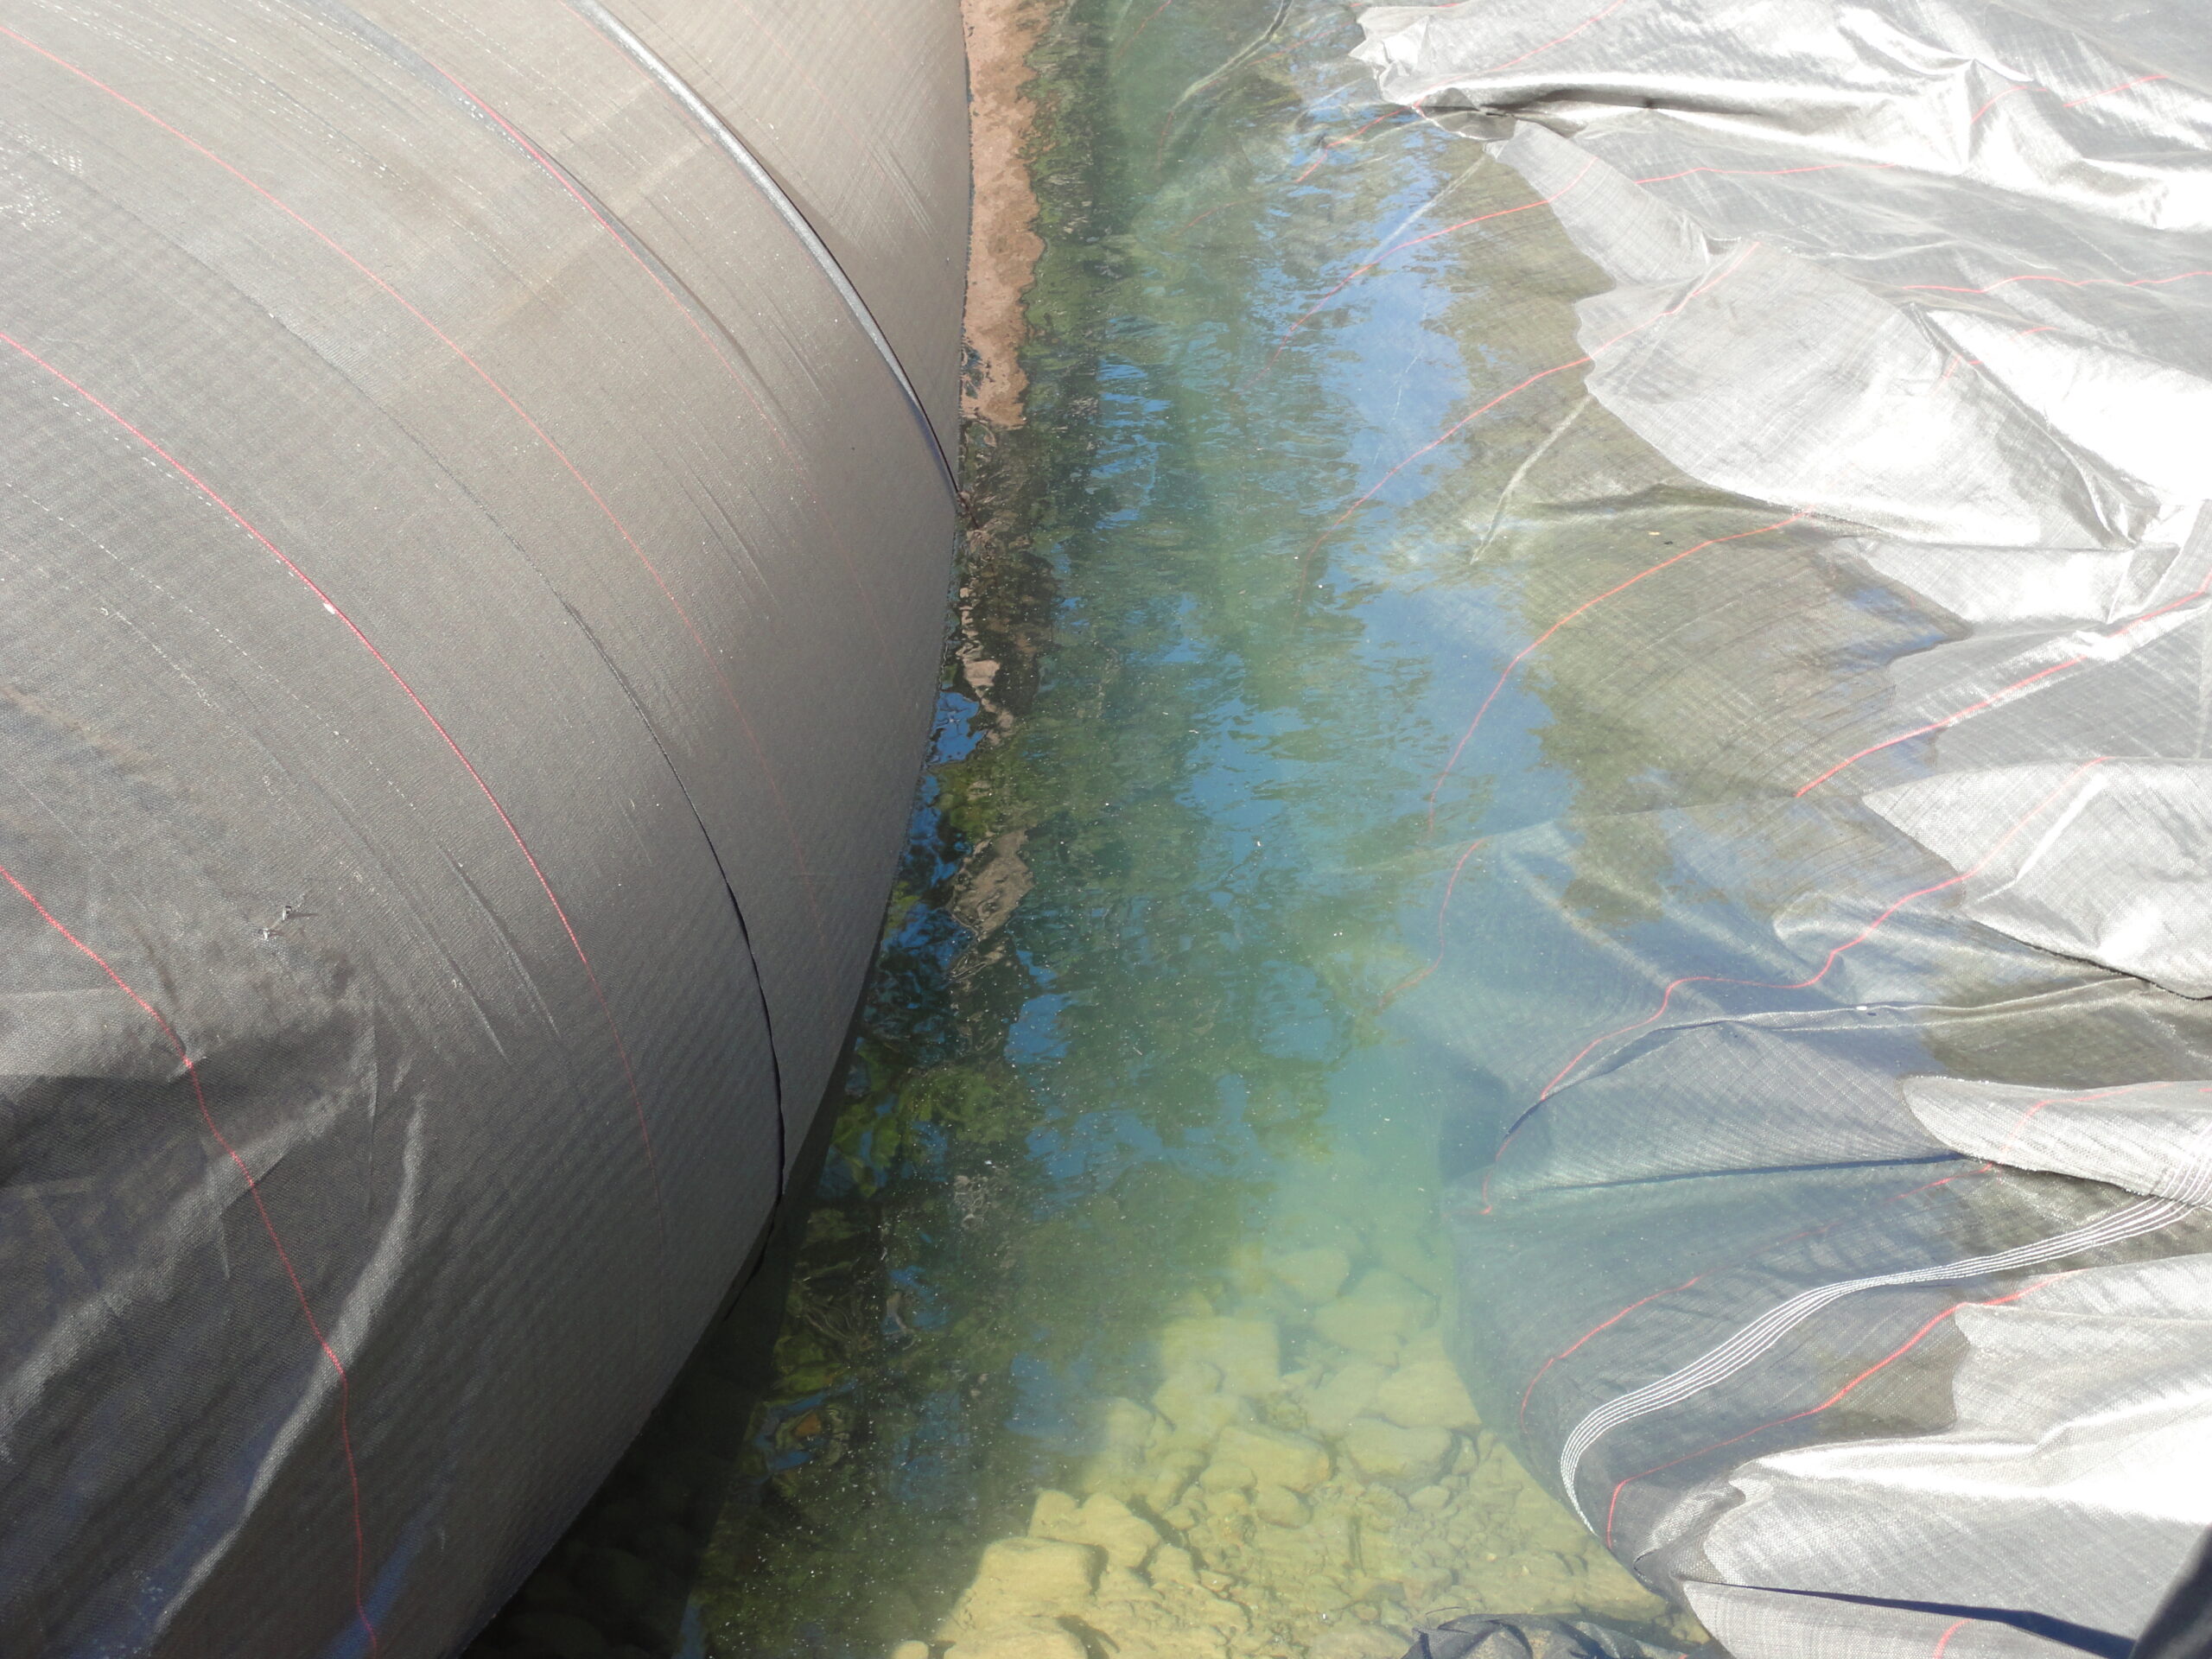
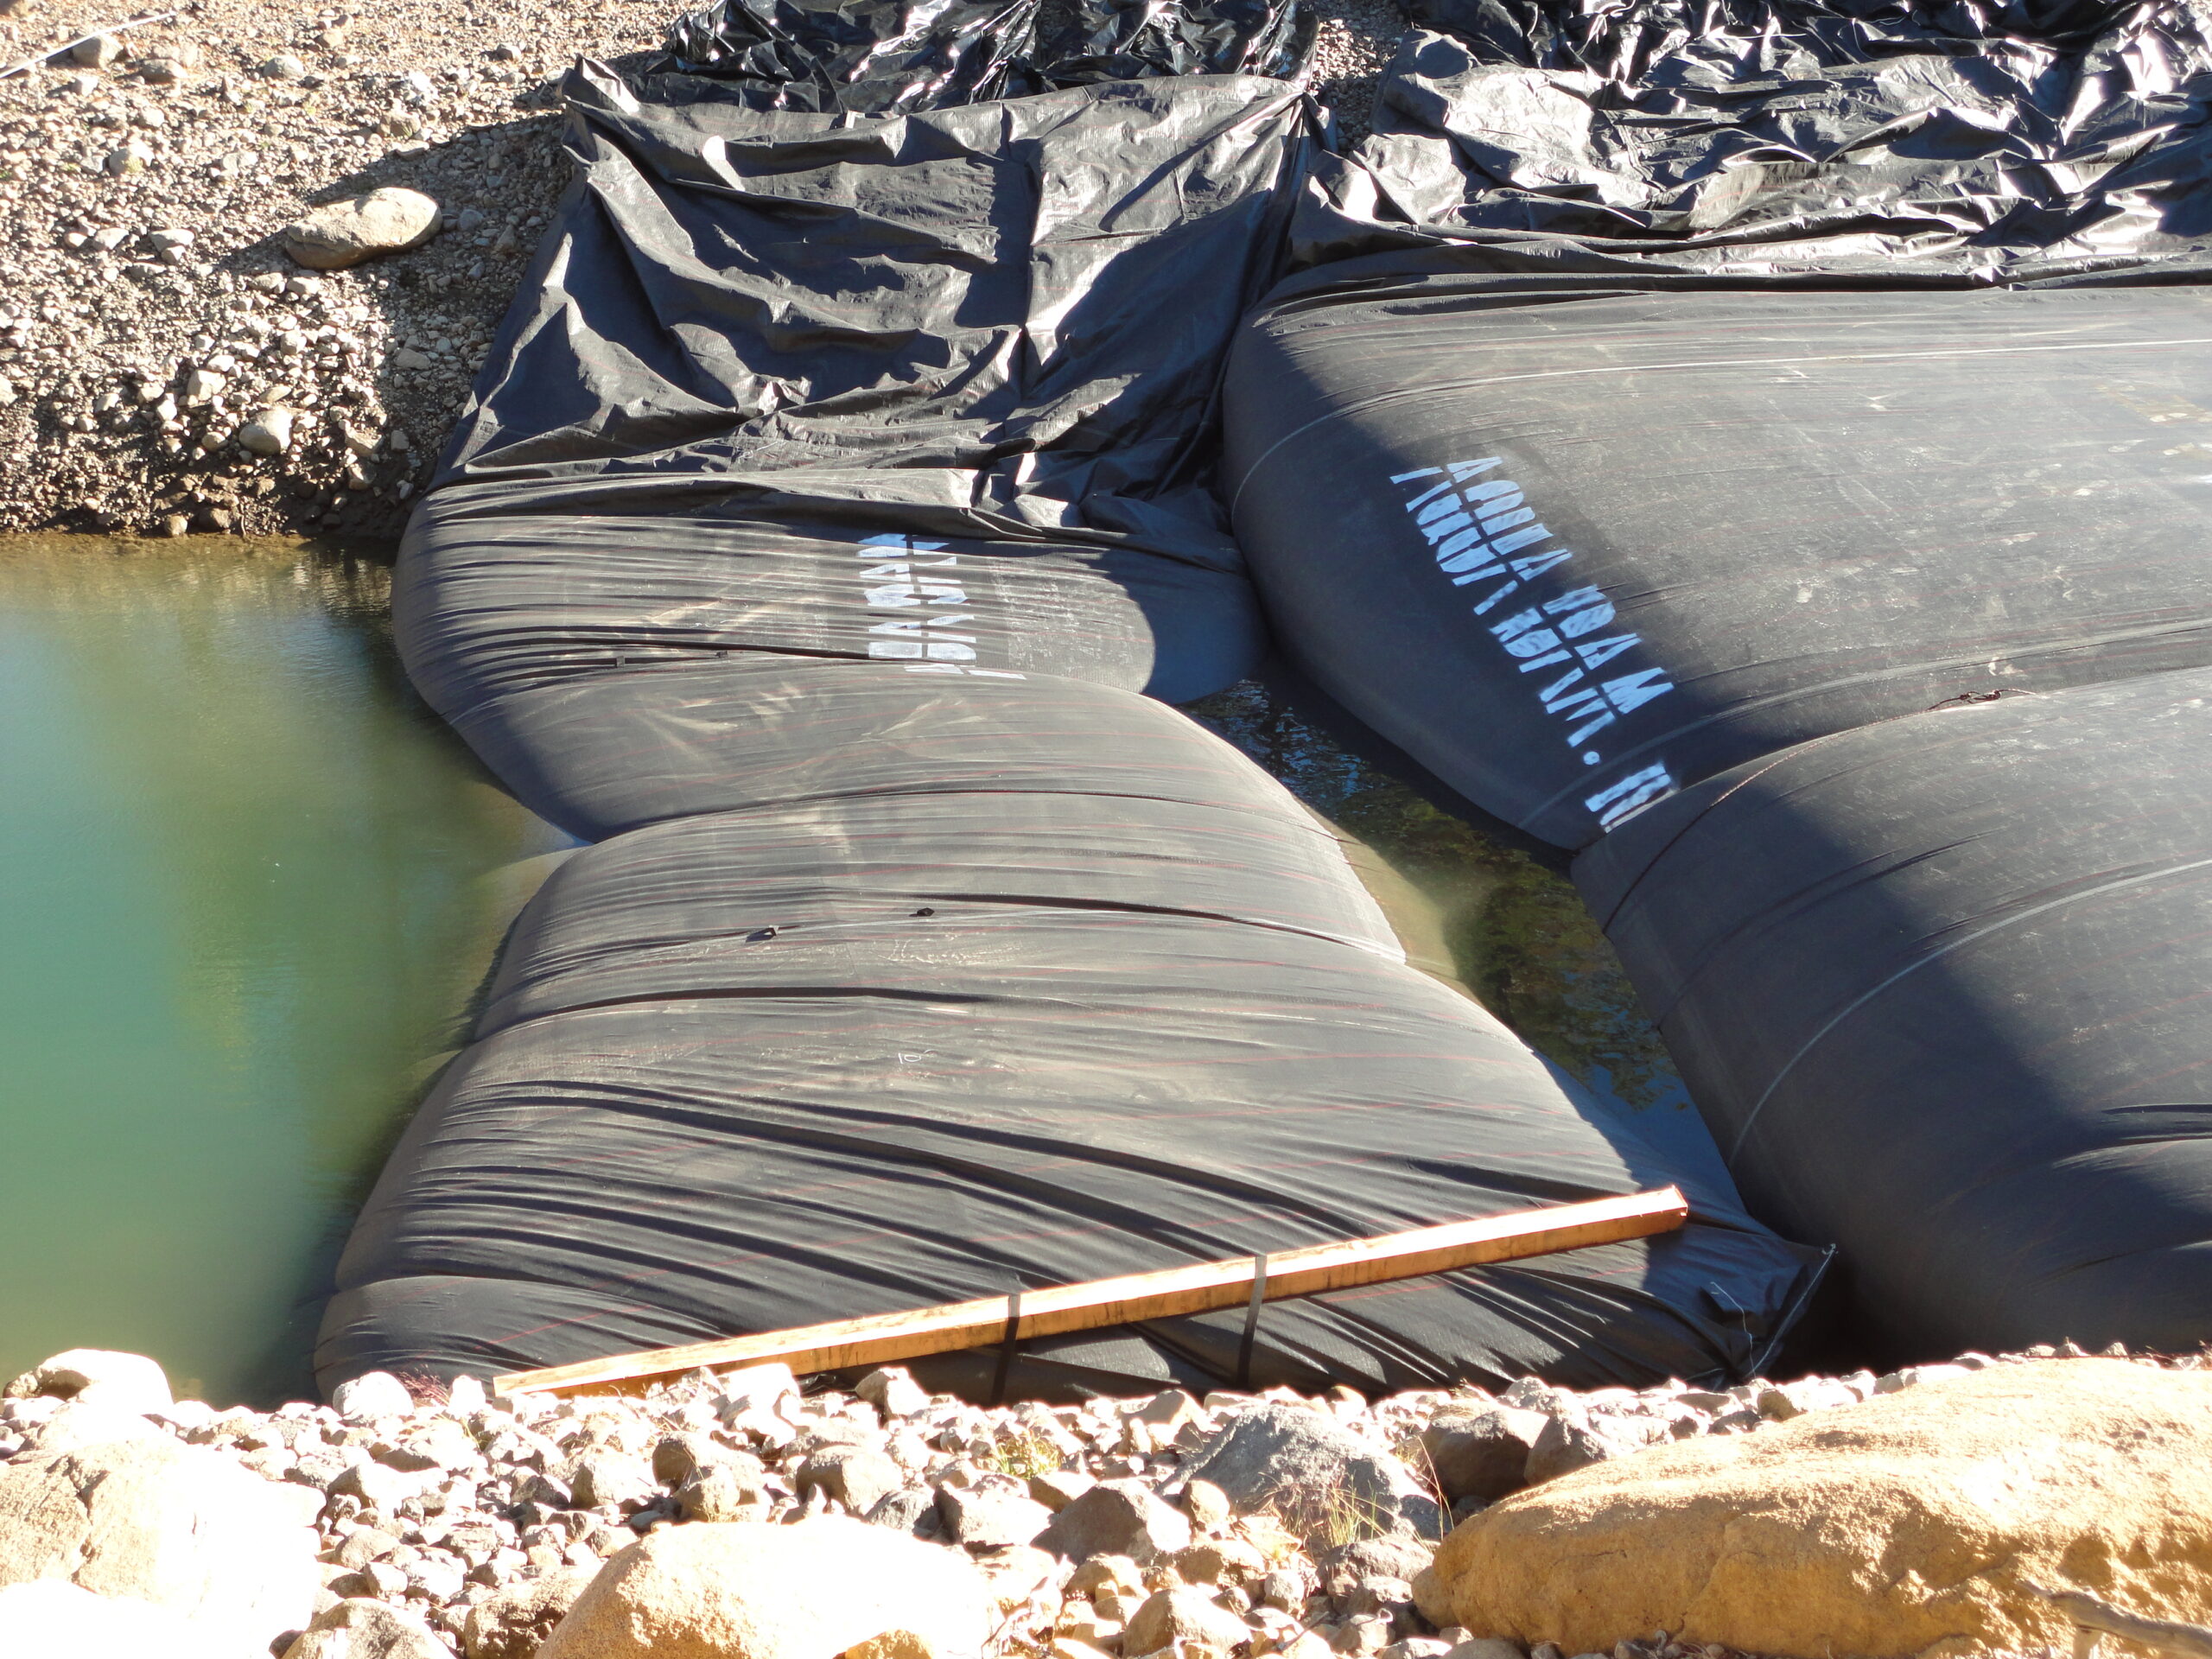
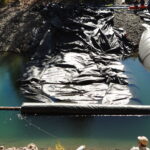
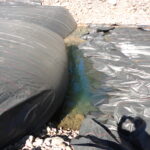
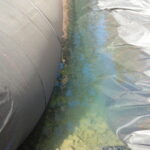
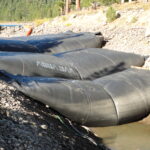
The water, seen here, between these two (2) AquaDams will drain through the two (2) inch rigid suction hoses that were laid under each of the supporting AquaDams.
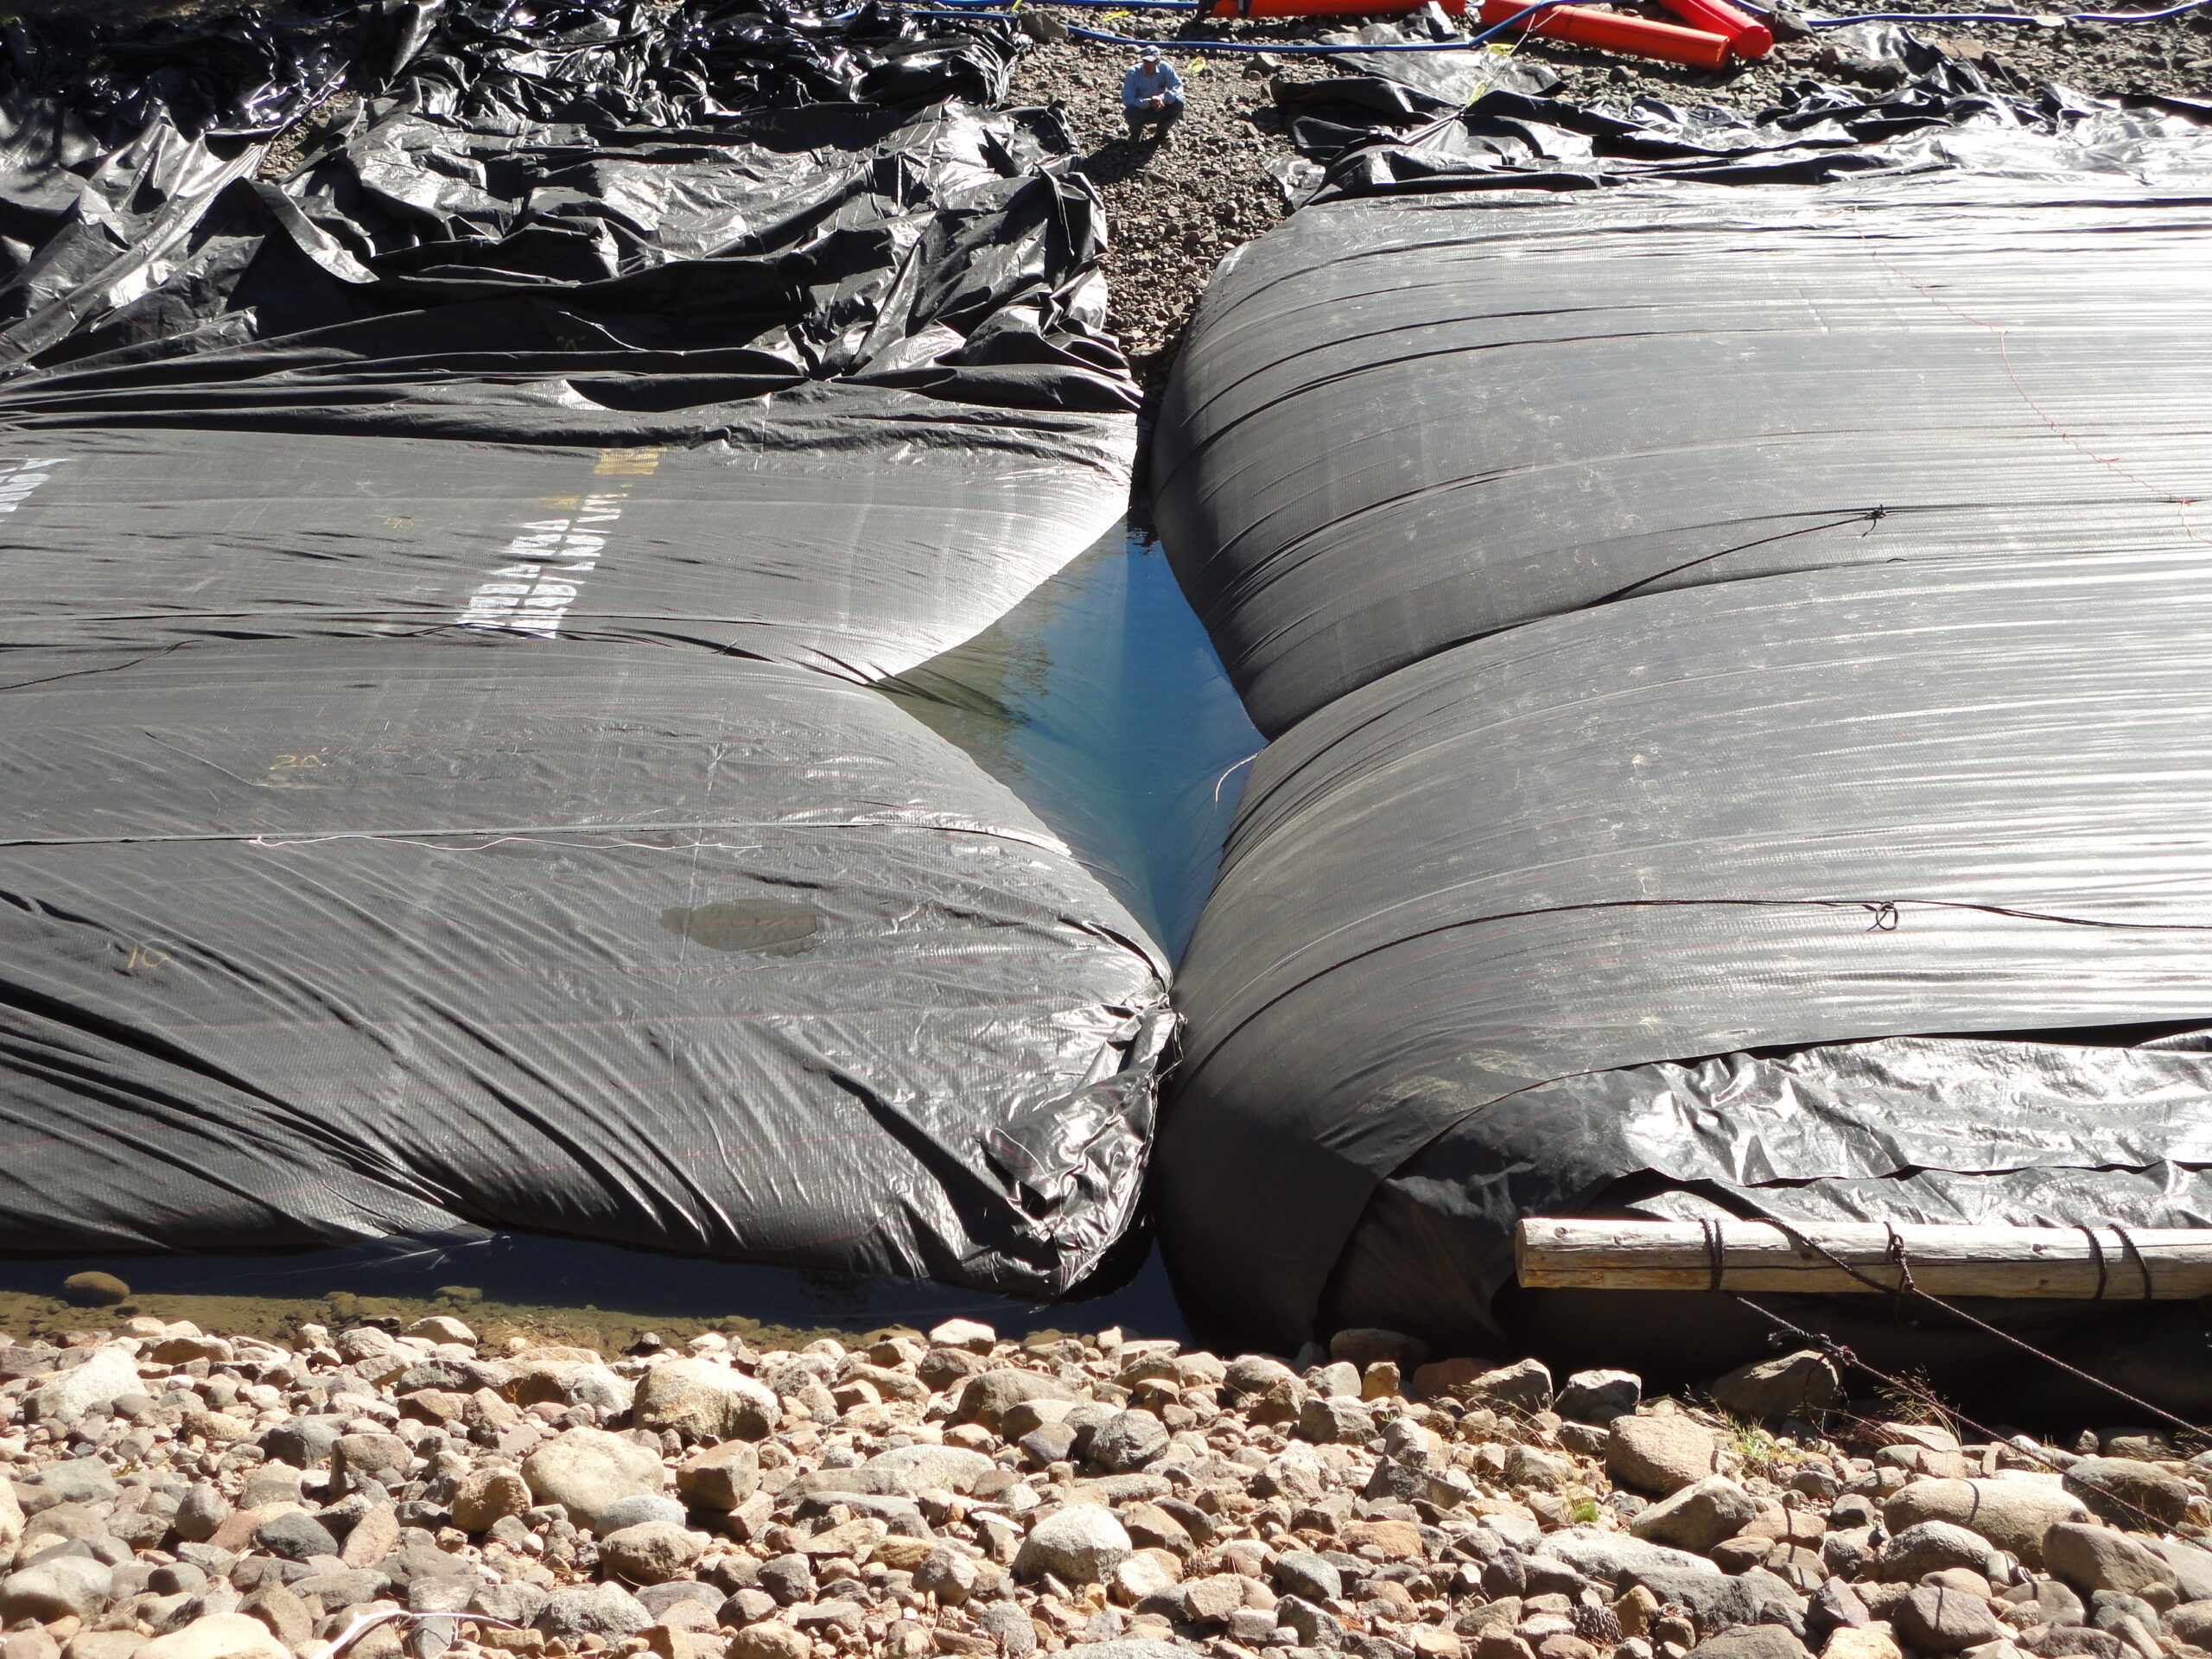
This pocket of water would have been trapped if it were not for the suction hoses that were laid out under the 16ft tall support AquaDam.

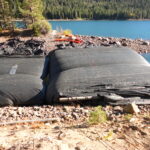
The 16ft tall support AquaDam is completely installed and filled. The 10ft tall support AquaDam has been completely unrolled, but has not been completely filled yet.
The water level in the work area continues to drop as the 10ft tall support AquaDam is filled to its full height.
Ropes, pulled by human power, were be used to pull the 10ft tall support AquaDam in closer to the 16ft tall support AquaDam.
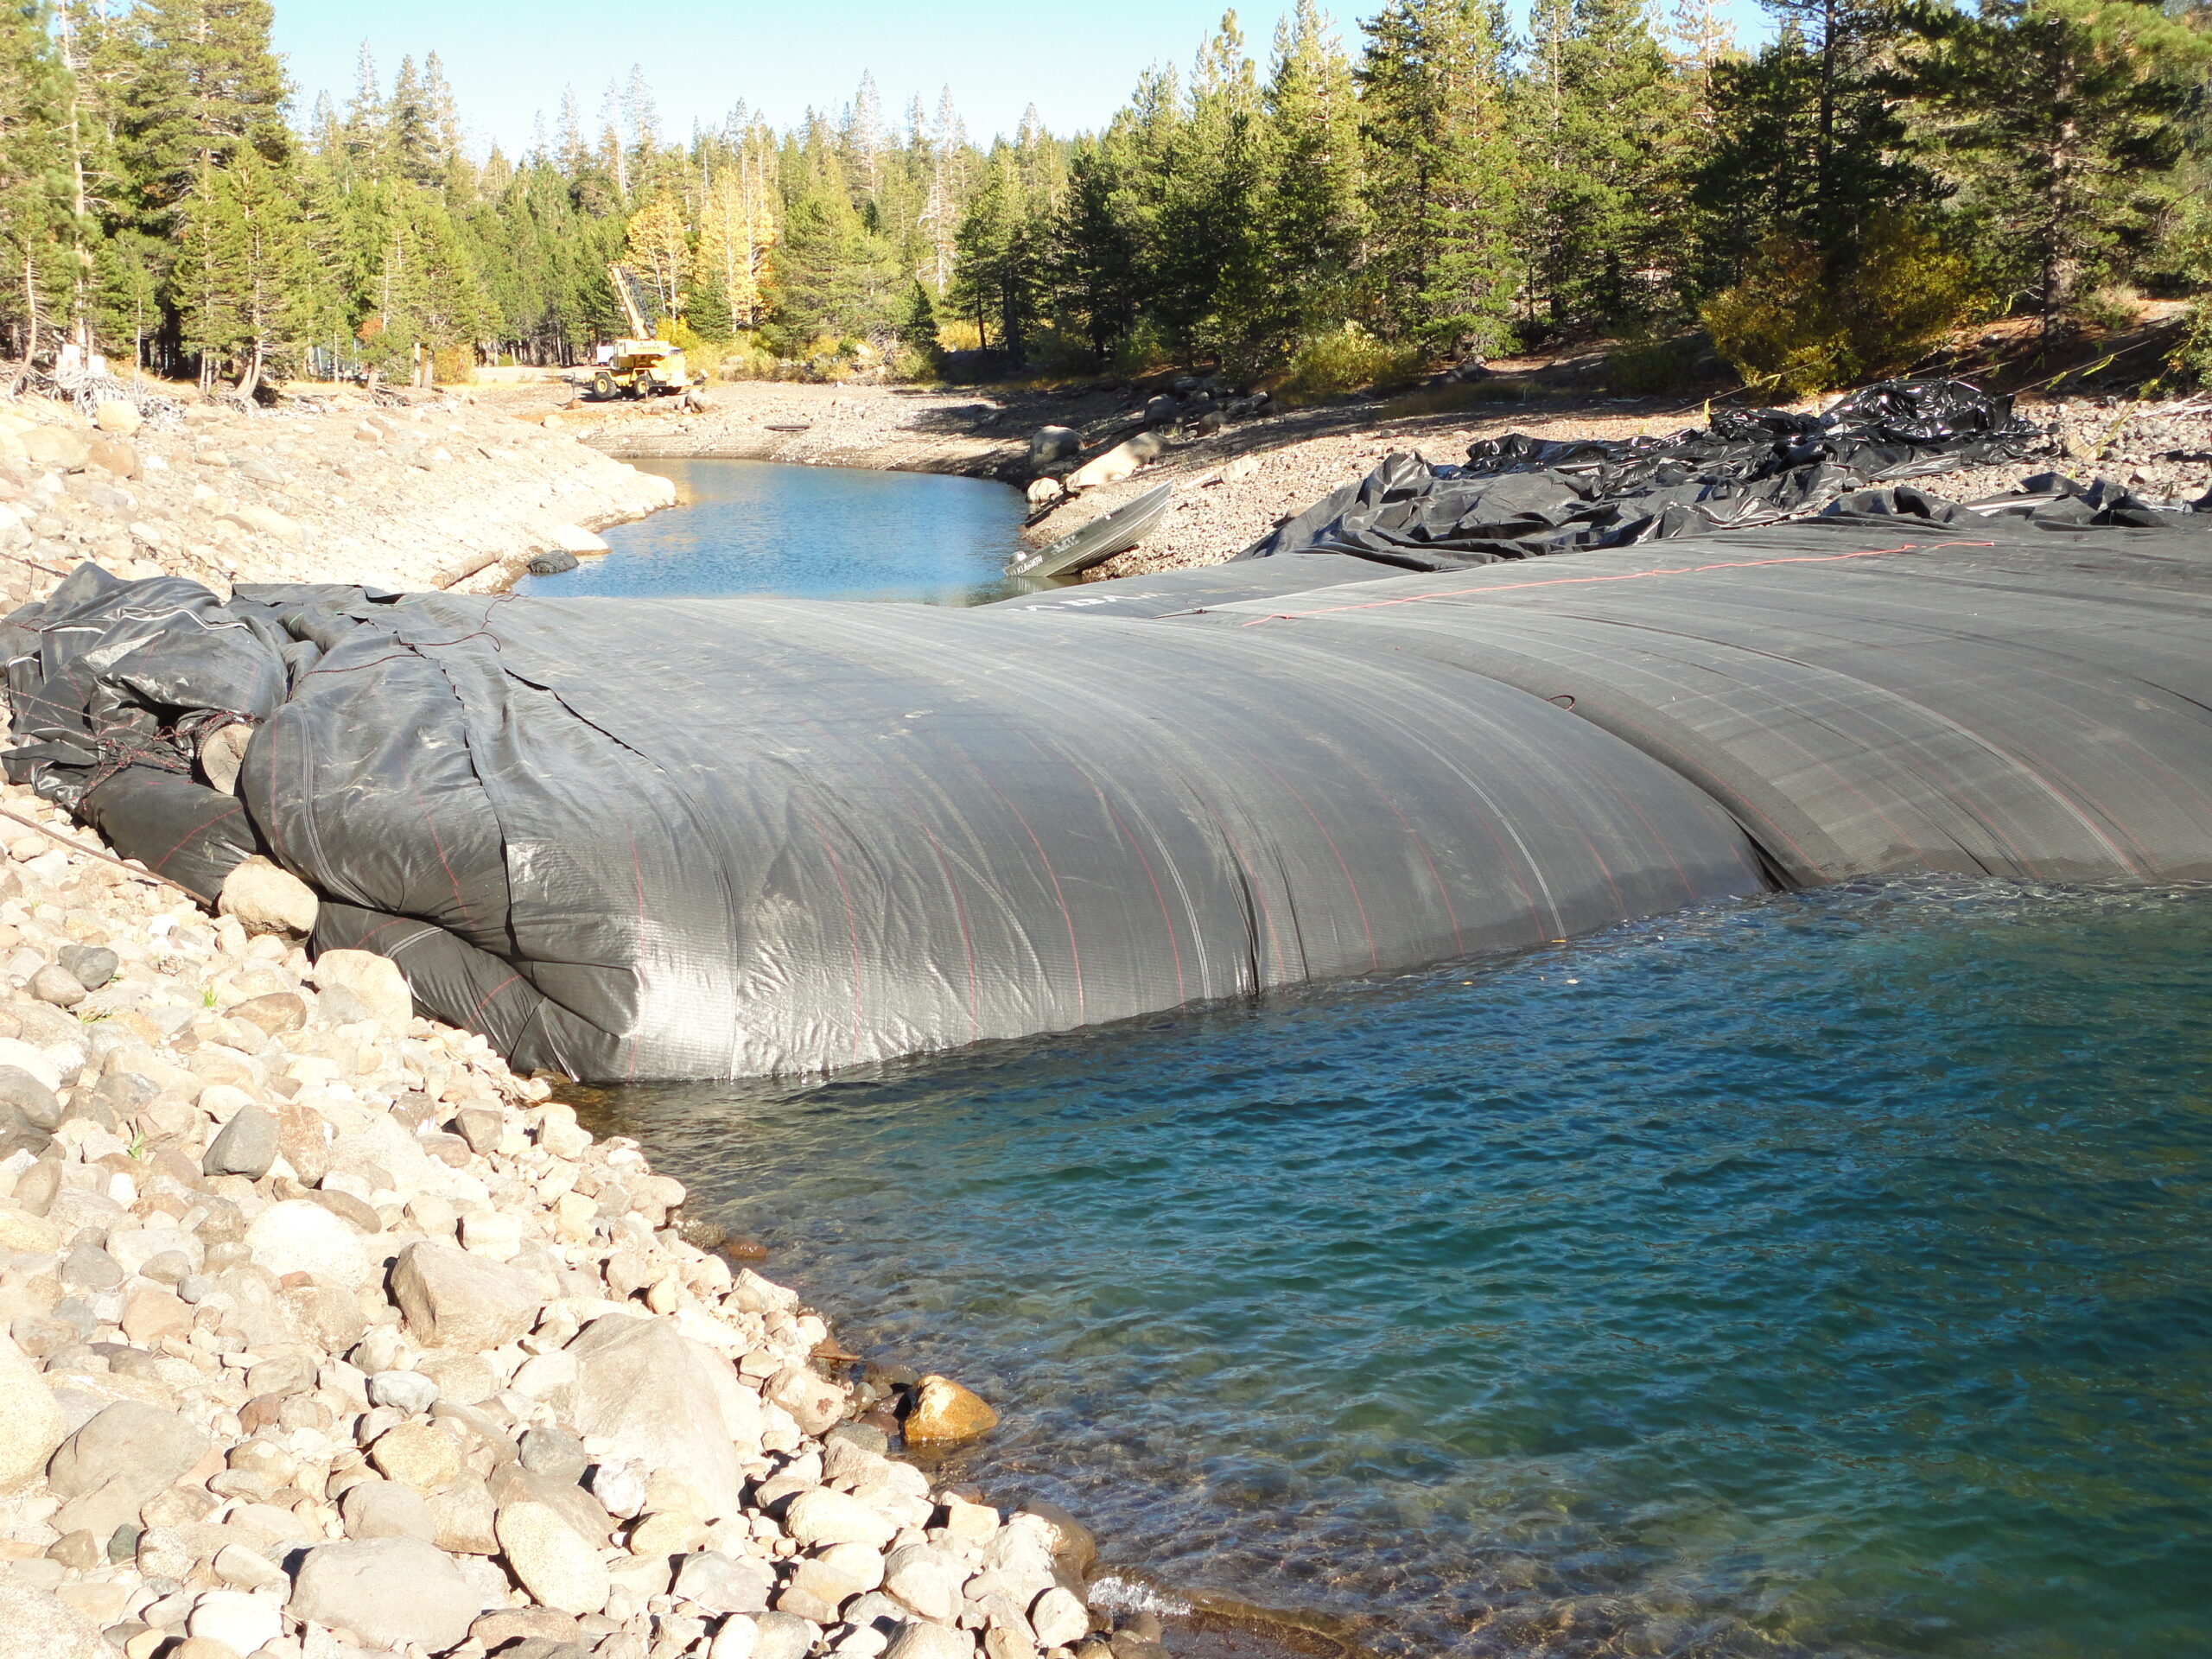
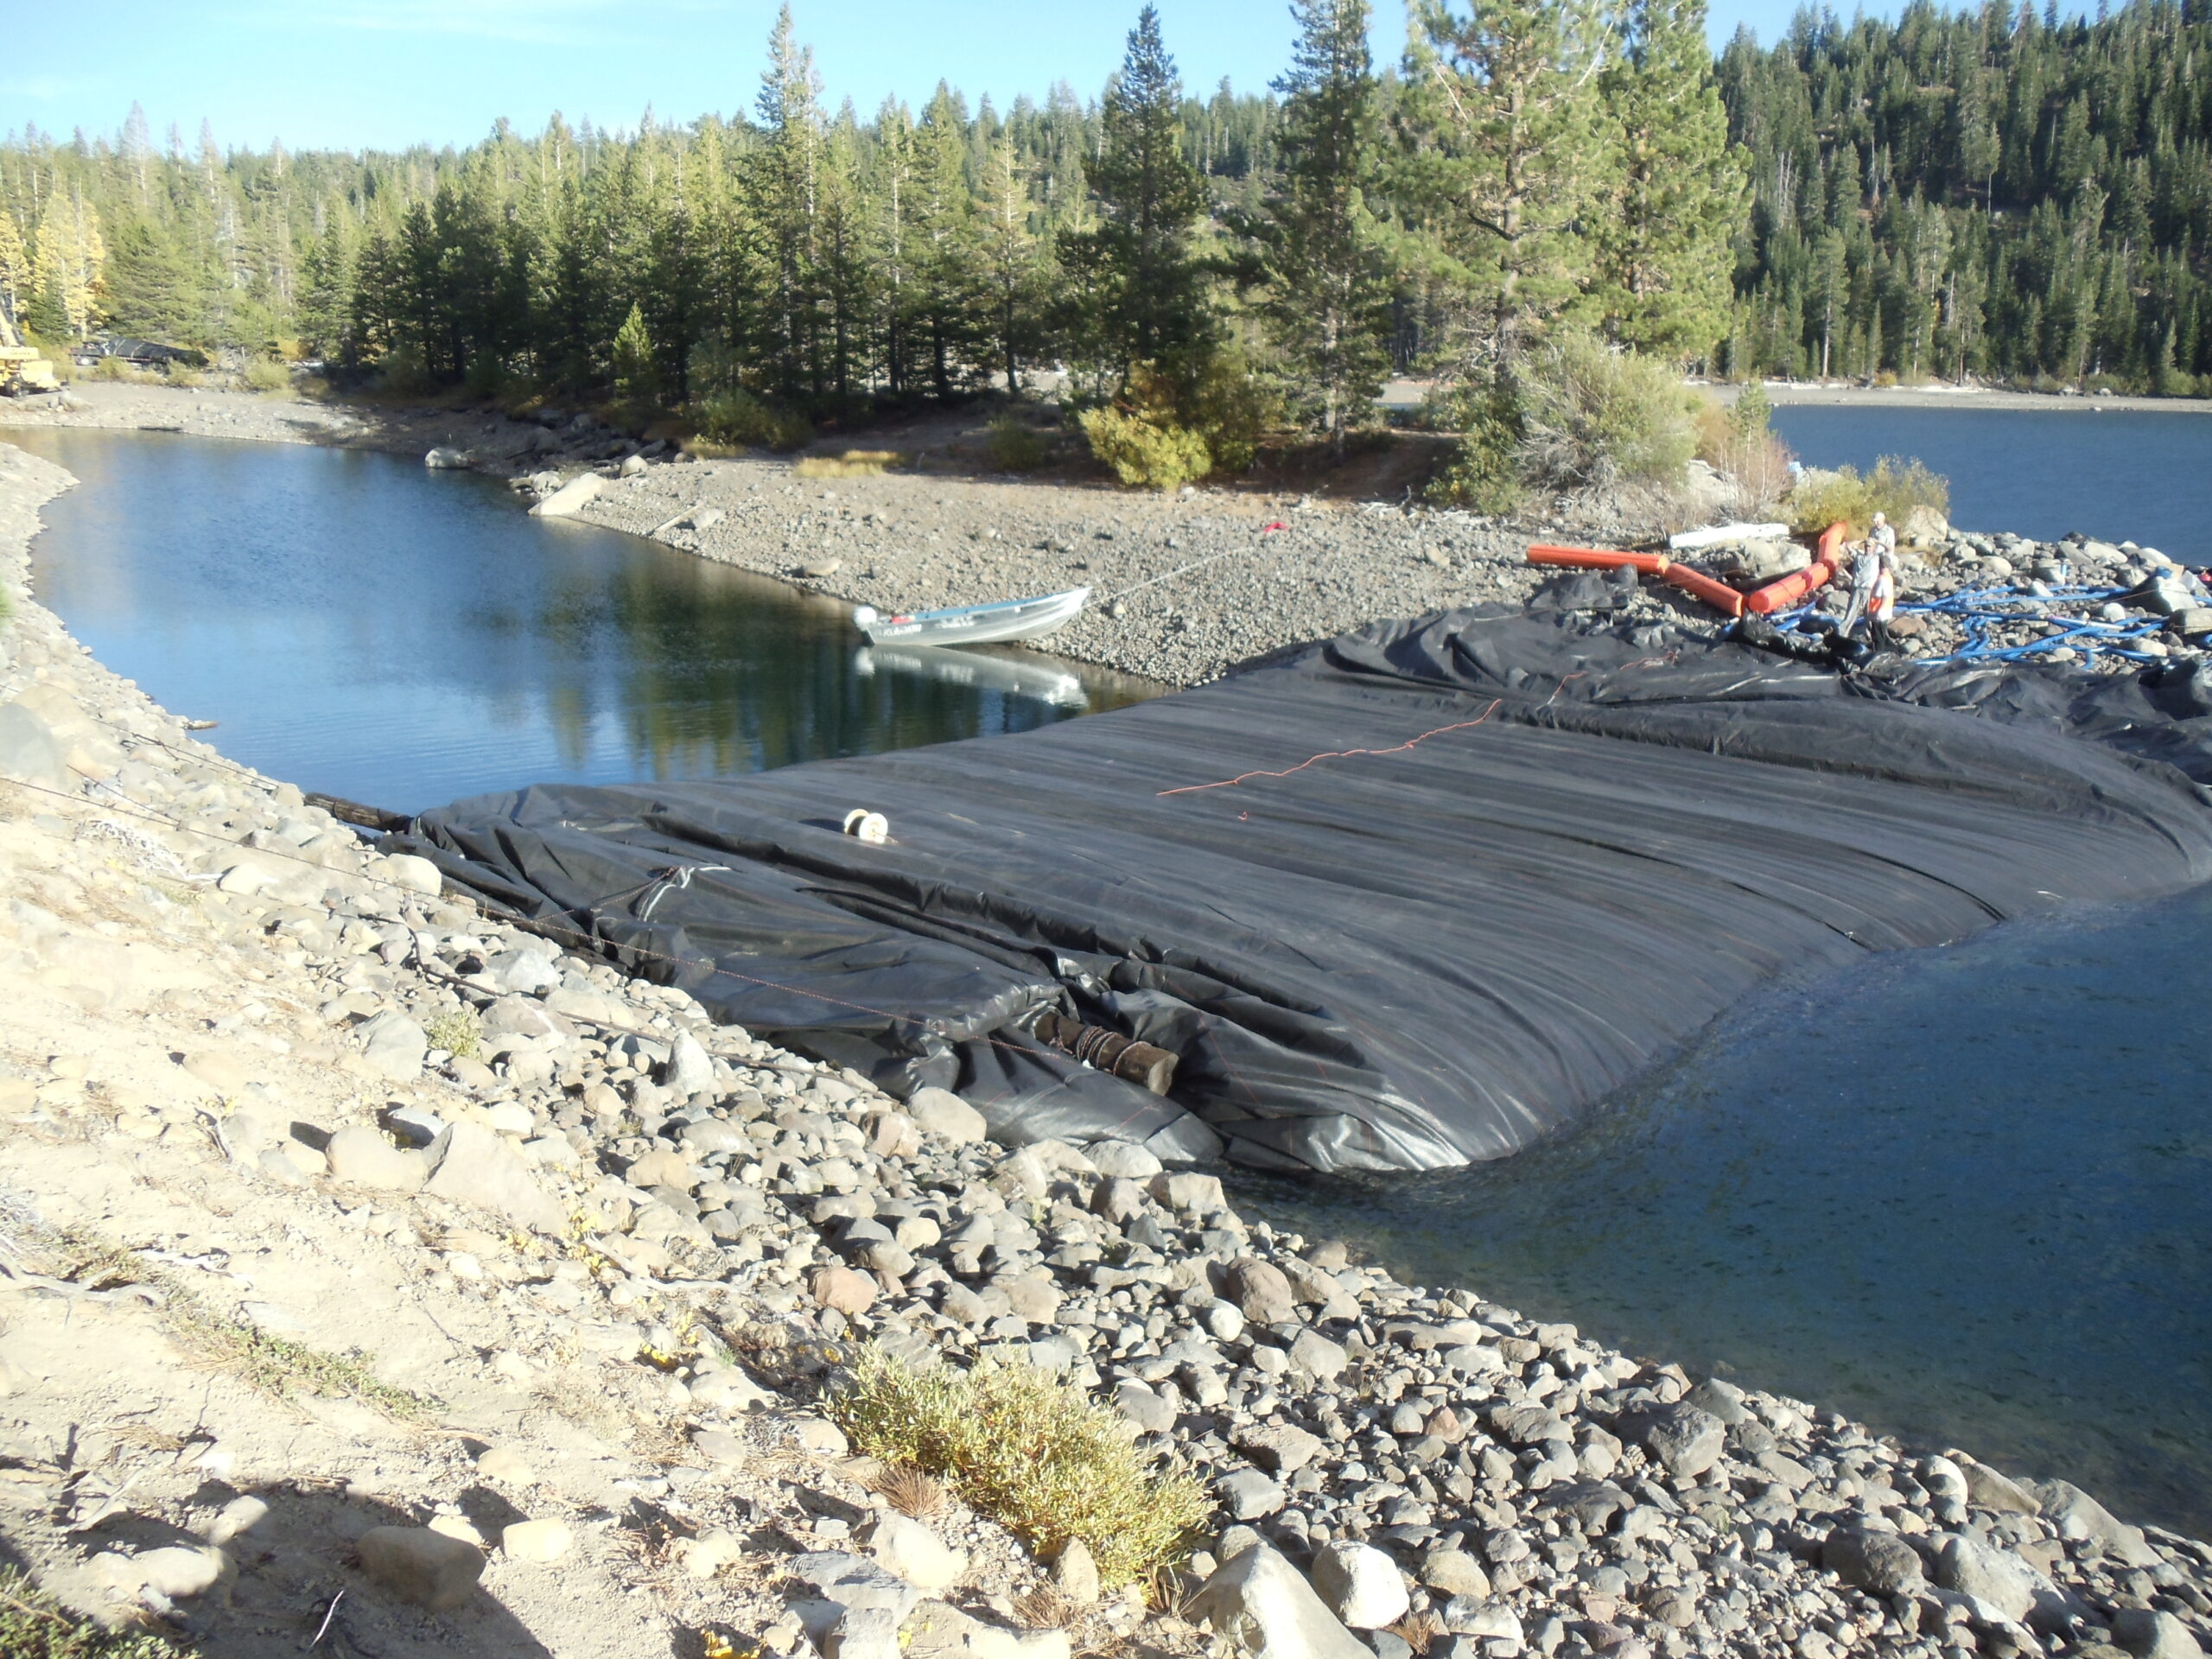
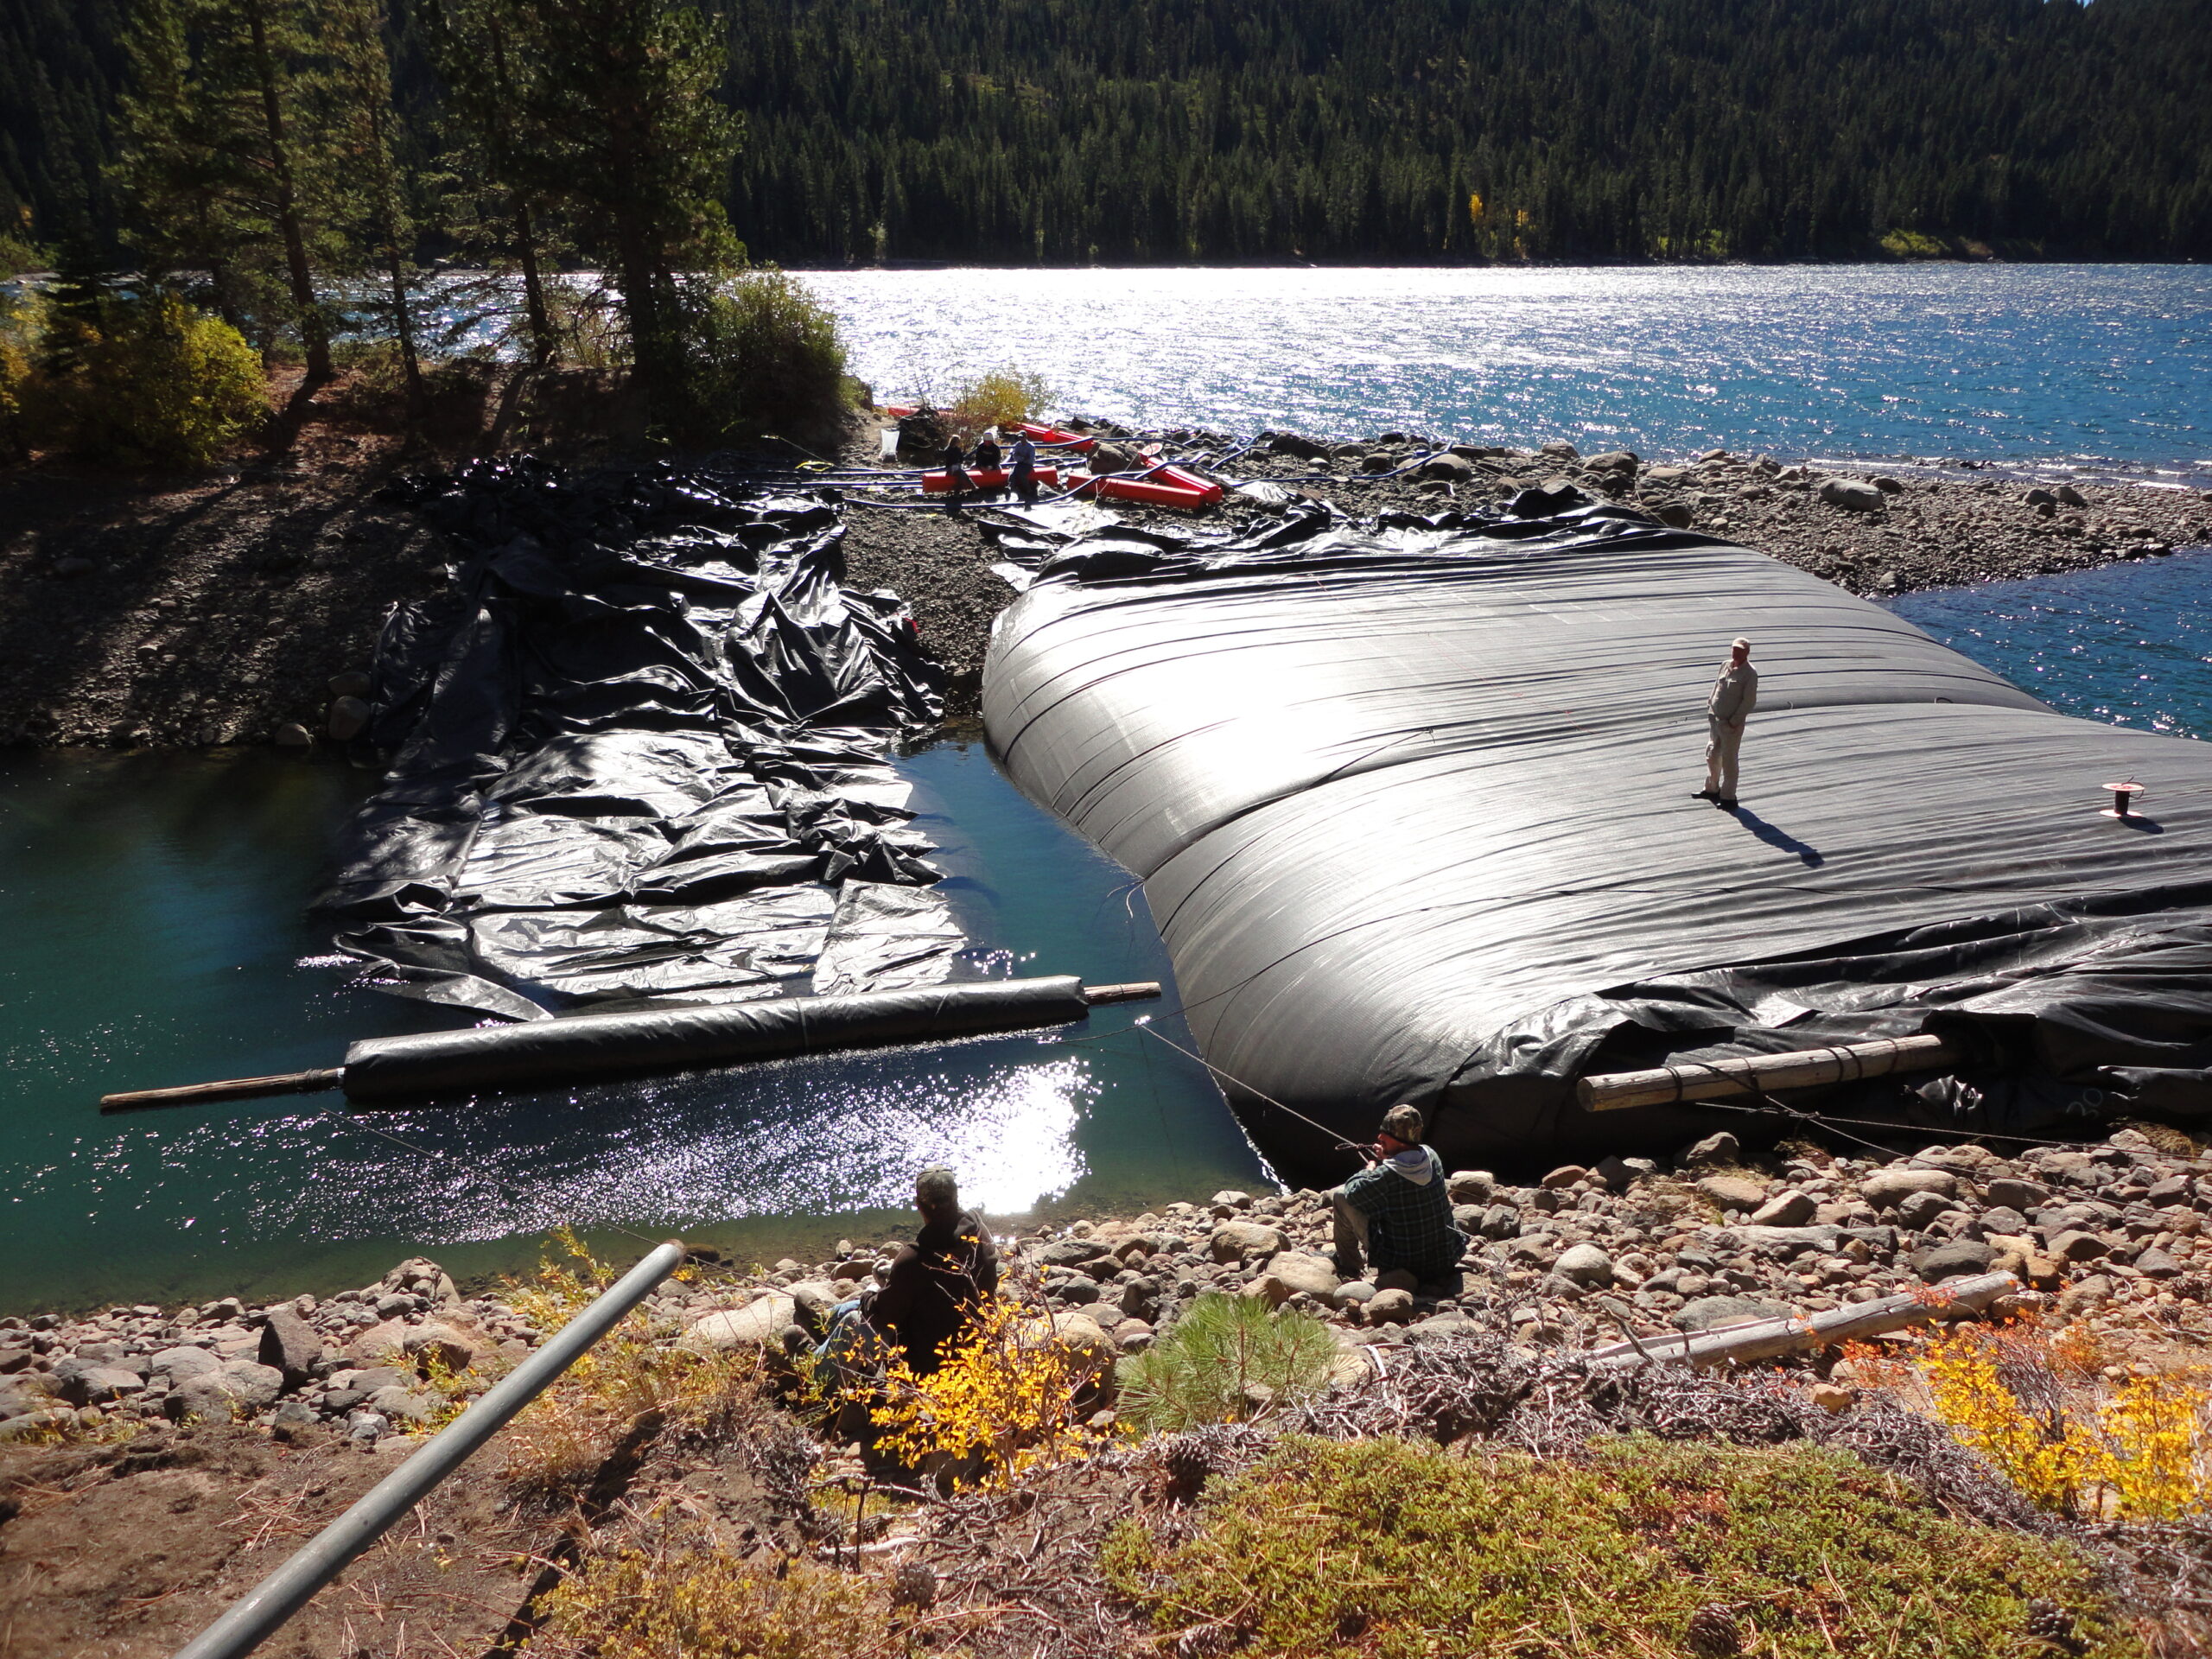
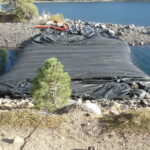
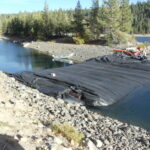
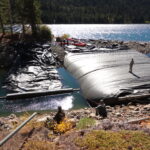
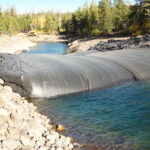
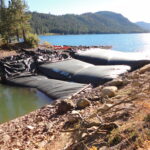
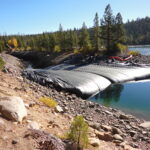
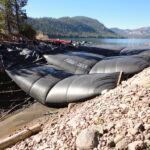
The 21ft tall primary AquaDam easily controlling 15ft of water depth.
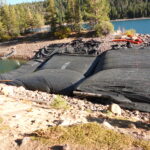
Here is a great photo of the starting bank used for this 21ft tall AquaDam. This starting bank was a great choice because there was plenty of height for the AquaDam to reach it's maximum height as well as an area for pumps and filling equipment.
Notice the water level difference from right to left.
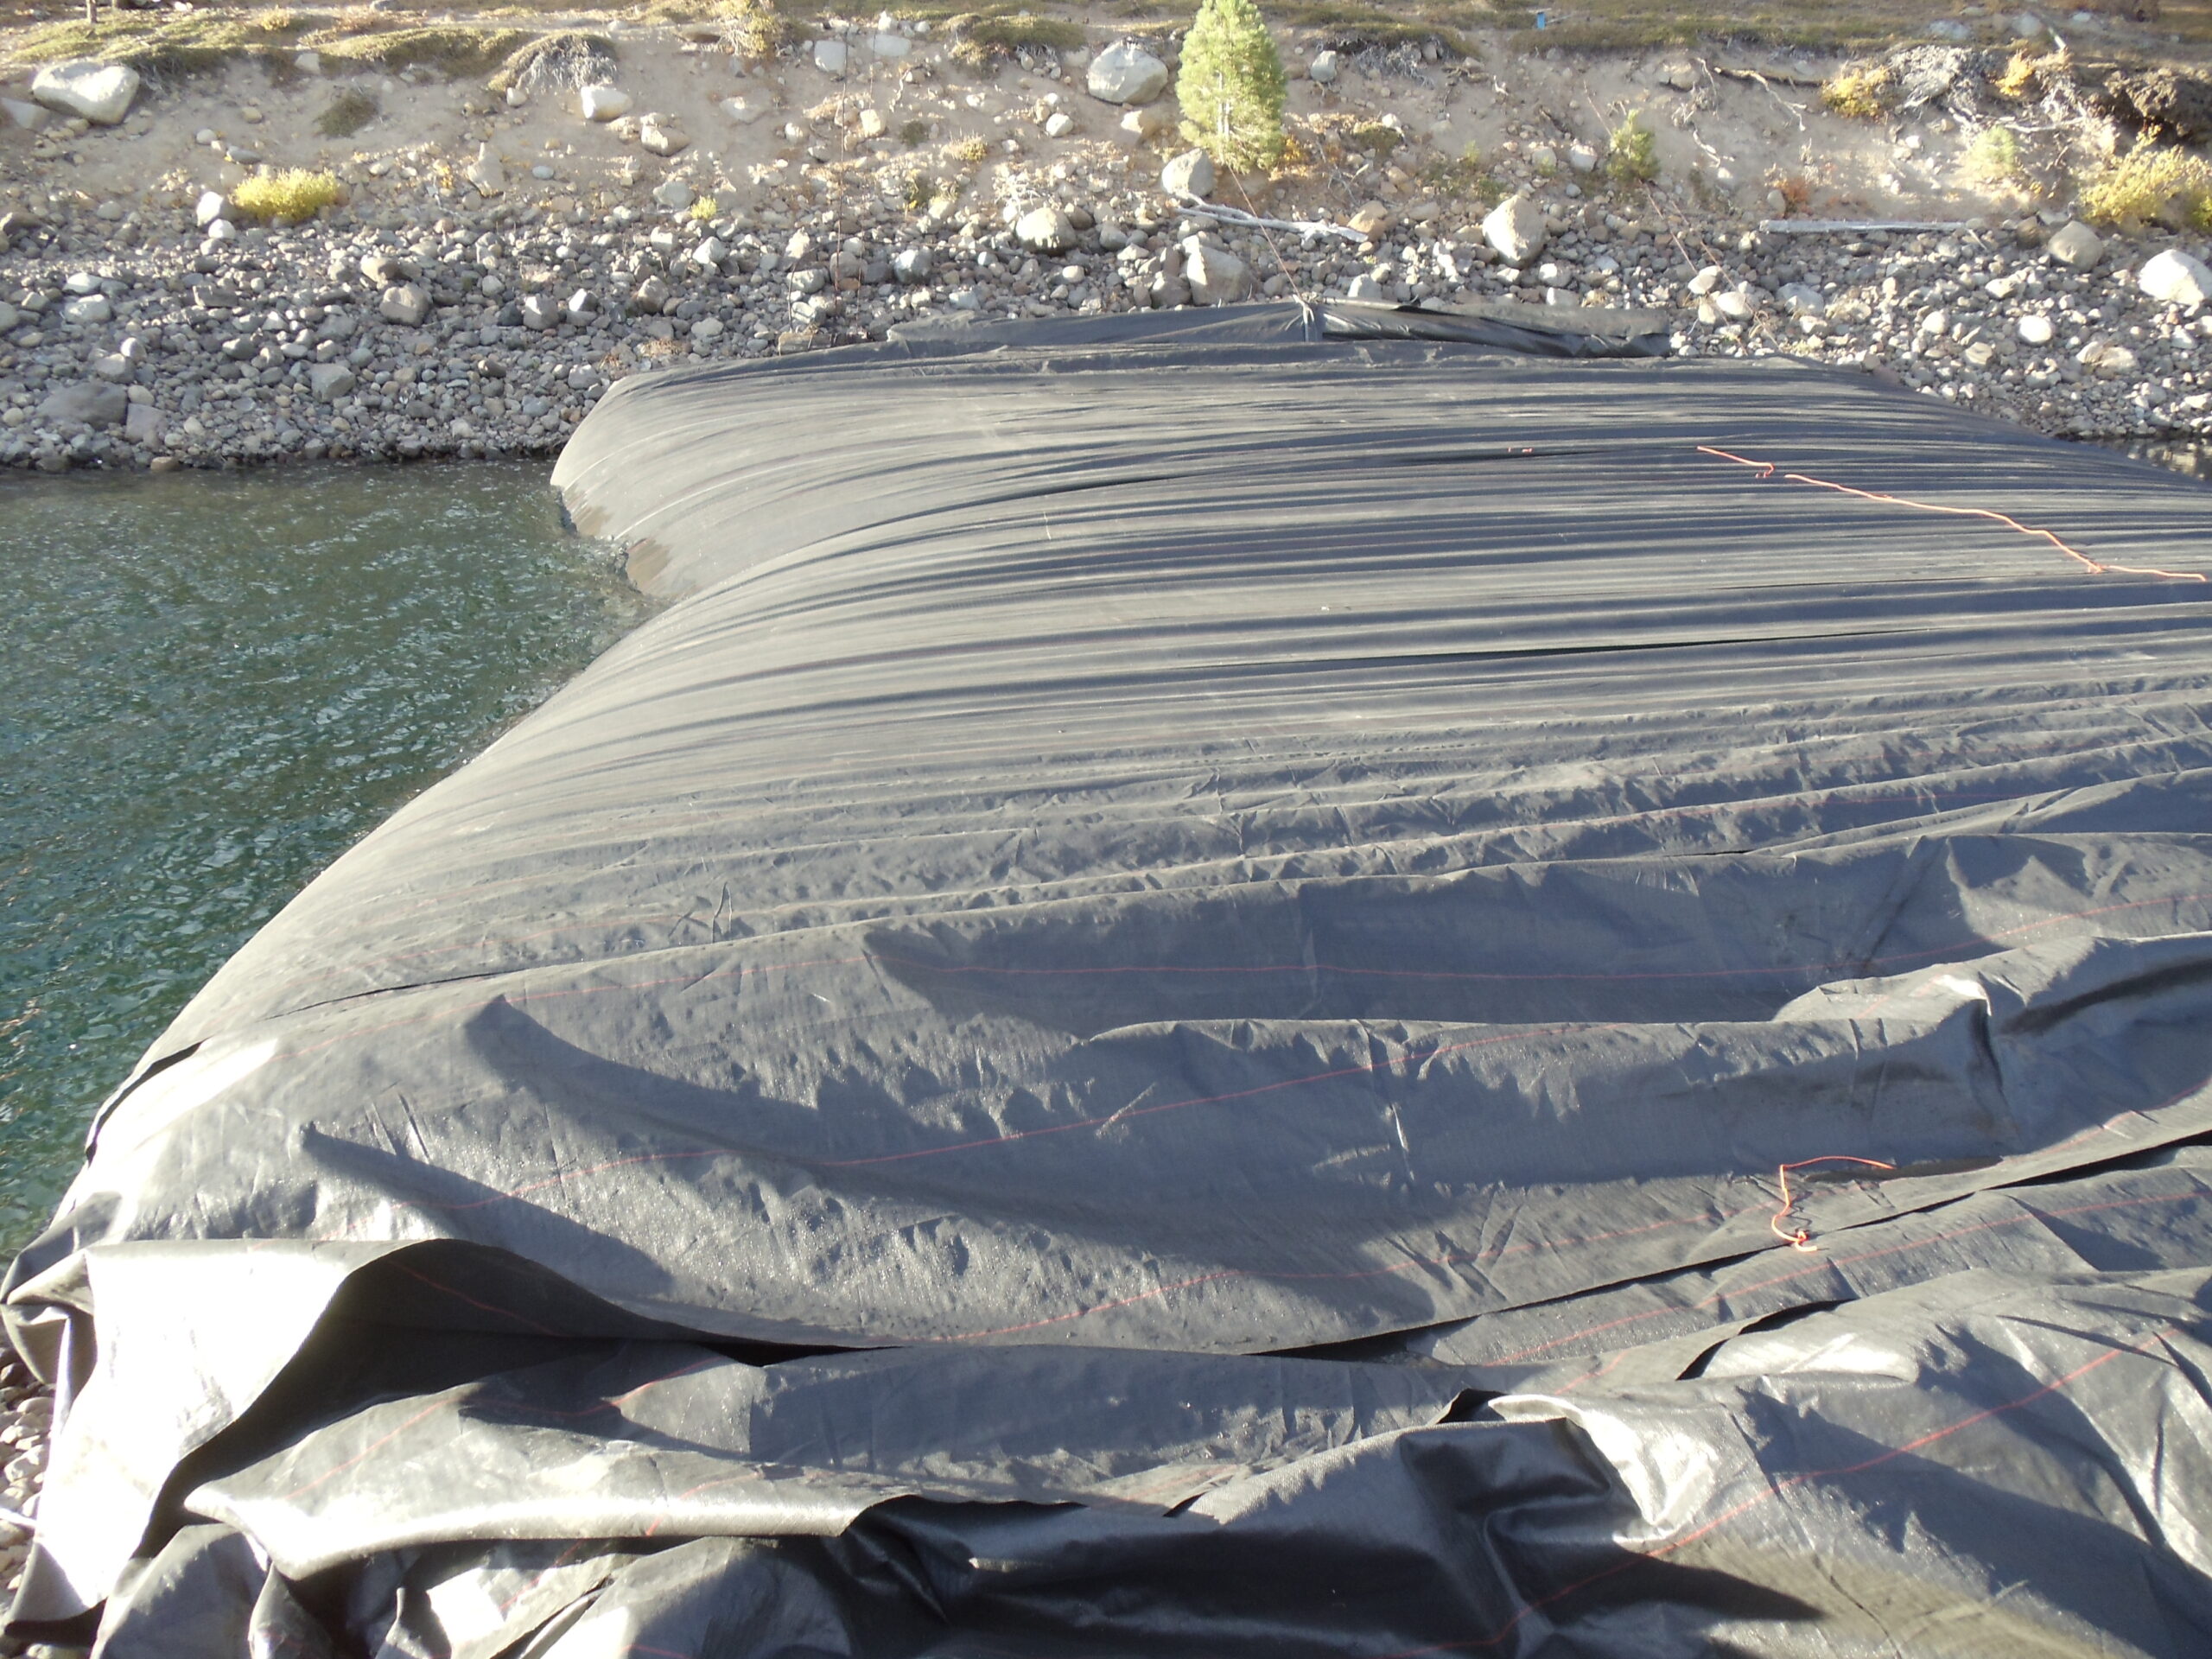
The 21ft tall AquaDam was roughly 44ft wide where the unit reached it's maximum height and slightly wider as it climbed the banks.
A stepping down technique was used for this project that worked very well.
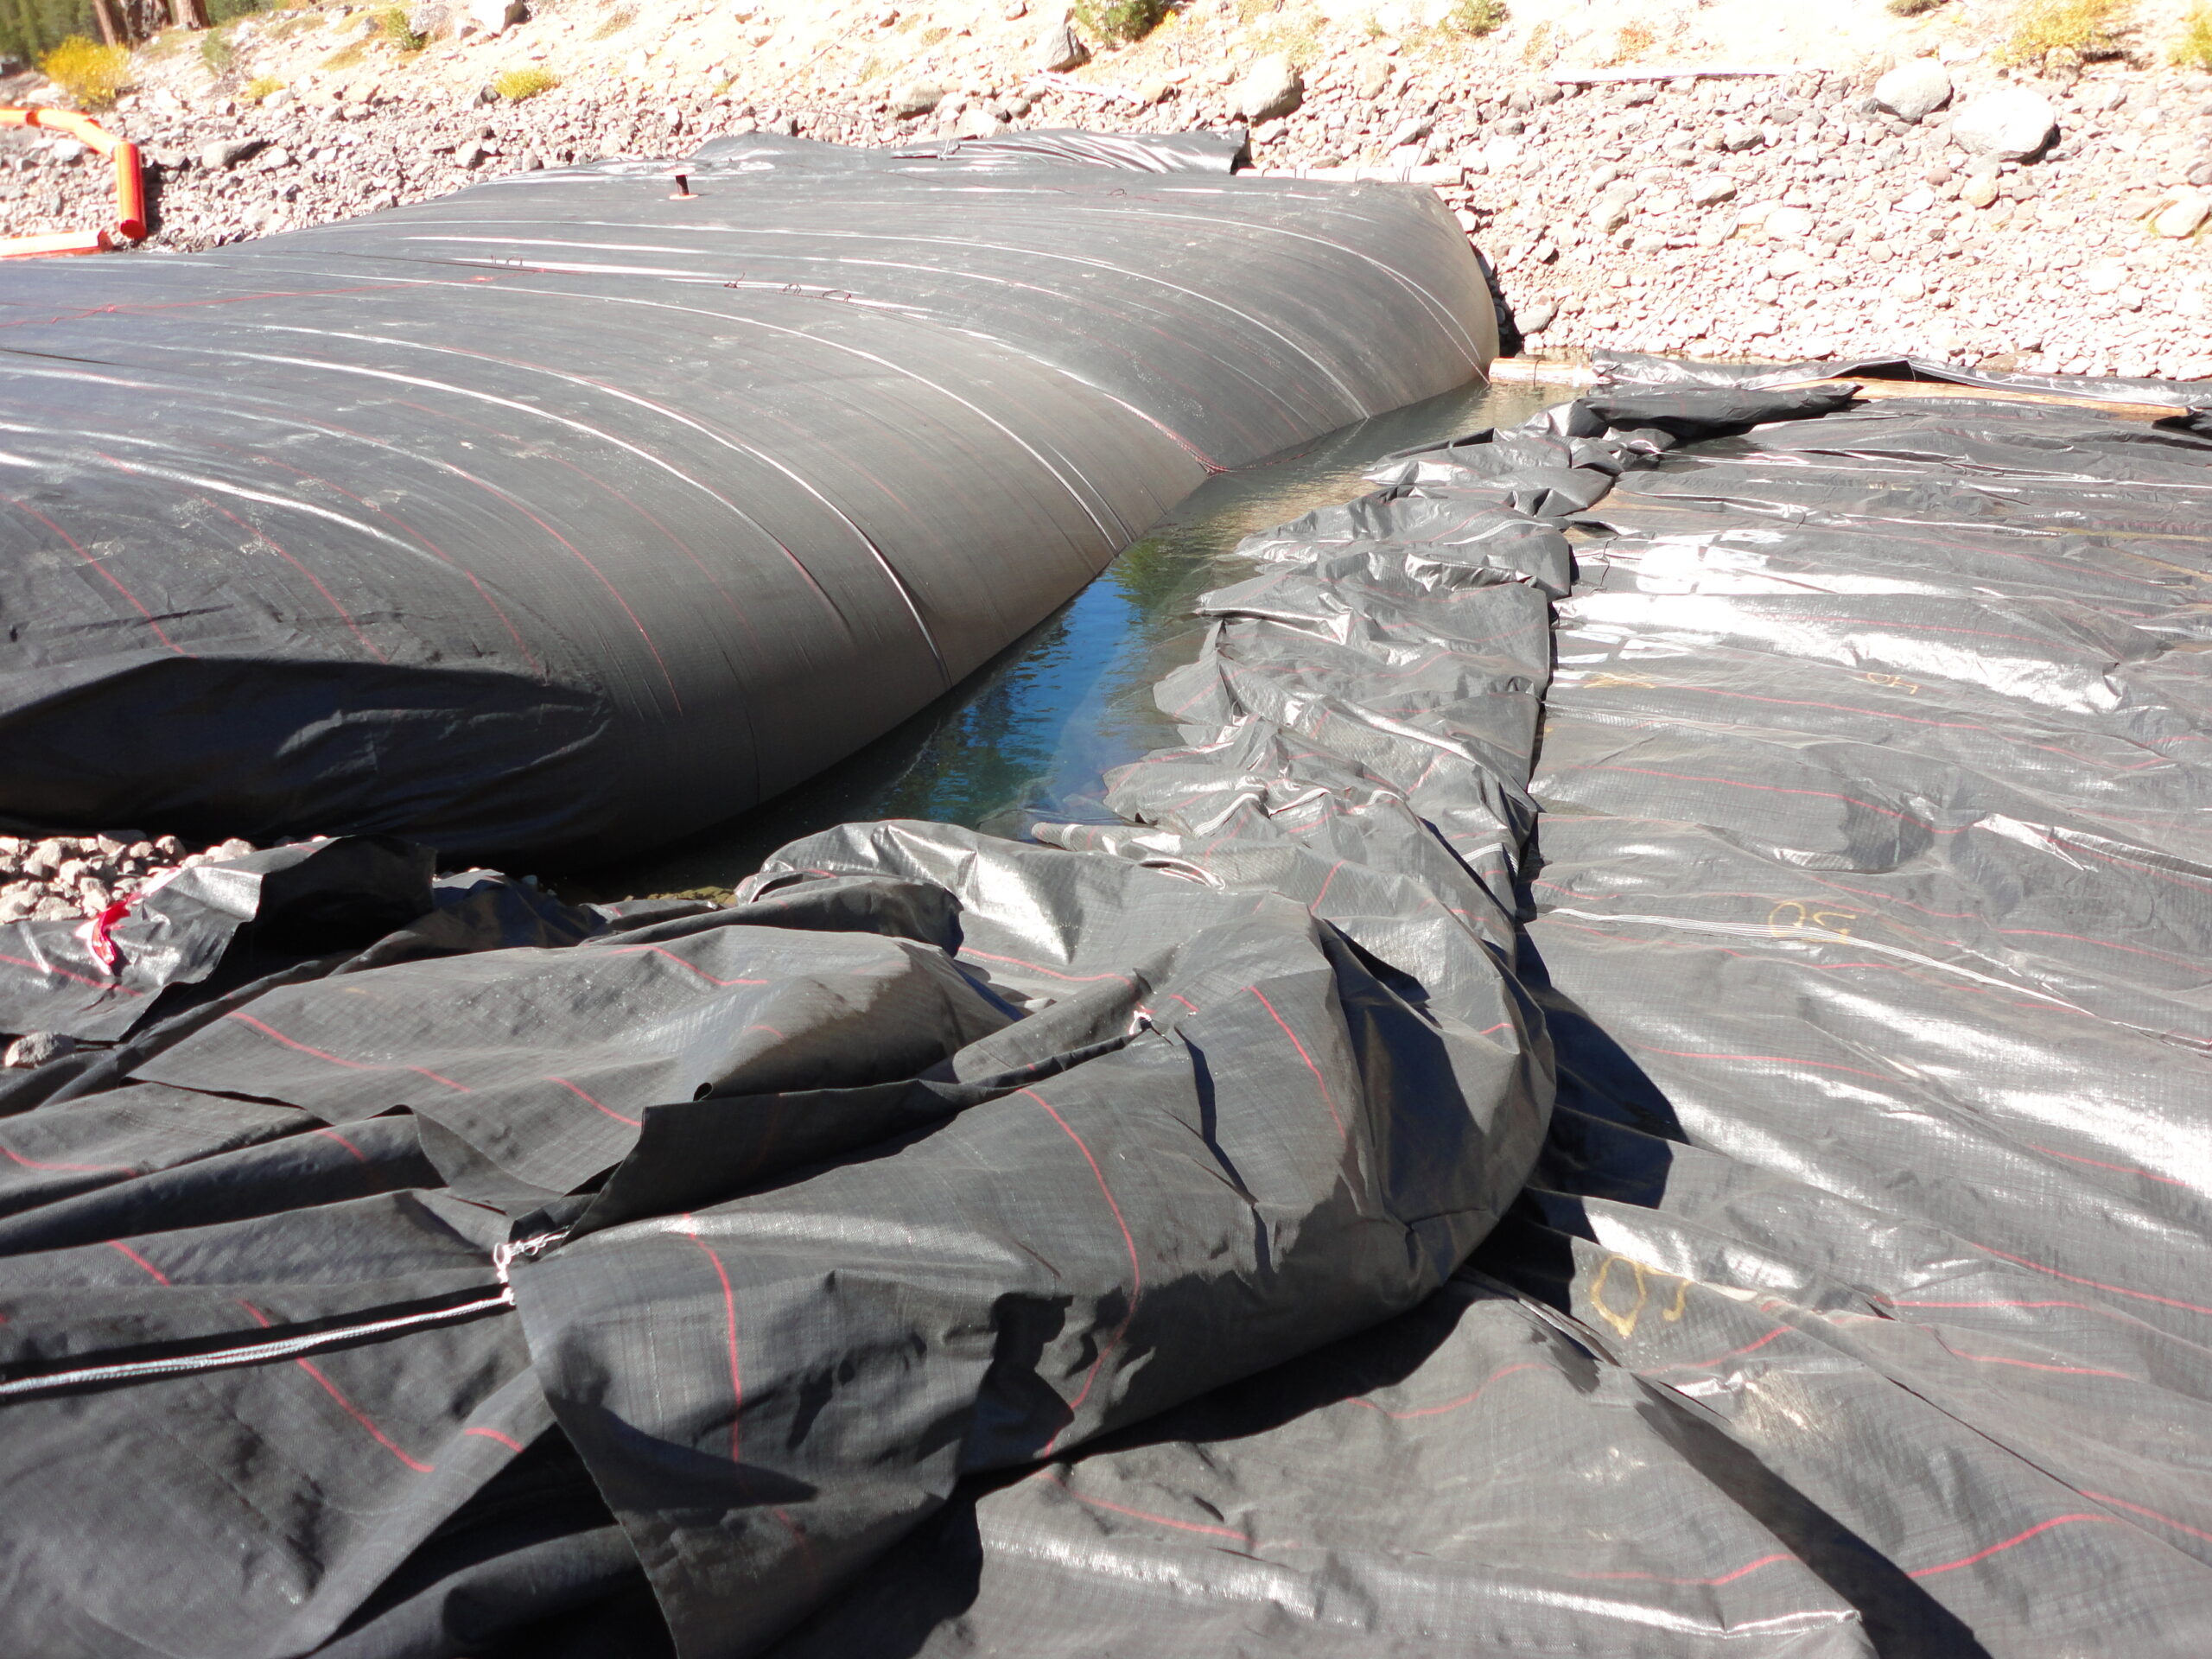
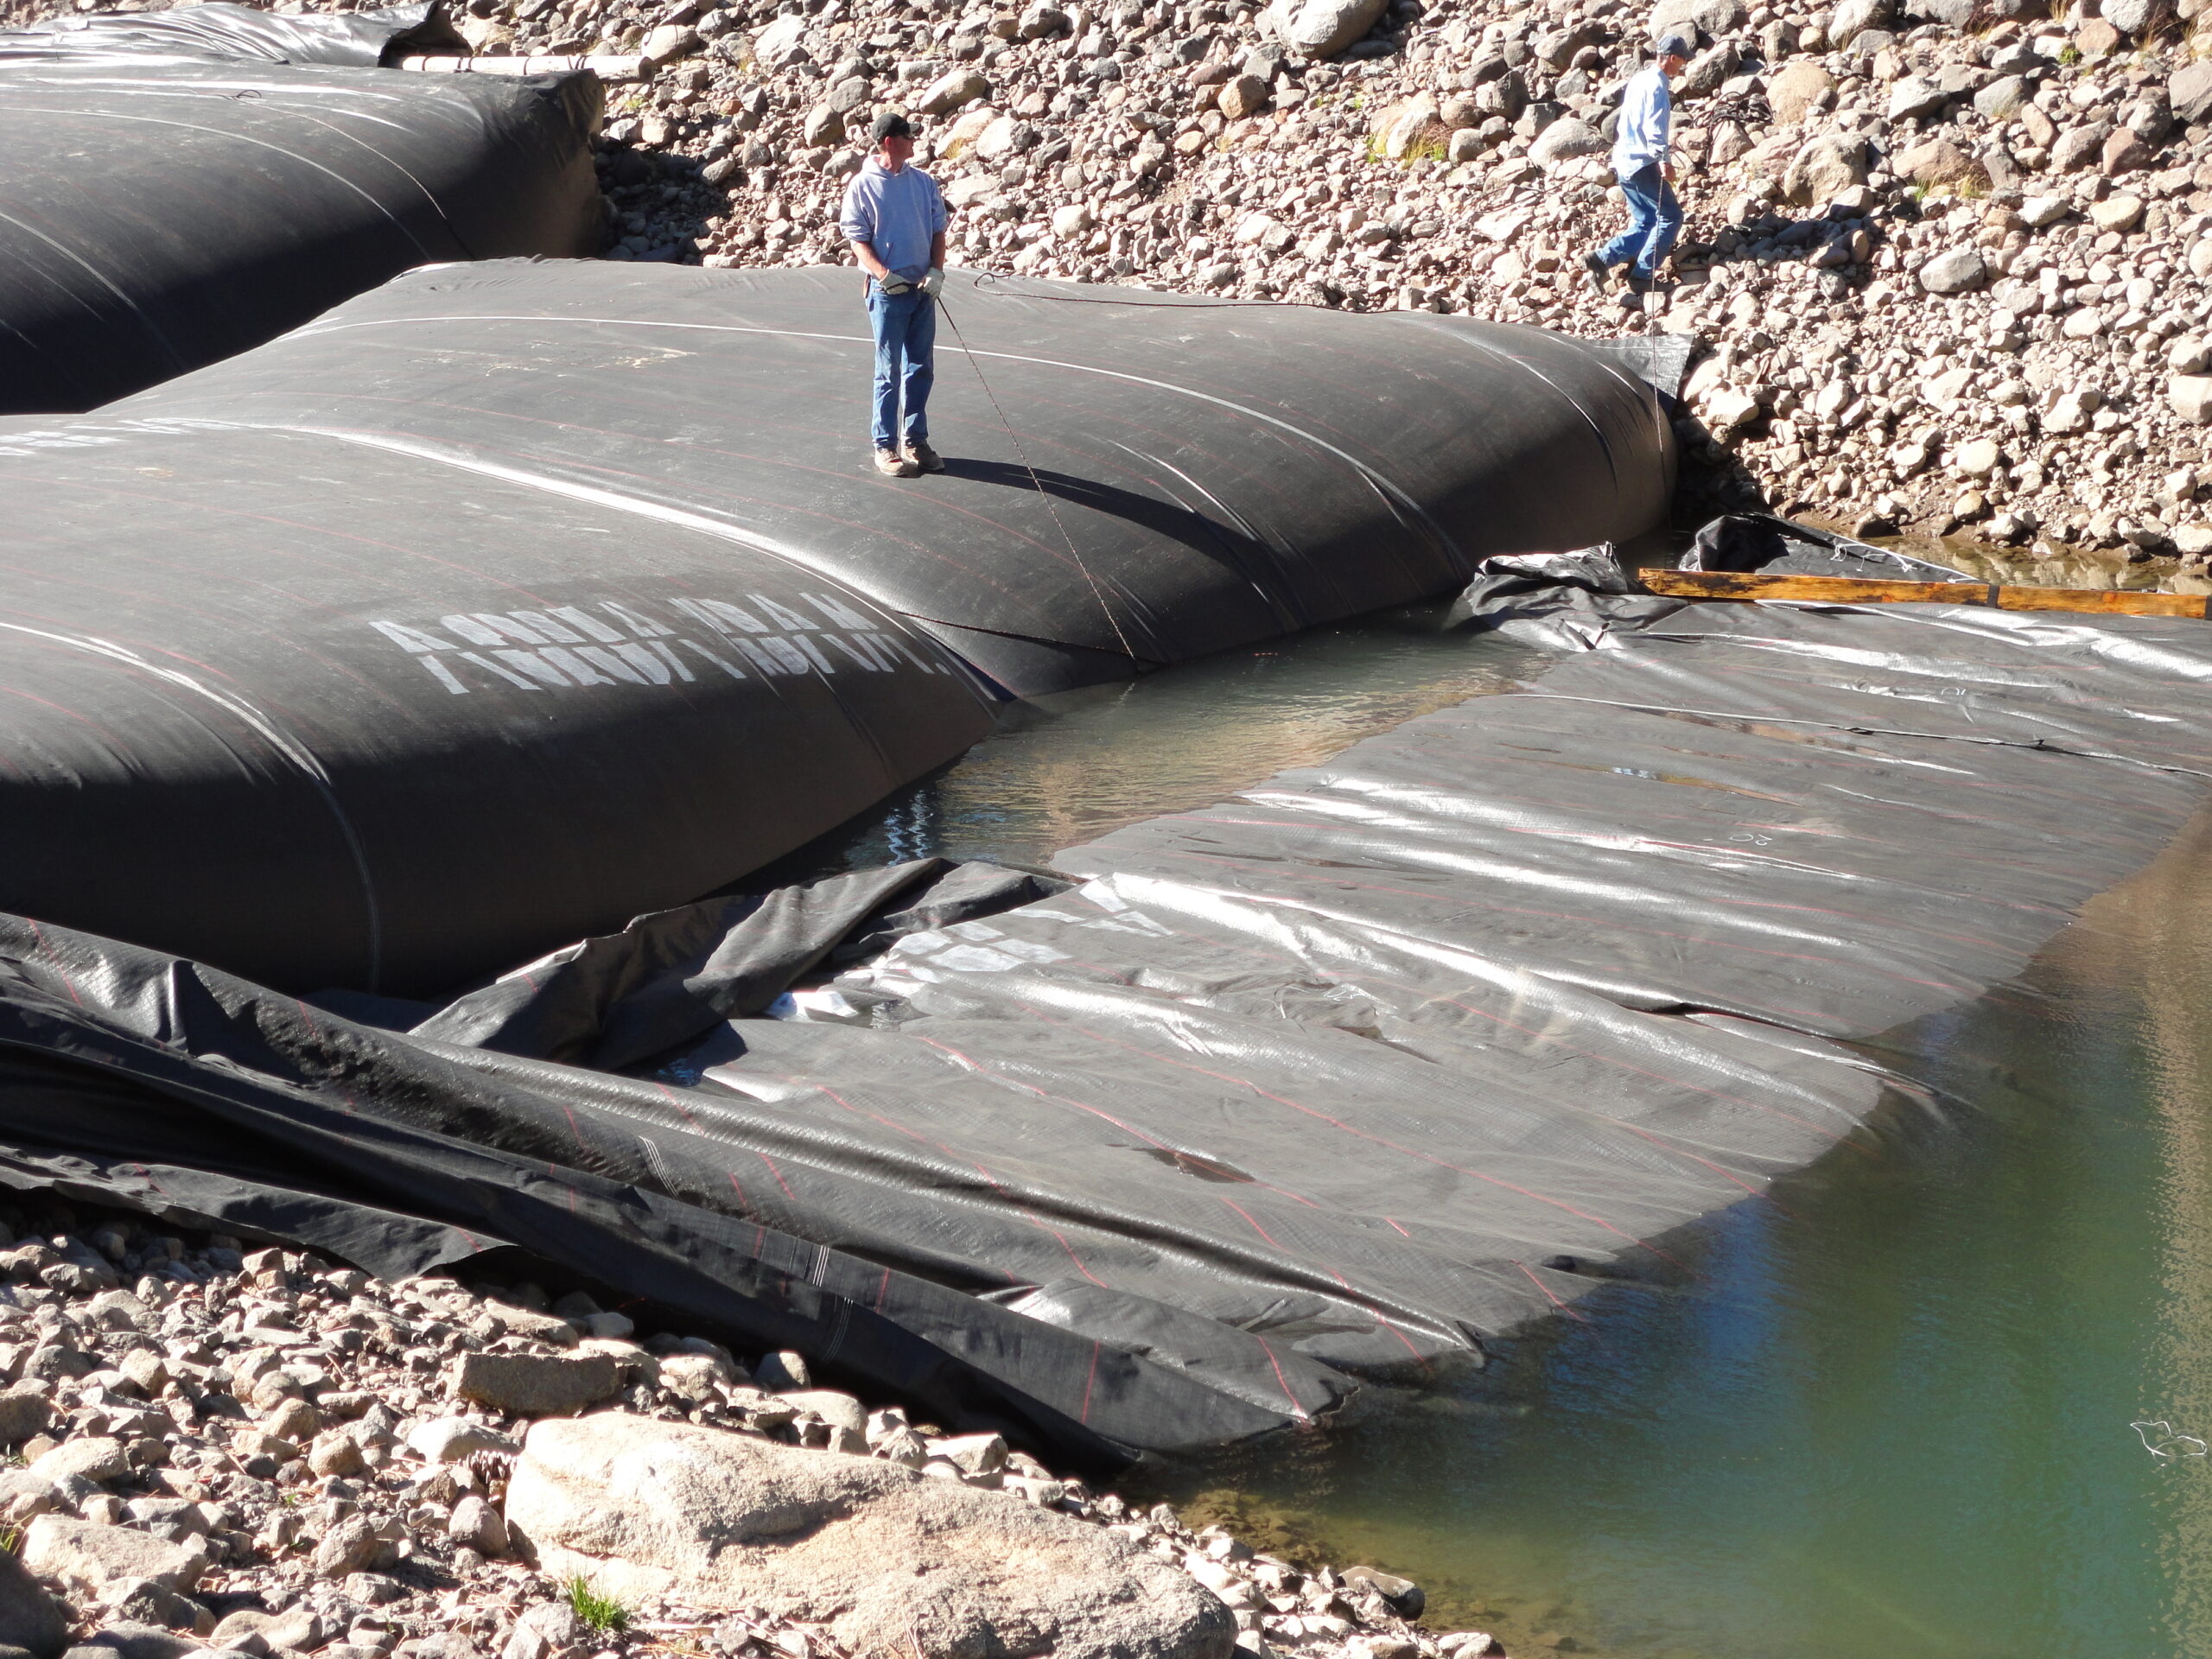
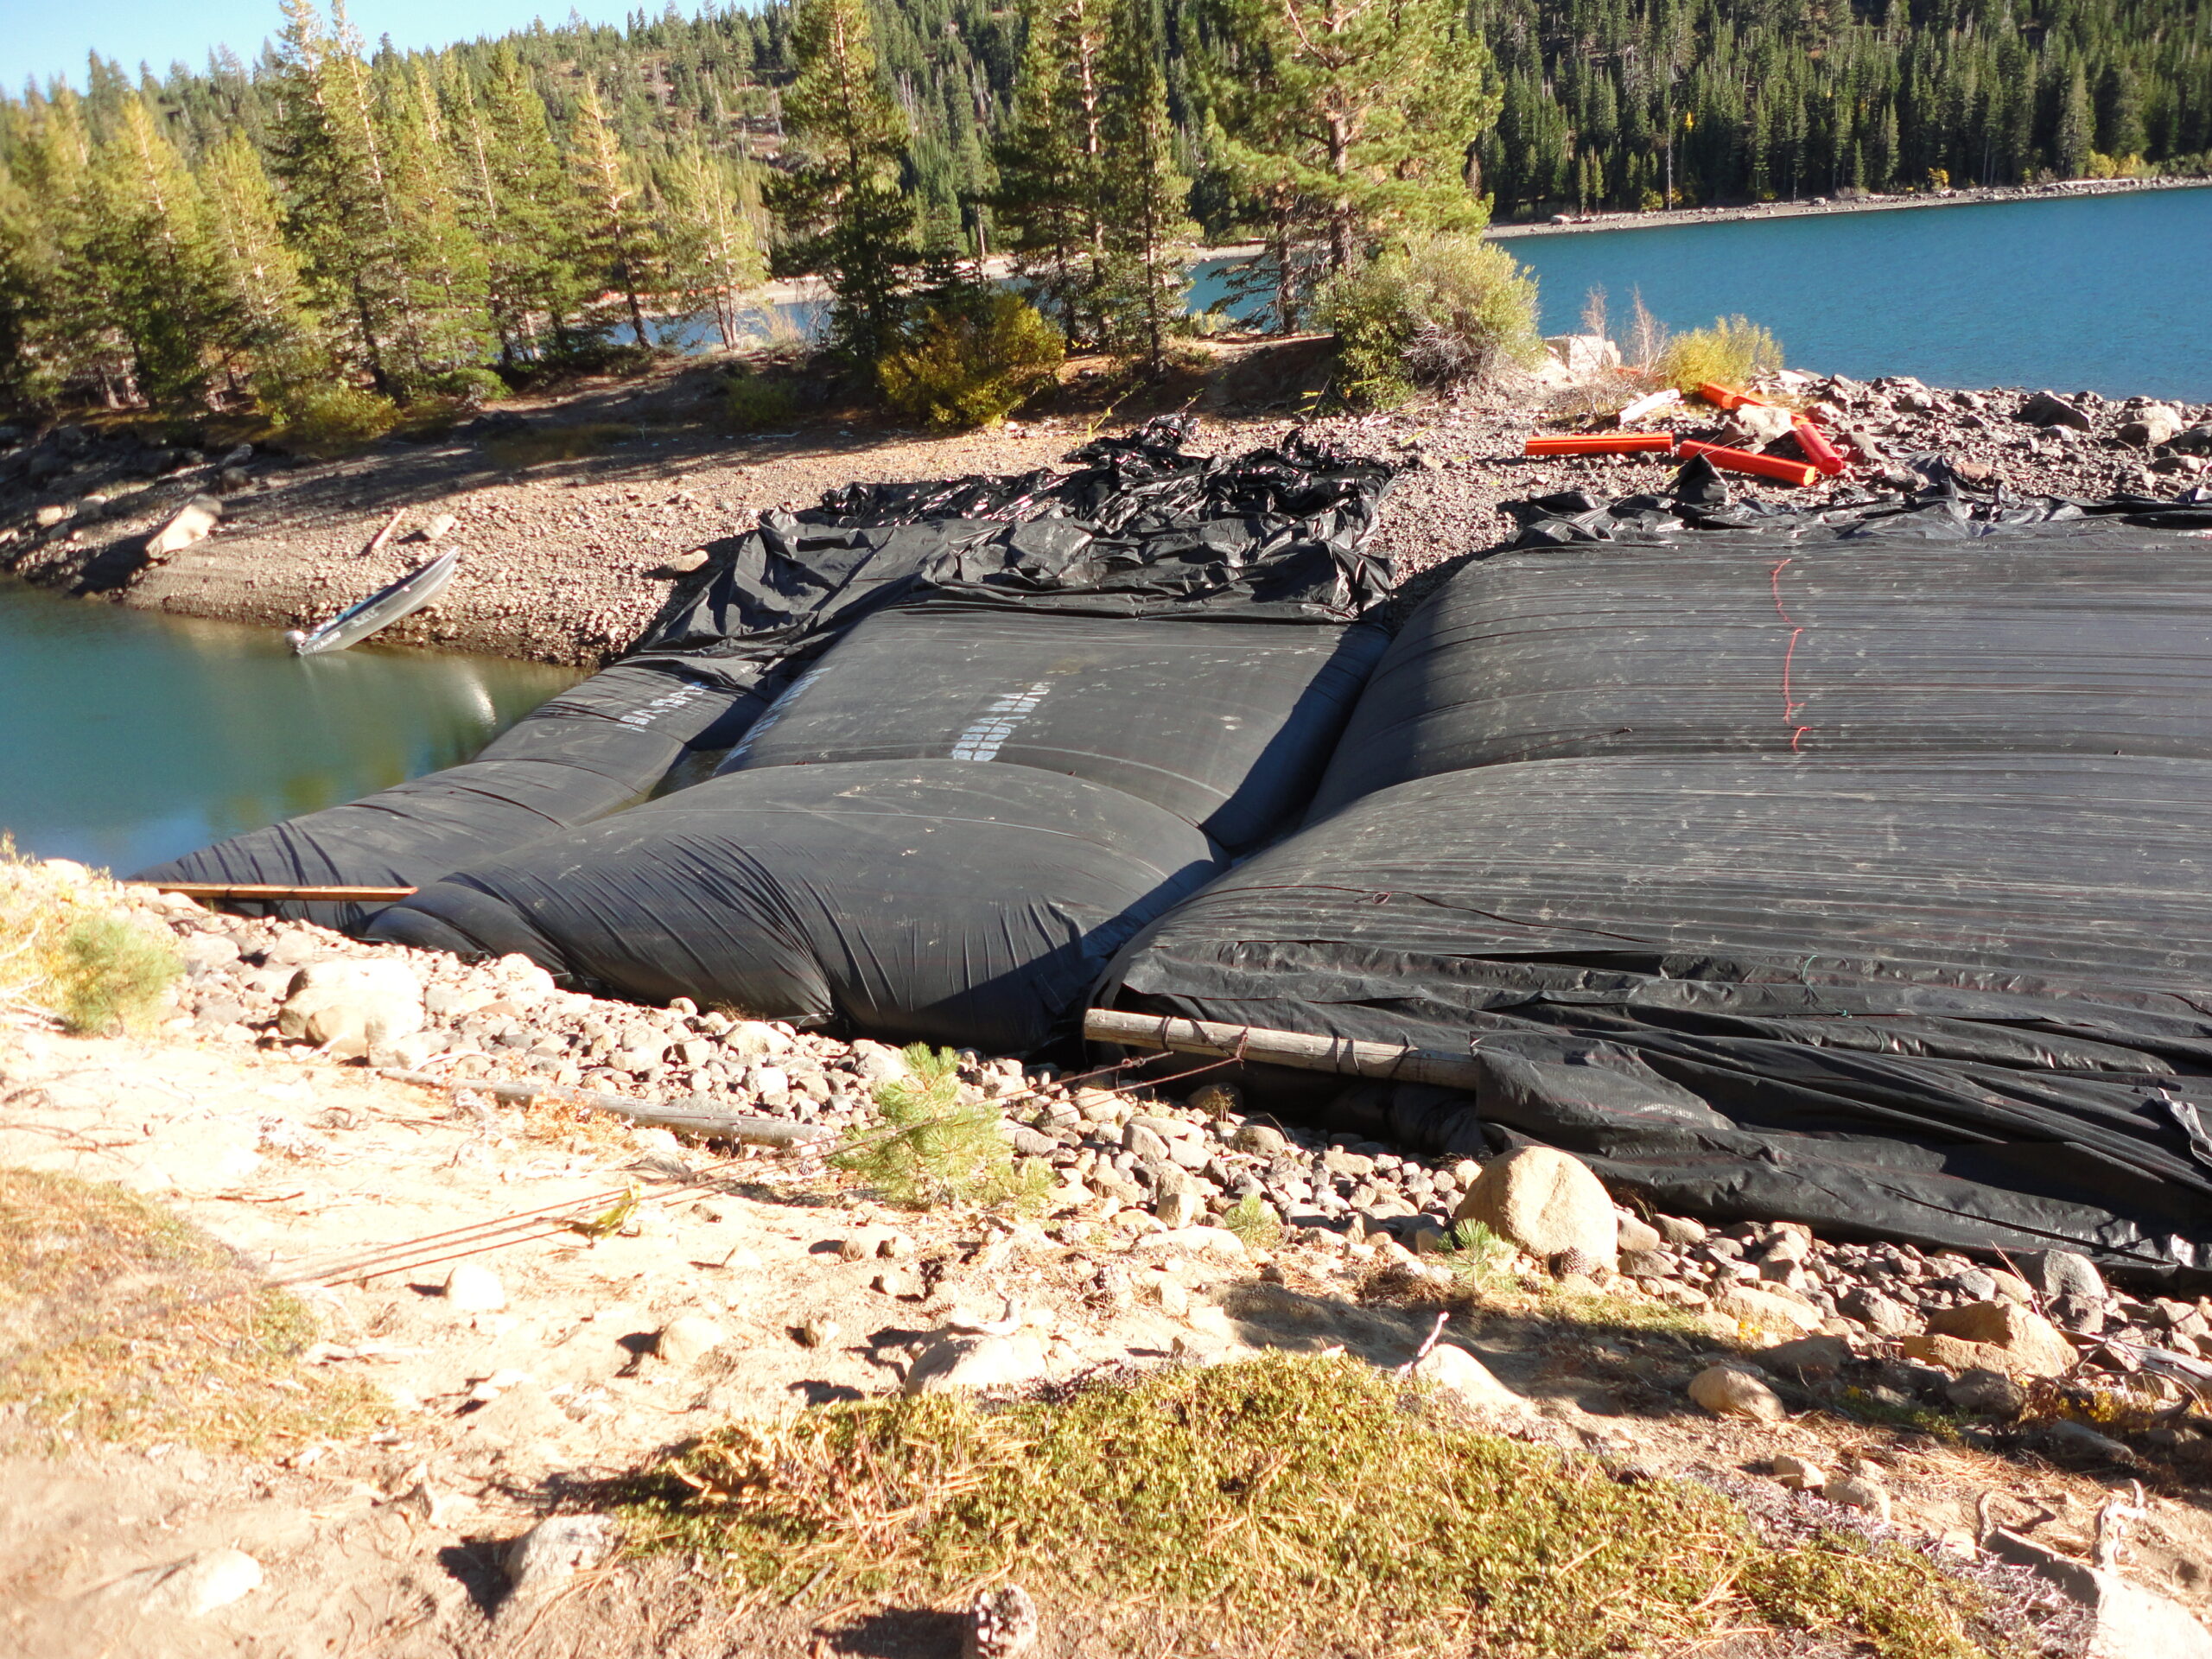
The water between the 21ft 16ft tall AquaDams will eventually drain, thanks to the two (2) inch suction hoses placed underneath the two (2) support AquaDams.
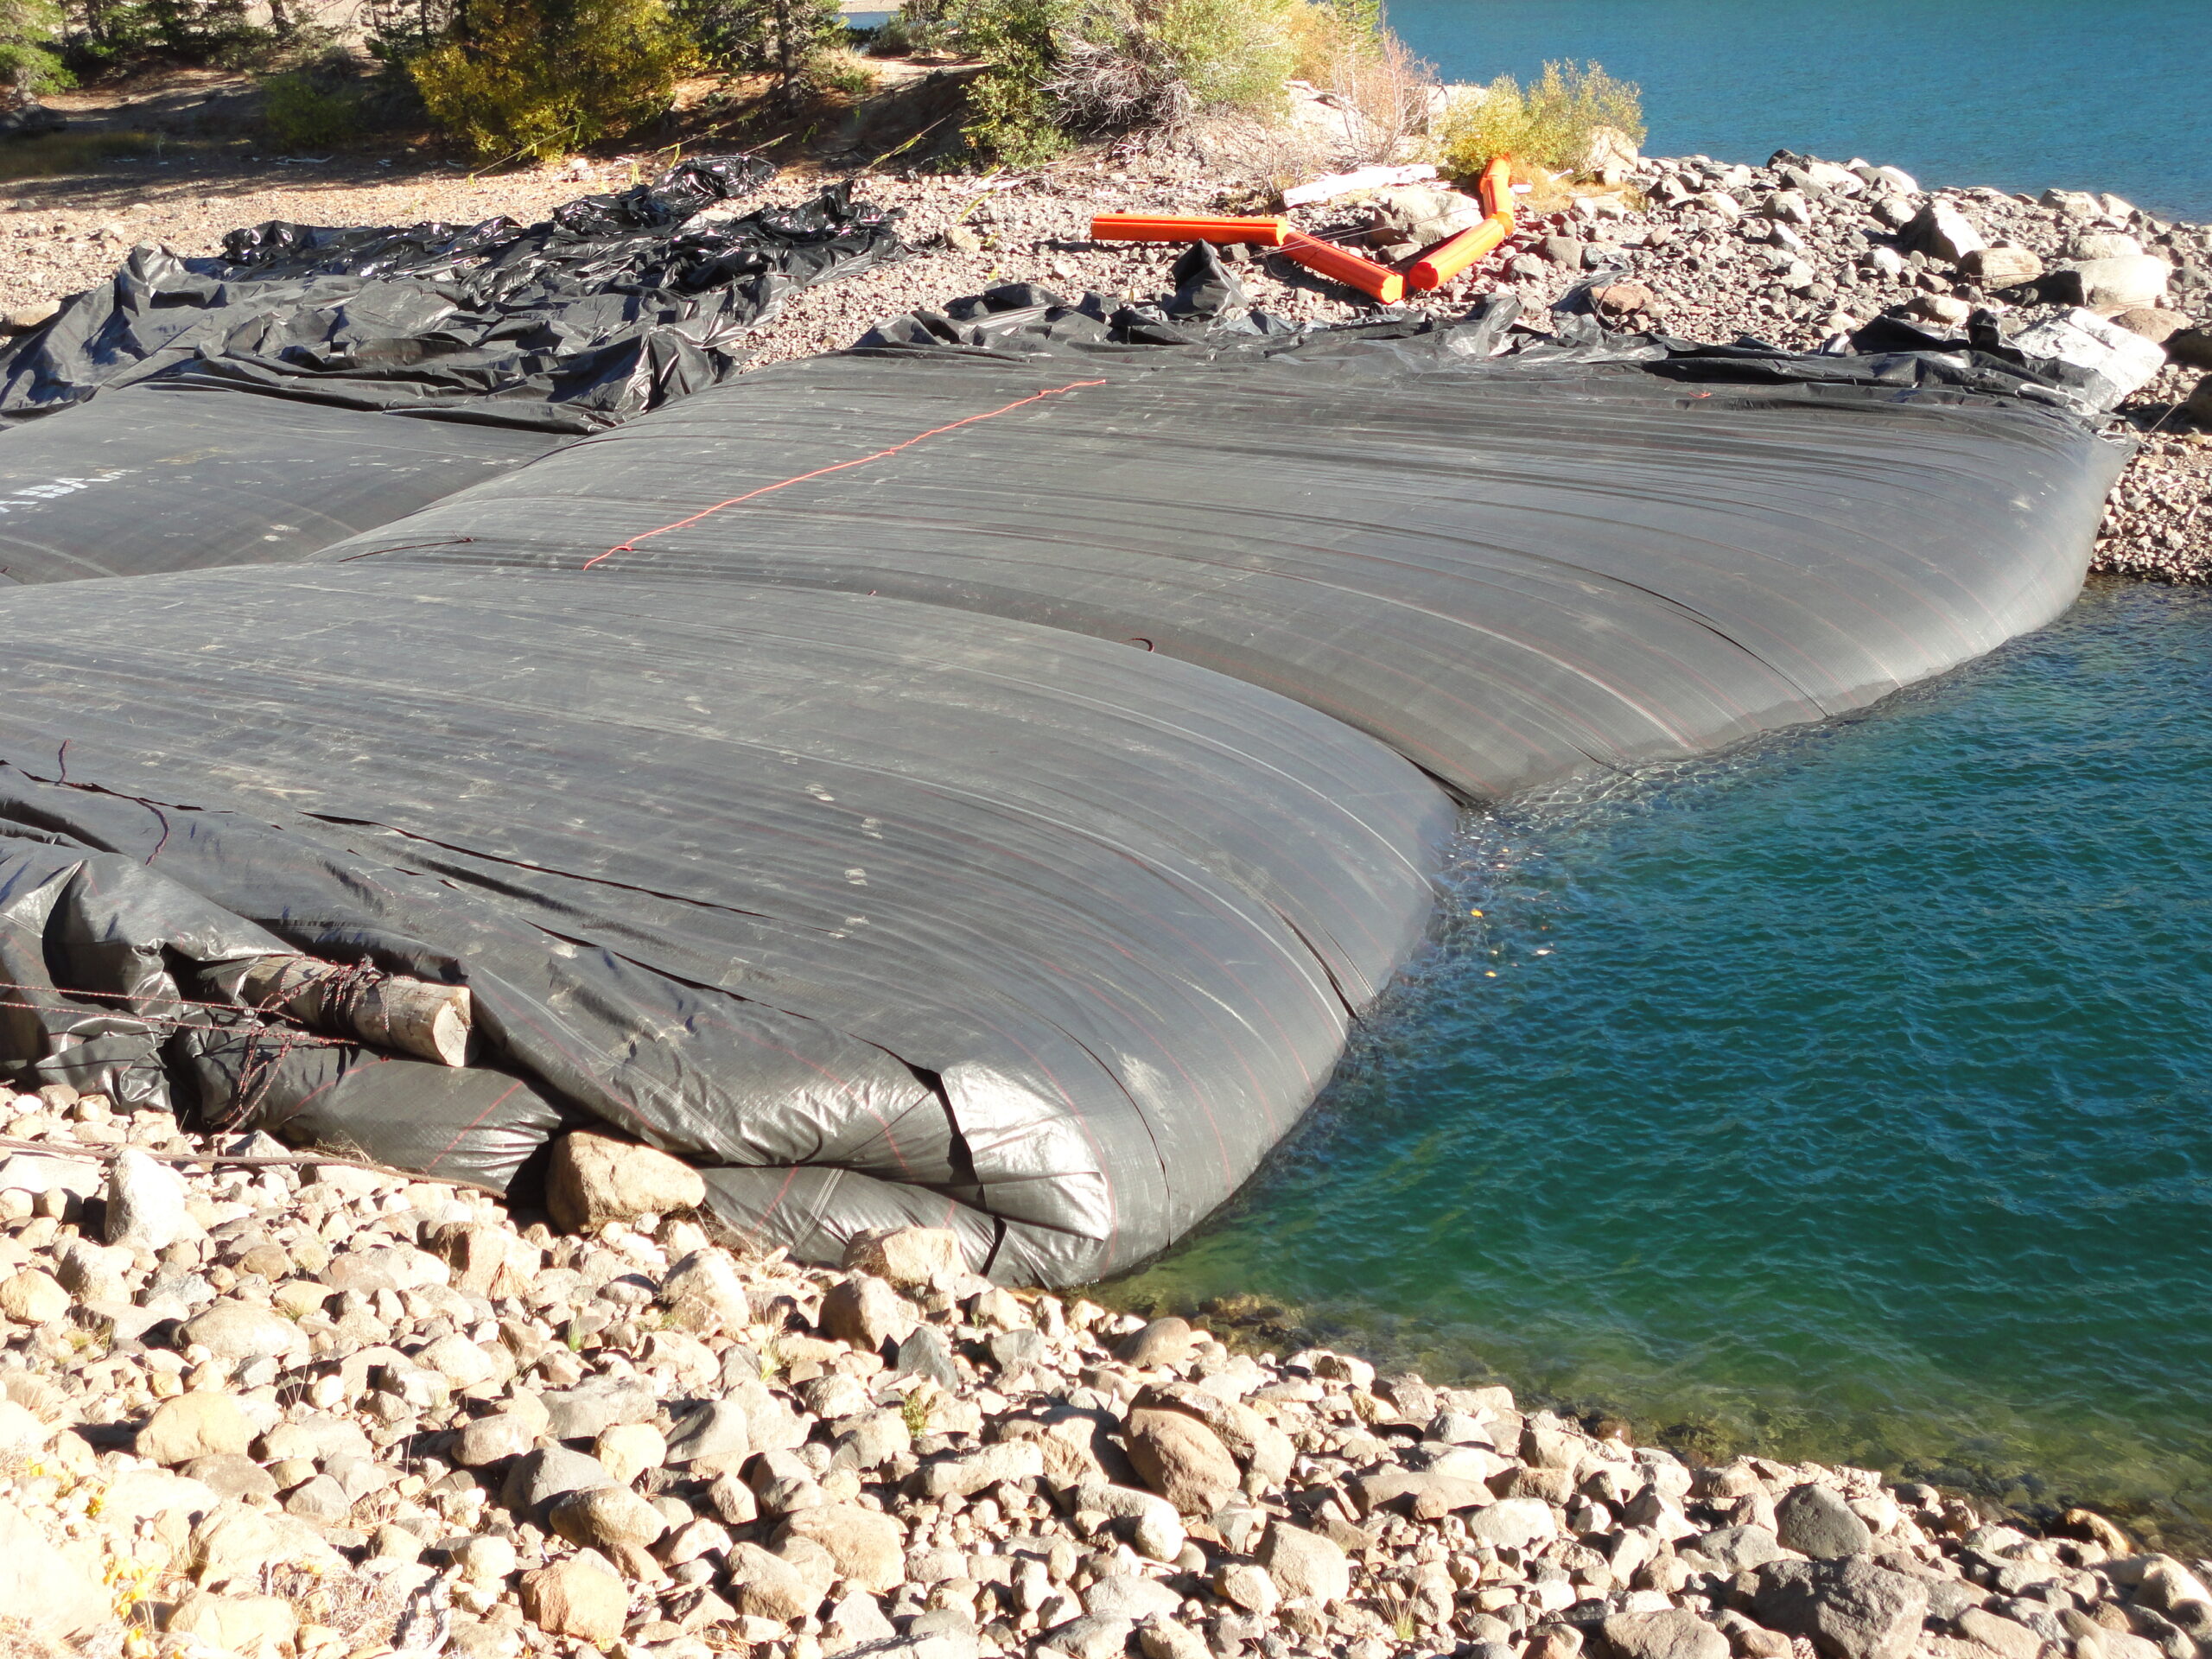
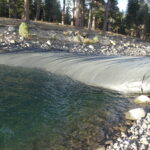
Here we can see the water level is the same between the three (3) AquaDams and downstream, therefore the water pressure must be equal and the drain hoses are working.
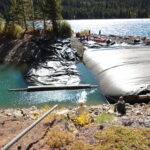
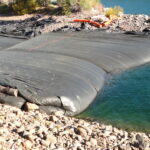
The 10ft tall support AquaDam in 9ft depth of water or greater, on both sides.

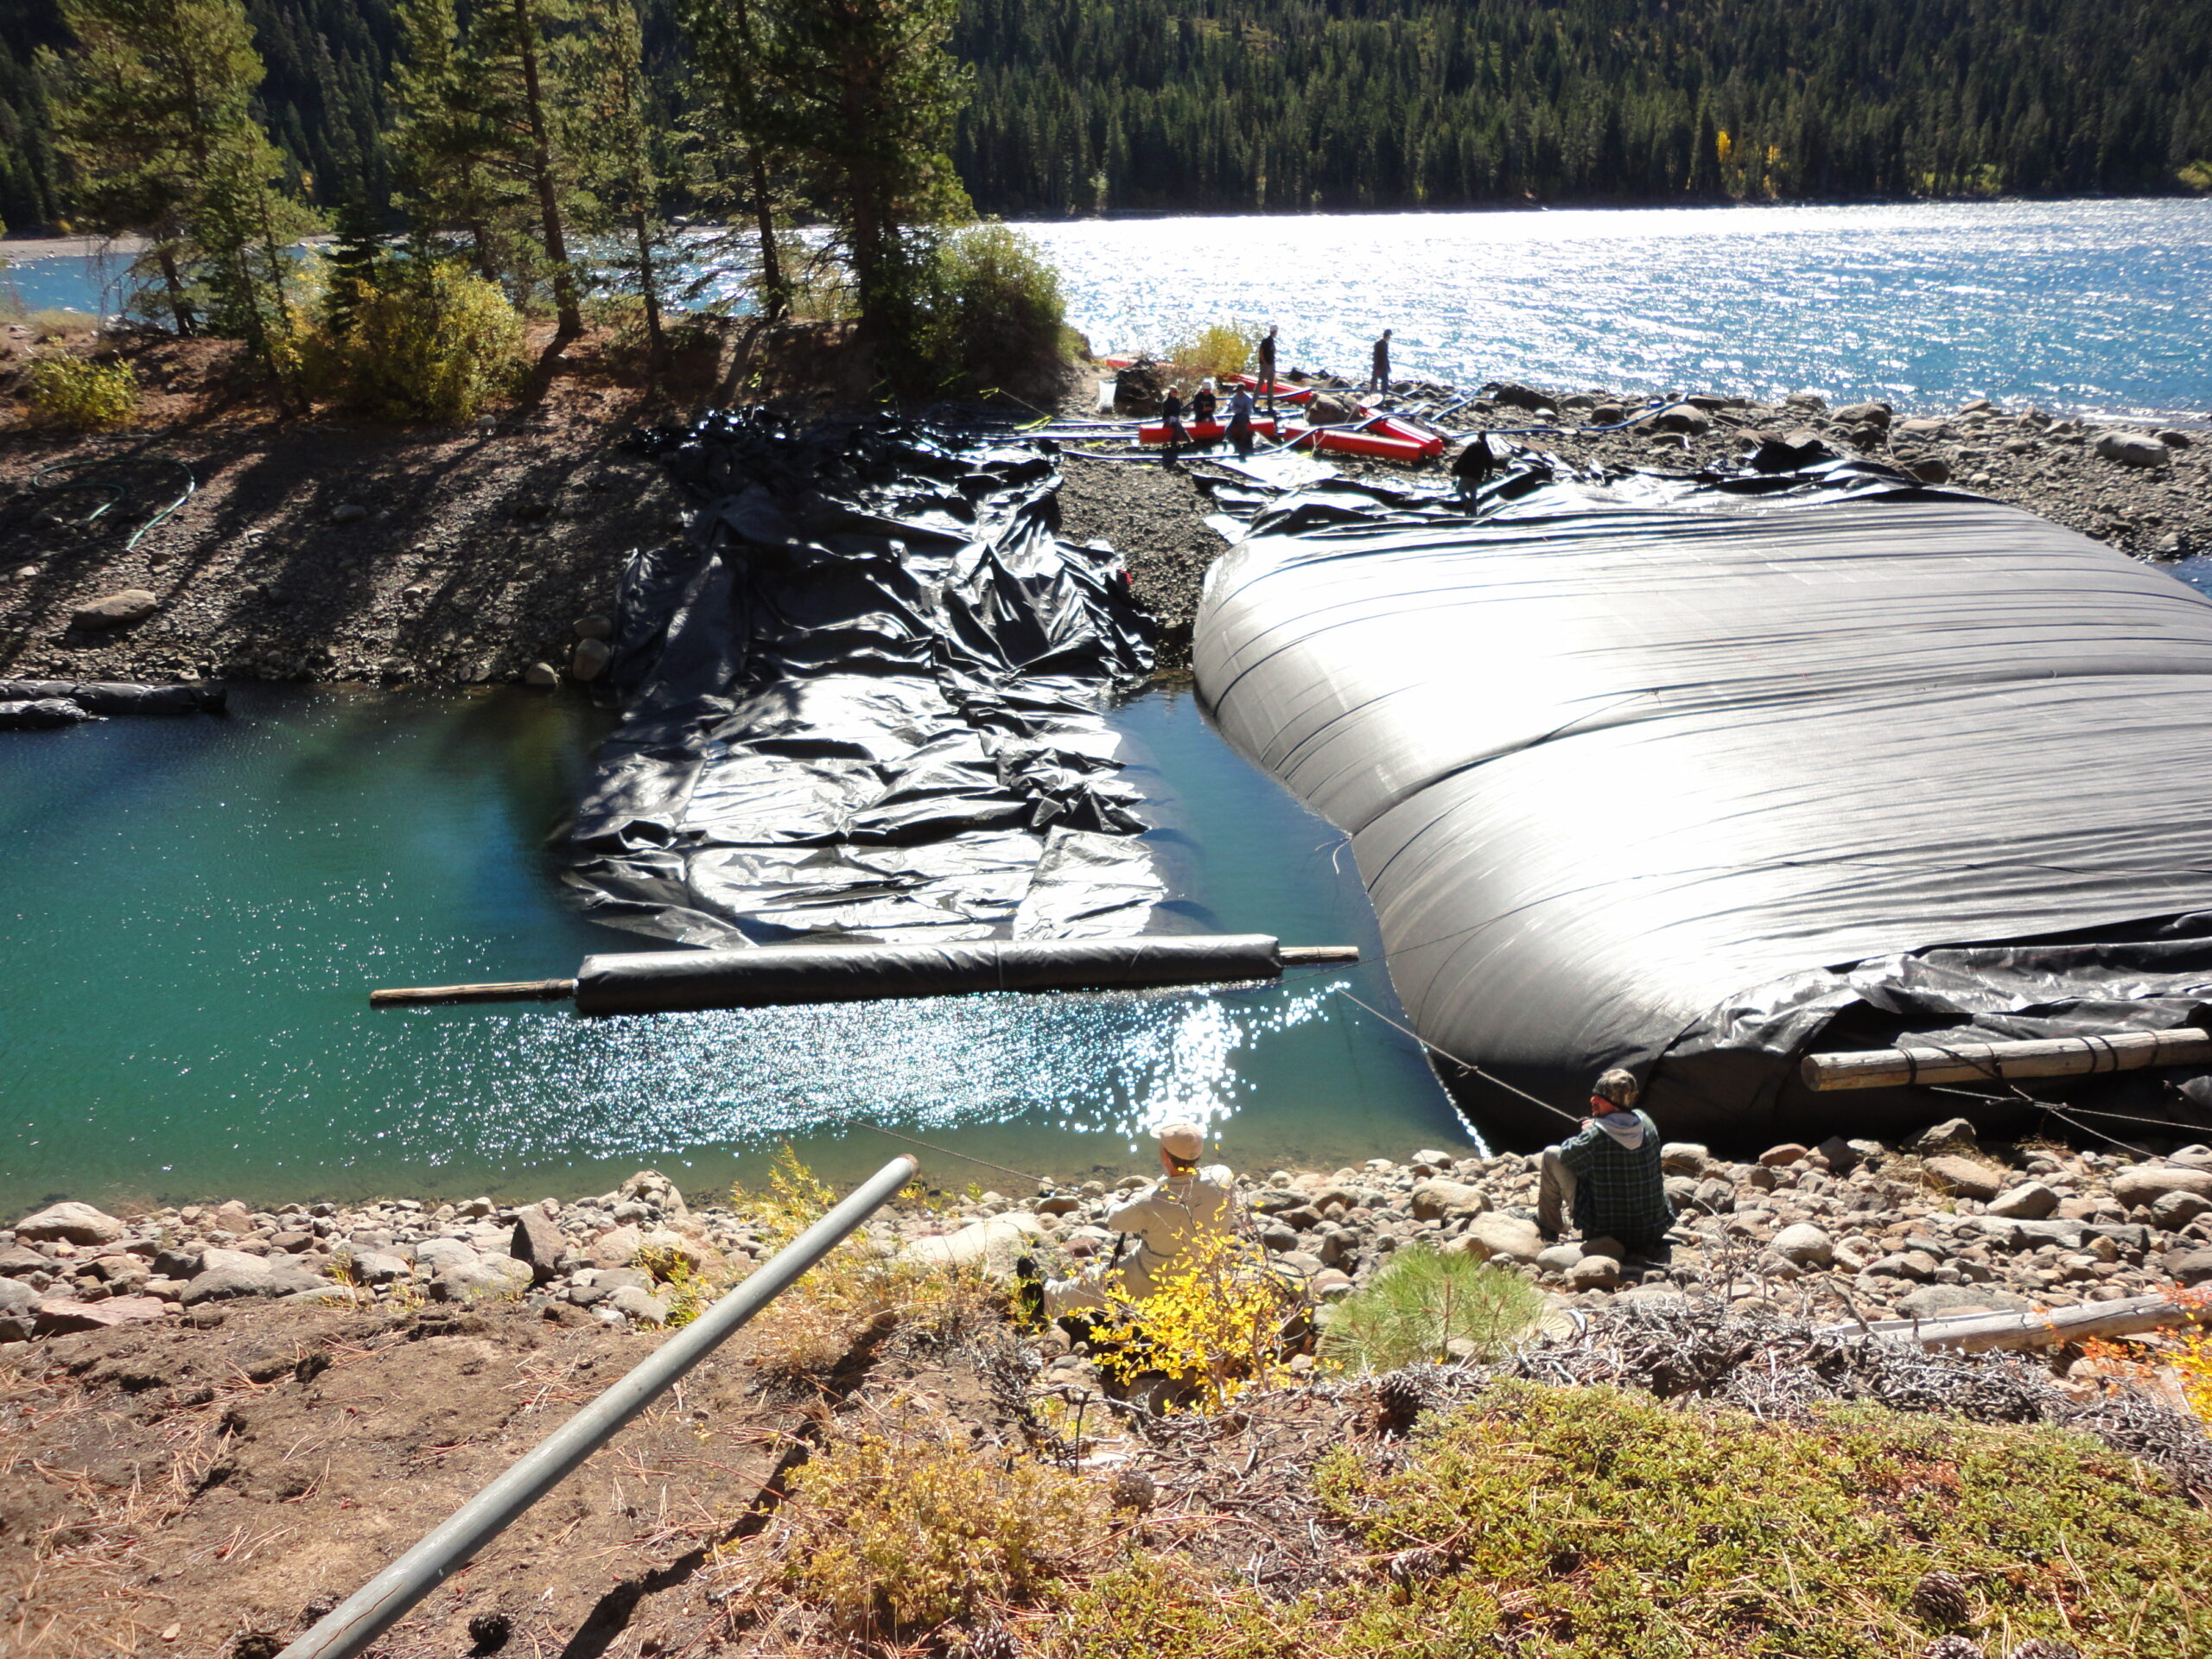
On the right of this picture we can see the greater lake side water is several feet higher than the water in the canal on the left side.
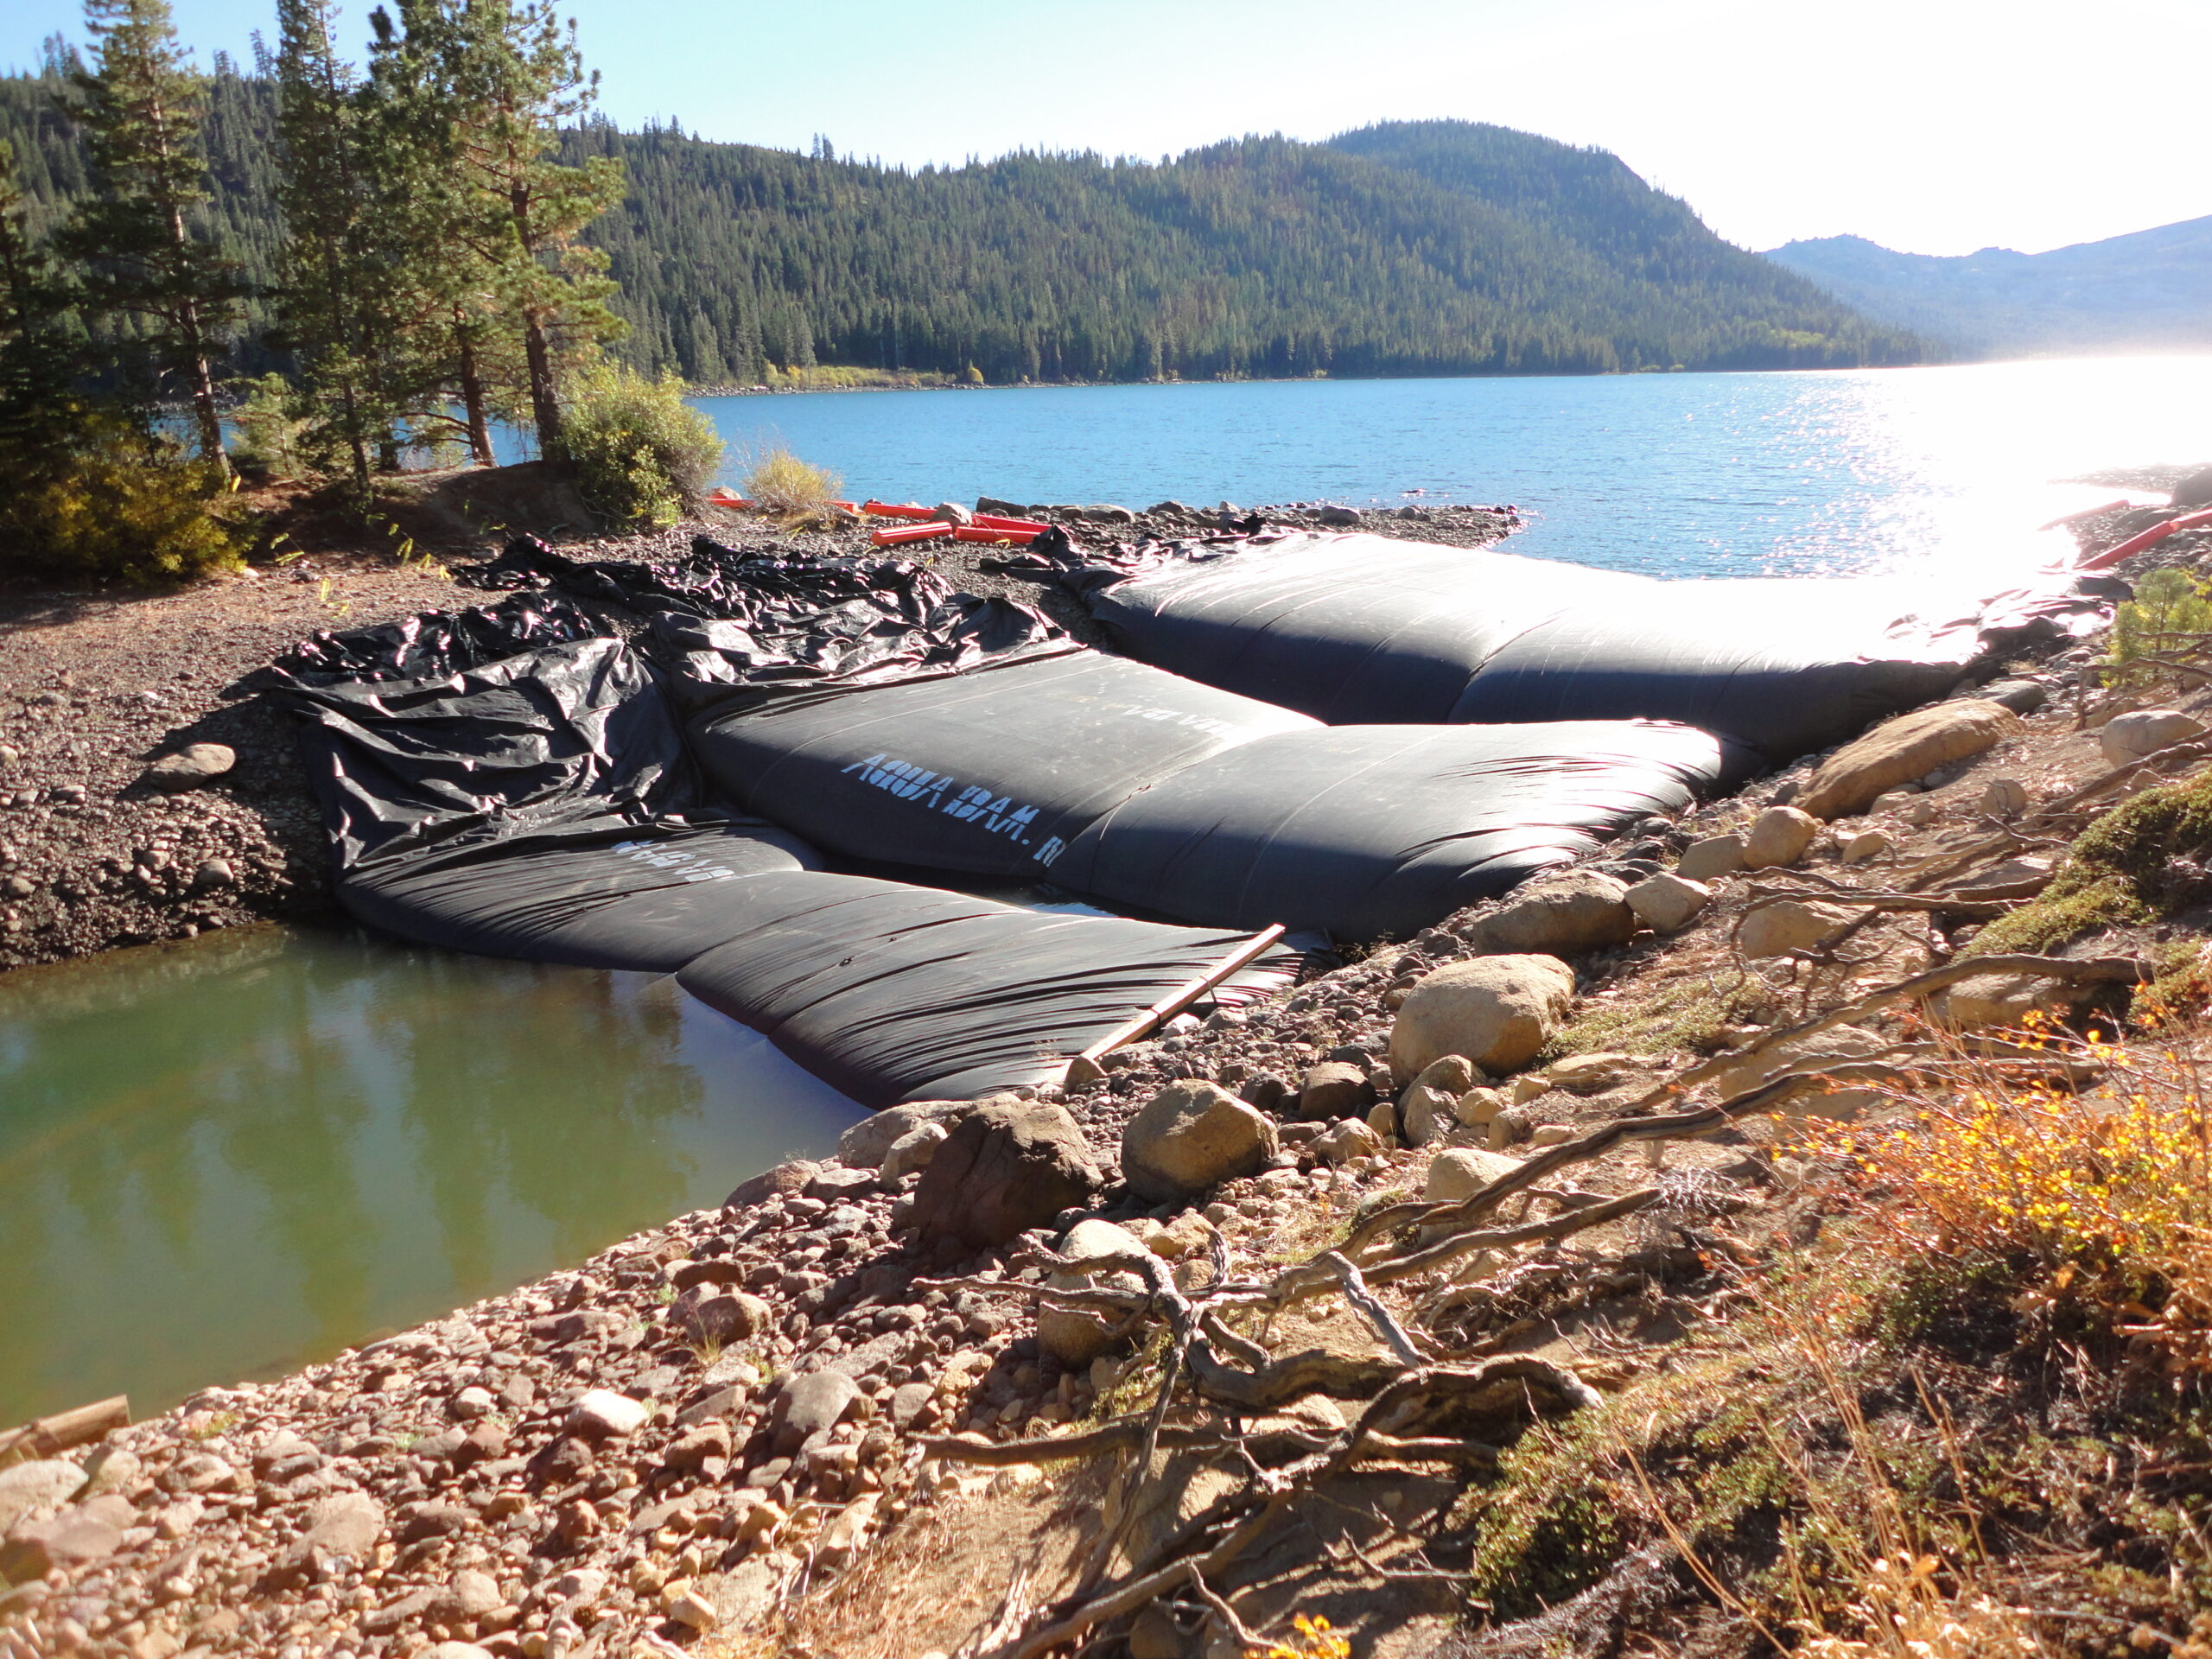
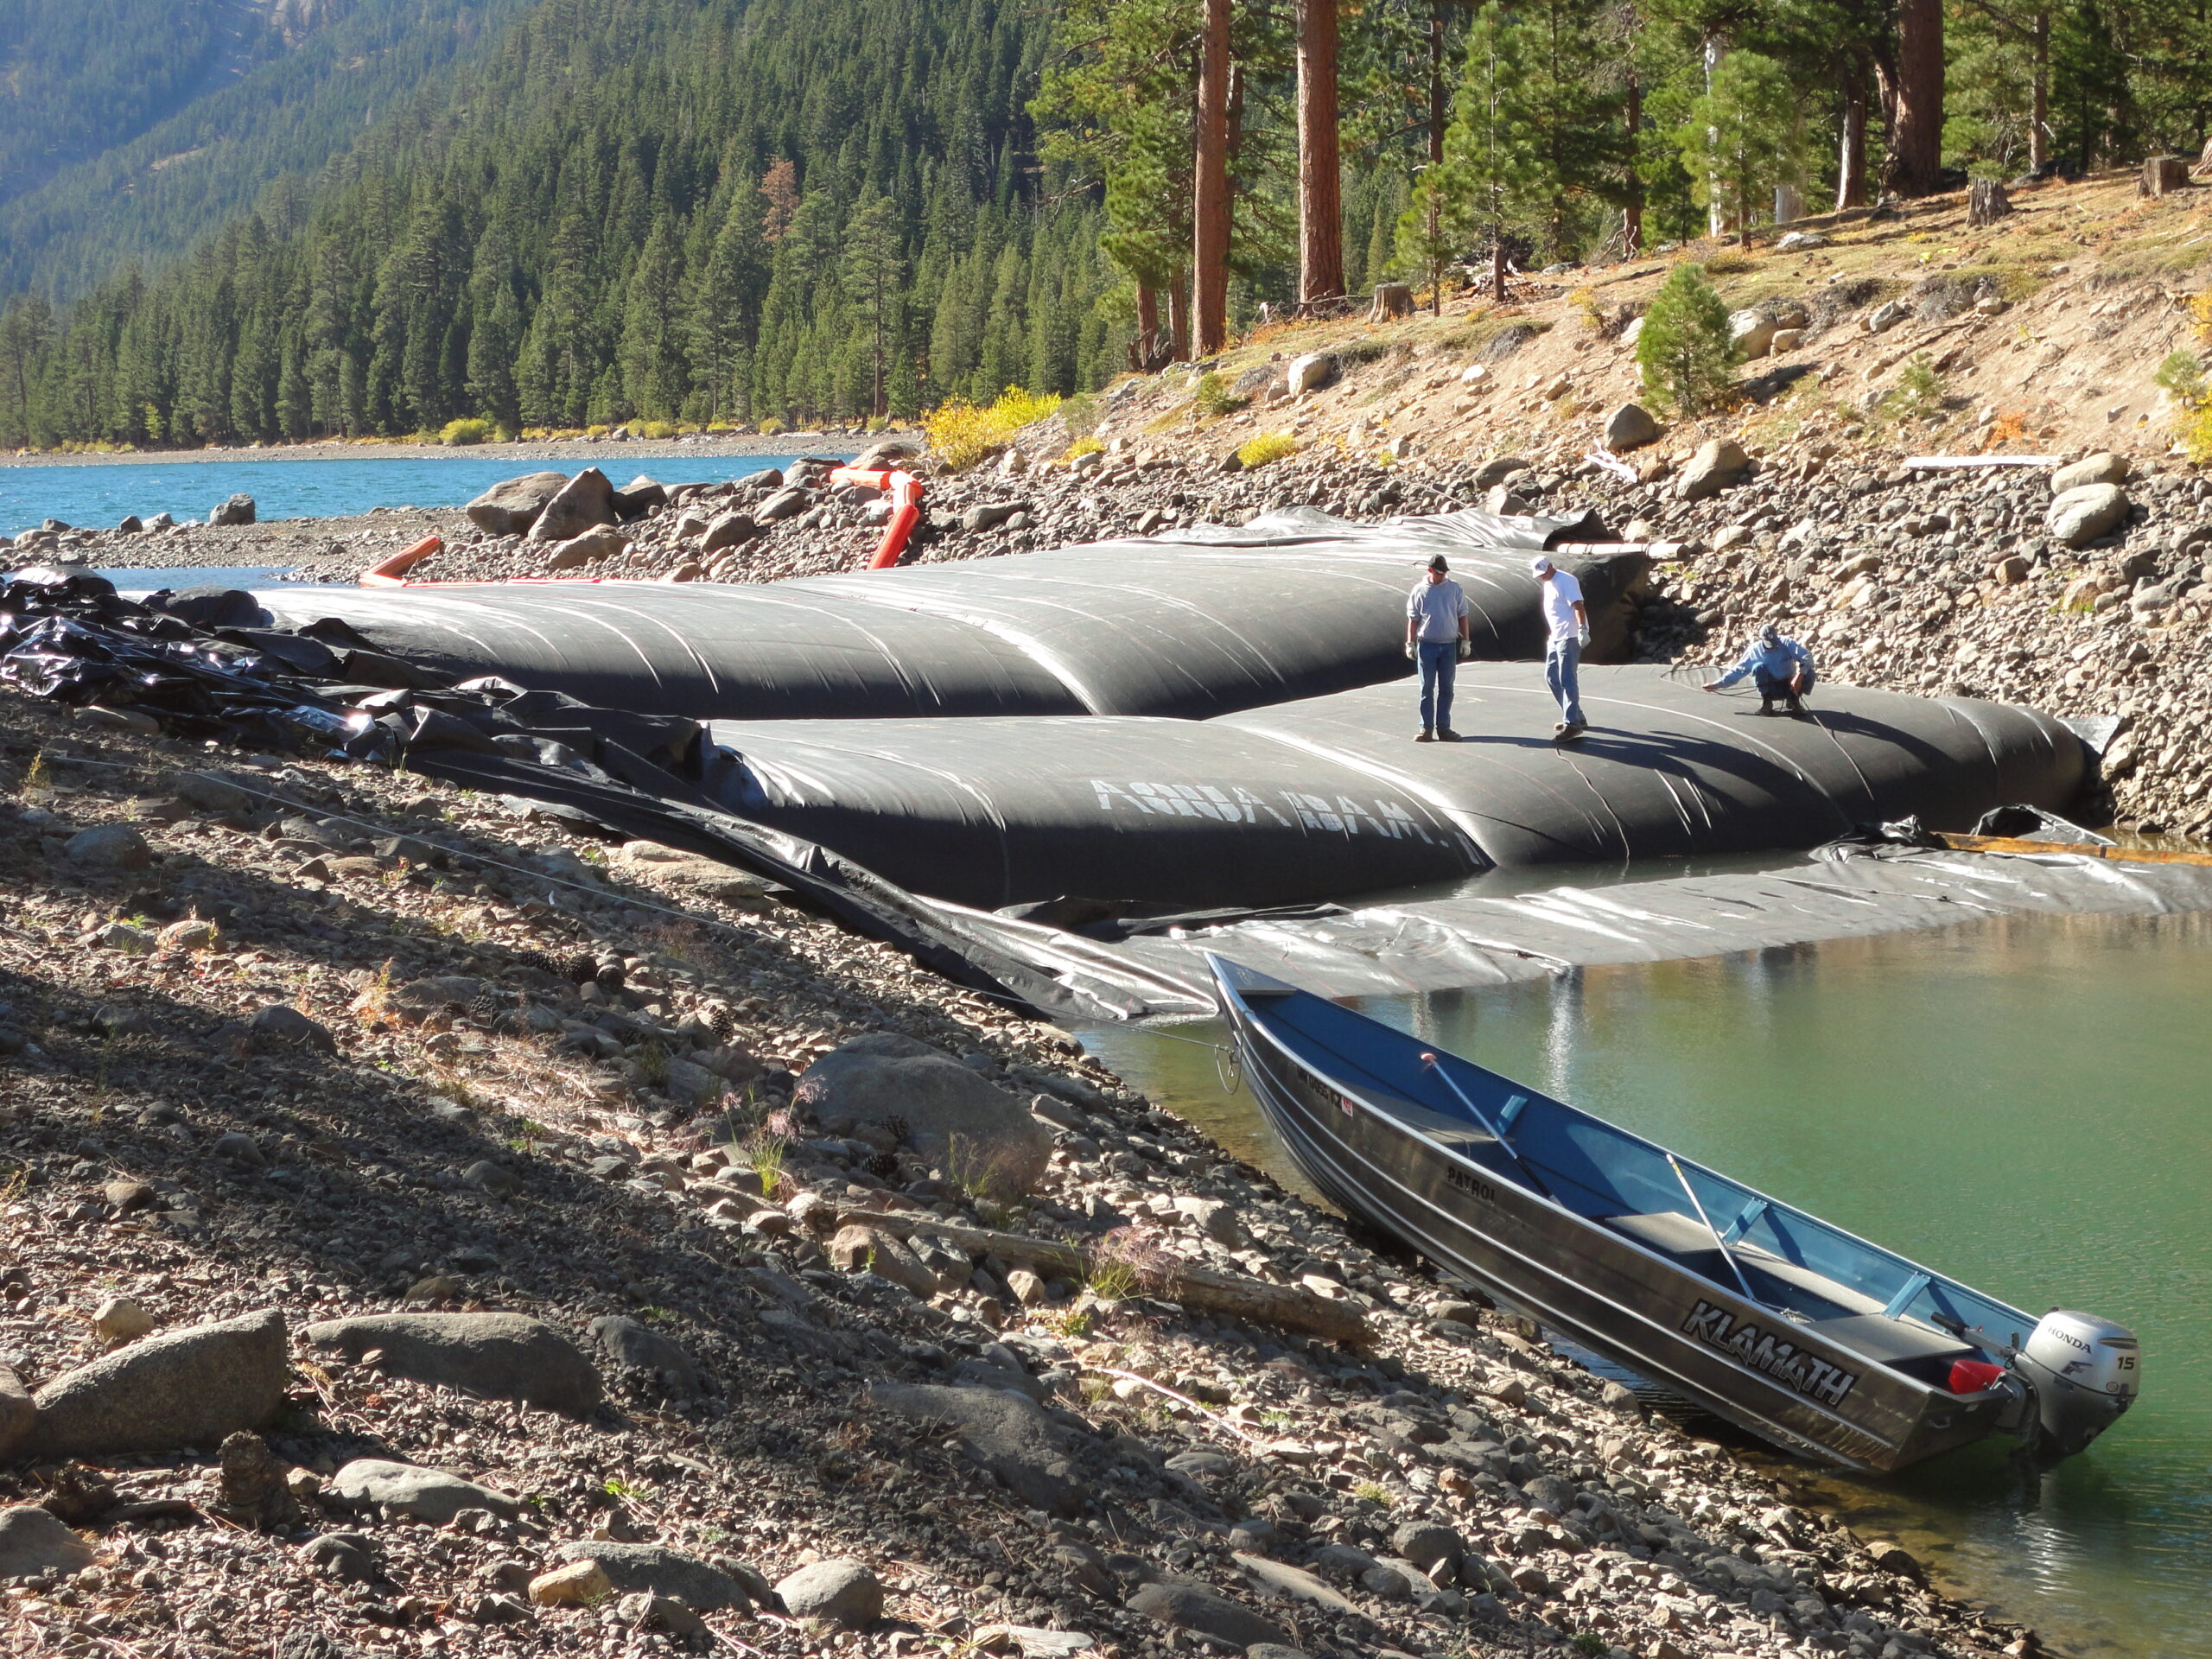
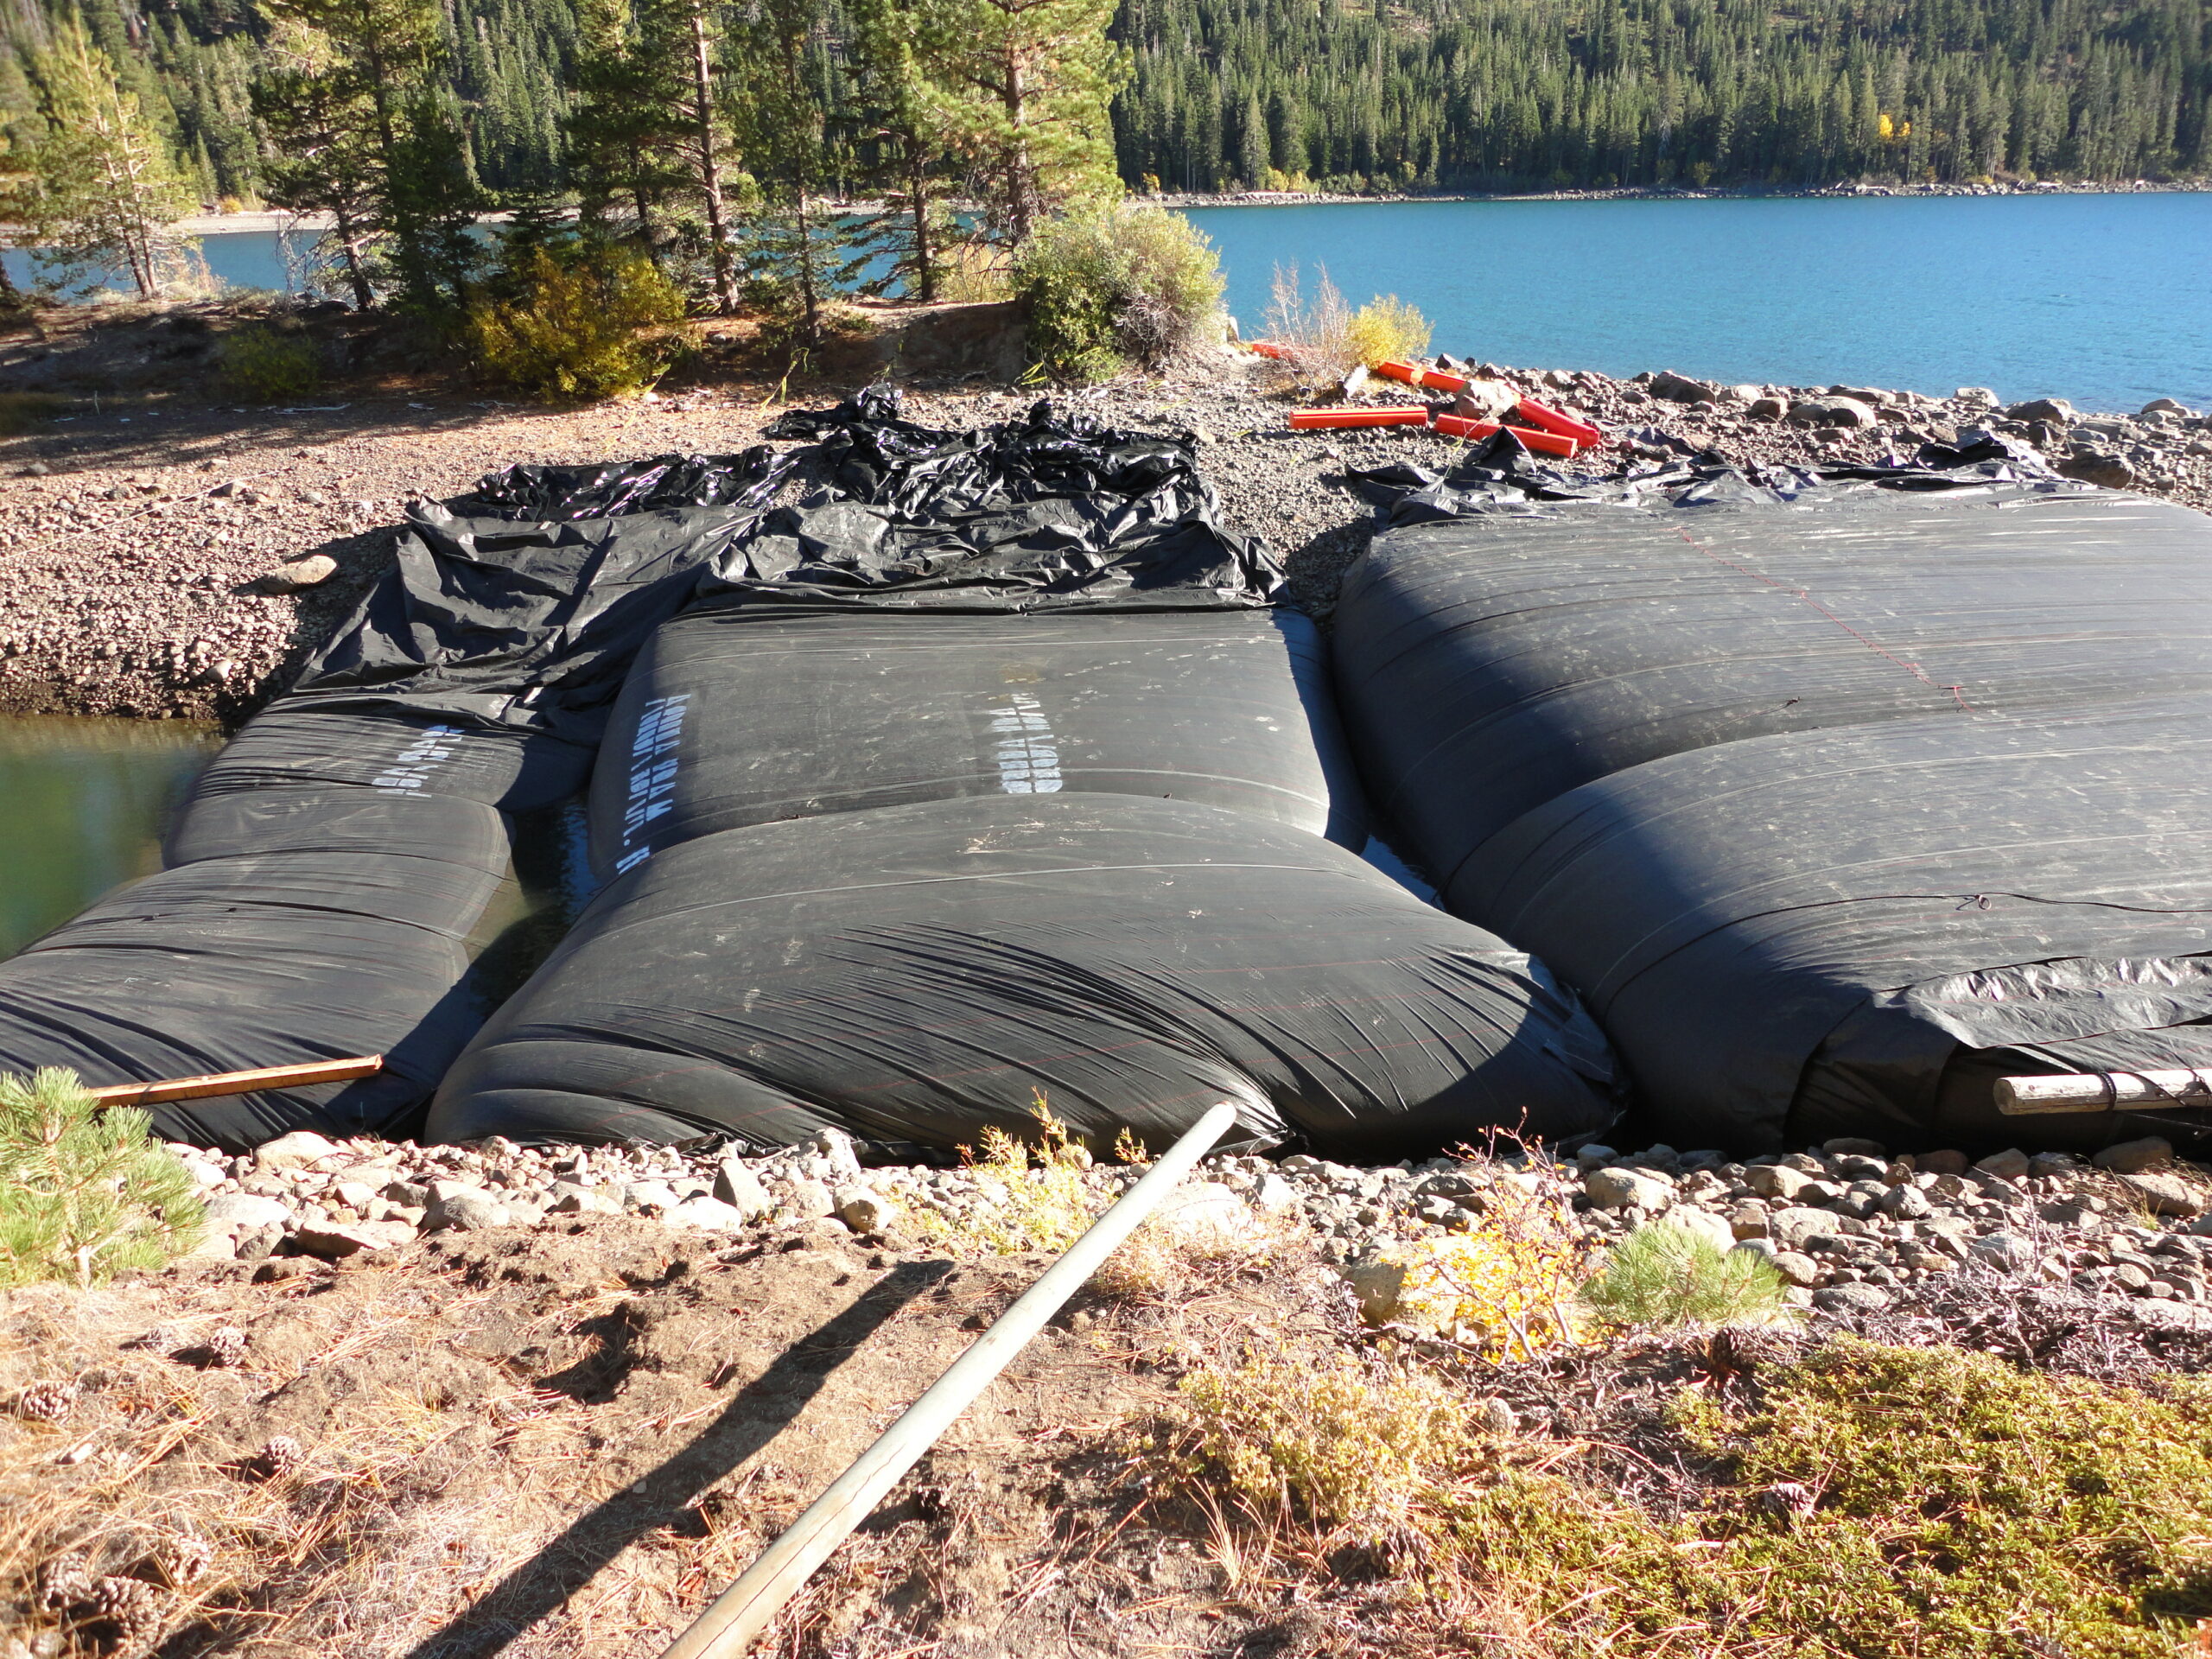
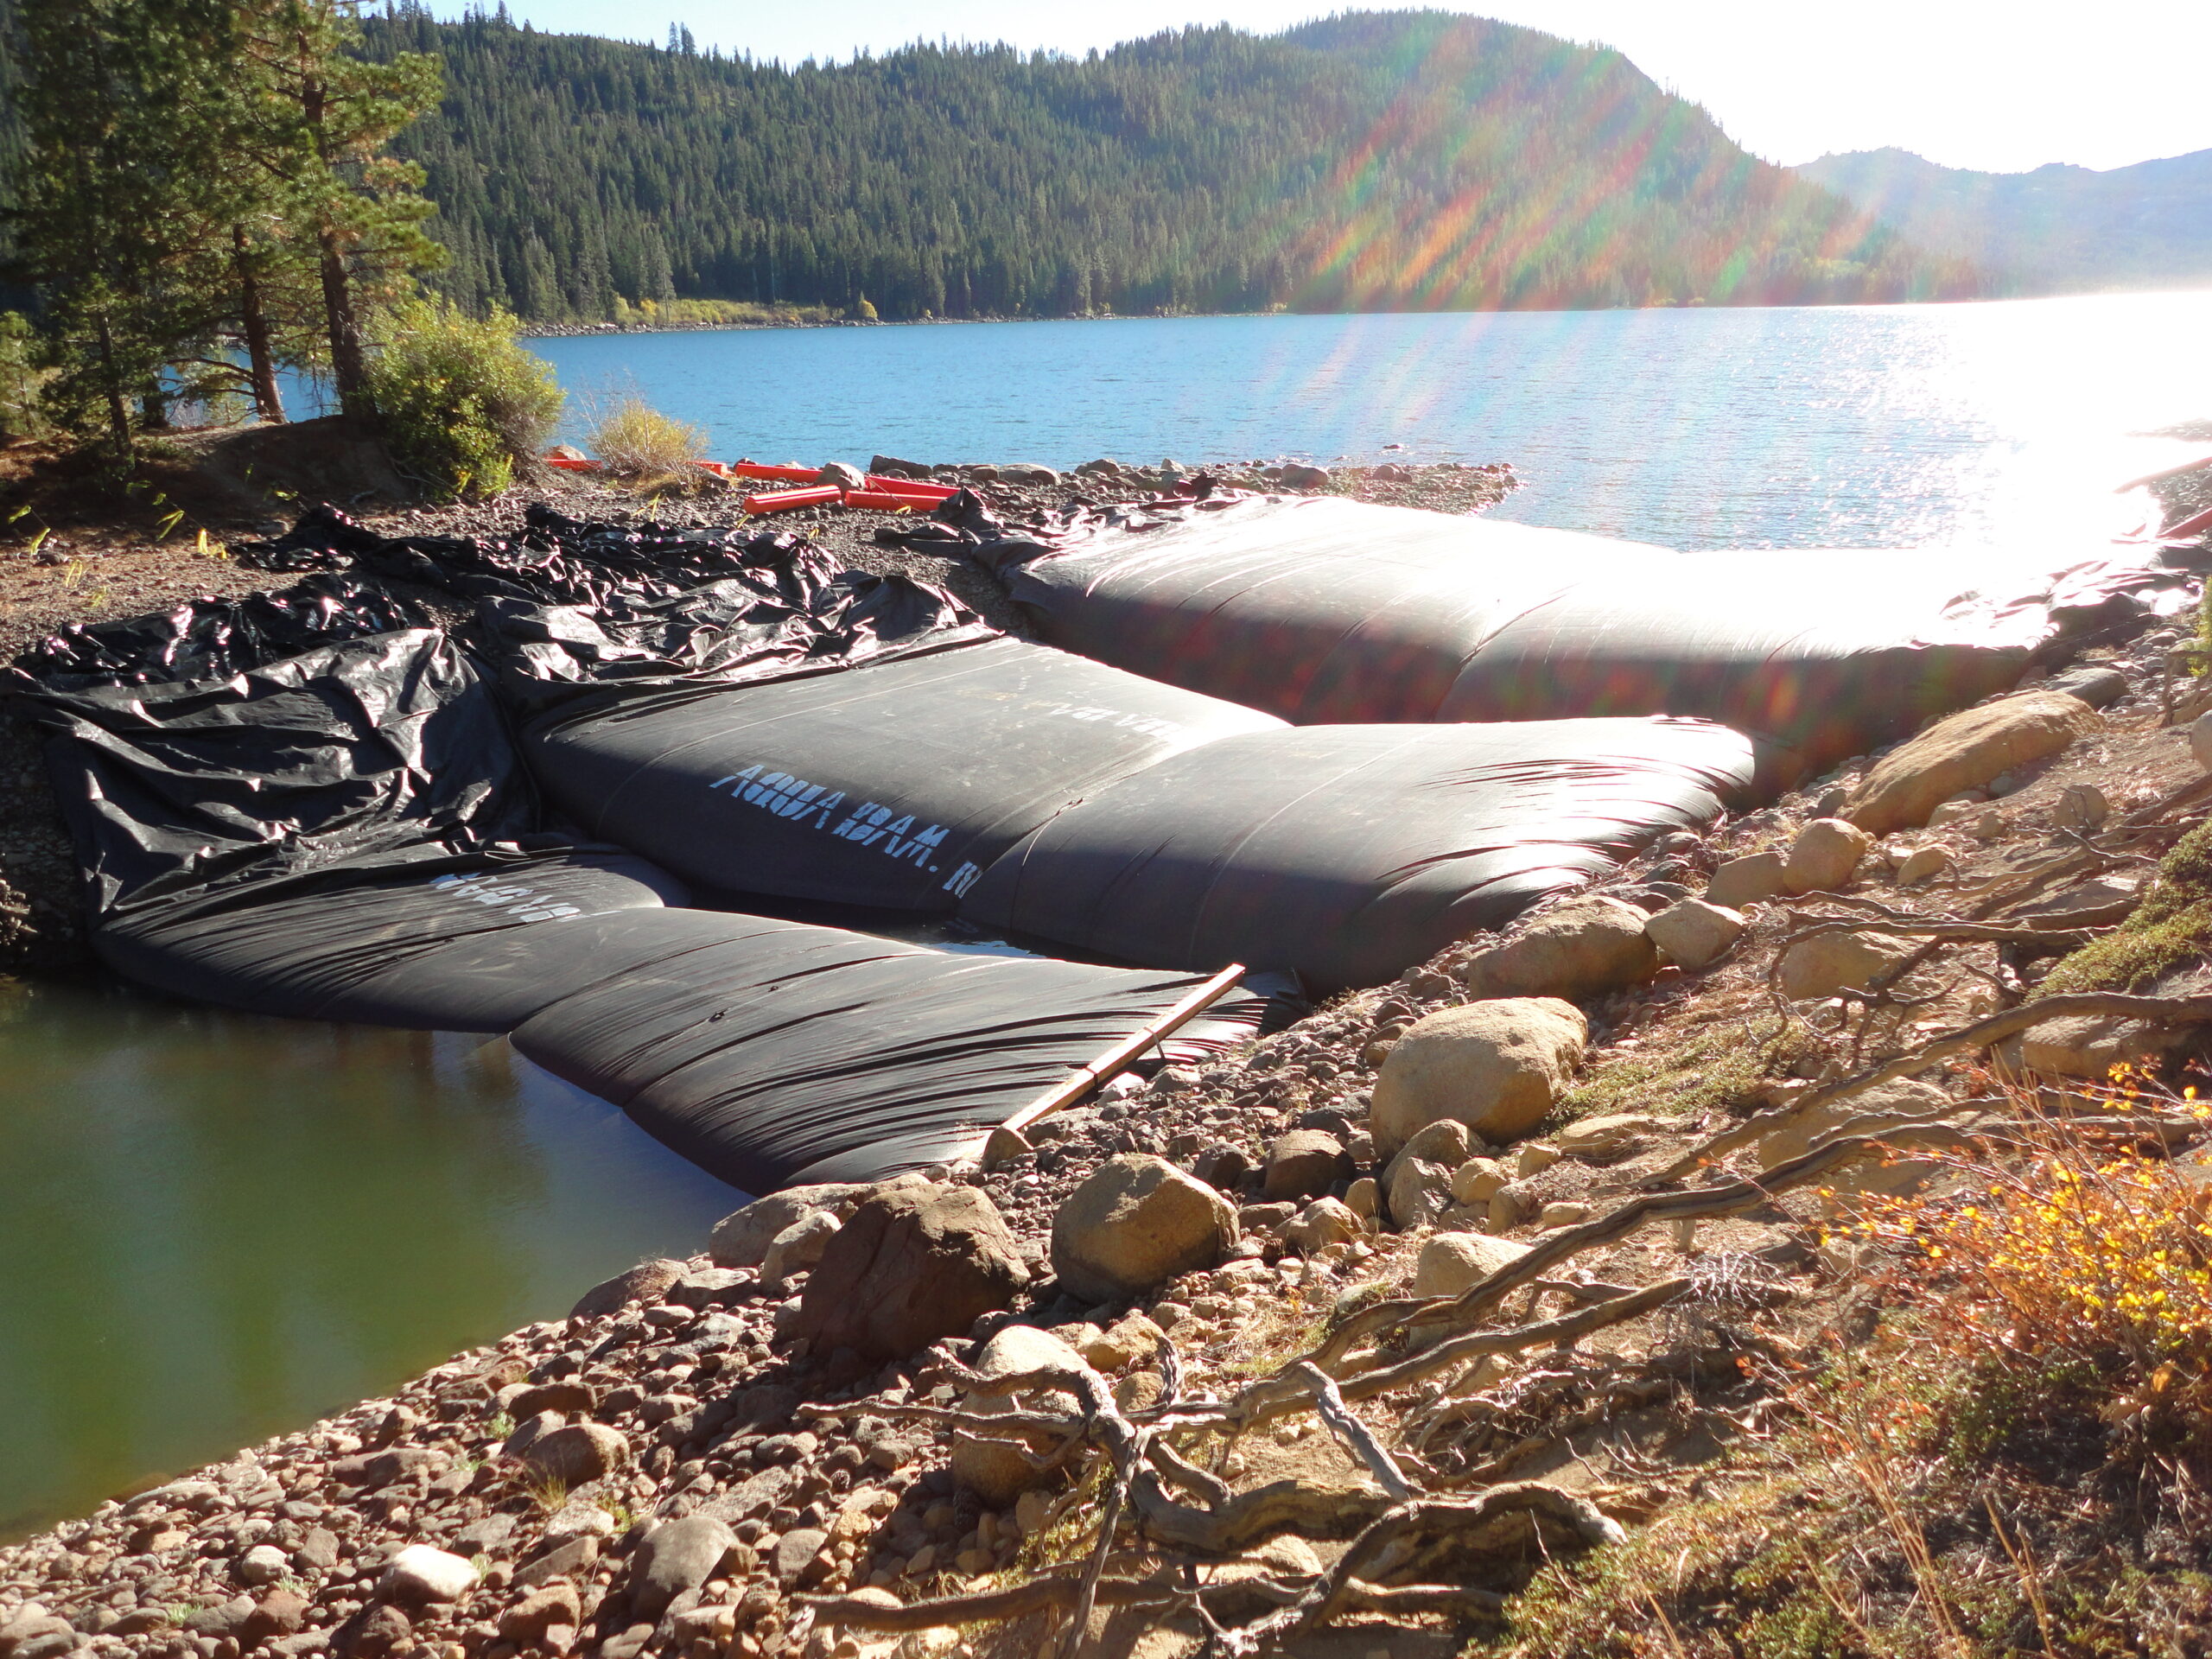
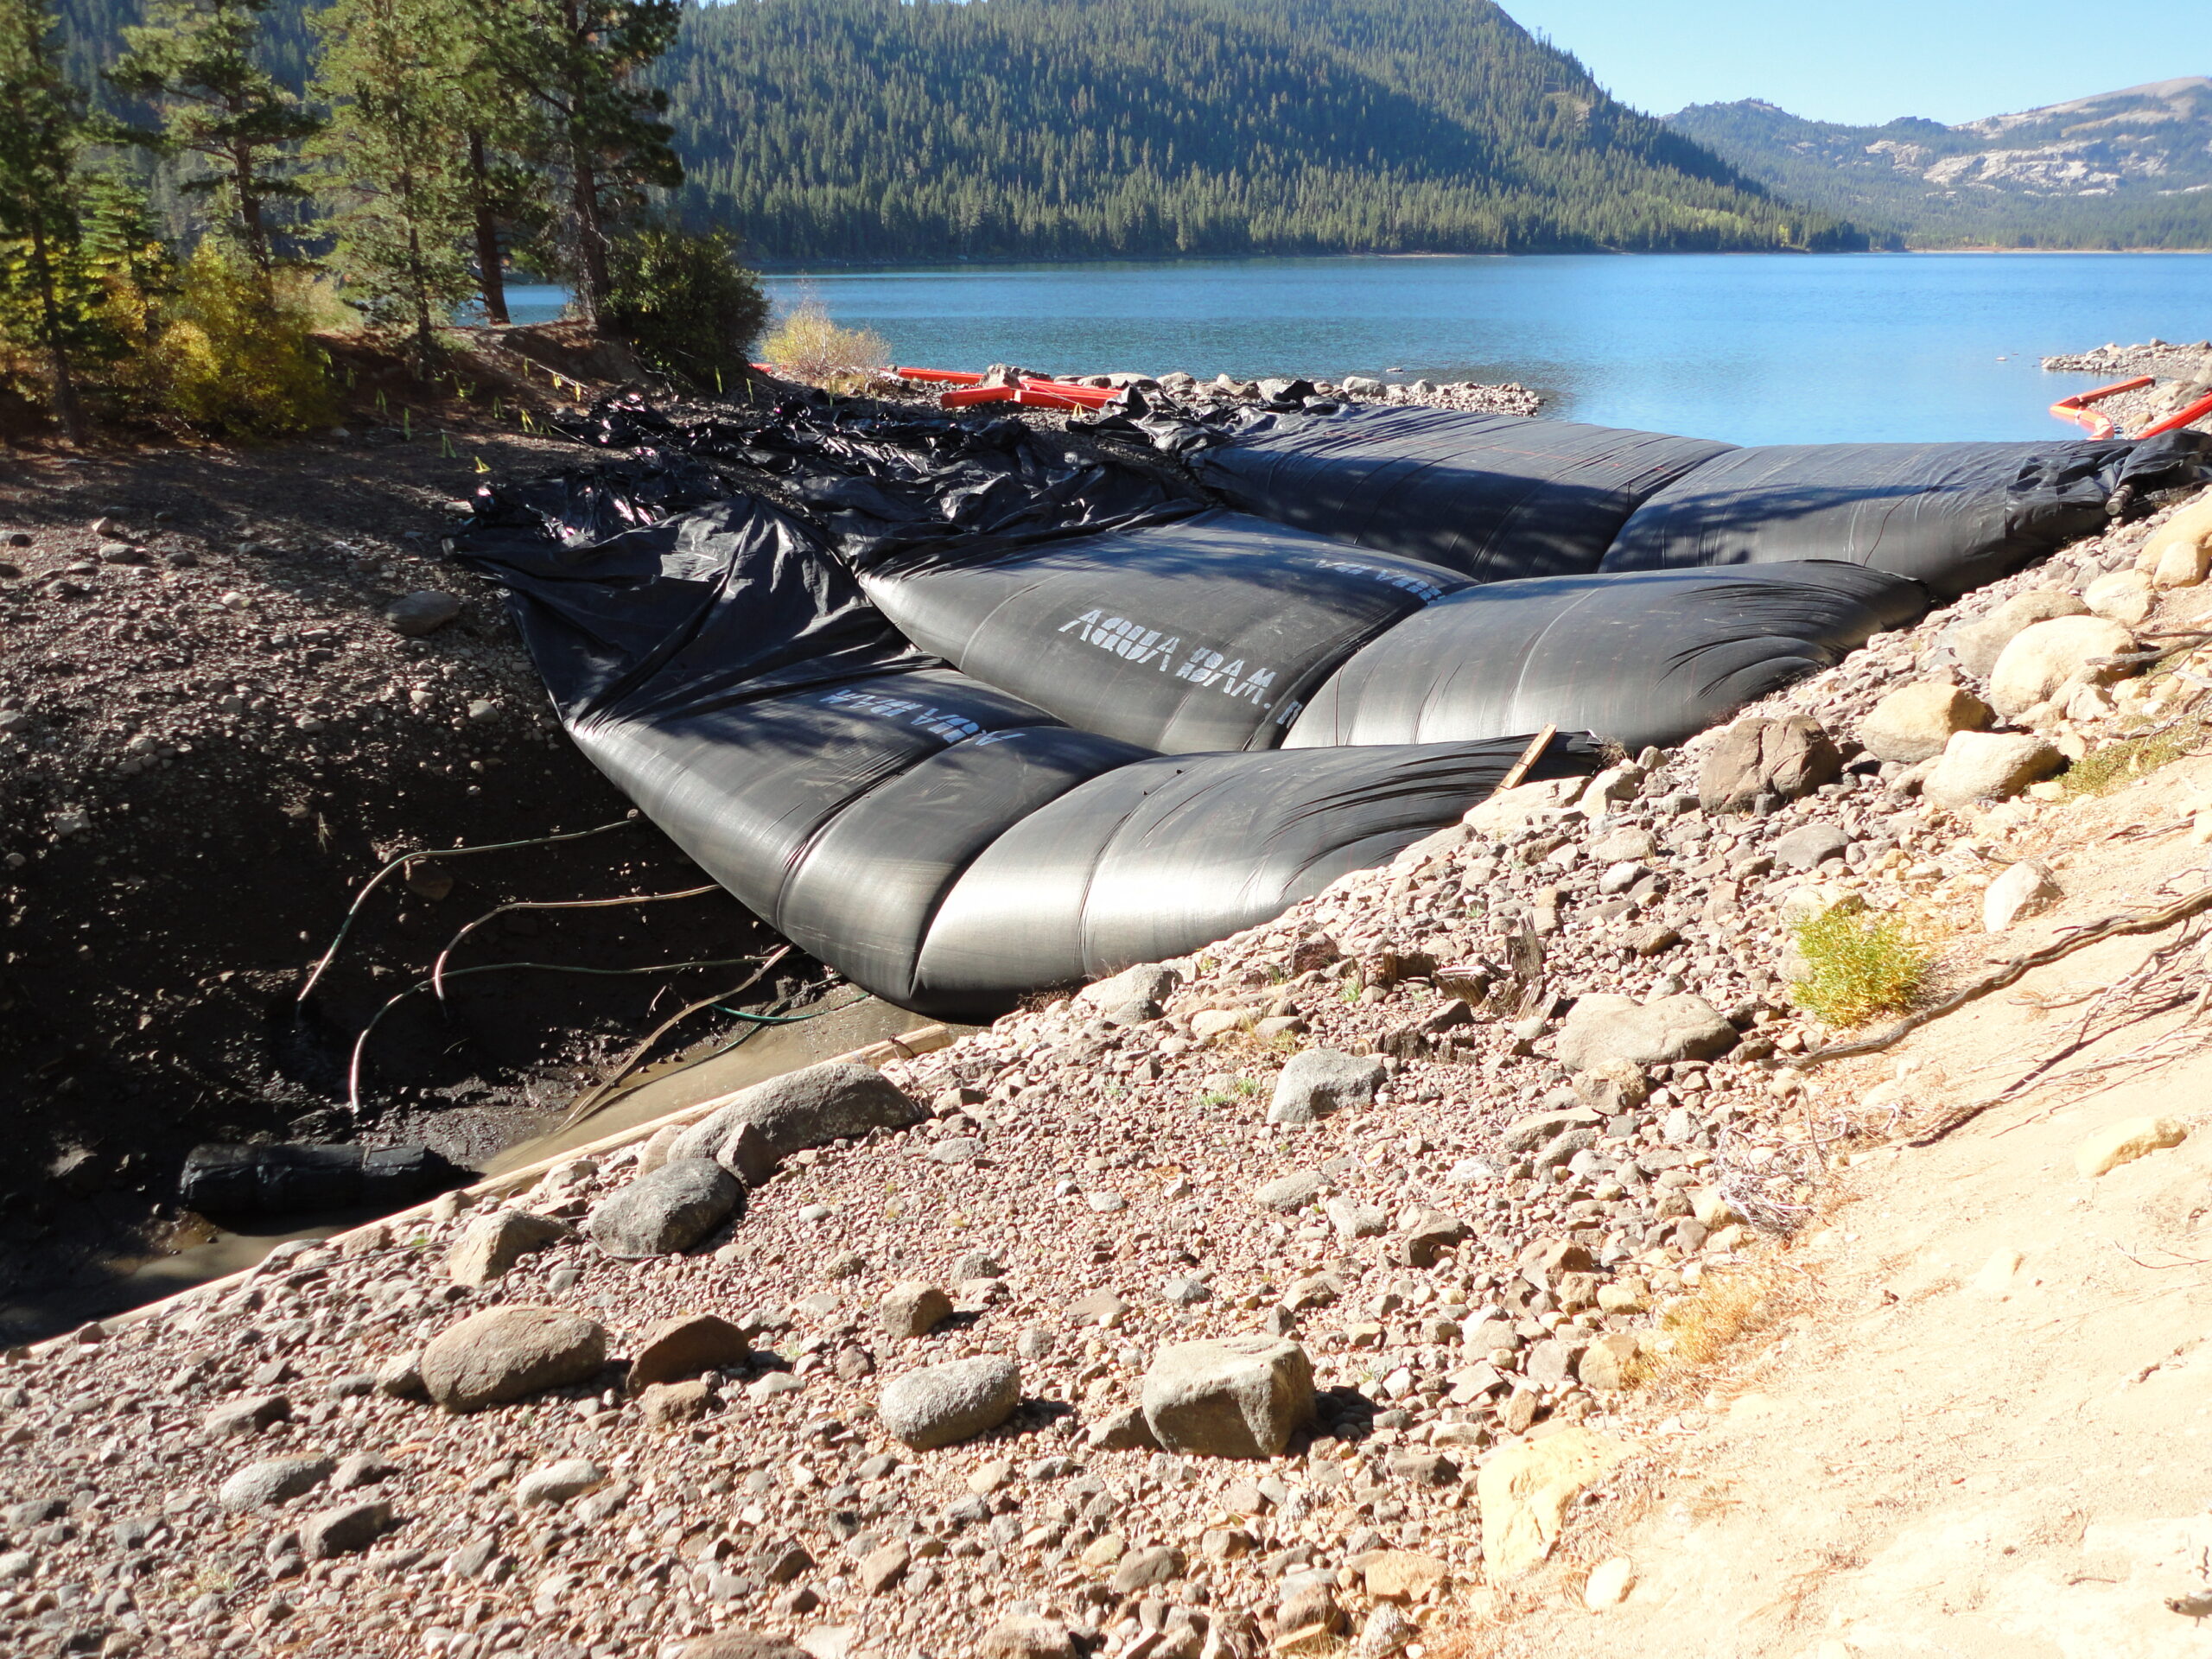
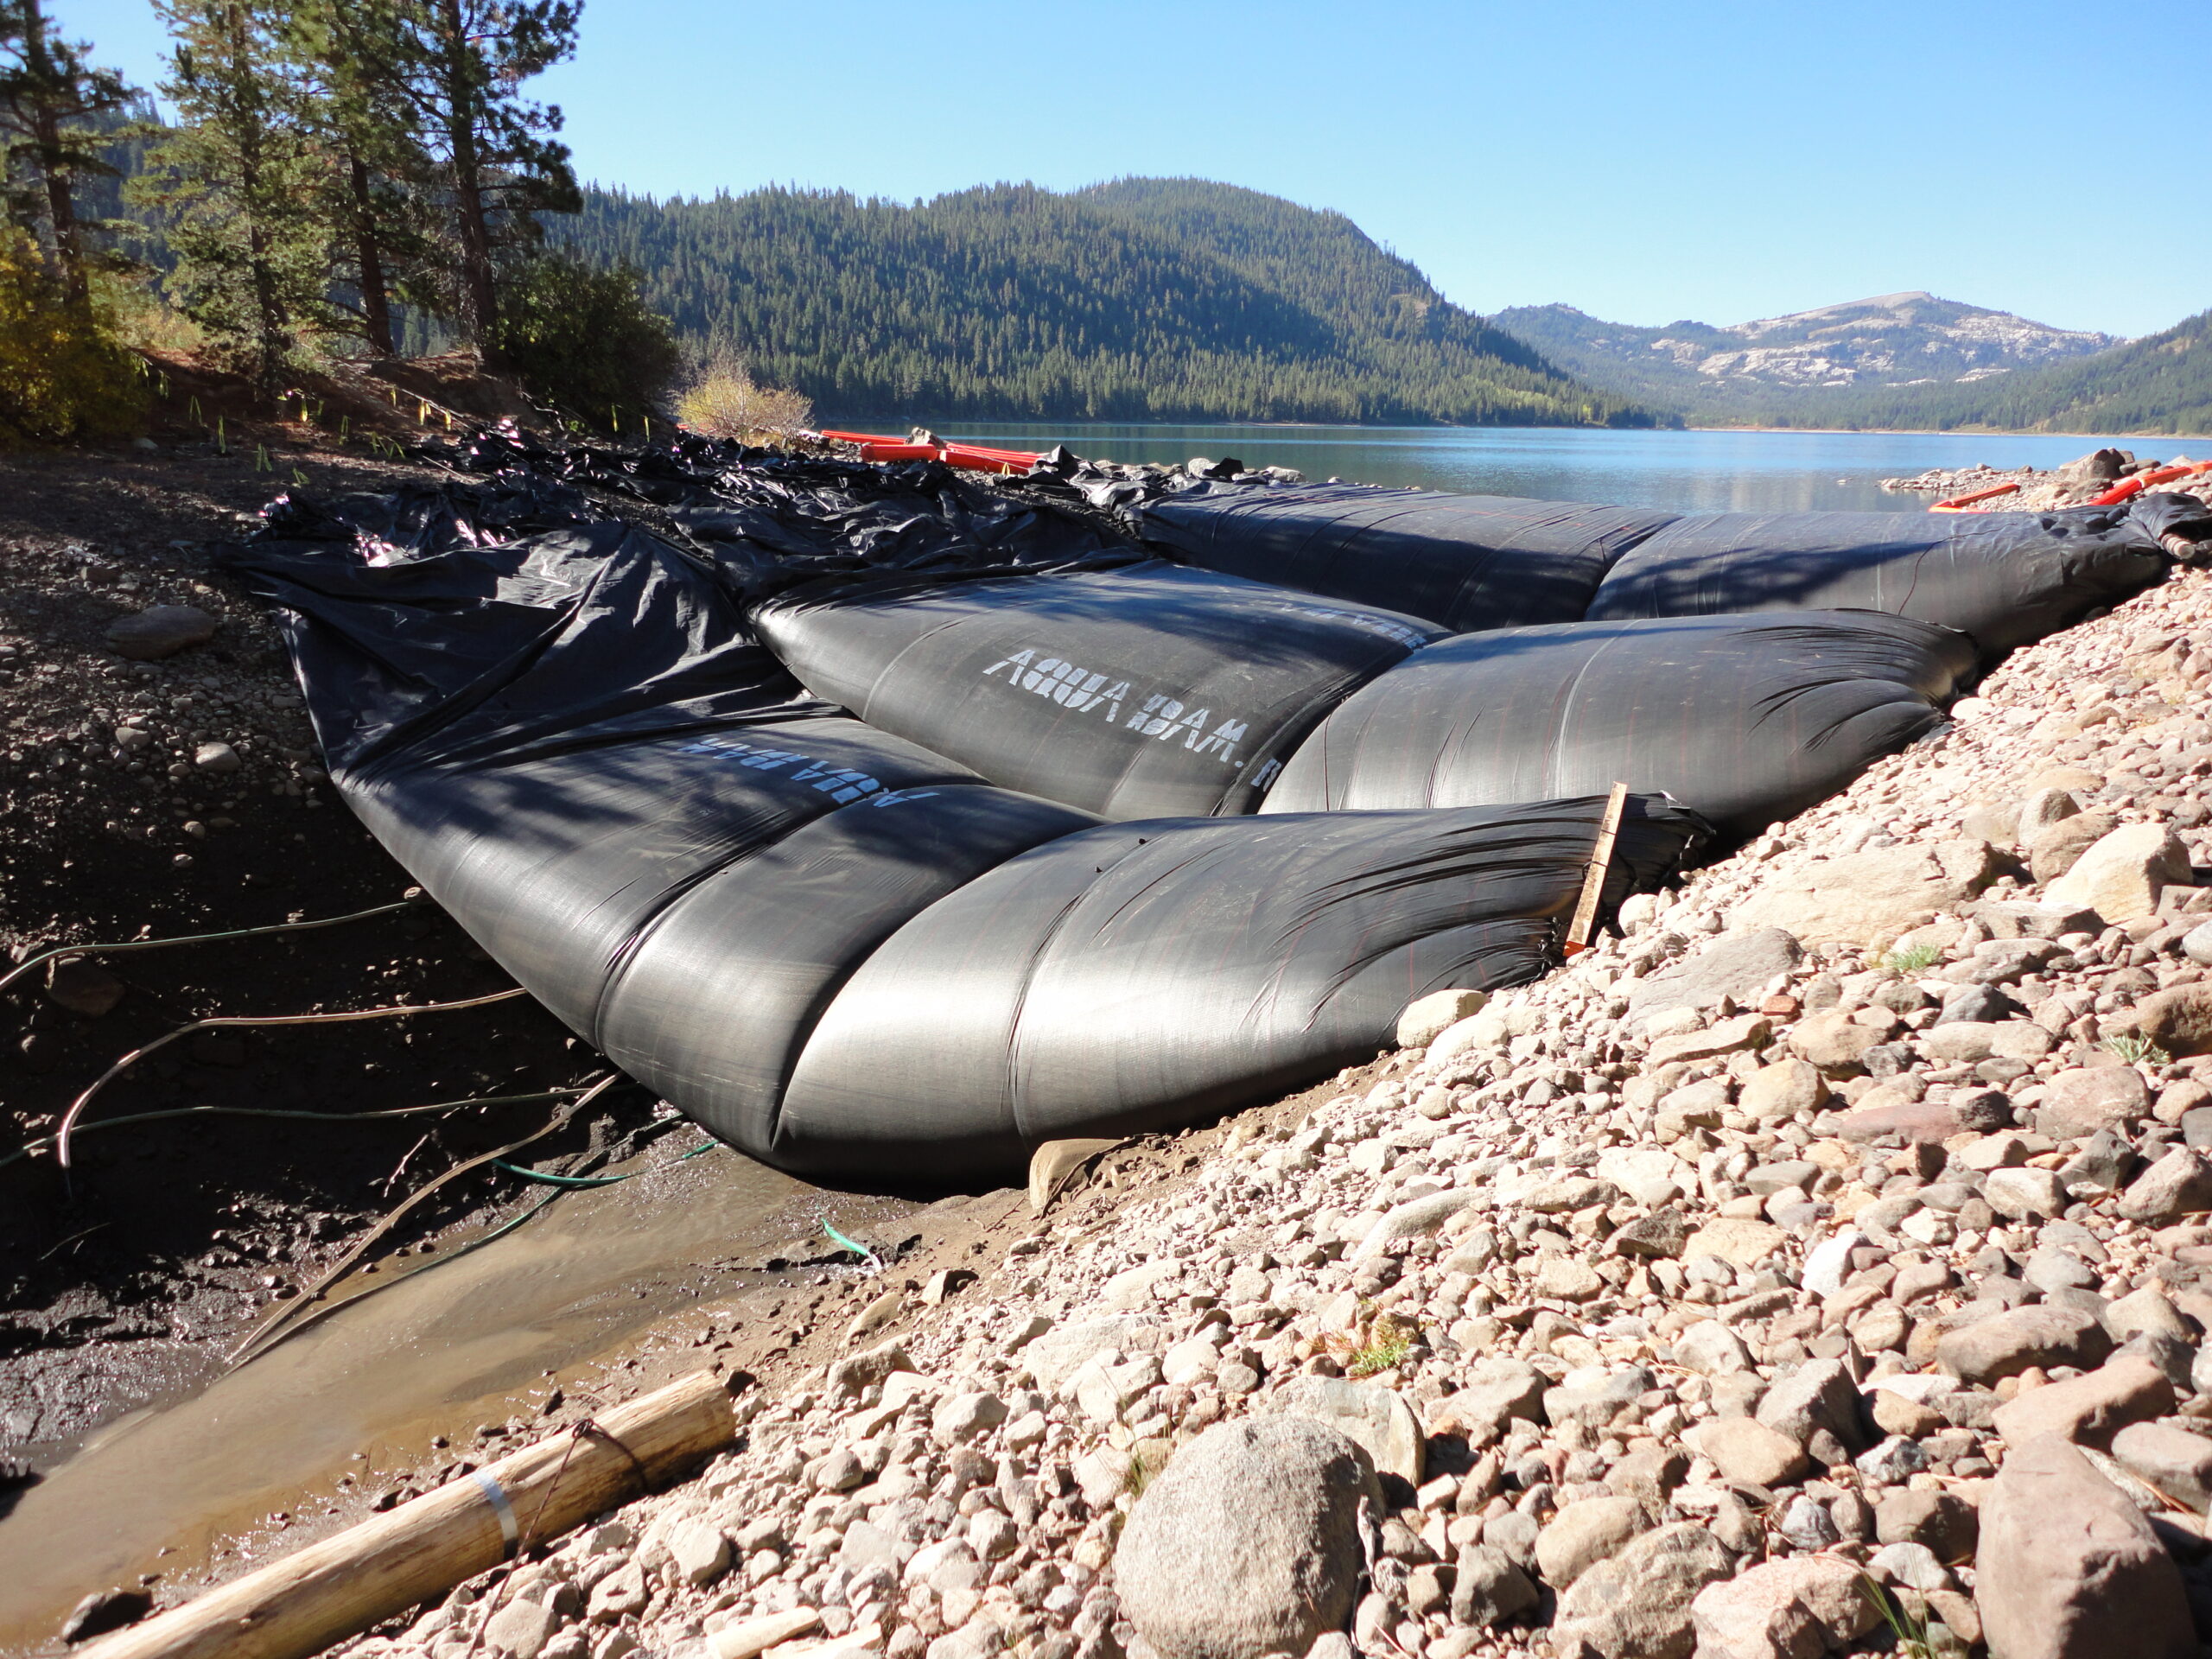
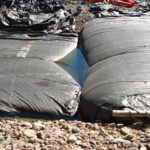
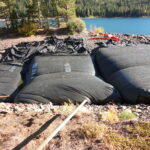
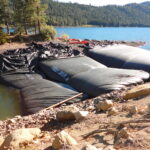
A better shot of all three (3) AquaDams doing a great job.
Great job AquaDam!
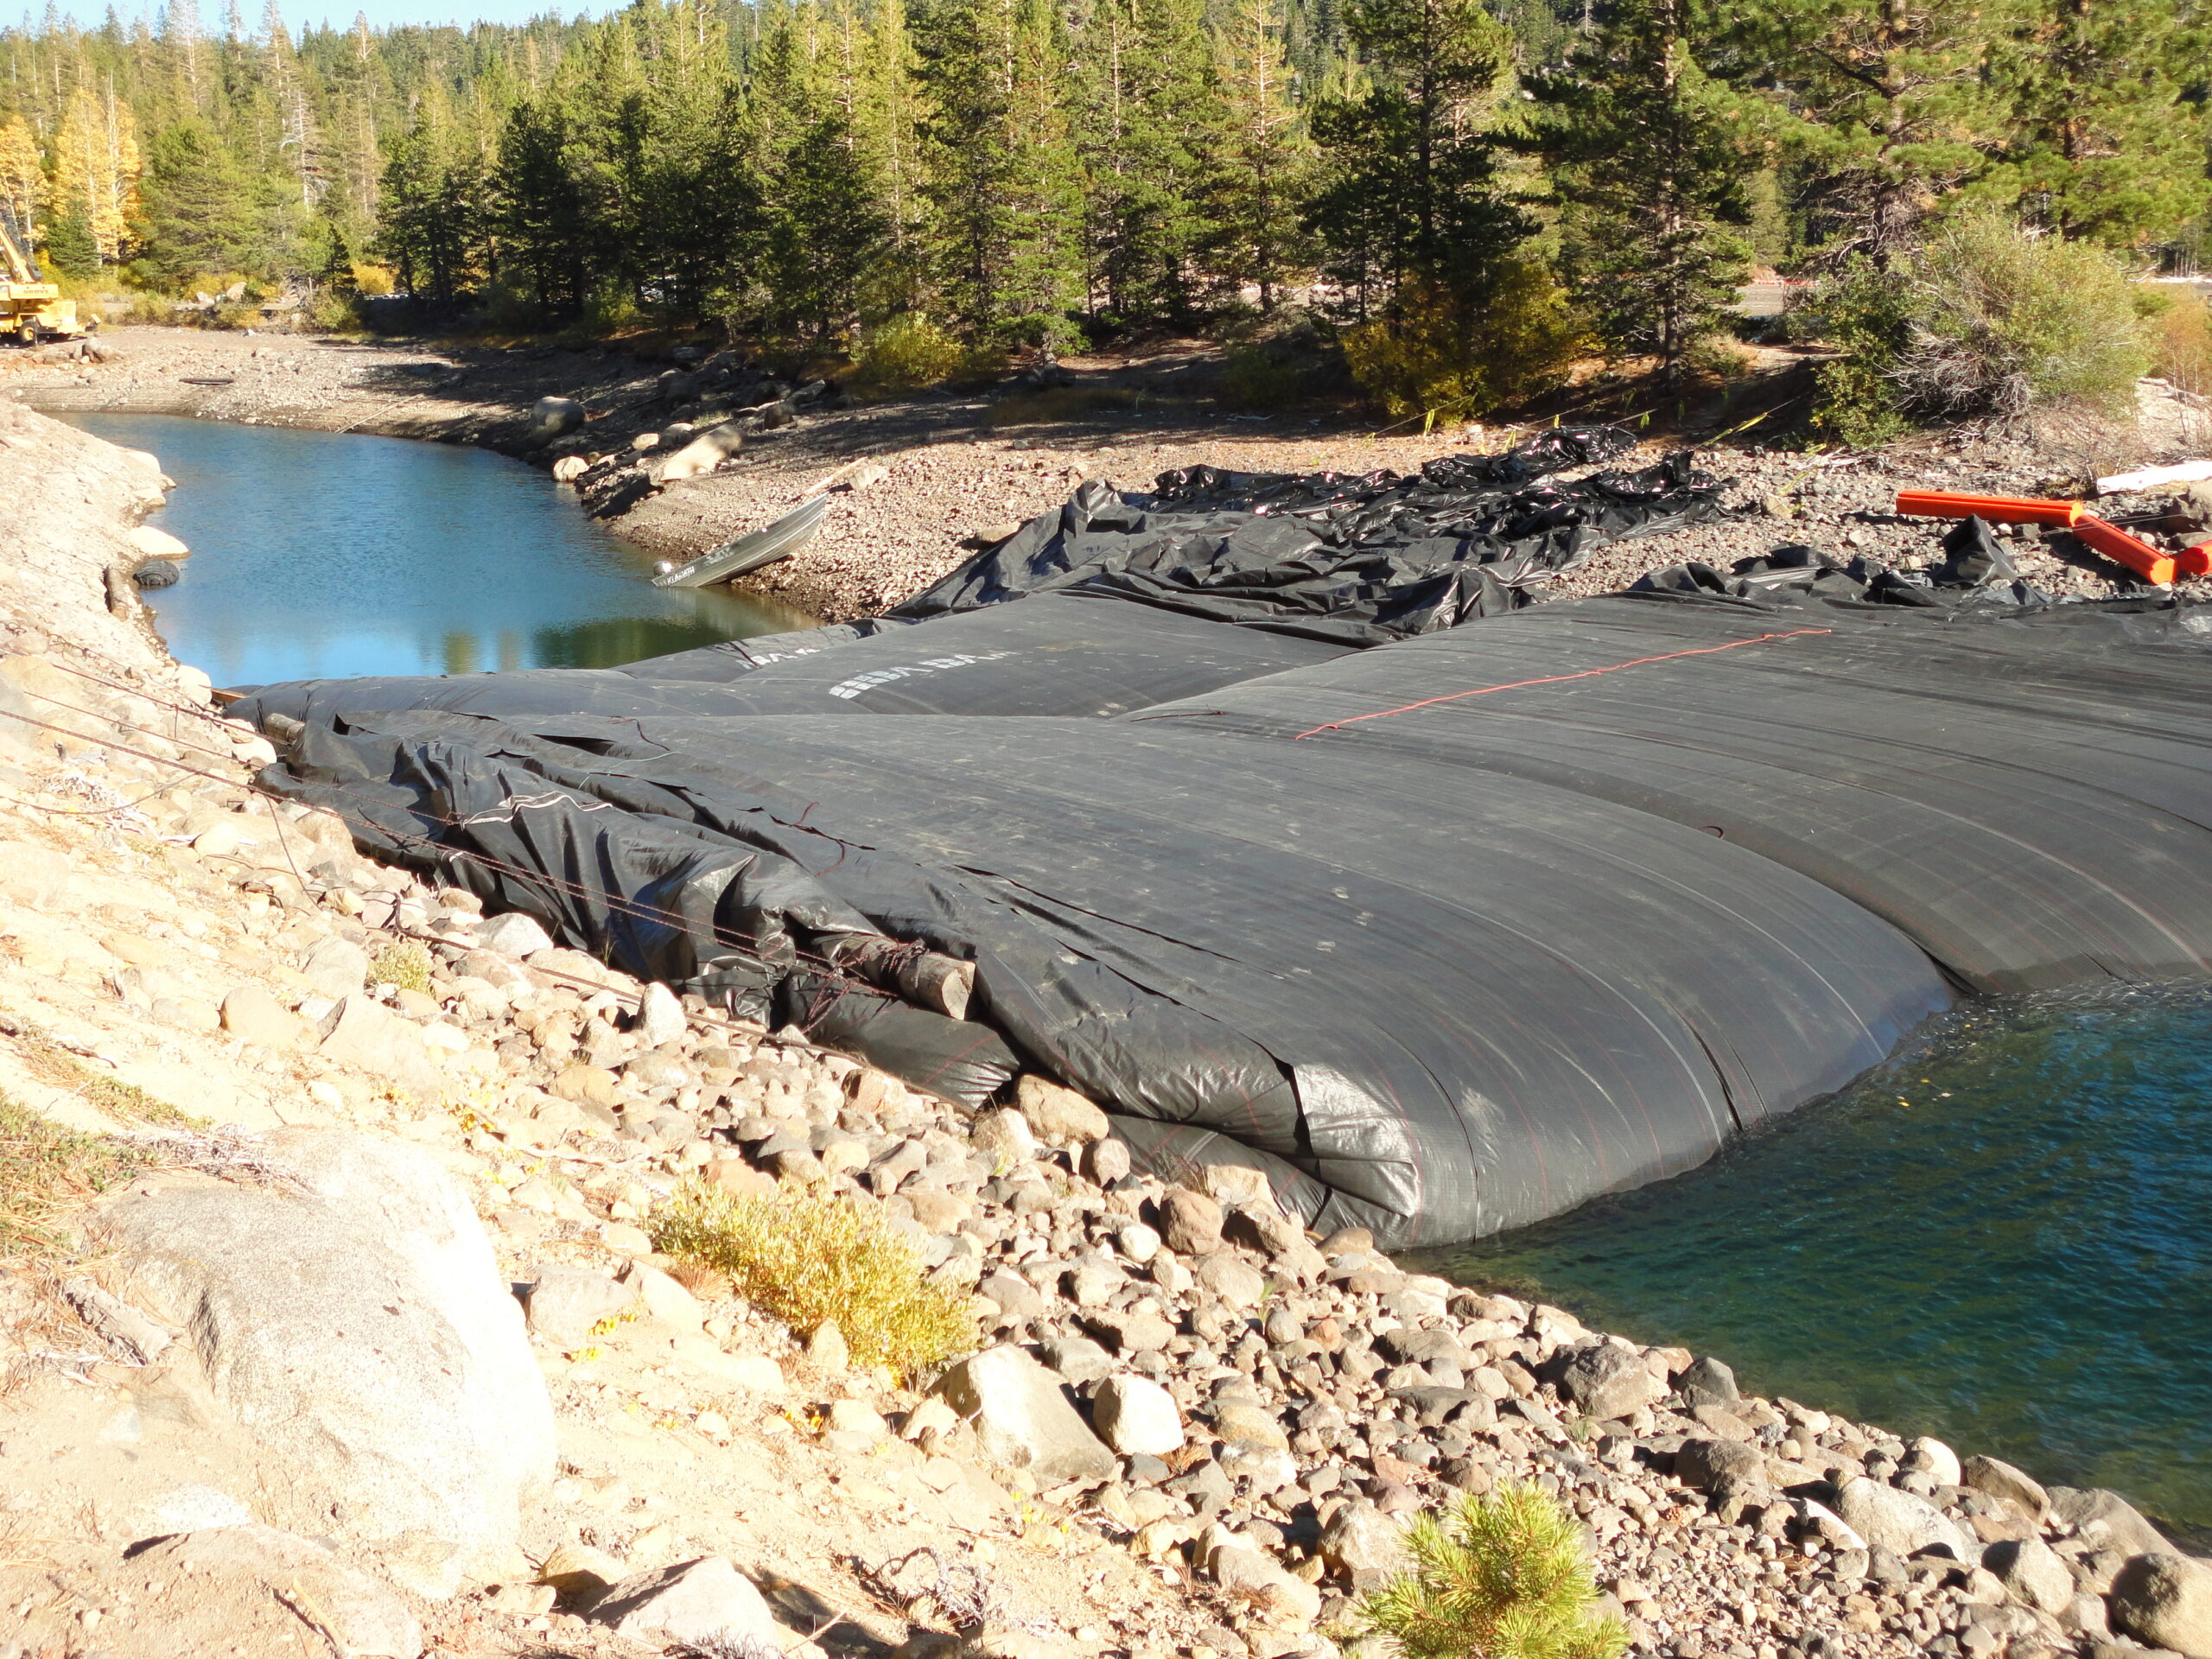
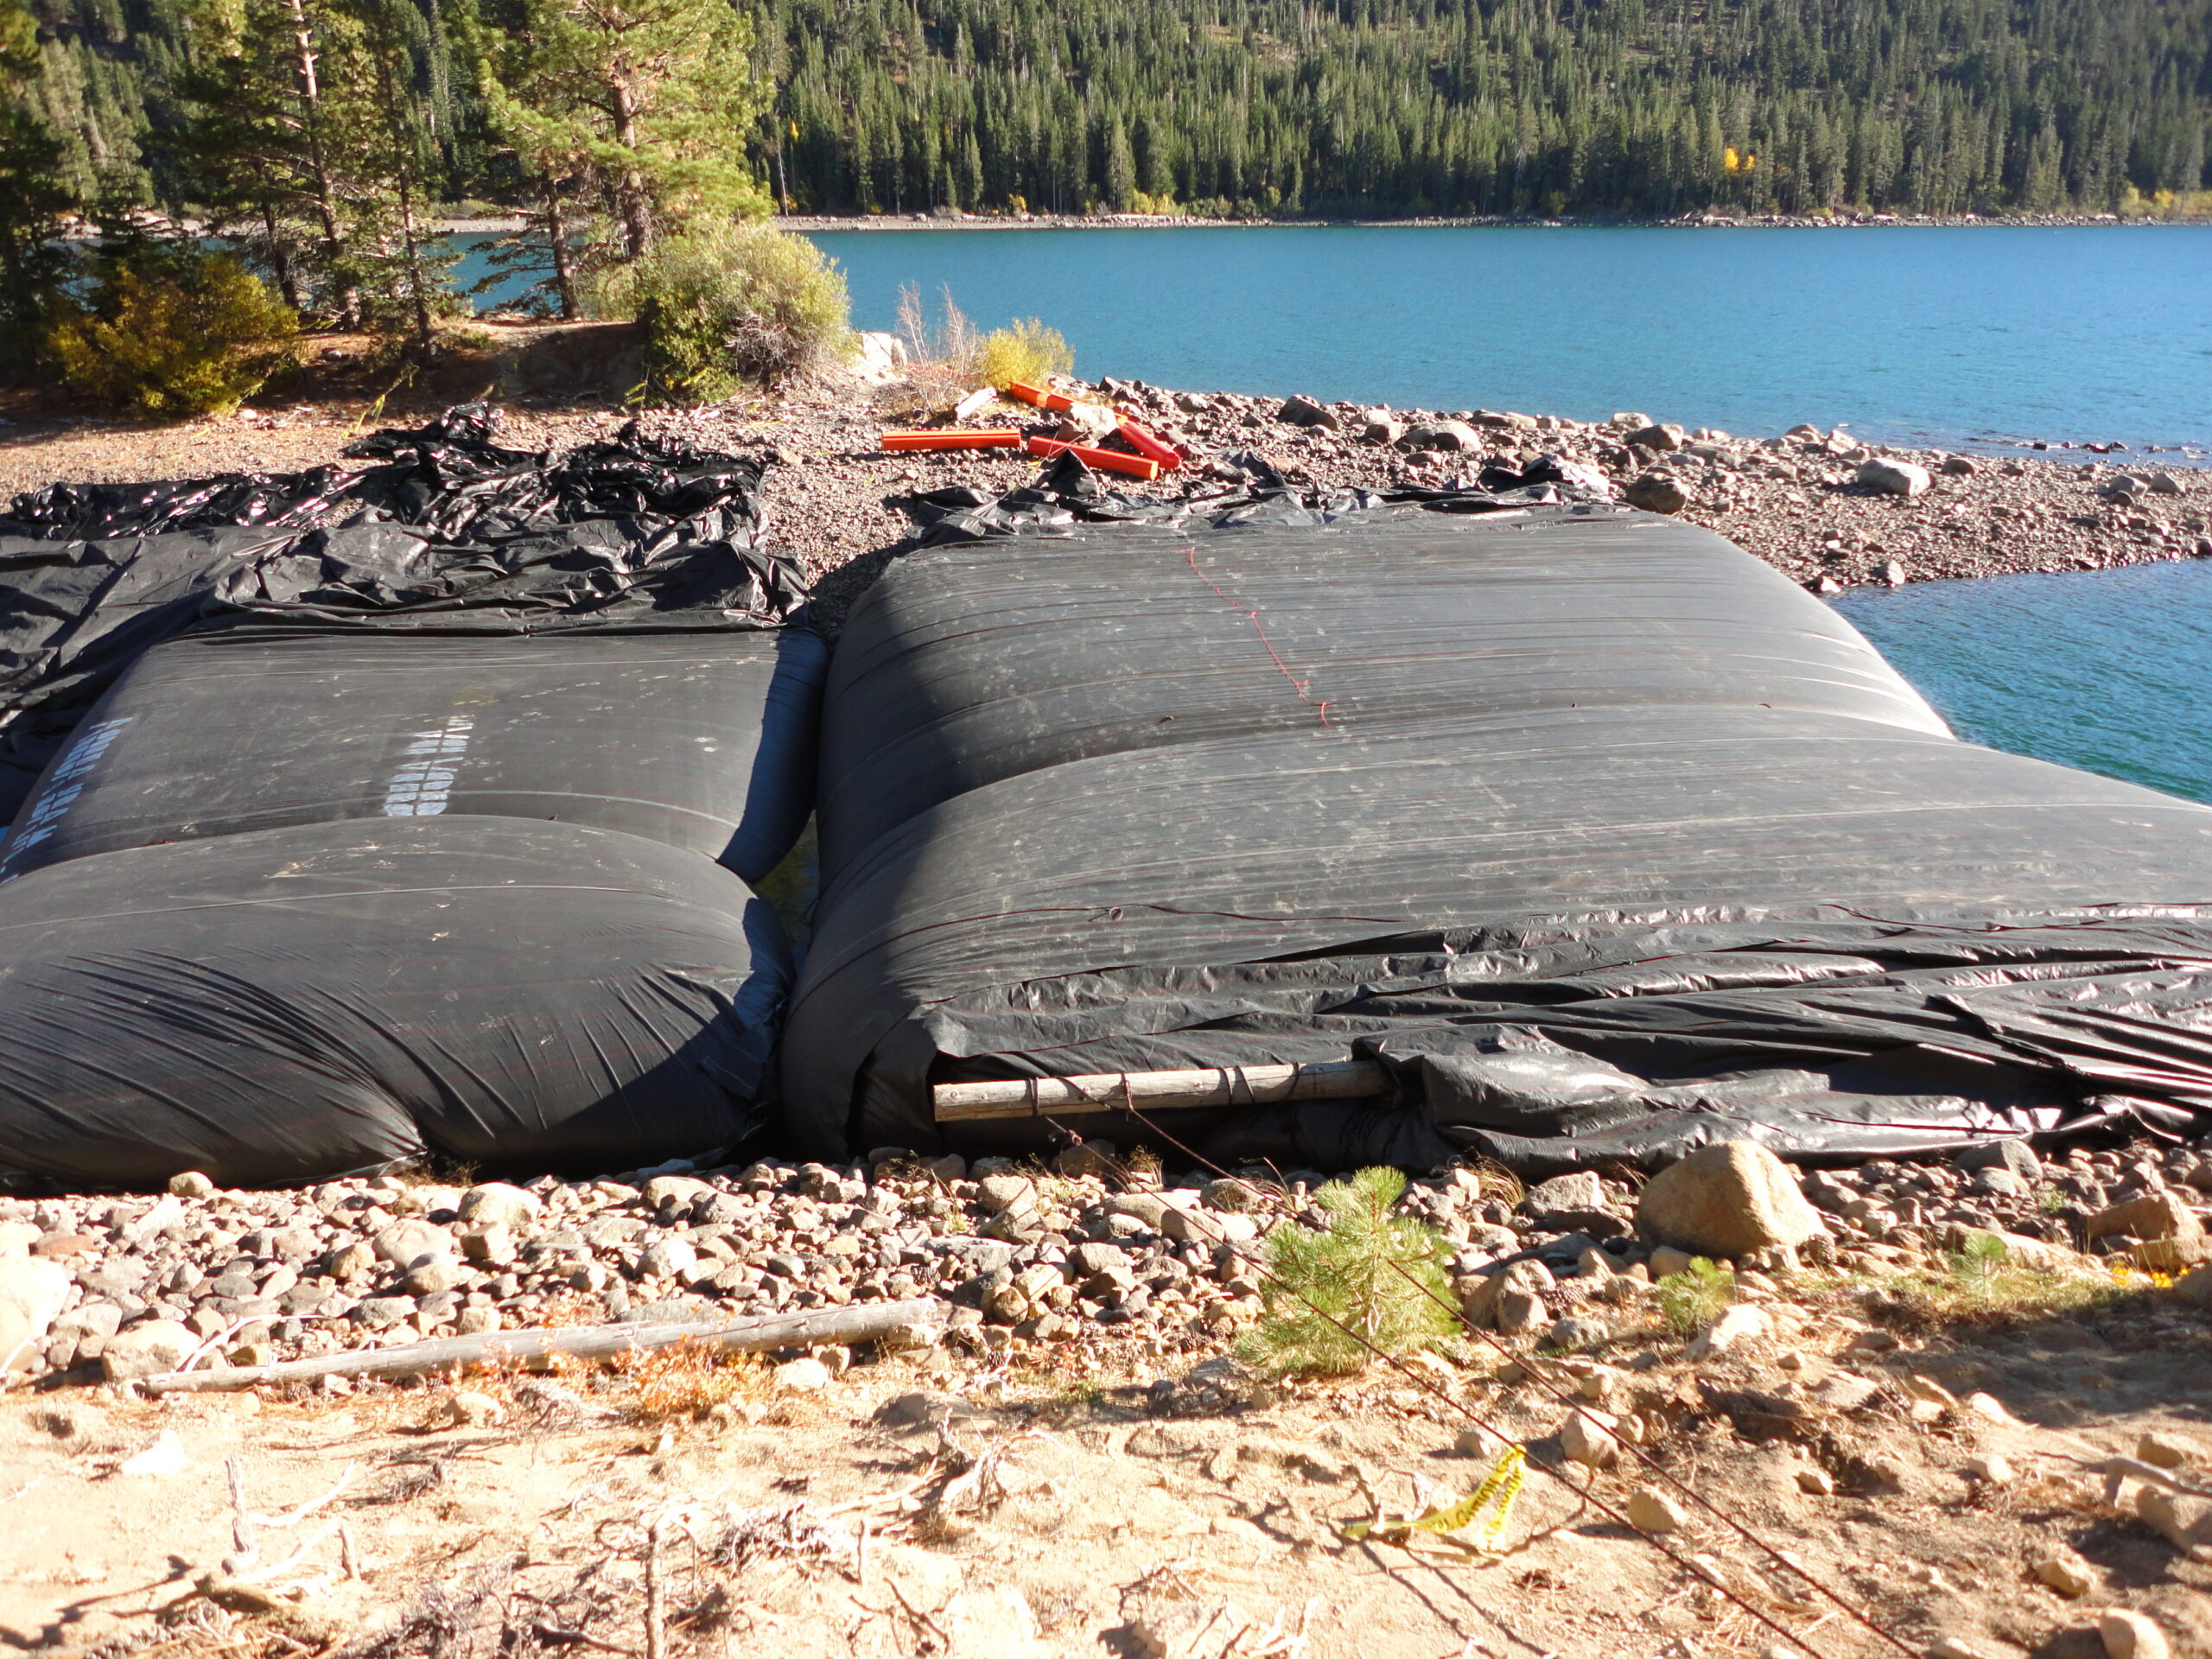
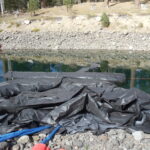
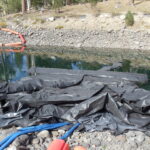
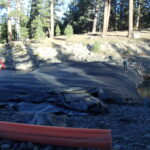
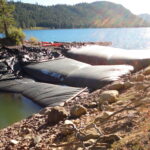
Some time has past now and the downstream (work) area continues to dewater.
The water lines left behind on each of the AquaDams, show where the water once was.
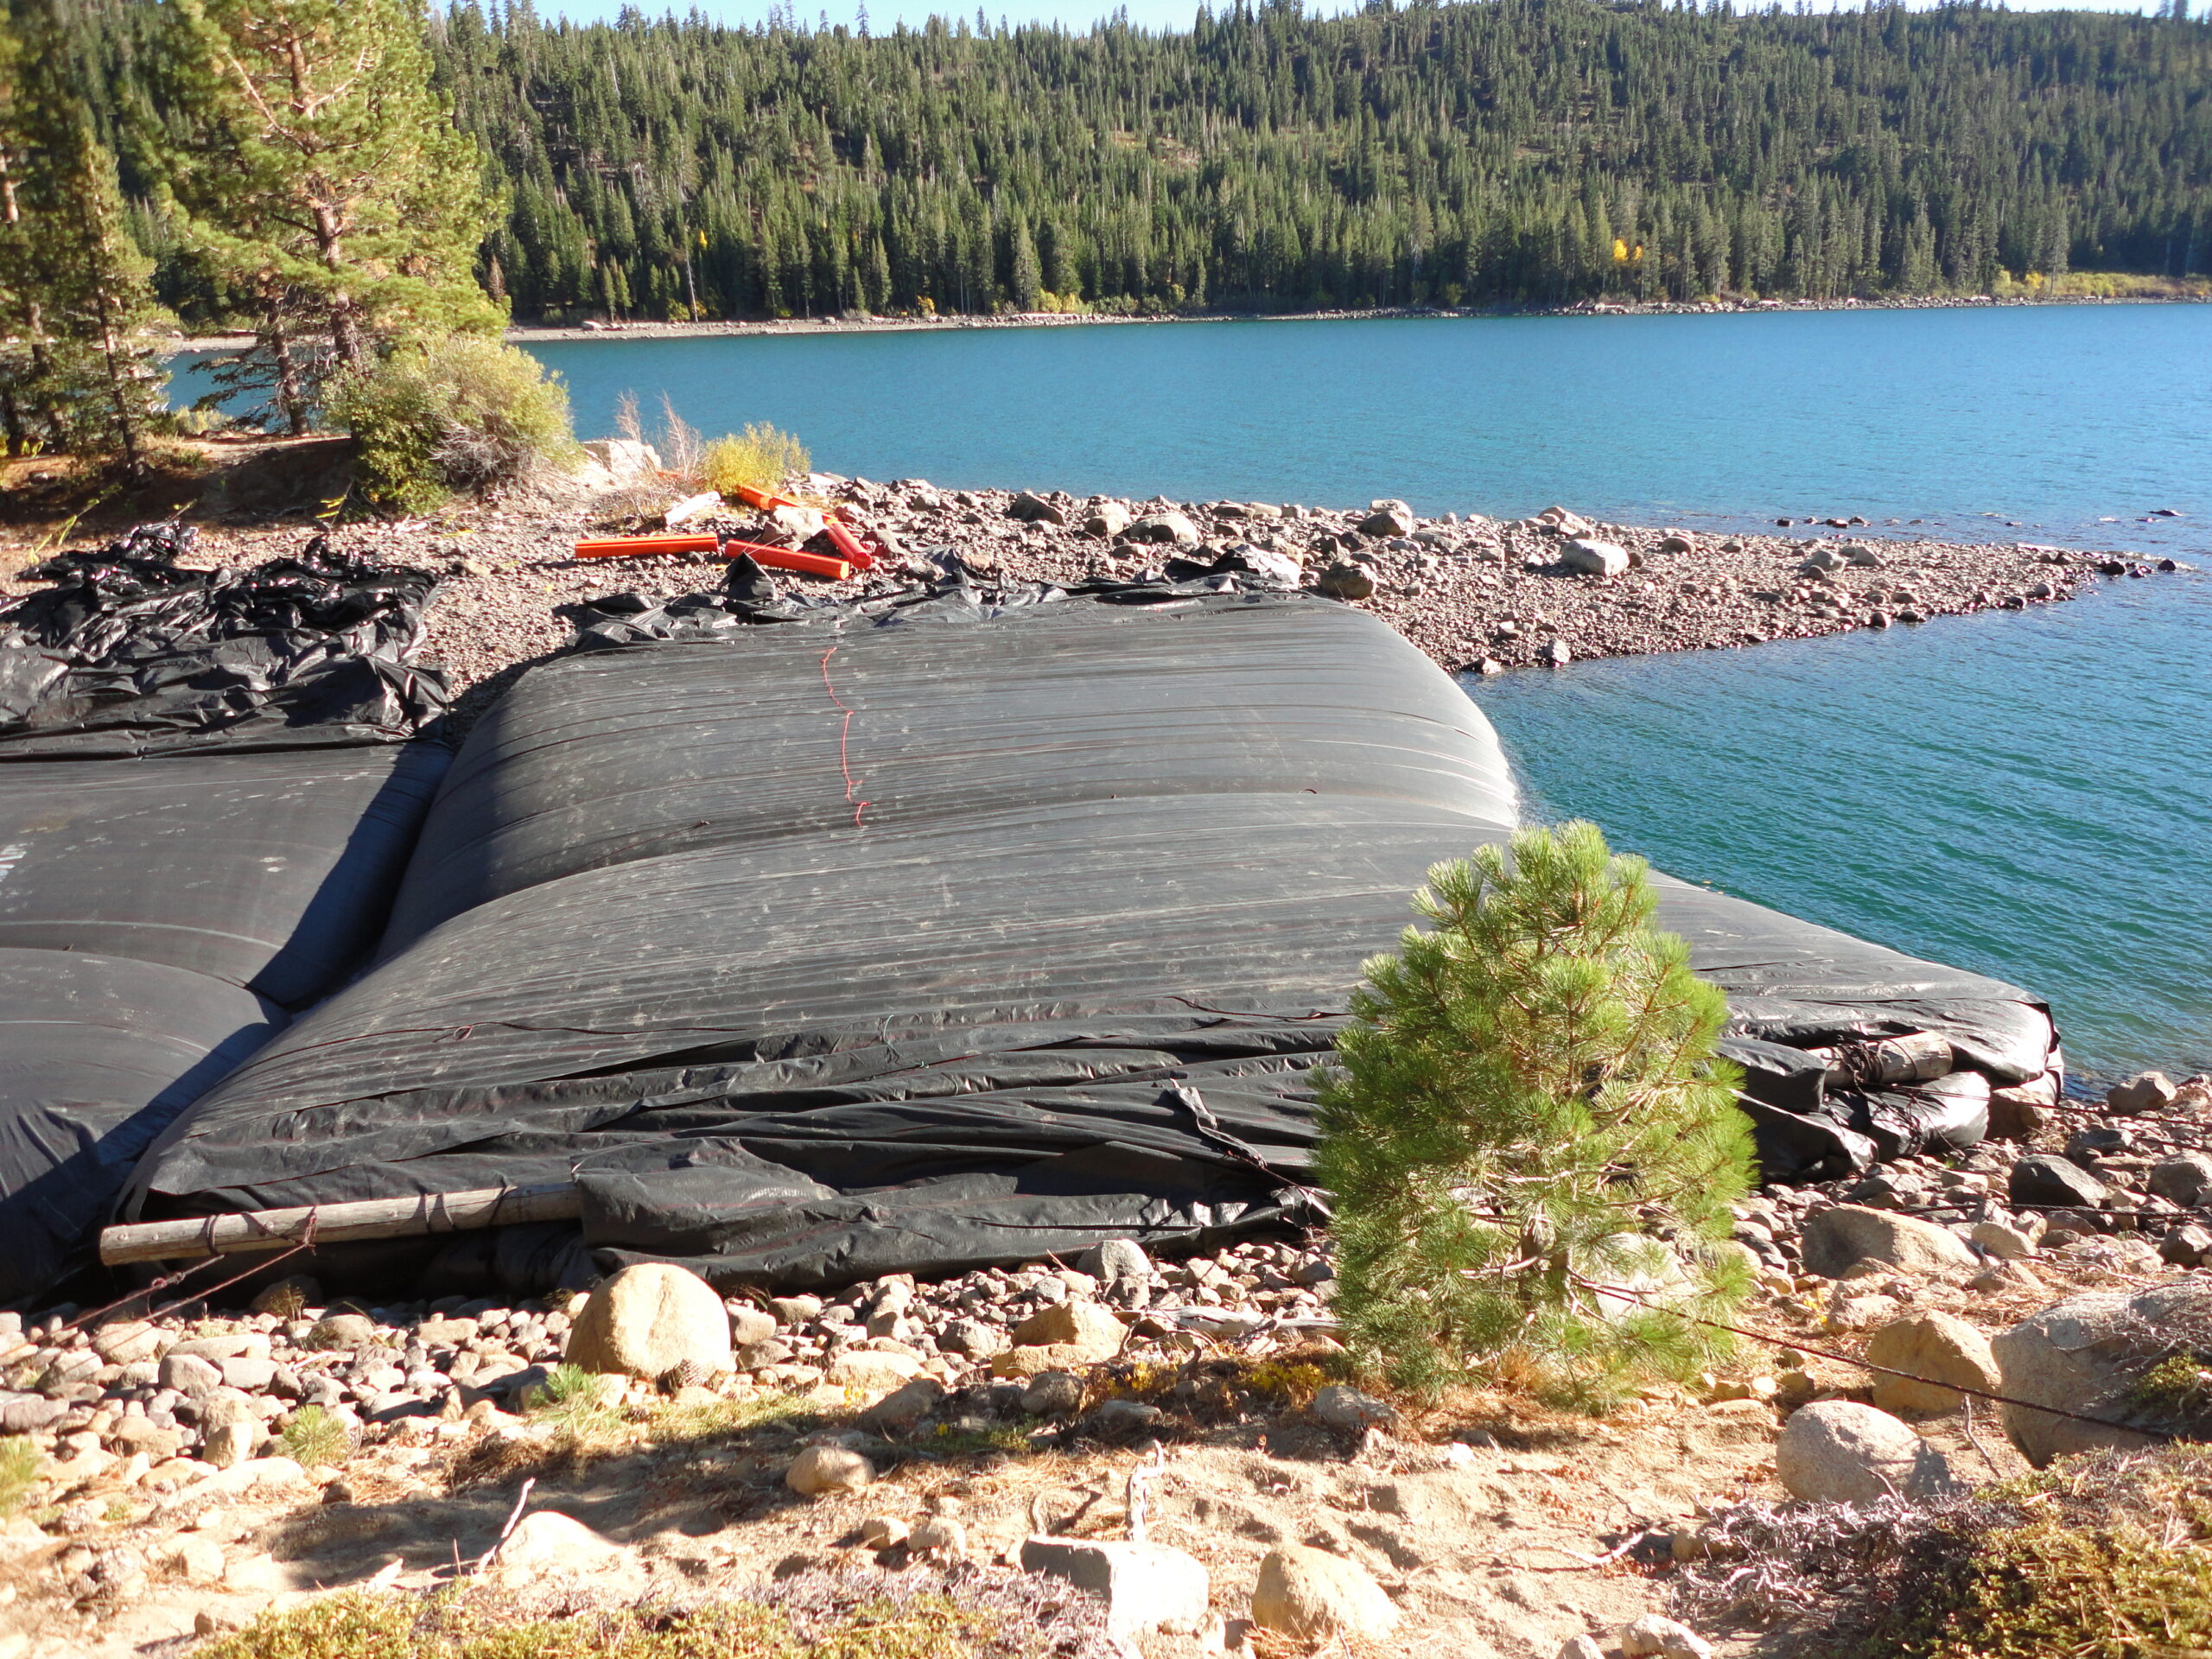
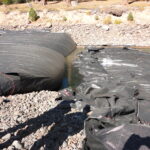
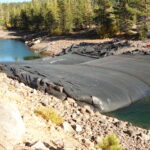
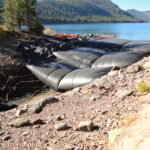
The 21ft tall primary AquaDam supported by two (2) smaller AquaDams is doing a great job at holding back 15ft of water depth. It is a little hard to see, but most of the water downstream is gone now.
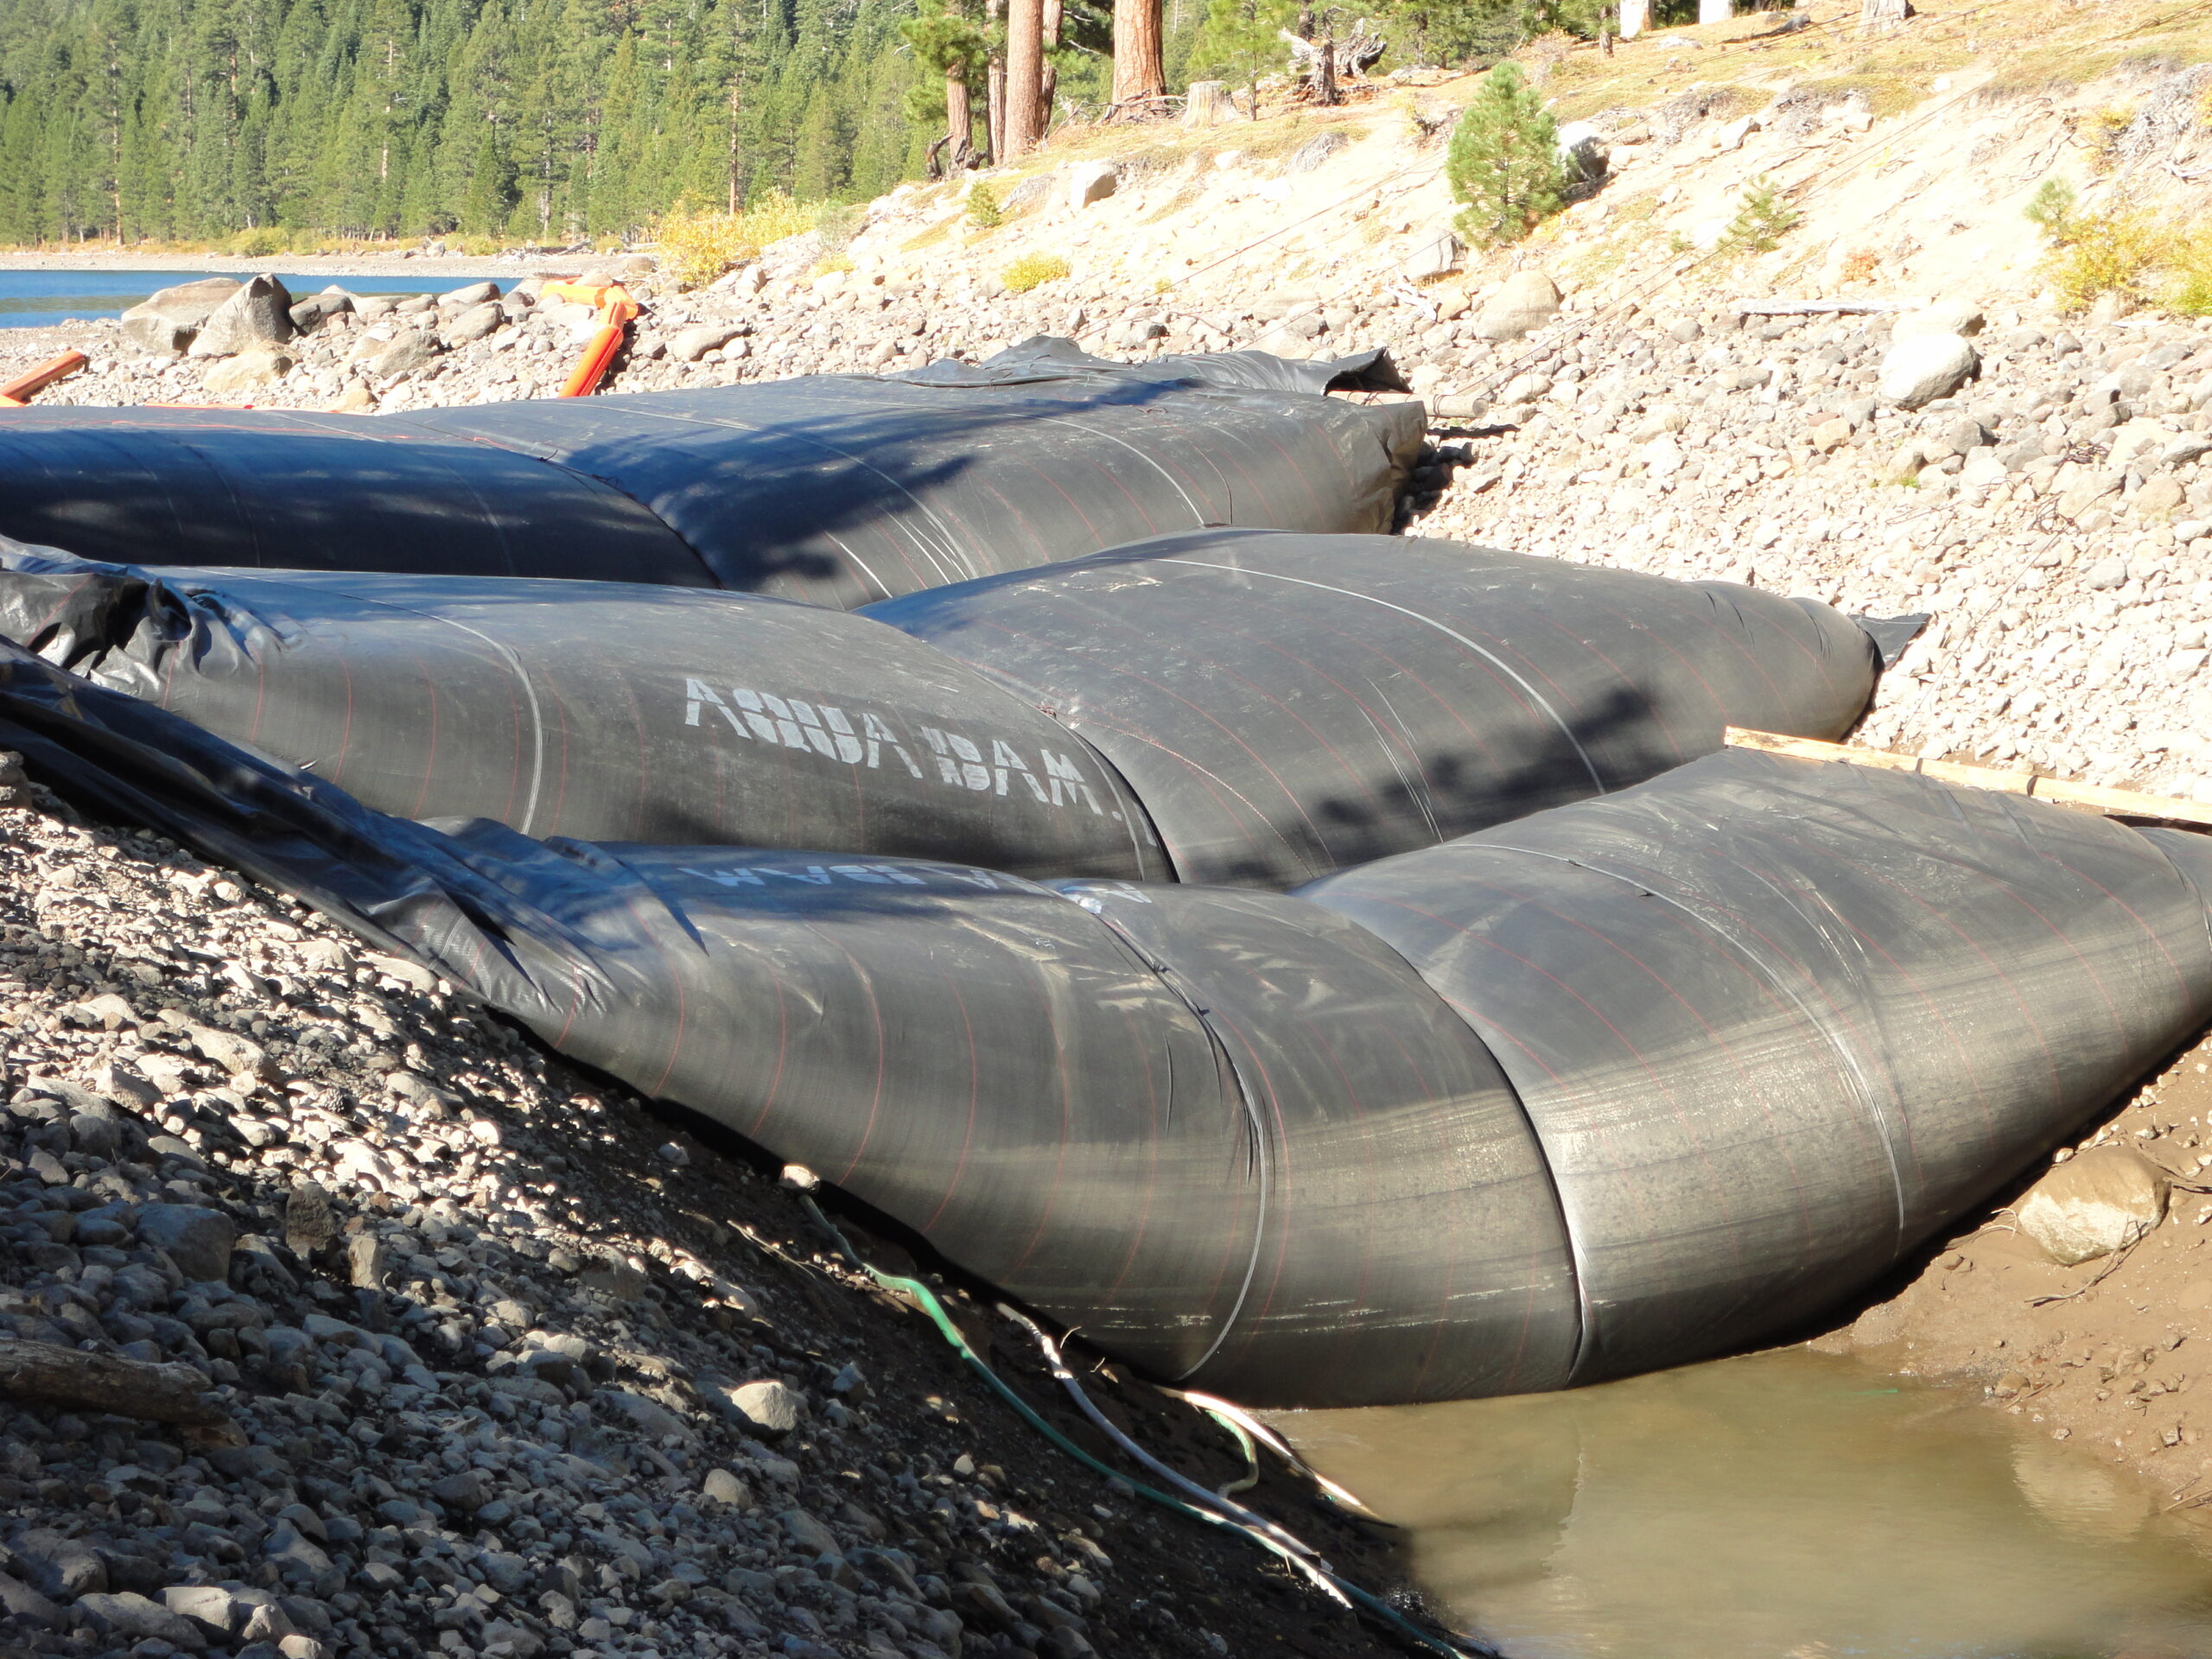
AquaDams can work great as a cofferdam system, even in rocky places.
This AquaDam cofferdam system installation took less than two days.
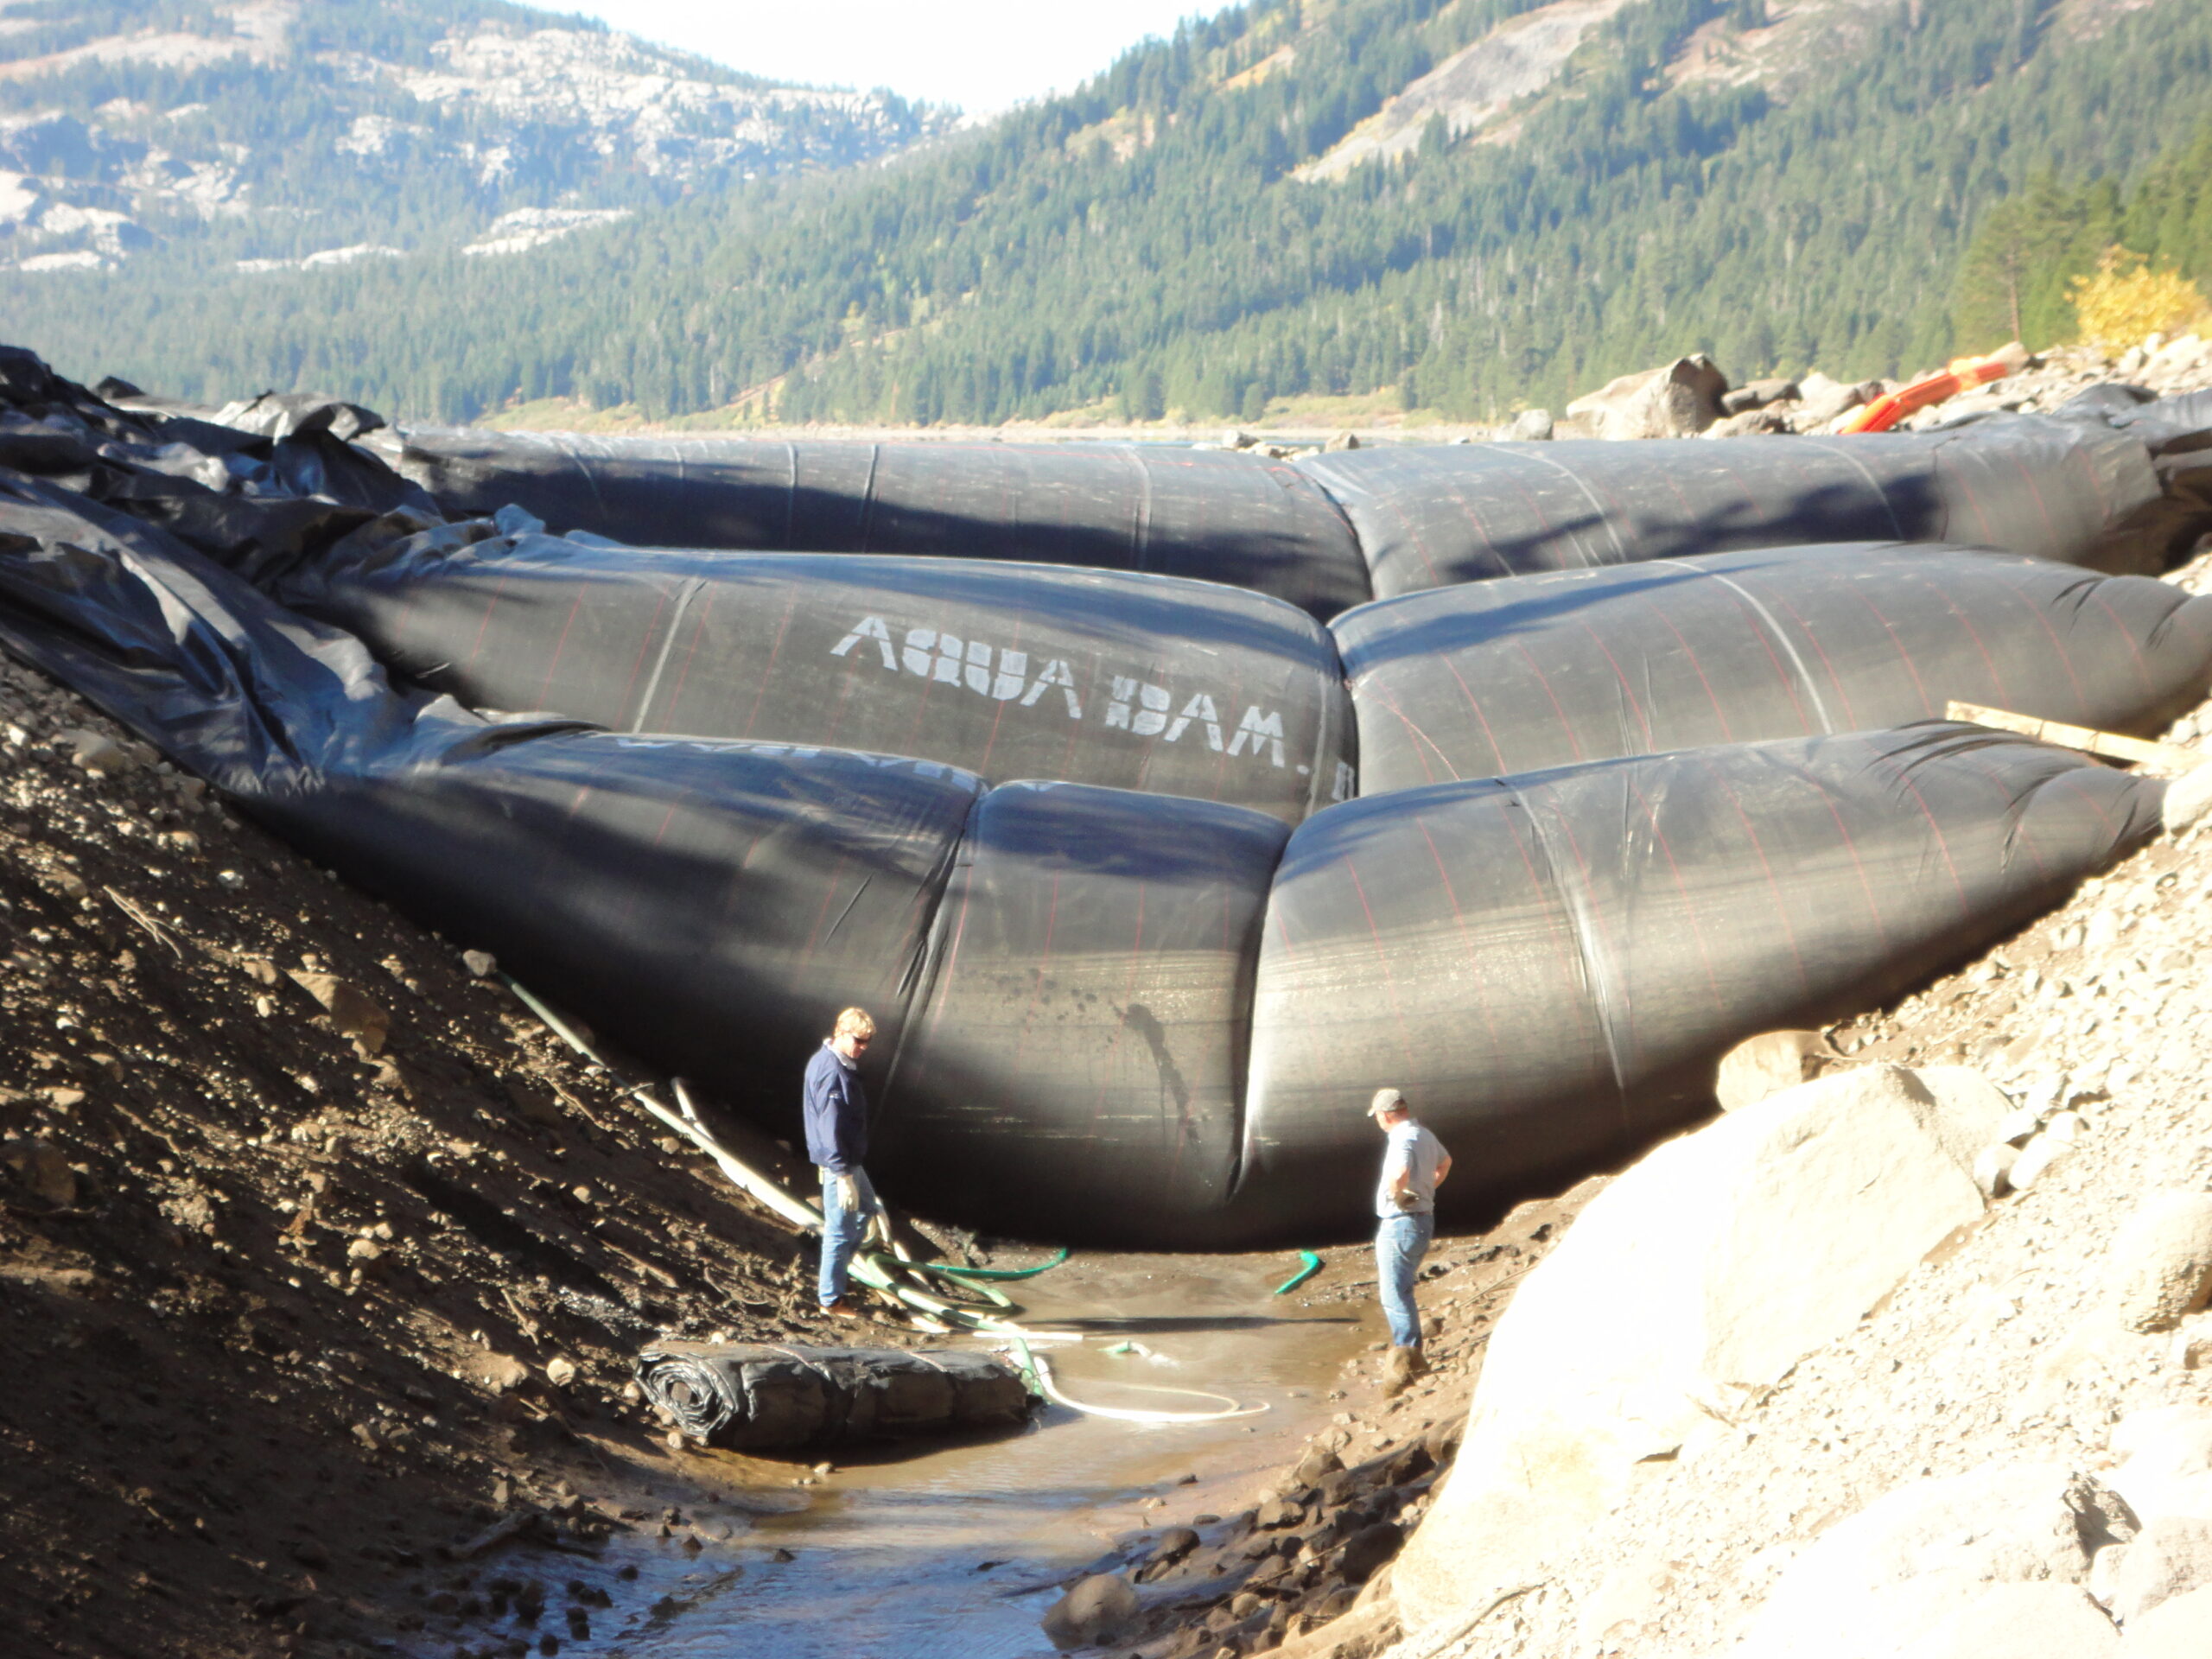
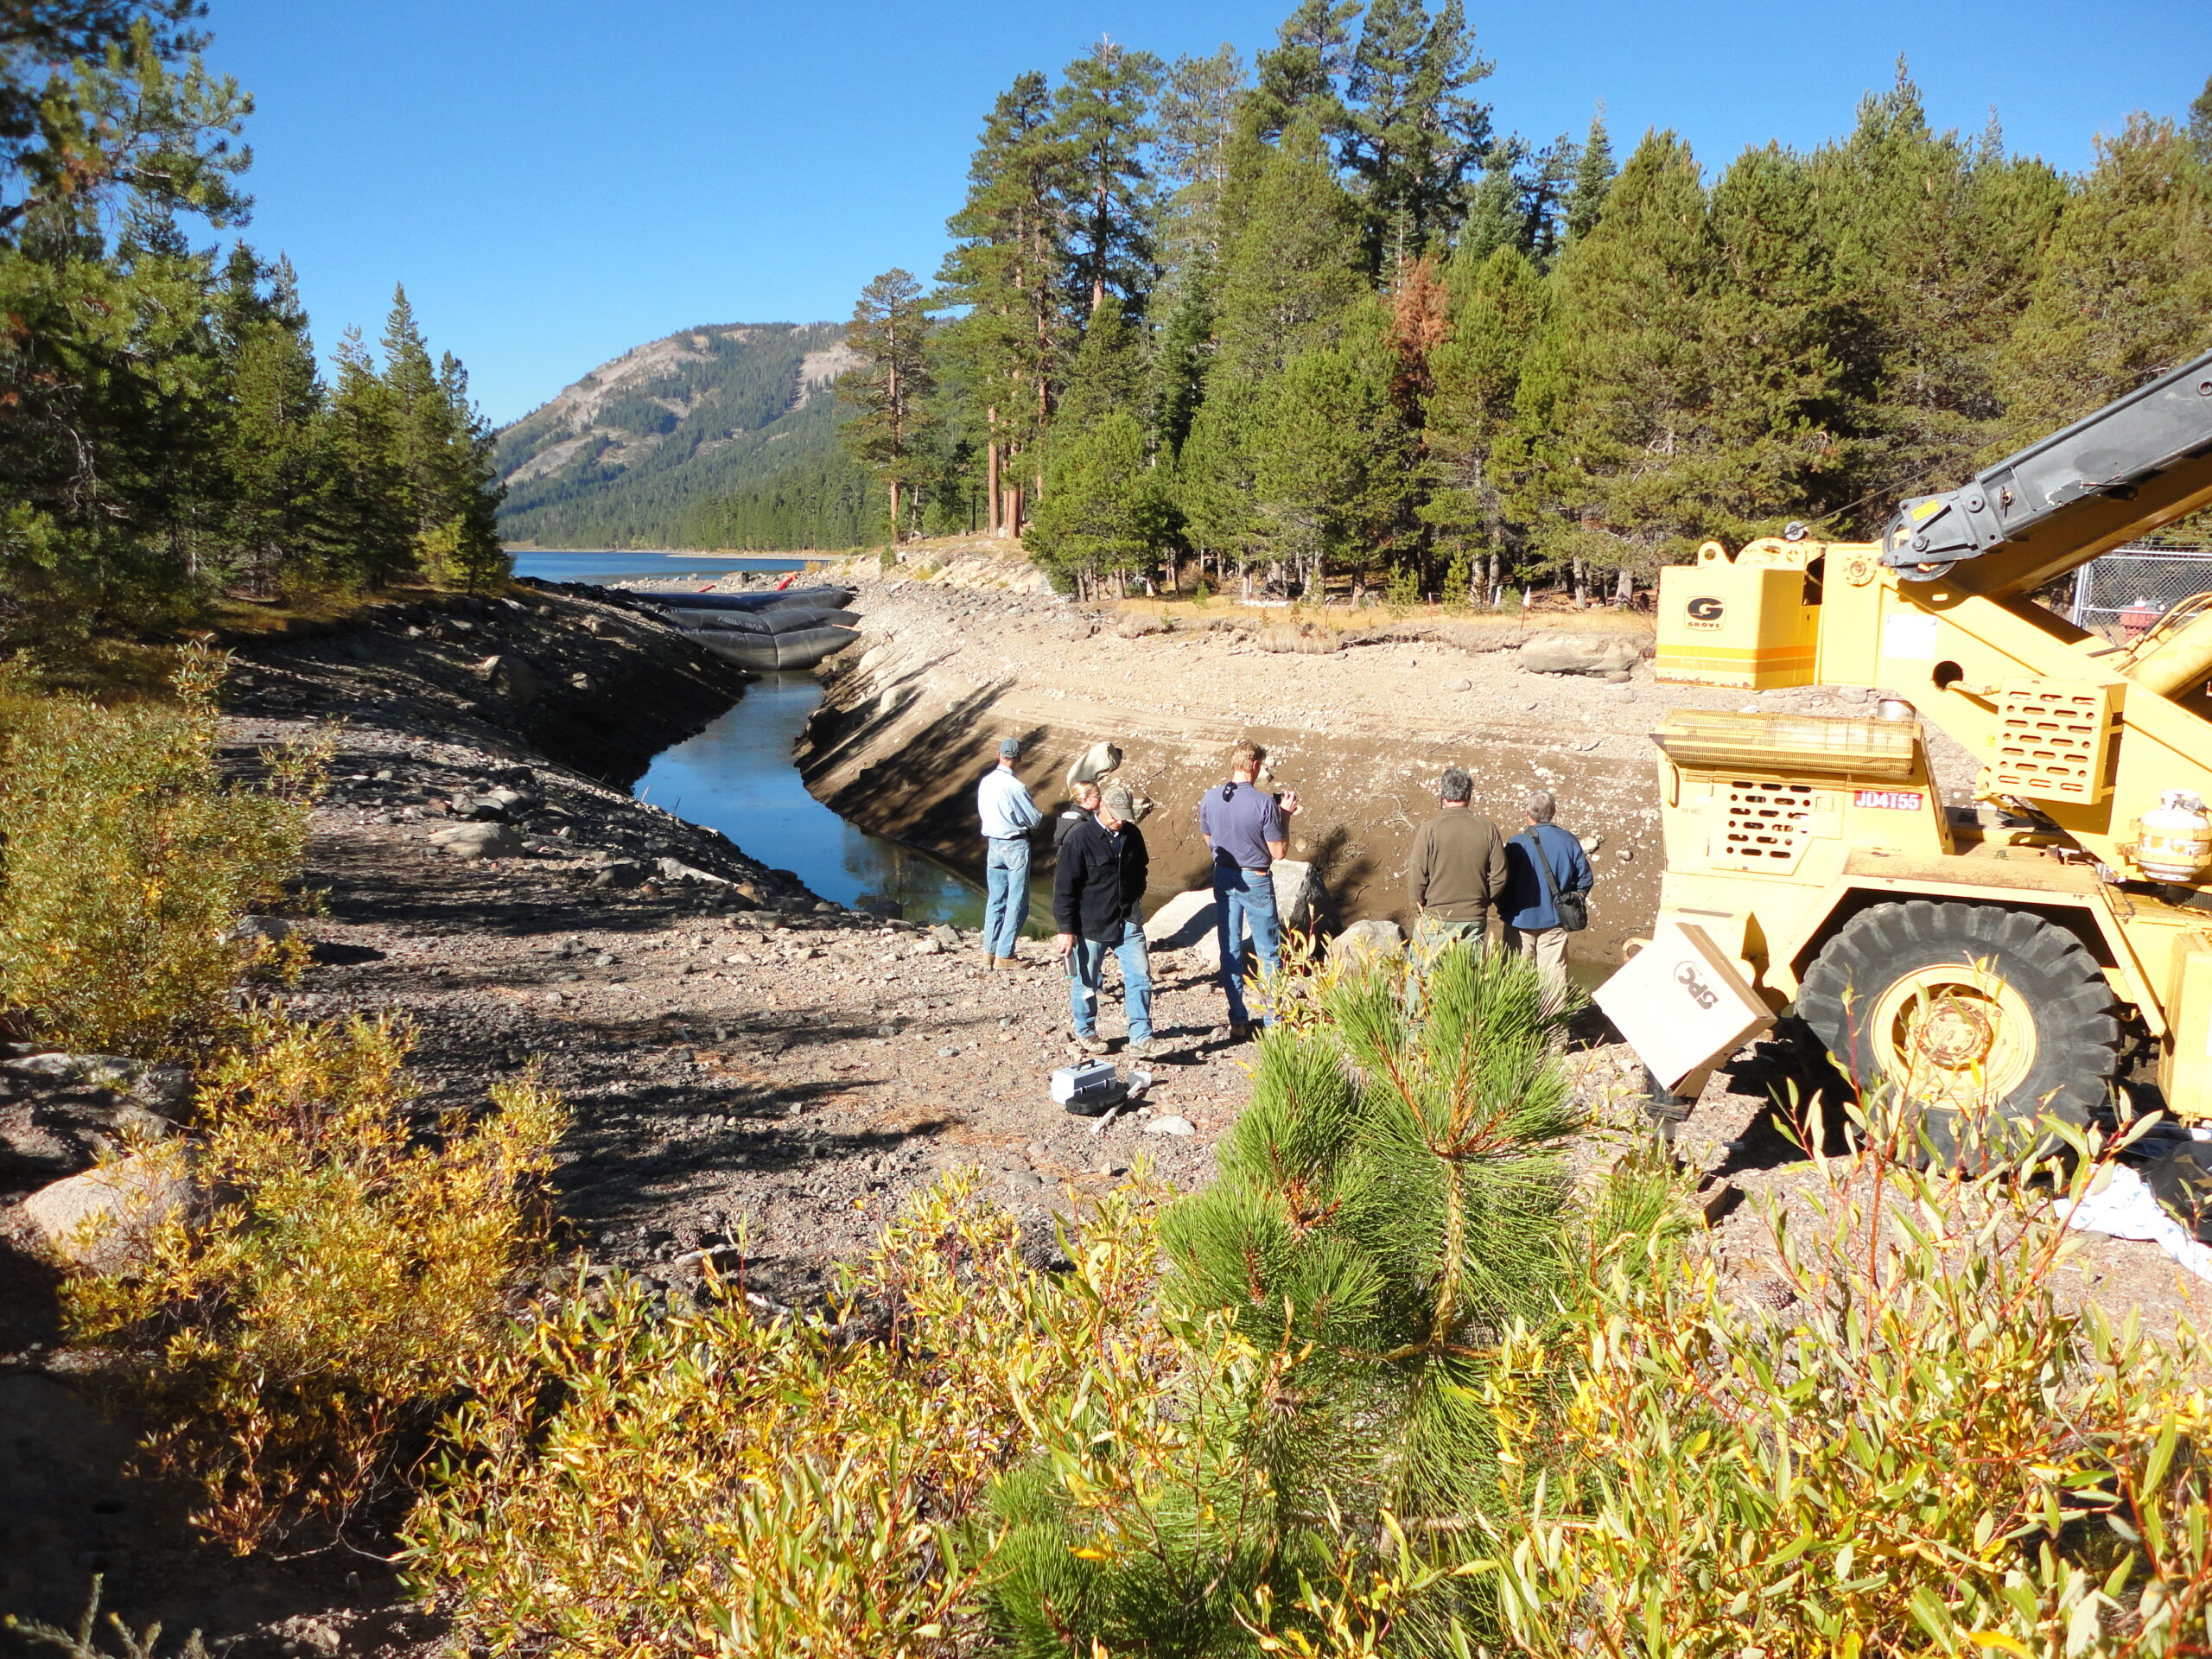
These people should give a good sense of scale to the size of this AquaDam cofferdam system.

Independence Lake is managed by a multitude of agencies at various levels of government.
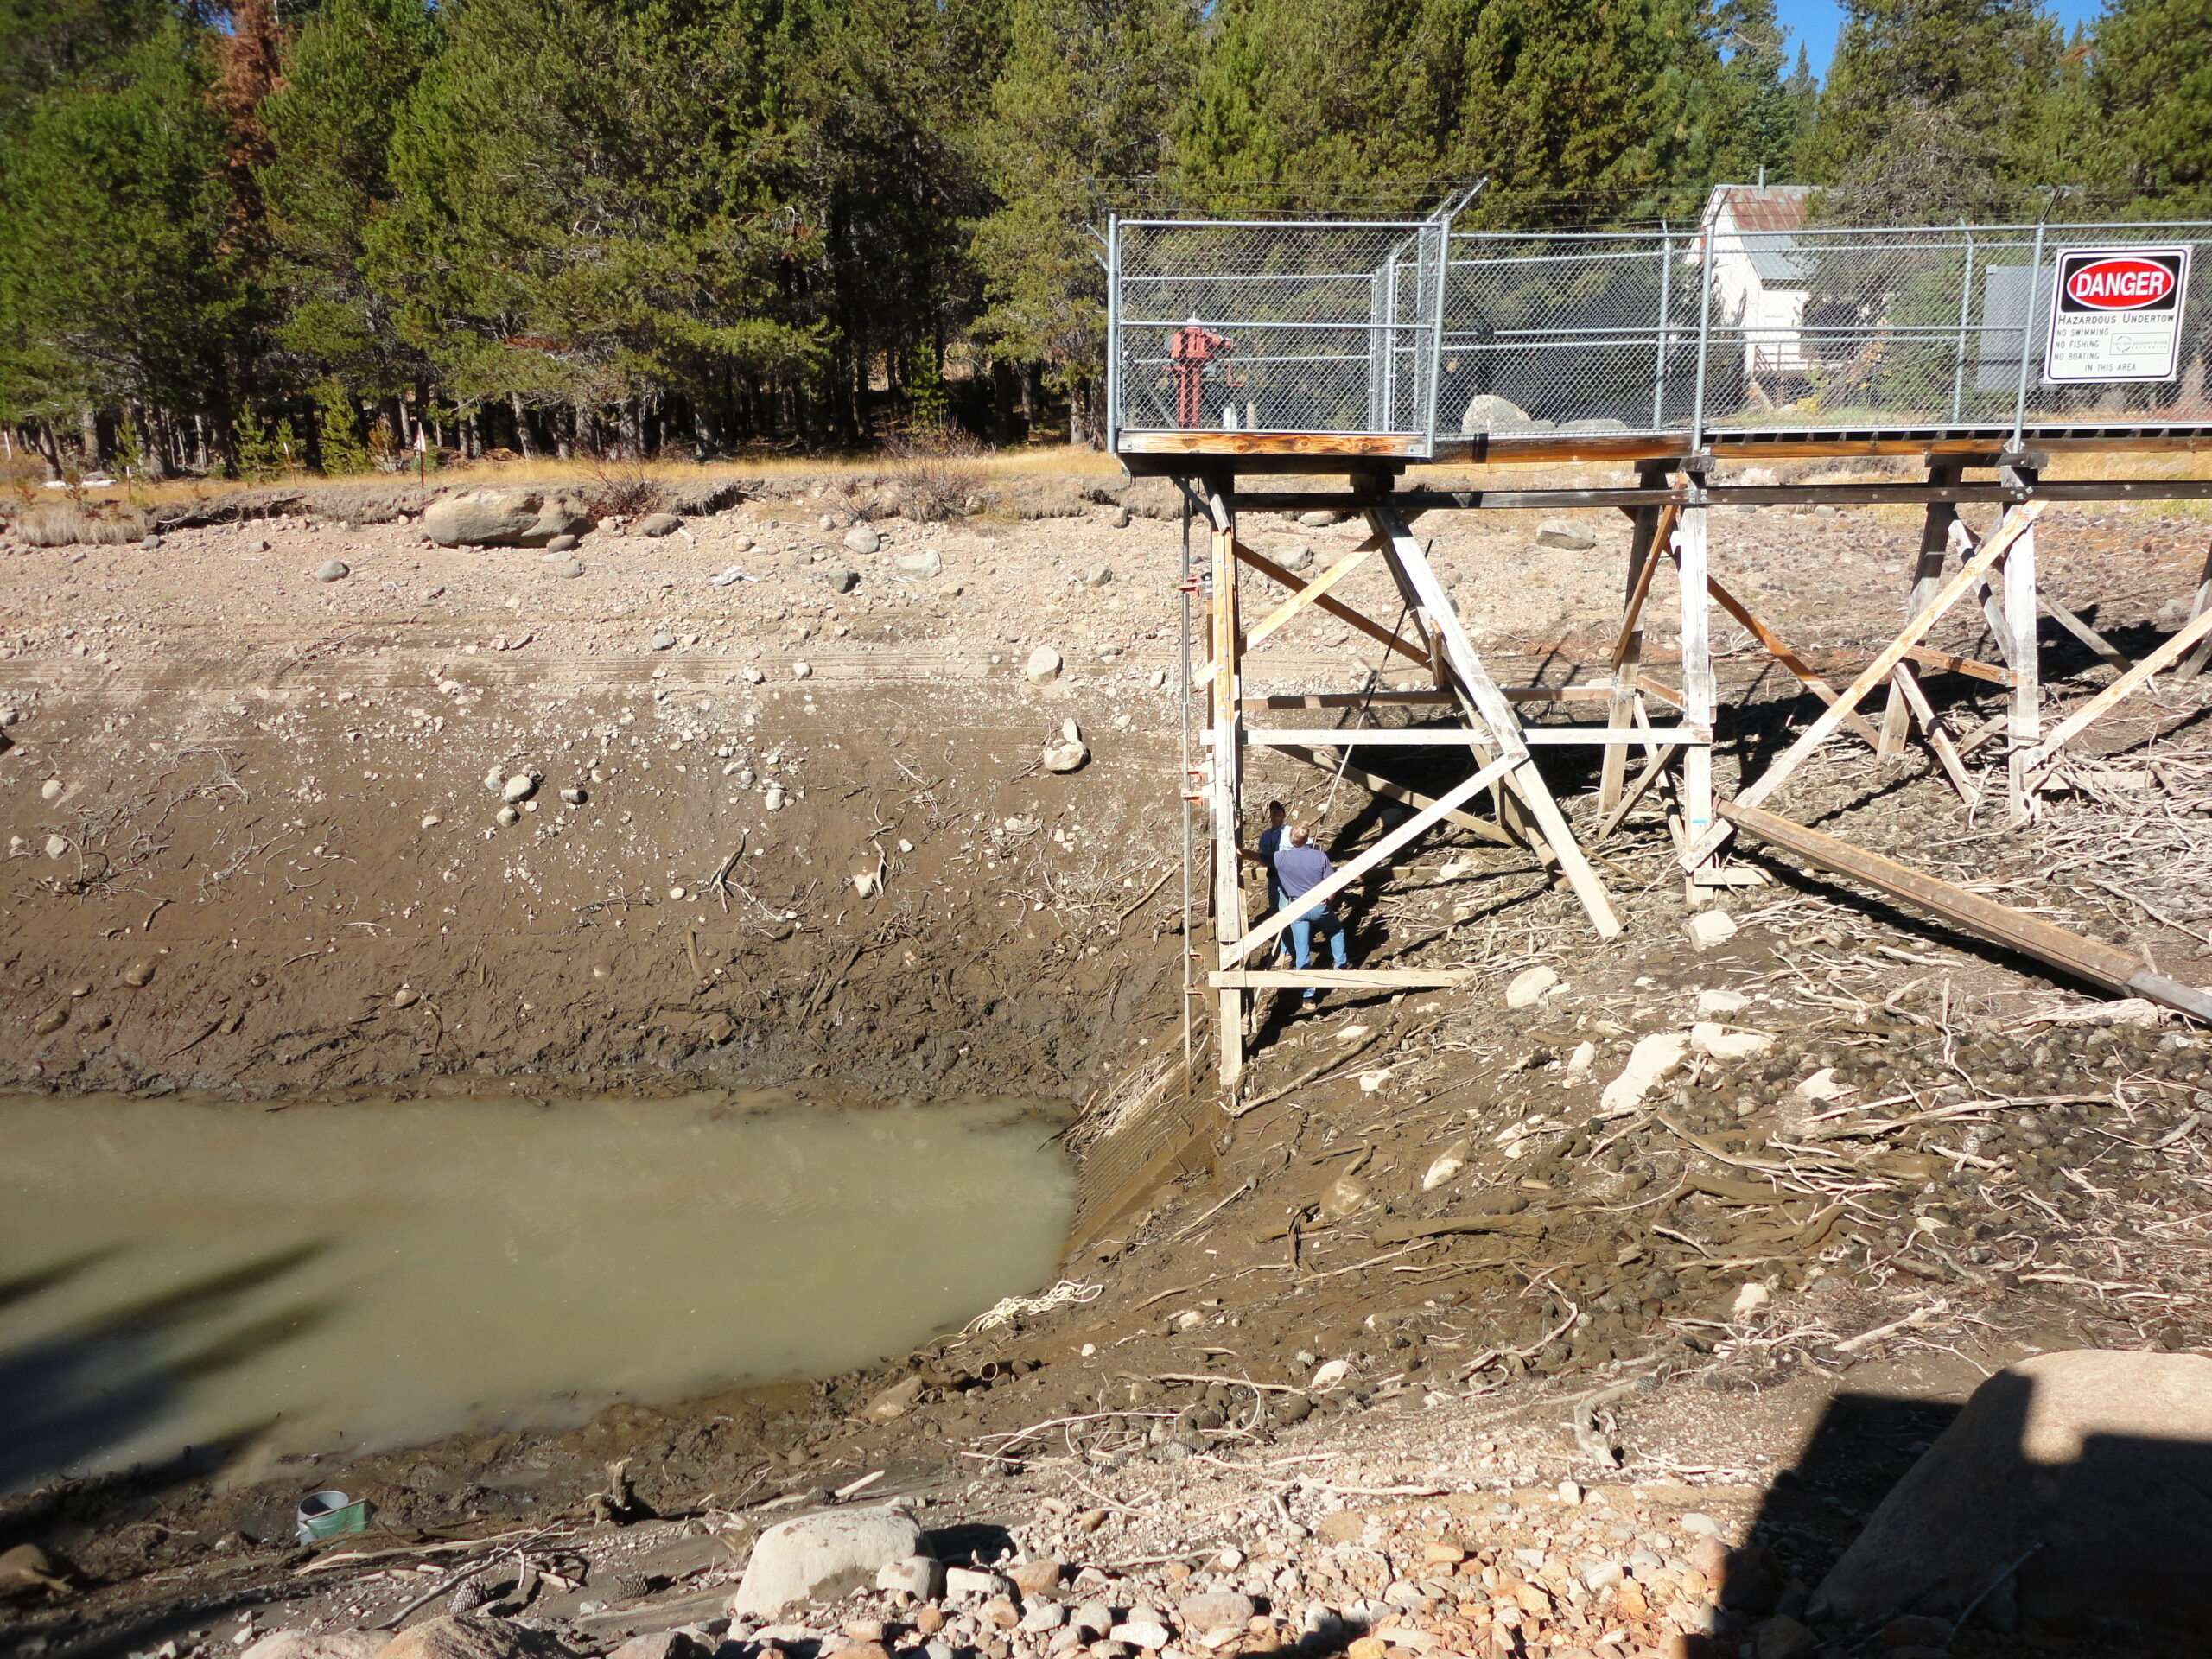
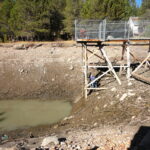
The intake structure is almost completely dewatered in this picture. The remaining water in the work area will be removed with pumps, by the contractor.


21ft tall 44ft wide (fully filled) 100ft long single closed end (SCE)AquaDam supported on the inner perimeter with a 16ft tall 33ft wide 75ft long SCE AquaDam, which was also supported with a 10ft tall 21ft wide 65ft long SCE AquaDam, Independence Lake Preserve, Intake Channel Isolation, 15ft of water depth